
jaymdee
-
Posts
2212 -
Joined
10 Followers

jaymdee's Achievements
")


-

Help needed please. Front crank pulley won’t budge
jaymdee replied to jaymdee's topic in mkiv Technical
Update. With help from a mate who builds motorbike race engines we helicoiled the stripped thread (was only one in the end) and with a little measured encouragement with a blow torch (not too much and applied in several stages) we’ve got the pulley off using the puller. Hopefully no detrimental effect to crank and oil seals etc. You can see rust on the crank which I’ll need to sort out before the new pulley goes back on, so probably why it was such a pig to remove the old one. Jon -
Am trying to change the cambelt among other things and the pulley nut is off but the pulley won’t pull off the crank. We’ve tried using a puller and all that’s happened is the threads inside one of the puller bolt holes have stripped. Any suggestions before I look into whether I can tap a hellicoil in there? on another forum someone suggested getting behind the pulley with a nut on the puller bolts. Is that possible, as it looks like the plastic housing and aux belt tensioner are in the way. thanks Jon
-
Urgently needed. Car in garage and caliper seized. Anyone got a serviceable one which could be available for quick delivery? Stock UK big brakes, 2 piston type Thanks Jon
-
Thanks guys. Yeah. I got some degreaser on it and will see if I can locate source of any leak. cheers
-
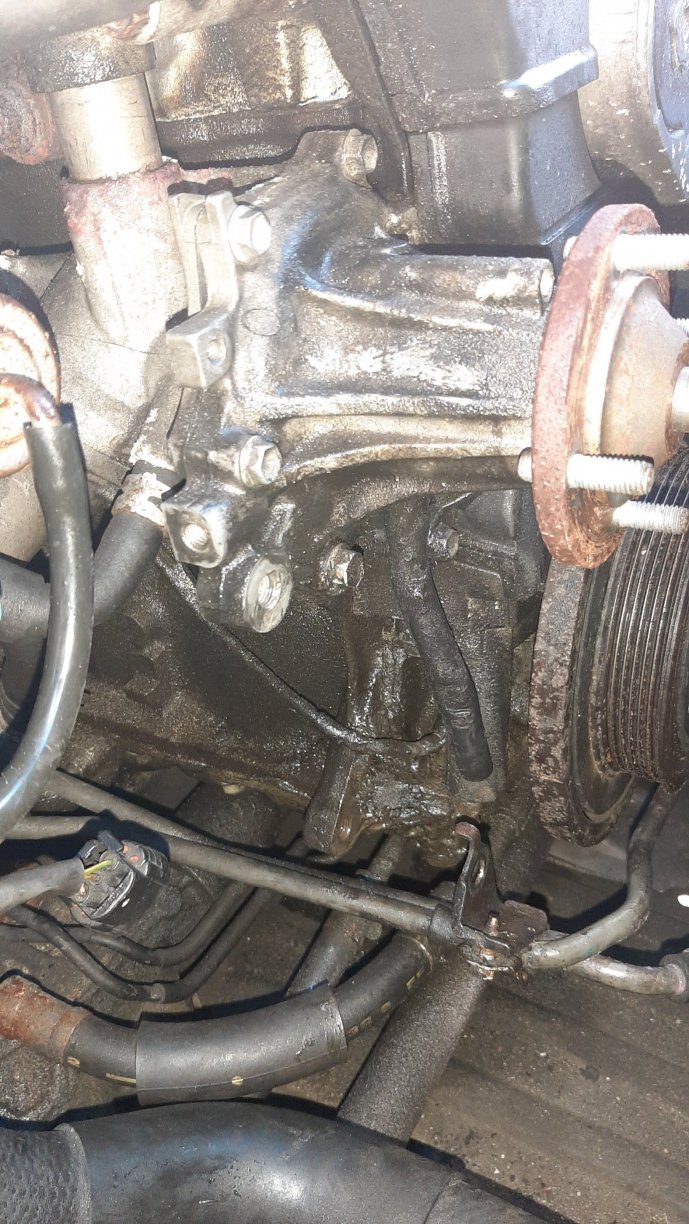
New alternator arrived and today was first chance to try and fit it. can anyone tell me whether the oily pipe which seems to come from the bottom of the water pump needs to connect anywhere, as it’s just hanging there? Is it an overflow pipe? cheers
-
Great news. Thanks Ric
-
Alternator is out. Connector was fiddly and needed the flat screwdriver trick. 10mm bolt needed to be loosened off and the alternator then rotates free of the cooler pipes. I have noticed white gunk/chalk in the connectors on the car and the alternator. Is this dielectric grease? Am thinking of getting an SRD 170amp standard. Anyone got any experience? Does it come with the right size pulley and uses the same size serpentine belt? My belt looks worn so going to buy a new one.
-
Thanks guys. I managed to get a bit of video on my phone and I think Scooter is right. Looks like a bracket holding the oil cooler pipes which hopefully drop down clear when I undo the nut. Thanks for the tip on the connector. Unfortunately jacking it up and getting underneath is not an easy option where it is currently parked, so hopefully can do it from above. Will have another attempt when it’s next dry.
-
Hi. After much reading on this, I find myself 2 hours into a supposed 30 min job (some forums have even suggested 20 minutes) and still don’t have the alternator out of the car. the fan shroud doesn’t seem to be as described in other posts and is an all in one unit with a secondary mini fan integrated into it and what looks like a load of 10mm nuts at the bottom holding it in place. I have managed to remove the viscous fan (after removing the top radiator hose) and I hope that will be sufficient. next issue is I can’t for the life of me find the lower bolt/nut by feeling with my fingers and it seems there are additional oil cooler pipes which I’ve not seen mentioned in any other thread I’ve read. I’m also stumped as to how to remove the plastic electrical connector on the back of the alternator. I’m concerned that I may break it and there’s no obvious clip or method to remove it. I’ve removed the 12mm nut and wiring loom attachment clip etc. any suggestions most welcome??? thanks Jon
-
Cheers people. Still not managed to get this sorted yet but some good tips. Hi Chris. Good to hear from you. Hope you guys are doing well.
-
Driving home tonight and suddenly had the battery warning light, engine oil, engine heat (?) and hazard warning lights all come on. Stopped and restarted and still the same so drove home 5 mins figuring it’s the alternator. Battery down to 11.8 volts. Should have tested it before I turned it off. have seen posts suggesting to check earths (where, how?) before buying a new alternator. Getting a lift to work tomorrow but will try a few tests on Friday. So where’s best for an alternator for TT auto? cheers Jon
-
I ‘think’ it can be done by someone with very small hands without removing anything, but I removed all intake pipes, the small bore black metal turbo pipe work, VSVs and actuators the IACV, turbo heat shield and loosened T1 (front turbo) to get some pipes off. Basically everything except the turbos. And it was still difficult. I used a bic biro to stretch new silicon hoses over and then dropped onto the 2 little hard pipes poking up and then squeezed the biro out. As I said, I reckon it took me about 30 hours going slow and methodically, plus I electrically tested all the VSVs. To be honest was very surprised I managed it and it worked. I did find a few small holes in the 2 hoses which connect to/from the pressure tank.
-
HaHa, was about to post a link to my thread from last year and then clicked on Scooters link, thinking it would be the Ian C turbo thread and it was mine. Yes. Replacing the two small vacuum hoses down the back of the engine which run to/from the pressure tank totally cured the problem. Took me about 30 hours to remove, clean, test all VSVs etc and refit, but definitely worth it. (I’m very slow, lol!!)
-
Spotted 4pm 1st March, at petrol station on roundabout on the A12 north of Brentwood.
-
I'd be interested too. They look really smart.
