
dandan
-
Posts
4928 -
Joined
Content Type
Profiles
Forums
Store
Blogs
Events
Downloads
Supra Articles
Gallery
Everything posted by dandan
-
Exactly the same situation as me - I did all mine yesterday and now need a decent 4 wheel geo setup to tide me over for a few weeks till I go up to see Chris Wilson....I'm currently searchng for the most economical knowledgable place to get it done. I'm considering this place but it may be a bit too South for you http://www.powerstation.org.uk/alignment.asp
-
That's an excellent price.
-
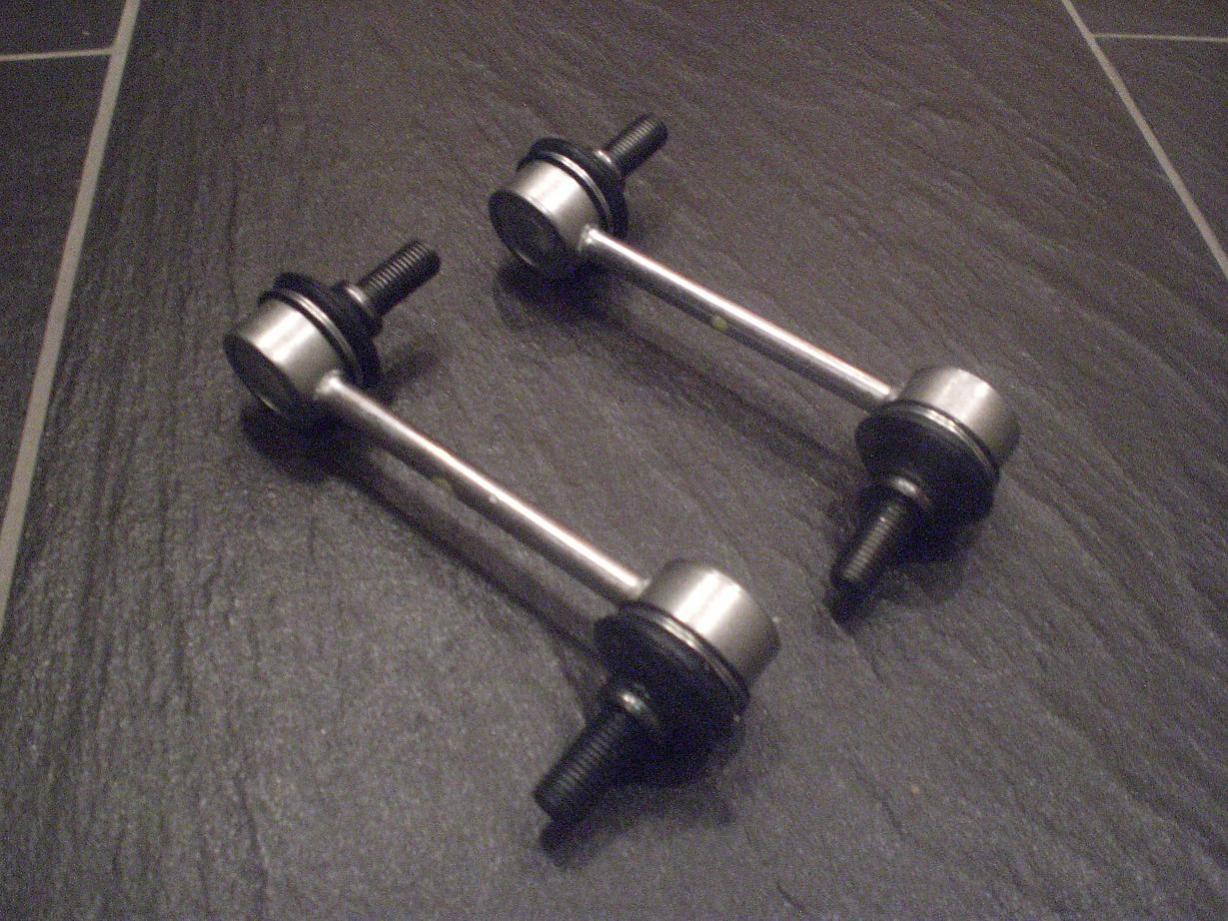
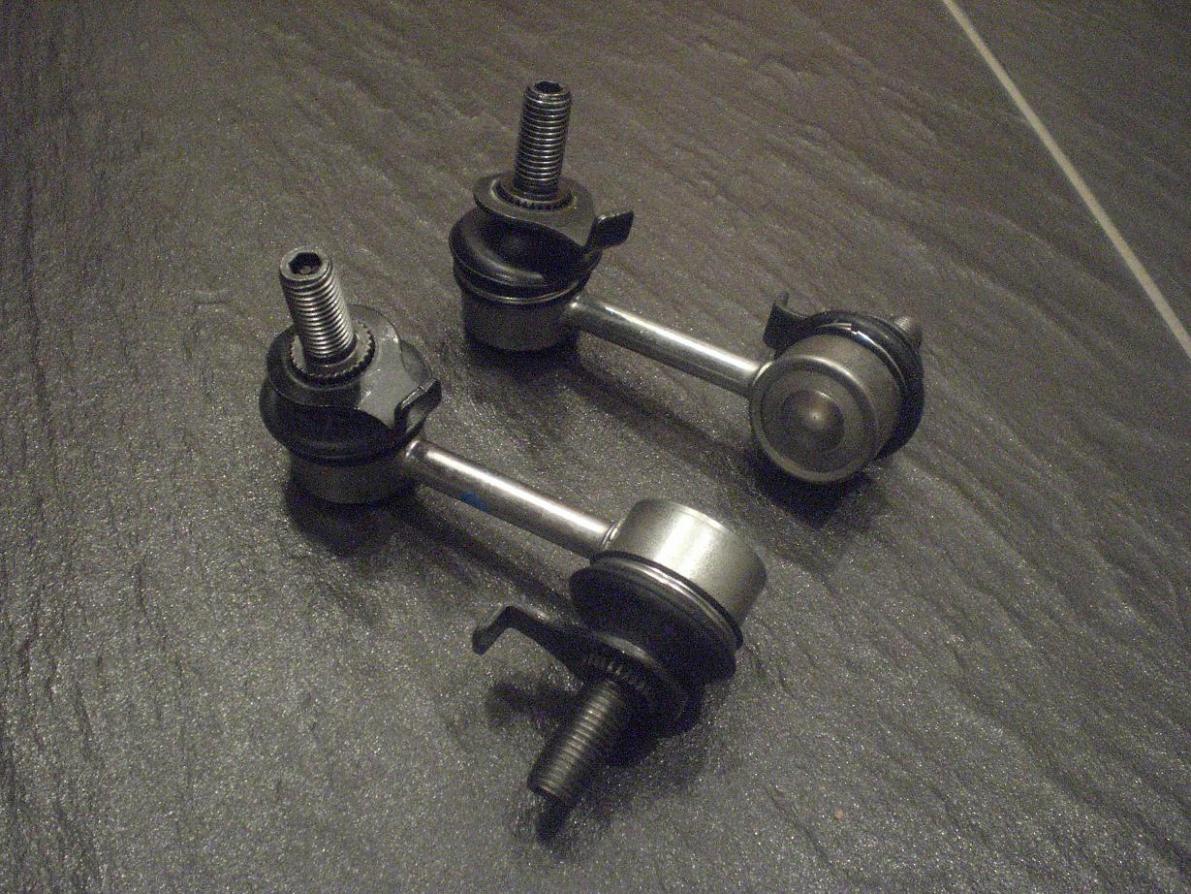
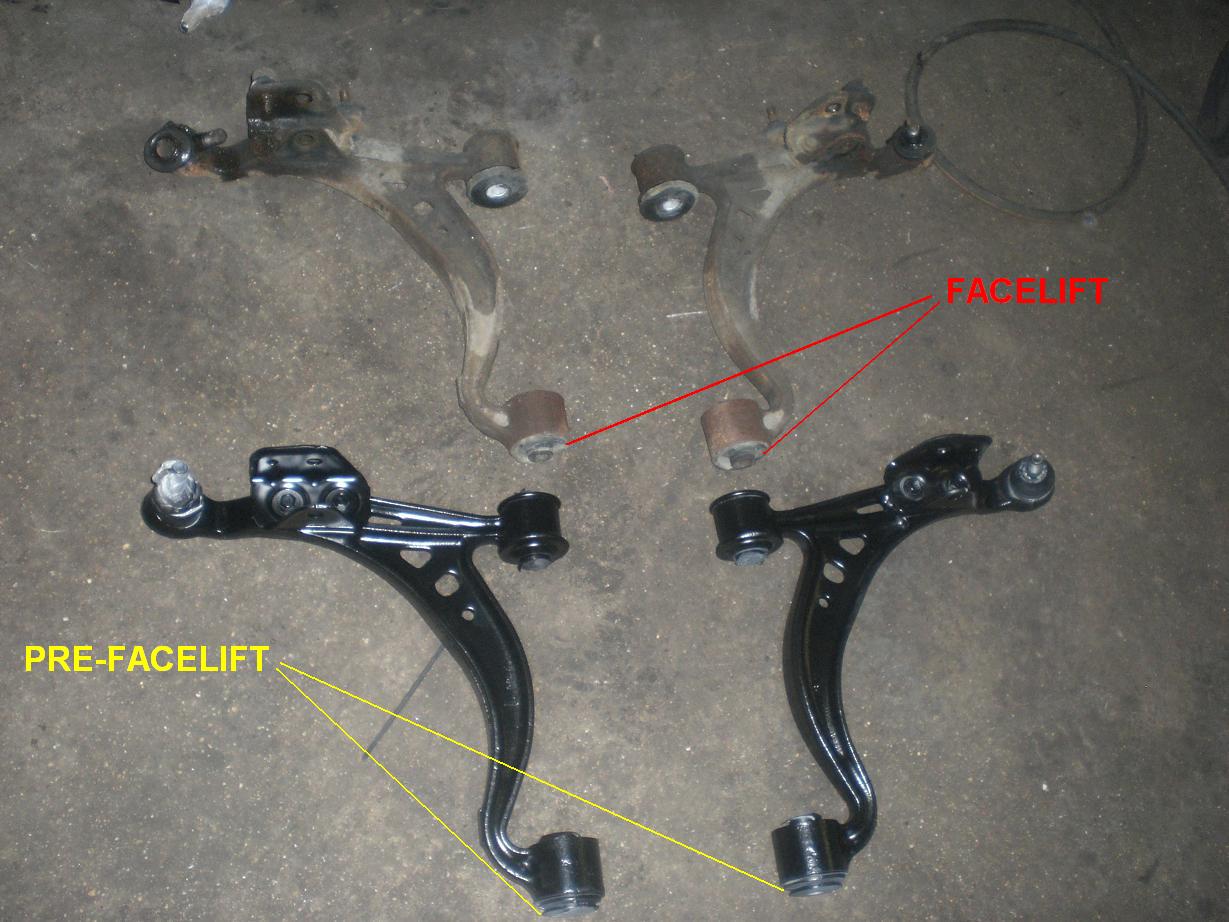
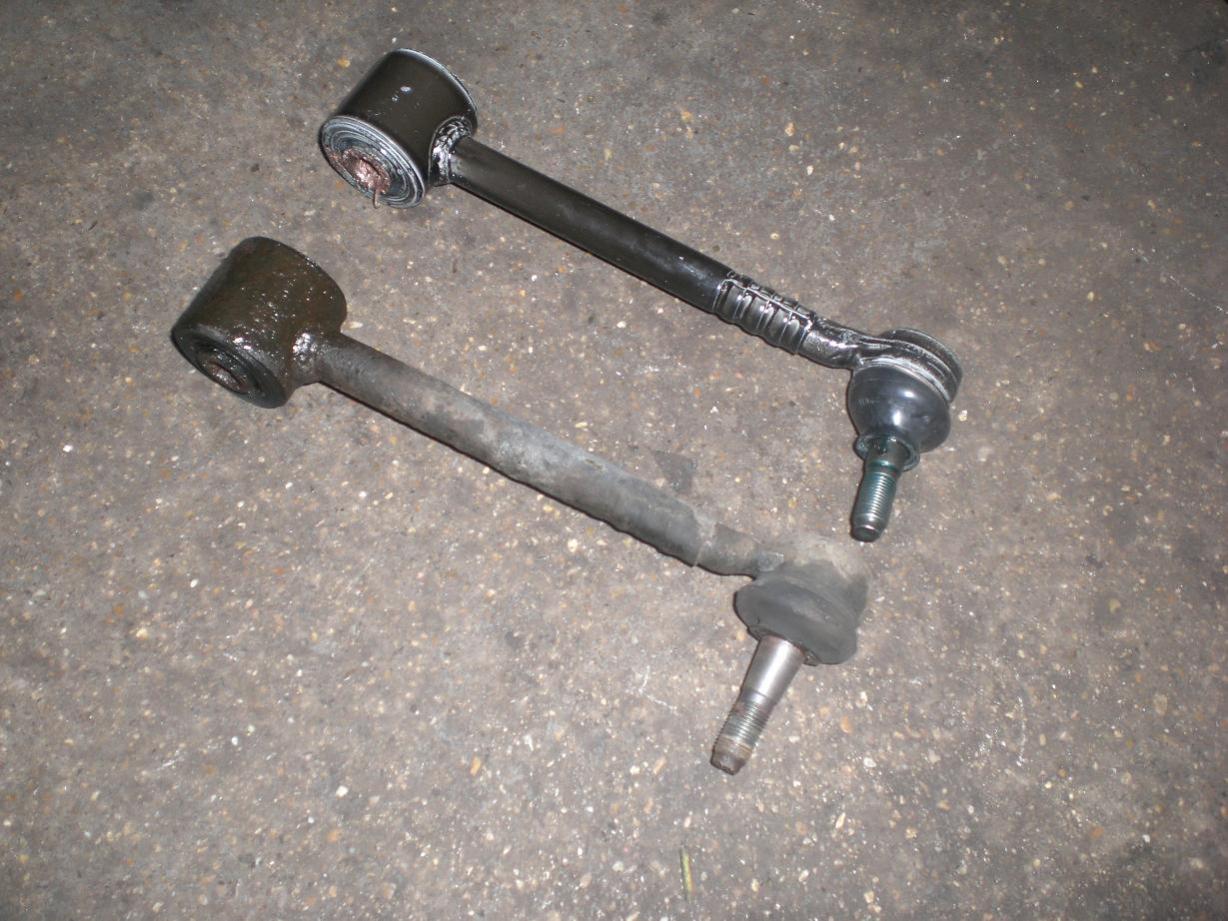
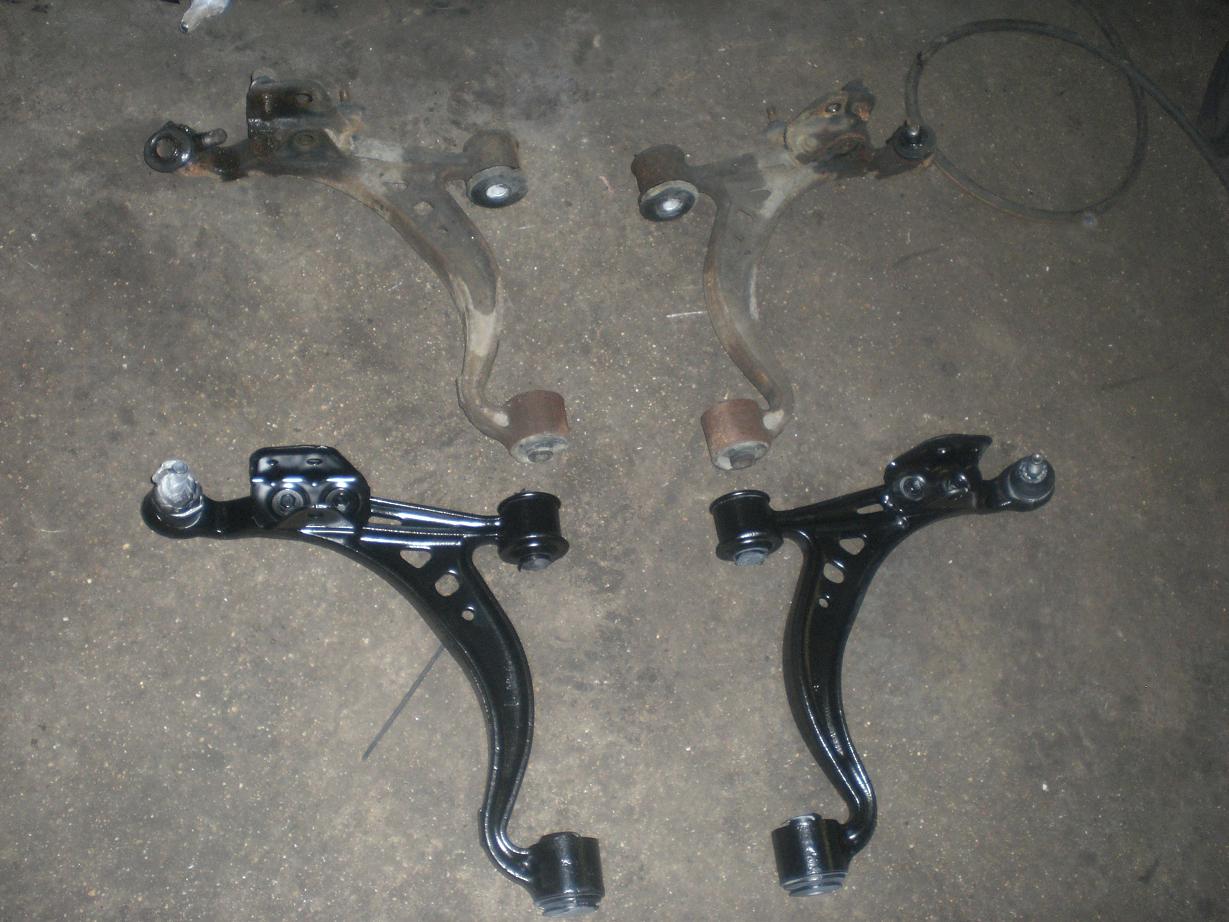
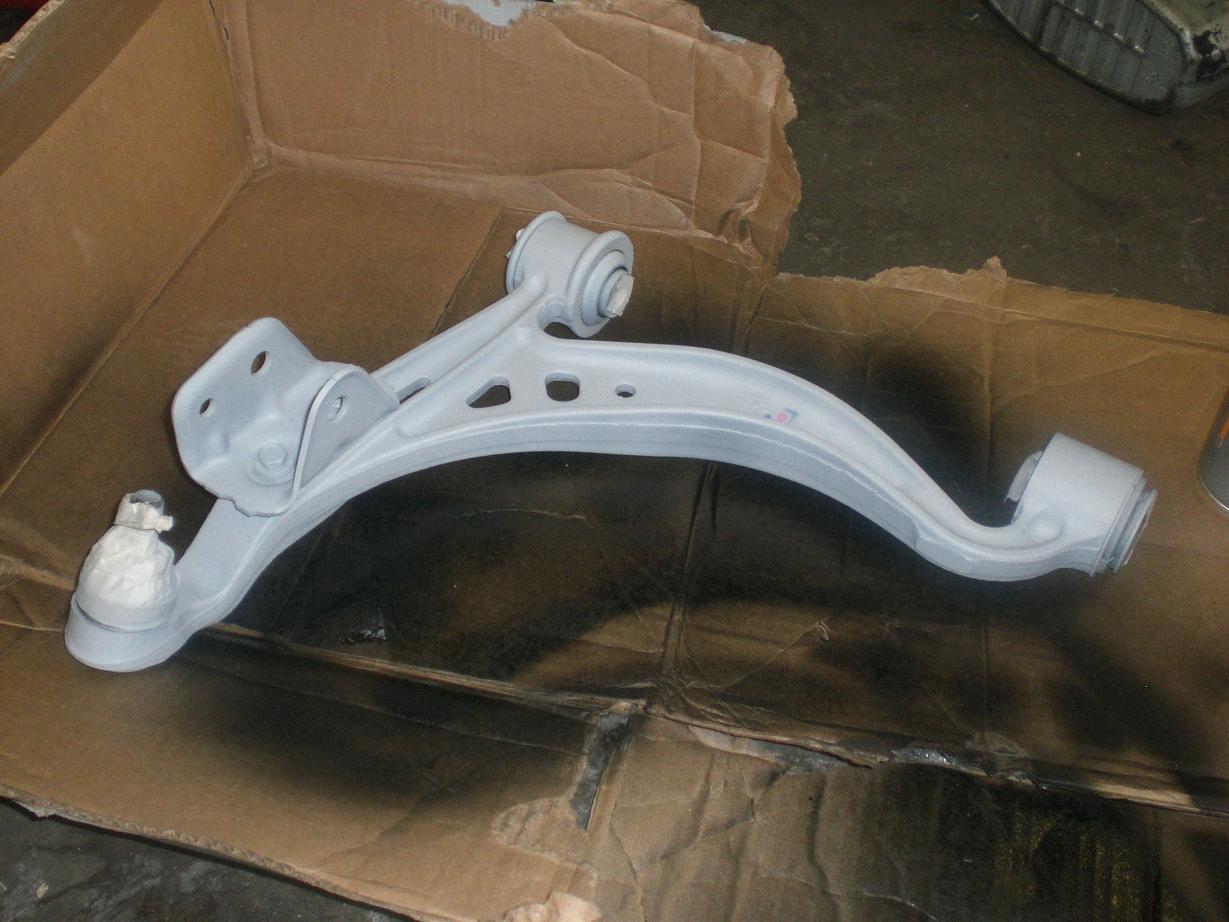
I also replaced all the anti roll bar drop links as I'd heard that these wear and can cause a few interesting noises and irritations. No pics of those during fitting I'm afraid. New fronts: New rears: Obviously after doing this I have all the part numbers of all this items and a sound appreciation of "what goes where" It isn't overly clear which numbers are which when you come to buy all these even with the EPC to help you out - not least because a lot of parts have been superceded and the new numbers do not appear anywhere. I will post something up in Supra Chat or Technical with a list of all the numbers and some photos of the adjusters to hopefully help people out. The camber bolts/adjusters are probably the most confusing part and I have those photographed and labelled already If anyone wants any advice on parts/numbers in the meantime then just pm me. I used "non facelift" bottom arms even though my car is a facelift. The bushes in the older arms are much stiffer and also have a steel piece on the rearmost bush which seems to provide a more rigid attachment and effectively stiffen the bush as the steel covers the whole rear face of the bush. Hopefully these stiffer bushes will give more consistent geo settings under hard cornering compared to the later (allegedly Soarer inspired) softer facelift bushes. See pic below: The front top arms follow a similar story....earlier pre facelift cars have stiffer bushes. Suffice to say mine are being replaced with the older style. So that's about it for now. I am waiting on a few more bits and pieces now and then I'll press on with the front and rear top arms and the rear strut rods. The top rear arms look a little more tricky (and the mounting hardware seems a little more complicated too) so I will definitely get some photos of all that. I'm going to get a geo setup done in the meantime as the tracking does seem a tiny bit off even though we were meticulous about refitting the cam bolts/adjusters in the same place as the old ones.....I was expecting to have to do it anyway so no big deal. So the plan ahead for the suspension is: 1. Geo setup 2. Replace front and rear top arms, rear strut rods, rear strut rod hub bushes and anti roll bar mounting rubbers 3. Fit customized CW suspension 4. Head up to Chris for a full corner weight and geo setup
-
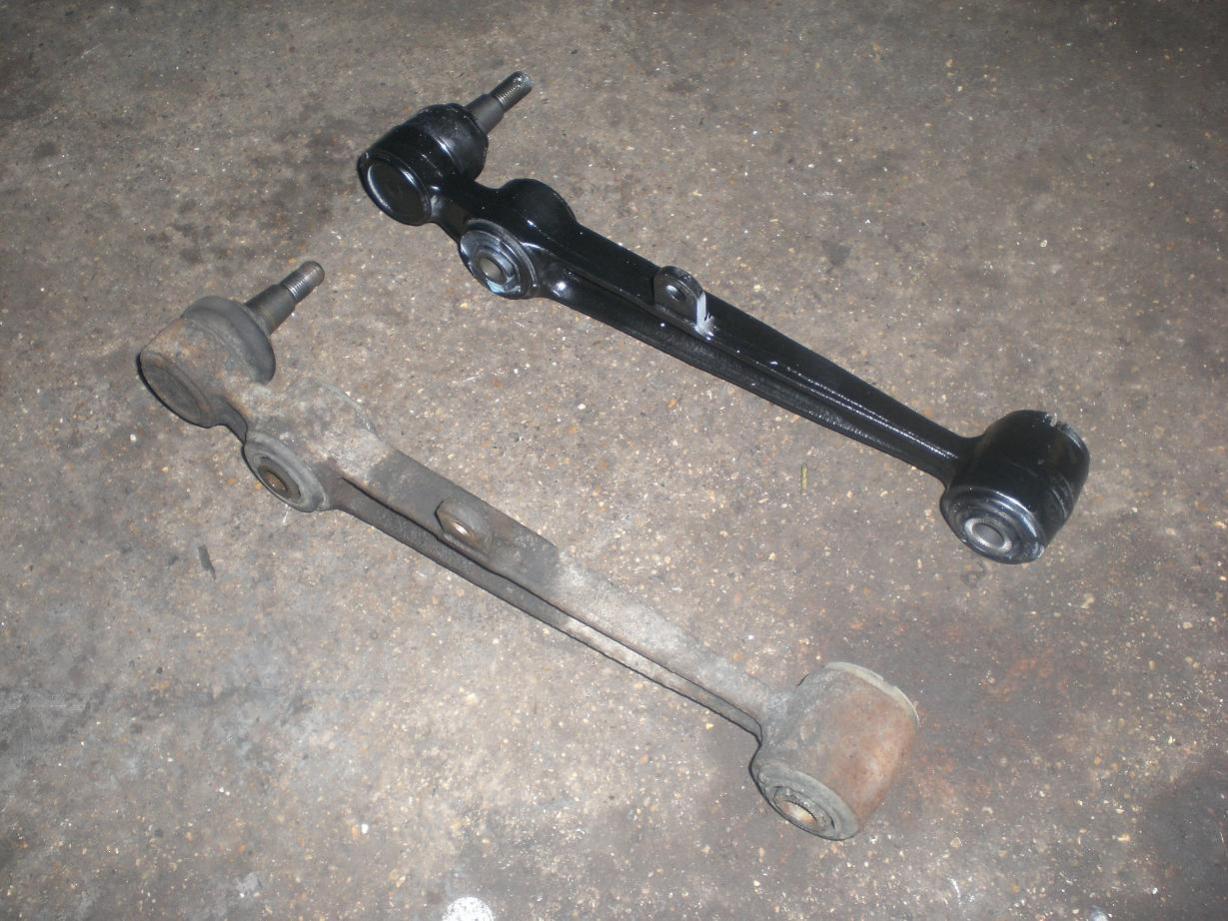
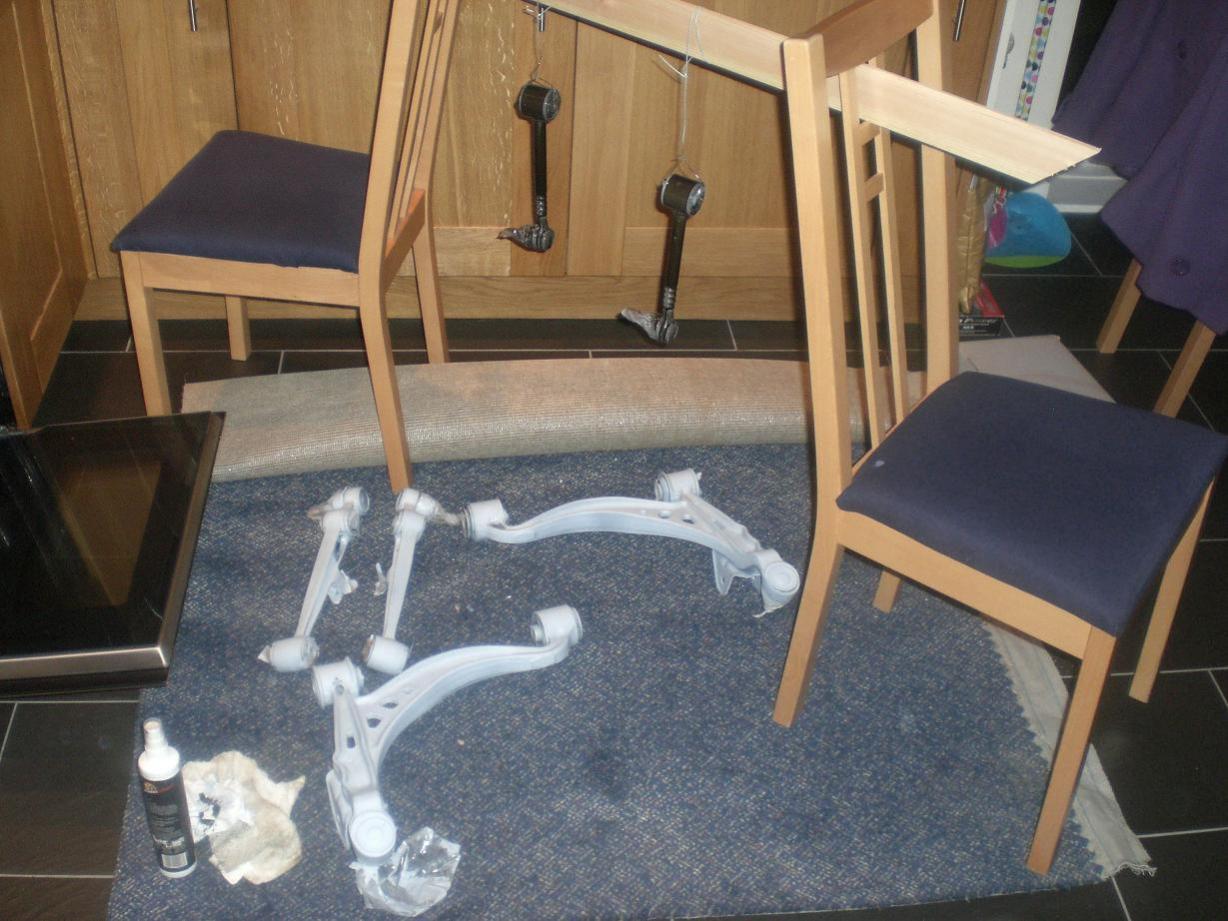
I don't have any pics of the rear arms fitted - the day started to drag on a little and the photo taking fell by the way side. I have some "partially painted" photos for comparison and that's about it The paint looks a little ropey on the rear toe link......and it is. I used an etch primer and was then foolish enough to try to spray over that with a Hammerite paint - oh dear. I told myself that hammerite = bad news but I carried on anyway. I will paint these ones up properly when the car is back on the ramp to do the top arms and I won't be buying hammerite again.
-
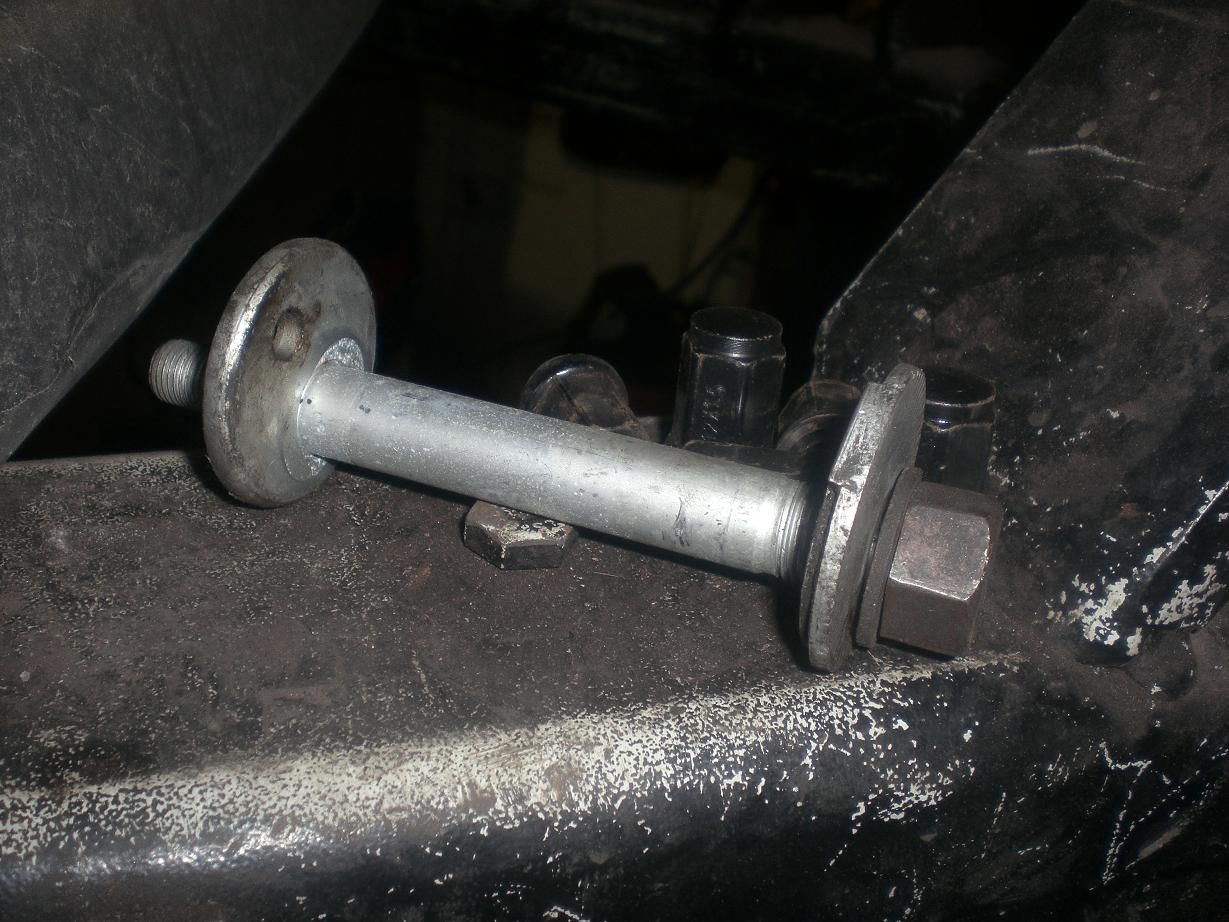
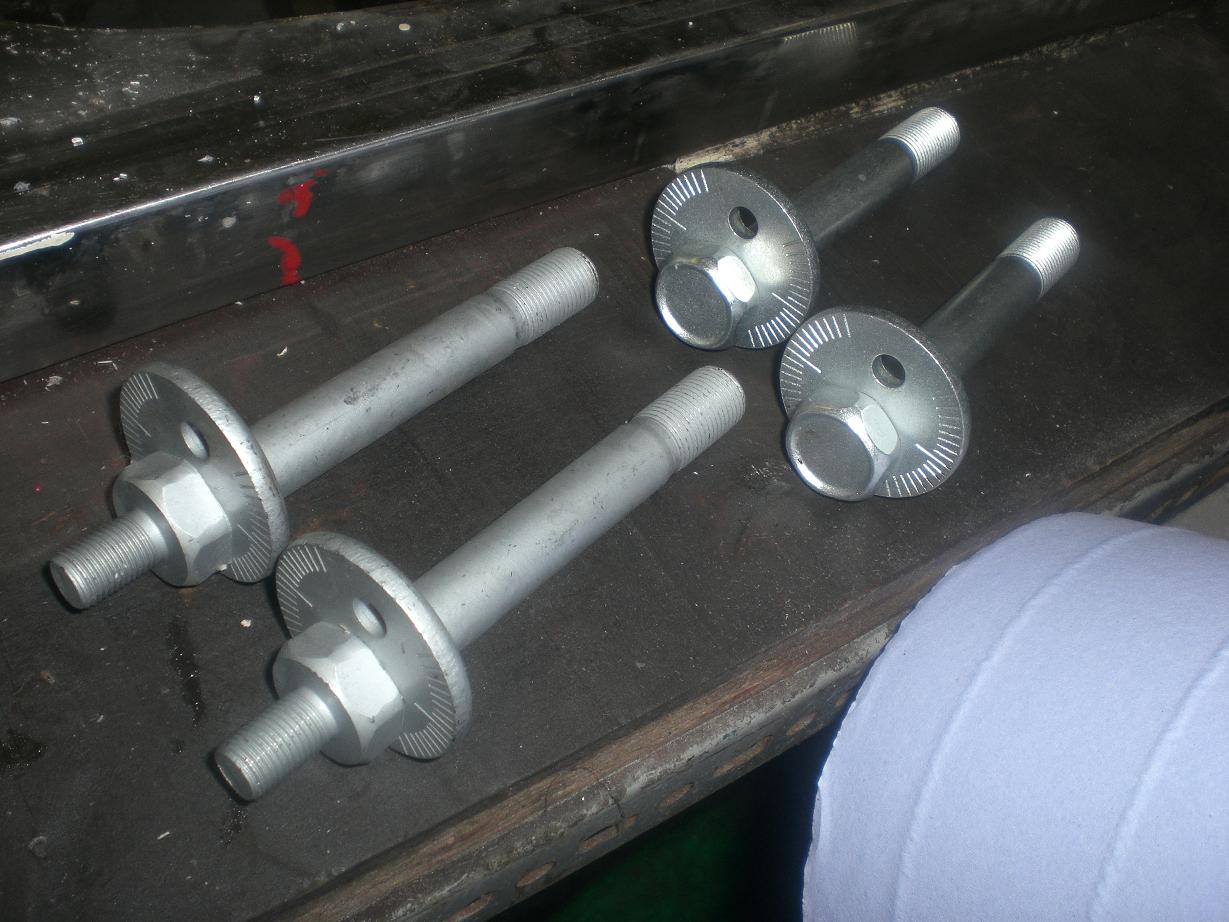
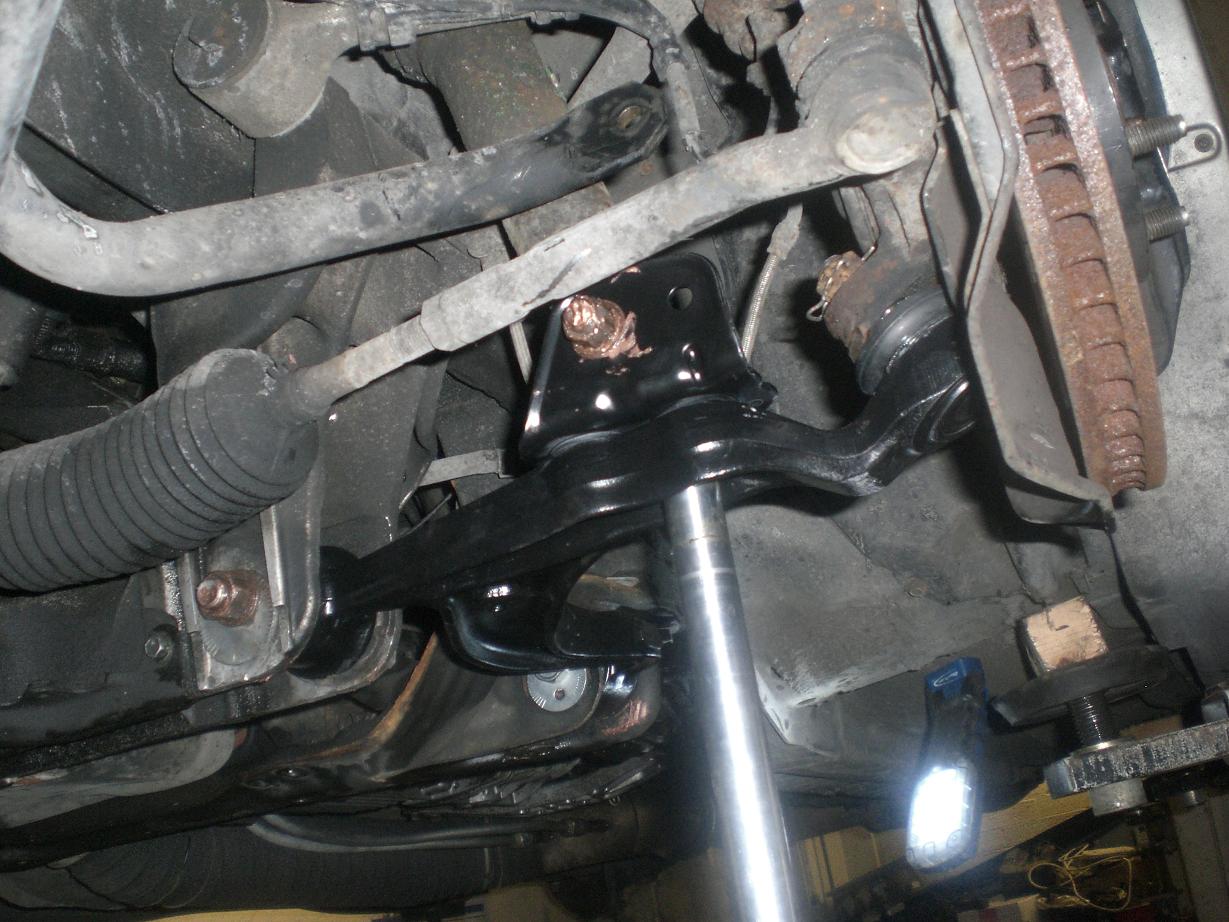
We tackled the front lower arms first and these were suprisingly easy to get off. The mounting bolts/adjusters looked almost new with no sign of water ingress and no problems seizing at all. The hardest part was removing the ARB drop links and that wasn't even especially difficult. I think these arms must be relatively new, I'll do a test on the balljoints to see if they are still in spec - maybe that will shed some light on things. I've had the car for approx seven years and have certainly never replaced them in that time. I was expecting HELL doing this but they were the easiest of any of the arms. One of the old adjusters exactly as it came out (the other three were in identical condition): The new adjusters ready to fit: Front NS arm fitted:
-
I made a start on my suspension arm replacement yesterday afternoon. A good friend of mine was kind enough to offer me the use of his ramp and helped me out with it all as well - what a difference to trying to do this on axle stands! Thanks Andy Yesterday's plan only involved replacing the lower arms (which are the ones that have the adjustment built in). I decided to get a few coats of paint on them to keep the crusty rust a way a little longer than the Toyota paint does....
-
I did wonder about that but I don't think it is quite fast enough to be automatic - it probably takes about 1 second to open fully. I'm sure it could be done with a faster acting valve....maybe it would be like VTEC or VVTi control? When I say I wondered about it - I actually mean that I thought about using the other valve (the QTP version) placing it somewhere that is always in the exhaust path. If that were linked to the ECU it could potentially be controlled like an EXUP valve. However, I don't really want any more bottom end grunt or response at the moment so it seems like more complication for little gain
-
That's the general idea - except it'll be quiet most of the time and then loud when I want it unrestricted and free flowing.
-
Nice one Homer - looking forward to seeing this little lot!
-
Which rental company were you using? Hertz, for example, are specifically setup to make it easy for you. They will charge you something like $2.50 for each day you use the EZ Pass and then add the actual charge as well. They will send you a bill in the post within about two months. Can be paid on the net.
-
My (as yet unfitted) Greddy manifold is modified so the idle valve is not seen. I'll find a pic....
-
Can you move your boost gauge connecting pipe to the compressor outlet or at least somewhere much closer to the turbo? It'll seem to read a little odd when idling or off boost but the on boost readings will be interesting and could help you determine if it's a leak. If you see a significant increase in boost at the compressor housing then it could be a leak anywhere from the compressor outlet to the inlet manifold gasket.
-
Nice going Mike. Have you got a copy of the plot?
-

for sale loads of random bits, want it all gone to who ever can pick it up
dandan replied to L33's topic in Parts for Sale
I'd like the IC pipe please -
Depending on a date I'll be up for that too....representing the lowly 550-600bhp crew amongst the big boys!
-
Does anyone know if a template for UK sized brake discs and calipers exists anywhere? Many thanks Dan
-
Good news mate
-
I wouldn't necessarily assume they are good for 1.4bar just because they are steel either.
-
I'm sure it will be very loud but at least it will have passed through the new full size silencer before it gets dumped so perhaps that'll take the edge off a little I do still have the QTP valve from you (above) and I understand what you were getting at regarding the machining etc so that it could be fitted in series with the rest of the exhaust. I was planning to fit it in the 3" portion of the exhaust but it is so quiet anyway there's no real need. I also toyed with fitting it and linking into the the ecu as a low rpm torque aid (Yamaha EXUP style) but the whole setup makes plenty of low speed torque so there's not much point with that idea either! God knows how loud it's going to be but it'll certainly be one hell of a contrast to the current setup. Another suck it and see modification in terms of noise level! It's not really that difficult to do, mine is only complicated by the addition of the 4" silencer to make it 4" all the way to the valve.
-
You got the wrong end of the stick there Paul - I'm fitting the valve as a cutout so it sits in parallel with the rest of the 3" exhaust. With the valve shut, all flow goes through the 3" exhaust. With it open, it dumps straight out after the 1st silencer. Something similar to this half finished setup.....
-
The next performance related change I want to do is to free up the exhaust breathing a little and give the potential for a little noise My downpipe and midpipe are 4" but the exhaust is only 3" and actually closer to 2 7/8" in places. Although I'm not yearning for more power on the road, I do want to see what the whole setup is capable of and ideally drop the boost a little to achieve the same power. So the plan is to fit my electric cutout and basically have the best of both worlds with a 4" (single silenced) routing or the quiet 3" system. The exhaust I currently have fitted is shown here on the left (although it's much cleaner looking now): I will be removing my 4" V band to 3" adaptor, the 2 bolt flange, the first resonator/silencer and a short section of piping (all shown in red) and fitting a large 4" silencer instead. Then the pipework will follow the same 45 degree bend route and neck back down to 3" and into the second silencer. However I will then fit the electric cutout (in the position shown in the exhaust pic by the yellow lines) firing straight out for the least restrictive path. That'll give me the option of quiet runnng and morning starts or loud and unrestricted for spirited motoring when I want a better soundtrack Here's a few close up pics for the photo whores out there (the circular flanges need a little more machining before they'll be ready to fit):
-
It doesn't seem too excessive right now so I'm not too concerned about it. A little less response would actually be nice sometimes on the motorway as an 80lepton cruising speed puts you right into positive boost as soon as you touch the pedal to accelerate even just a tiny bit. However - I am being very picky now
-
I know the feeling
-
The top rear arms have spherical bearings in. I'm 99% certain the rest are just bushes. Also, the pre facelift bushed arms use a stiffer elastomer than the facelift ones. Edit: Jamie - I have some prices here from Whifbitz for a couple of arms and several adjusters/bolts that I need. Once you get a reply from Steve we could do a compare as Paul may be a little cheaper than Steve.
-
I think Terminator had some Toyos in that size.


