
dandan
-
Posts
4928 -
Joined
Content Type
Profiles
Forums
Store
Blogs
Events
Downloads
Supra Articles
Gallery
Everything posted by dandan
-
It's probably the HSDs. Any chance of a side on photo of the rear wheel/tyre hanging all the way down at full droop. When mine are hanging the "arch to tyre" gap is about seven inches!
-
Nice one mate, what size spacers did you end up with in the end? Mine are on the car and end up at 45mm offset and I still had to do some work on the inner wheel well to get the wheels to clear at full droop - which is quite a lot of sag with my CW suspension (about 30mm more than the Tein HA). What coilovers do you have?
-

wanted Set of UK 17" wheel to replace stolen ones.
dandan replied to little num's topic in Parts Wanted
Can you claim for a new set from Toyota on your insurance? -
Anyone? Cheers Dan
-
for sale Gauging interest . My HKS T04Z single Turbo 6 speed supra
dandan replied to mikeyh's topic in Supra Classifieds
Lovely motor. I really would try to keep it if you can. -
Battery Recomendations for a supe that gets litte use
dandan replied to DamanC's topic in mkiv Technical
I bought a Varta 027 Silver and it will fit if you have UK size battery terminals (same as the HCB005) and one of the smaller width battery clamps. http://www.tayna.co.uk/Type-027-Varta-Silver-Dynamic-Car-Battery-P3190.html I've only started the car twice in the last few months and both times it's been fine cranking over fast and consistently. Hard to make comparisons to an old duff battery but 63Ah is a lot of reserve and the 610 cold cranking amps is monstrous so if you decide to go with a 13:1 NA this will be fine too Plus there's the 5yr guarantee. -
Thank you for the offer but in terms of turbo position it's no different to what I have now.
-
The turbo sits a little bit further forward and the wastegate exit is at the top. The external casting also suggests there may be some sort of profiled internal ports but I wouldn't be too excited about that. I want to sit my turbo further forward.
-
Anyone got one they fancy selling?
-
Lovely motor Michel - I would love it but couldn't justify another petrol guzzler right now. Did you build it to sell on or were you planning to keep it long term?
-
Gotcha - makes sense now. Well done with it all by the way, must be amazing to feel that thing hook up and take off now
-
Good oil. Did you fire it up or do any running in at all with mineral oil or has it been synthetic from the first start?
-
What oil will you be running it it JP when it's switched to synthetic?
-
Regarding Megasquirt in general........the things I would like to see changed would be: The case or more accurately the loom connections through the case to the board(s), some improved board mounting strategy and then some conformal coating on the finished boards - that would go a long way to make a lot of DIY installations a lot more rugged and reliable. Editted to add: This is a very useful link to a page that compares all the different Megasquirt options: http://www.ms3efi.com/feature-xref.html
-
I'm not sure if you were asking me Chris but I always bought my parts from glensgarage.com but they seem to be out of stock of "built" ECUs. DIYAutotune.com are selling this MS3 ECU fully assembled and ready to roll with the latest MS3X daughter card installed for $640. They can also be bought from ExtraEFI.co.uk but I have never dealt with those guys and their site looks a bit confusing for my simple mind
-
The original Megasquirt (MS1) code and hardware is limited but the latest MS3 system is pretty feature rich: Speed-density, alpha-n or MAF for fuelling calculations 16x16 fuel tables in 0.1% steps with true interpolation and movable rows/columns 16x16 spark tables in 0.1 degree steps with true interpolation and movable rows/columns Wall-wetting transient fuel control for better driveability On board datalogging to SDcard (max 333Hz sample rate) Tuning by serial or built-in USB-serial port. 8 channels sequential fuel (hi-z injectors or low-z with external resistors) 2 additional fuel channels (hi-z or low-z) 8 channels sequential spark (logic level output) 6 channels mid current output for small solenoids or relays 2 'spare' conditioned 0-5V analogue inputs (+2 more raw) Two wideband oxygen sensor input (external controller required) (Up to eight widebands supported via external data capture) GM-style stepper idle control 2 and 3 wire PWM idle control Closed loop idle control Closed loop mixture control - ideally with wideband Closed loop boost control Various boost control systems (gear, time, speed based) Two stage variable nitrous control 2 step type launch control CAN communications to interconnect other Megasquirt products e.g. transmission controller Supports external data capture boards (e.g. for external EGT boards) EGT data support (with external amplifier) Staged injection Dual fuel (e.g. LPG) Table switching, (mainly for dual fuel use) Water/Meth injection Individual cylinder injector trim Injector phase timing Individual cylinder spark trim Support for numerous OEM trigger wheel patterns. Magnetic (VR), Hall, Opto crank sensor input Magnetic (VR), Hall, Opto cam sensor input
-
Does anyone know of any steel (or Titanium) nuts that have an open end so the stud could poke through?
-
I have built four Megasquirt ECU setups over the years and currently have a Megasquirt 1 fitted to a mini running the ignition through a Ford EDIS ignition module and coil pack whilst the fuelling is being handled by a Megasquirt II on a 3.0 board with my own intake/throttle/injection design. OT - sorry......Fuel injecting a Mini is very tricky though owing to the siamese ports in the head meaning two cylinders share the same intake charge. Going off the subject a little but the reason for two ECUs here is because a Mini needs equal ignition firing angles and uneven injection firing - when I started out looking at this the Megasquirt ECU could not handle that (so I ran two ECUs to leave more inputs and outputs available for the fuelling side of things) but I think a Megasquirt II will do it now whilst running coil on plug, EDIS or distributor based ignition. The Mini also needs massive injectors as the injection window is very small.....I think the 65hp twin point injection has 480cc/min injectors from the factory Personally I don't think I'd go fitting a Megasquirt 1 ECU to anything unless it was real low budget. The injection and ignition tables are very small, the resolution on injector pulsewidth is poor, the acceleration enrichment options are extremely limited etc etc. That is not the case with the more advanced Megasquirt II kit - that's miles more advanced. I would consider a Megasquirt II installation in a normal car (rather than just some fun experimenting like I have been doing on the Mini) if.... 1) I assembled it all myself 2) I found a good mapper who was happy to map my car with this ECU. I'm Ok with mechanical stuff and PCB assembly but leave the mapping to someone else!
-
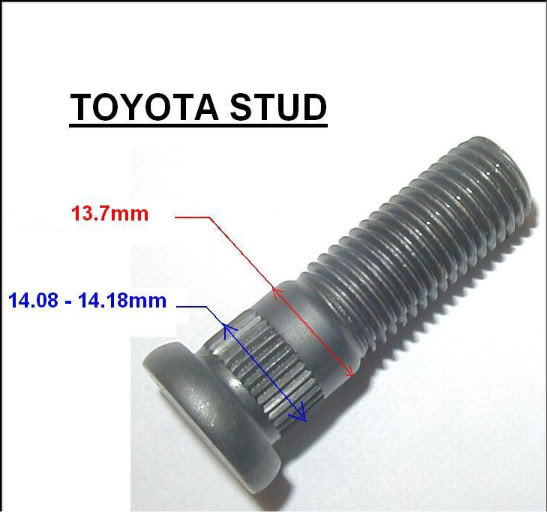
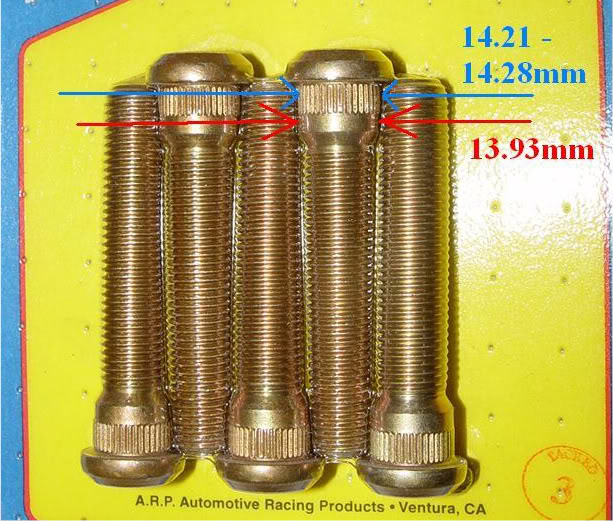
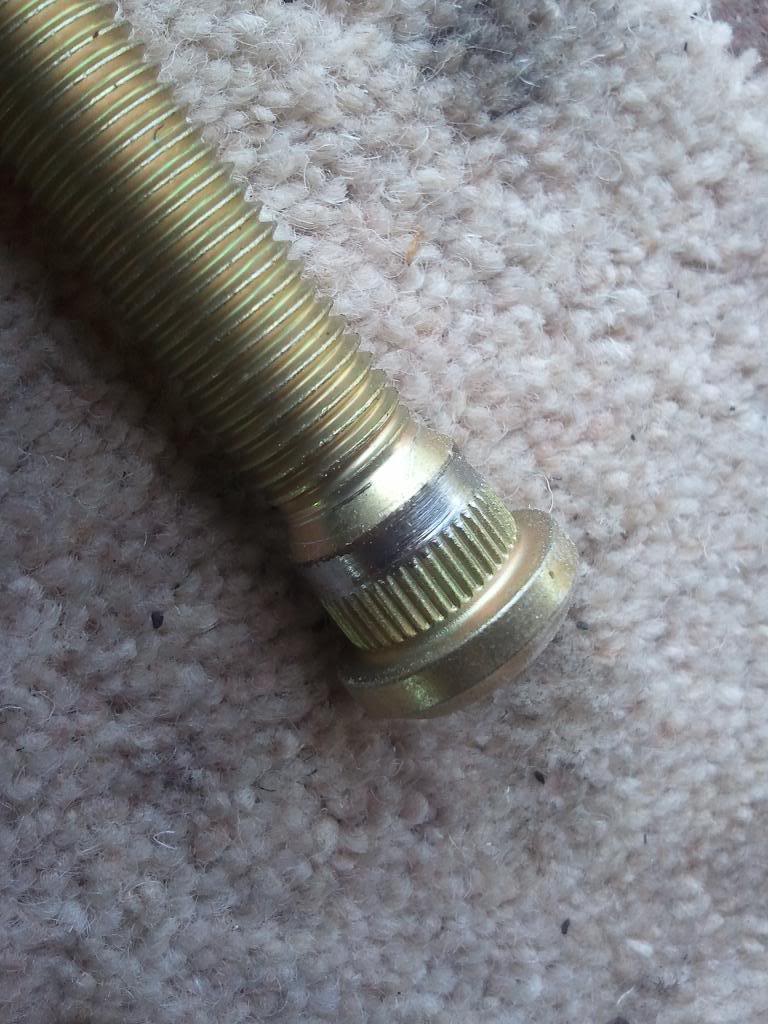
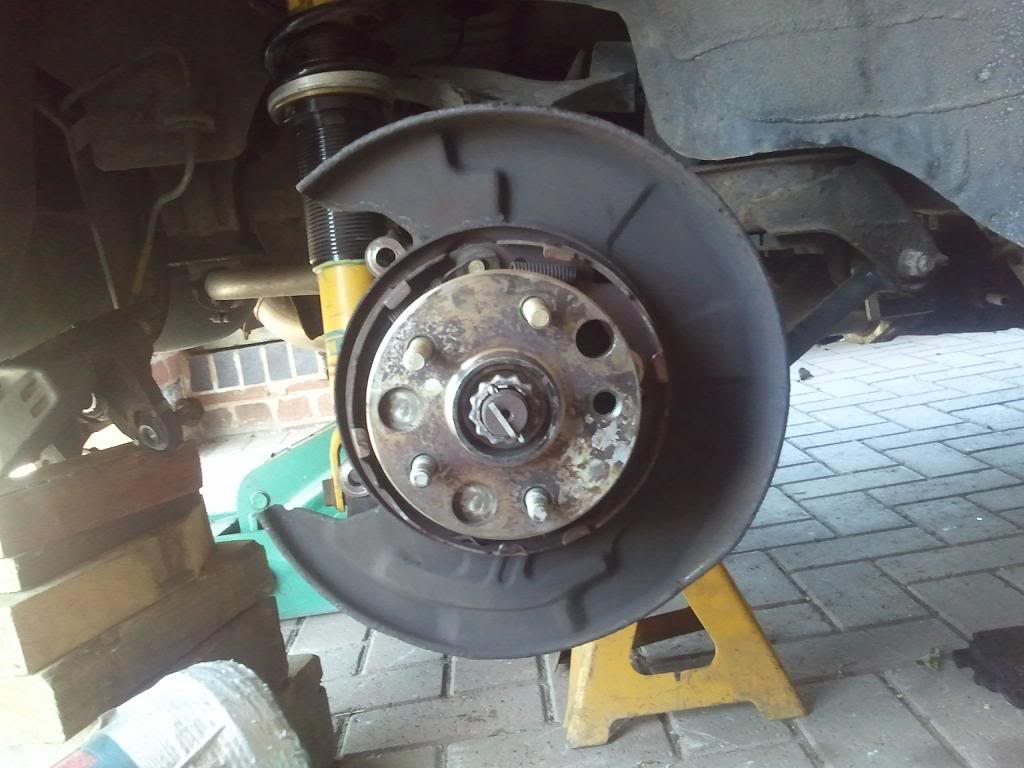
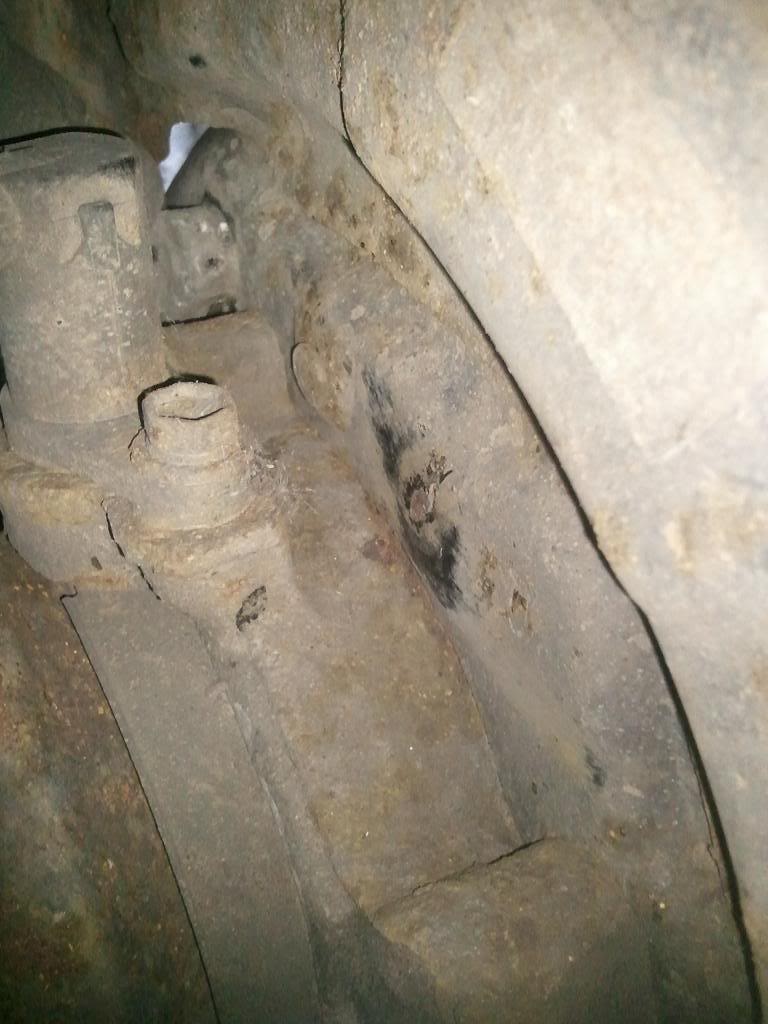
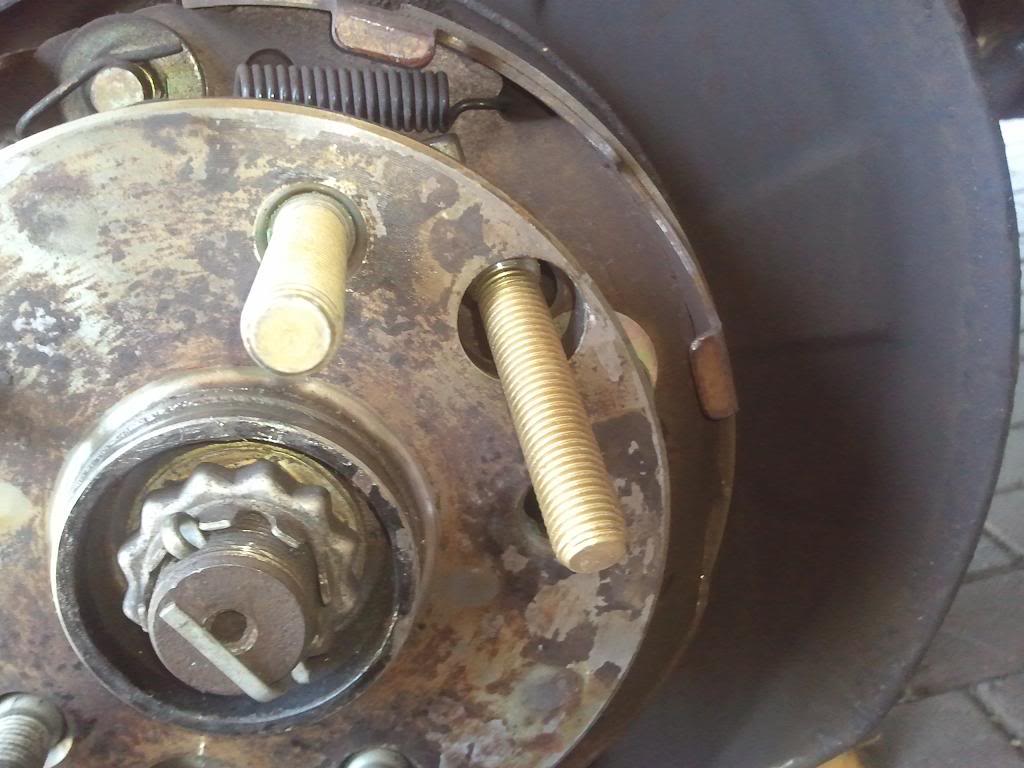
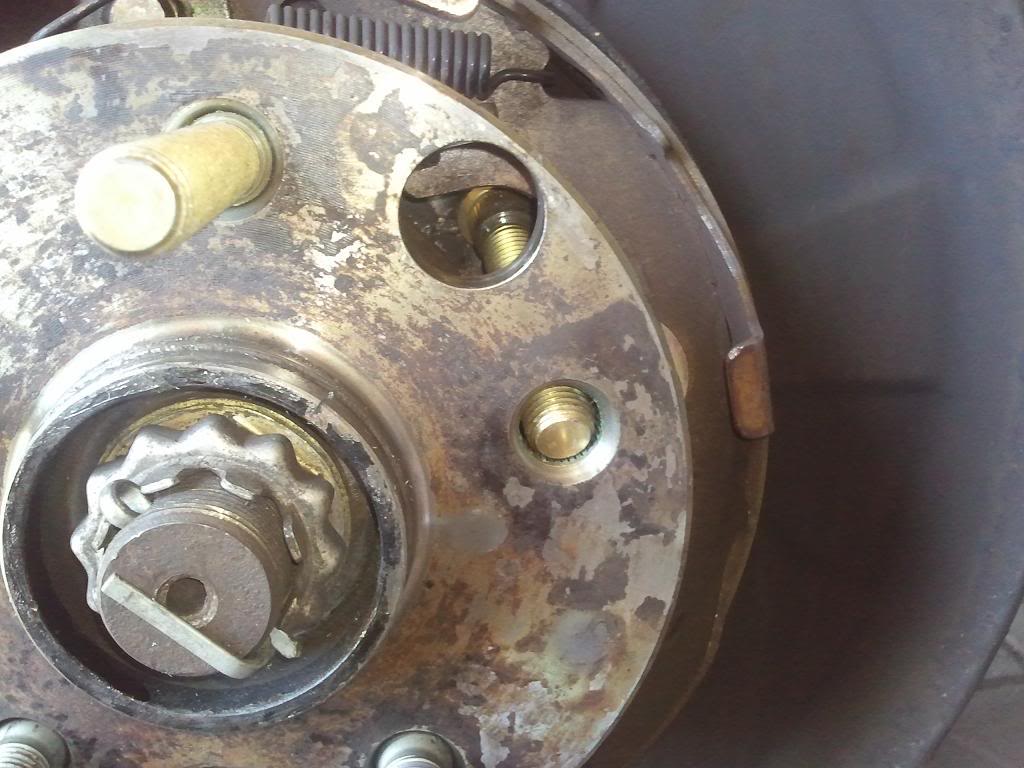
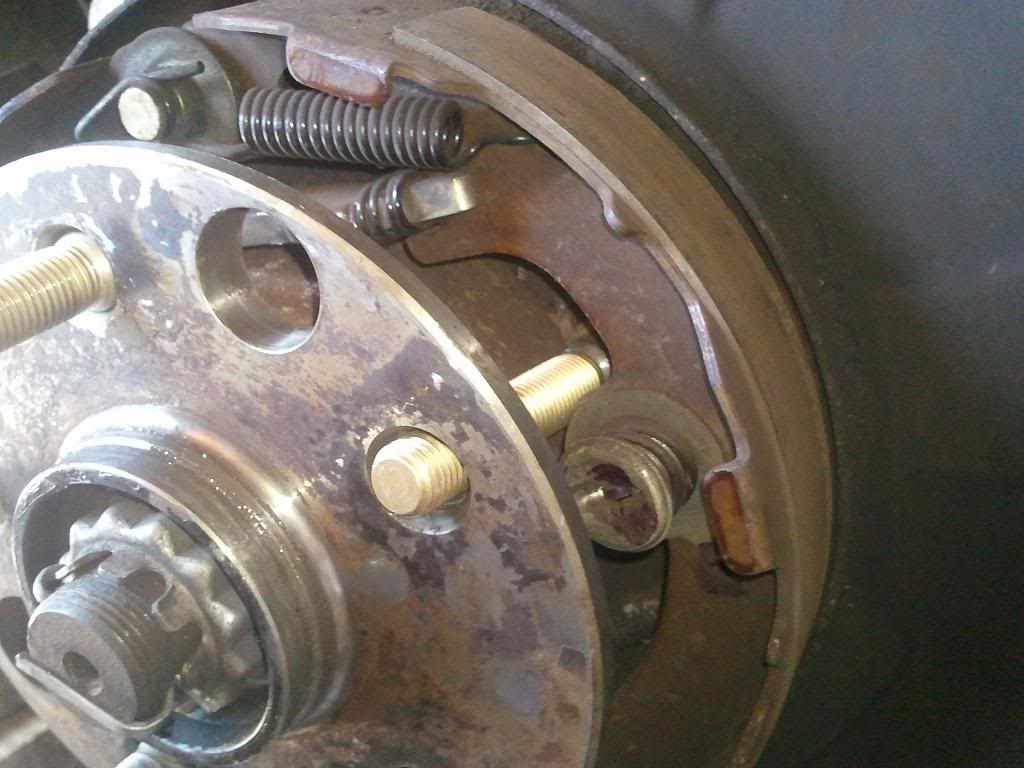
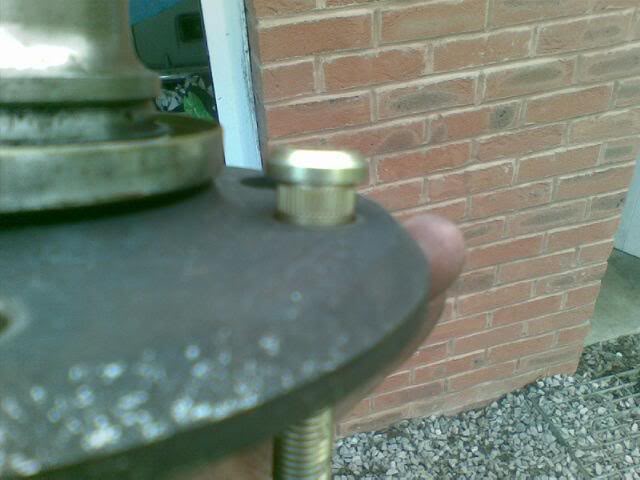
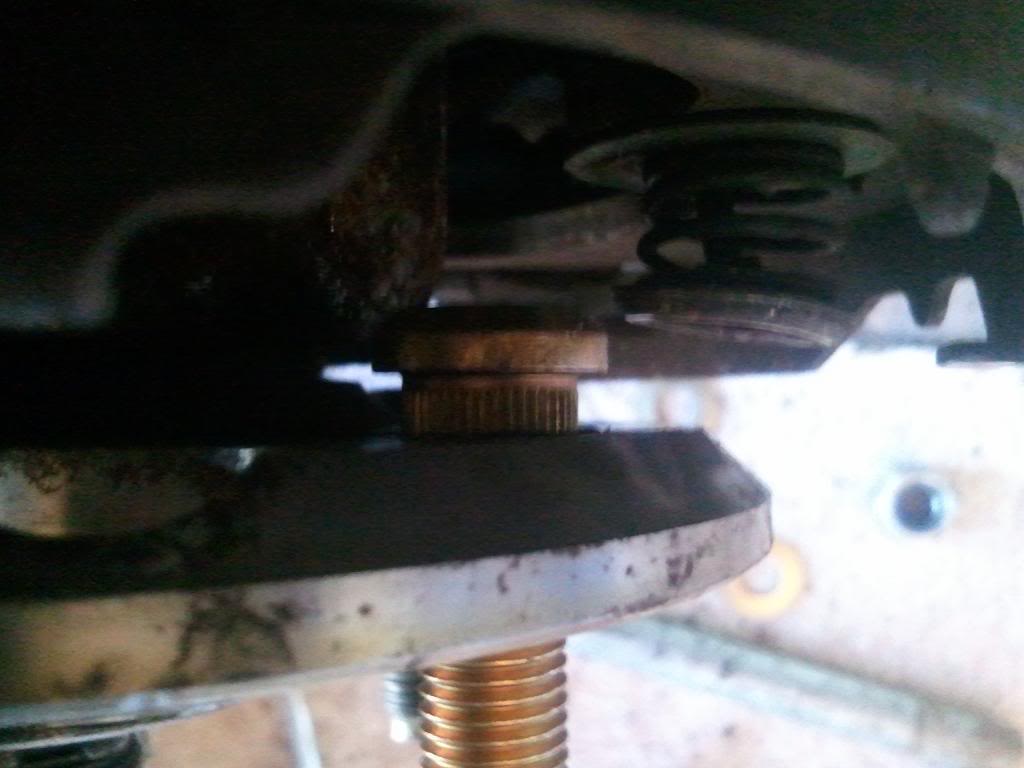
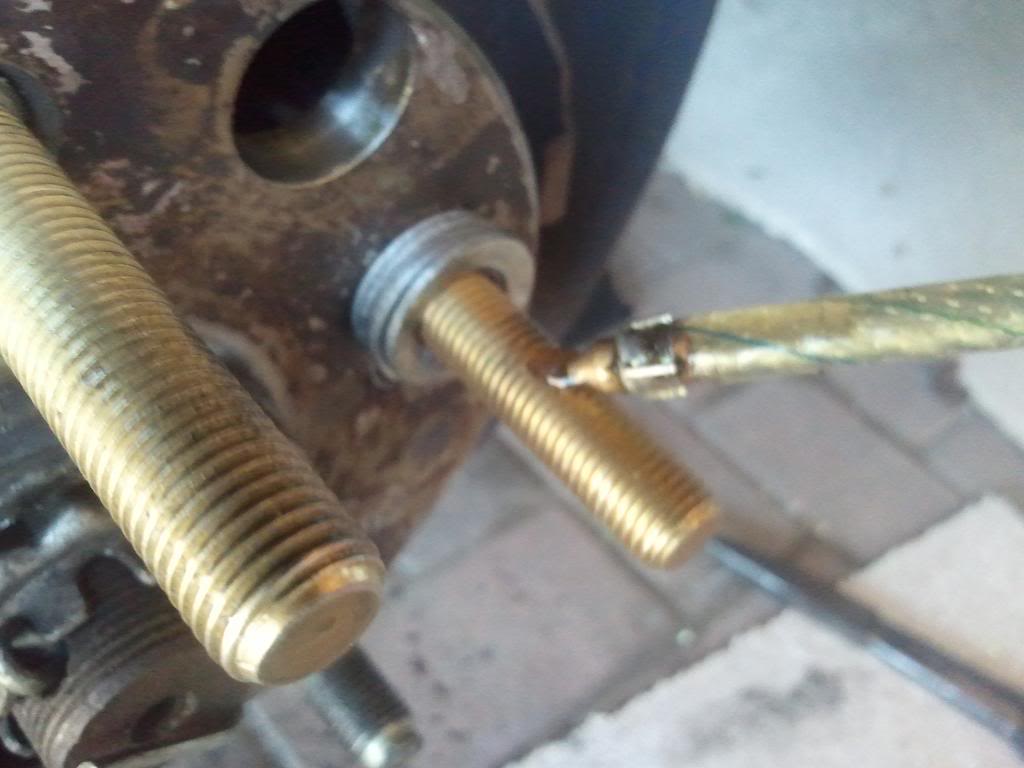
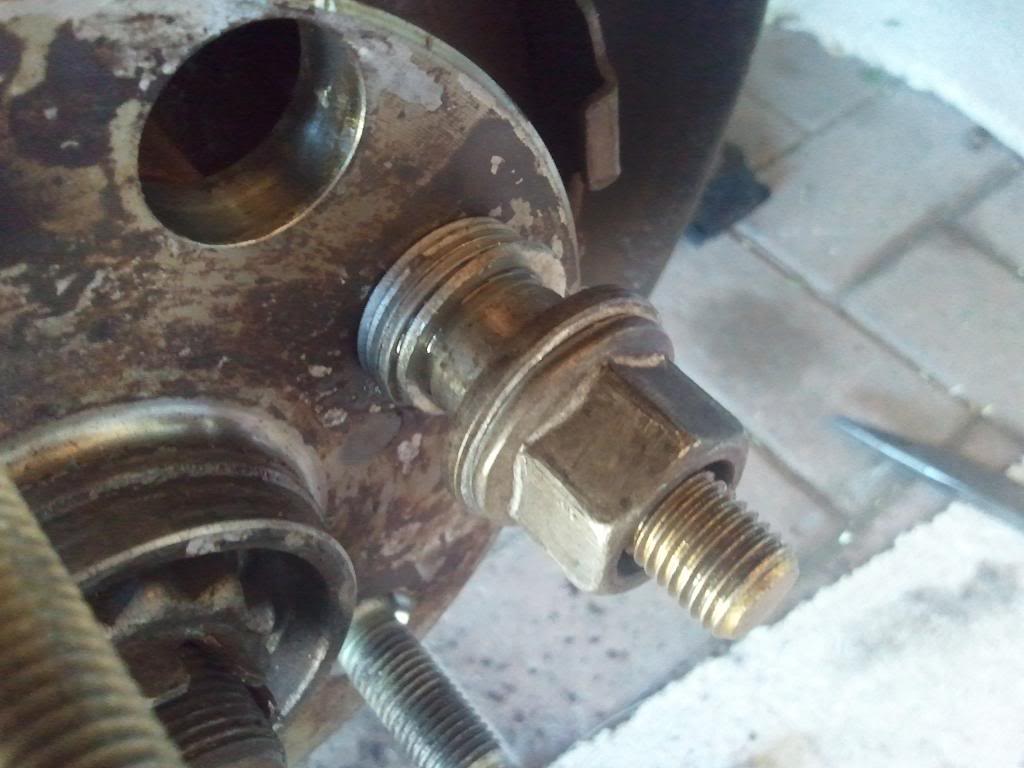
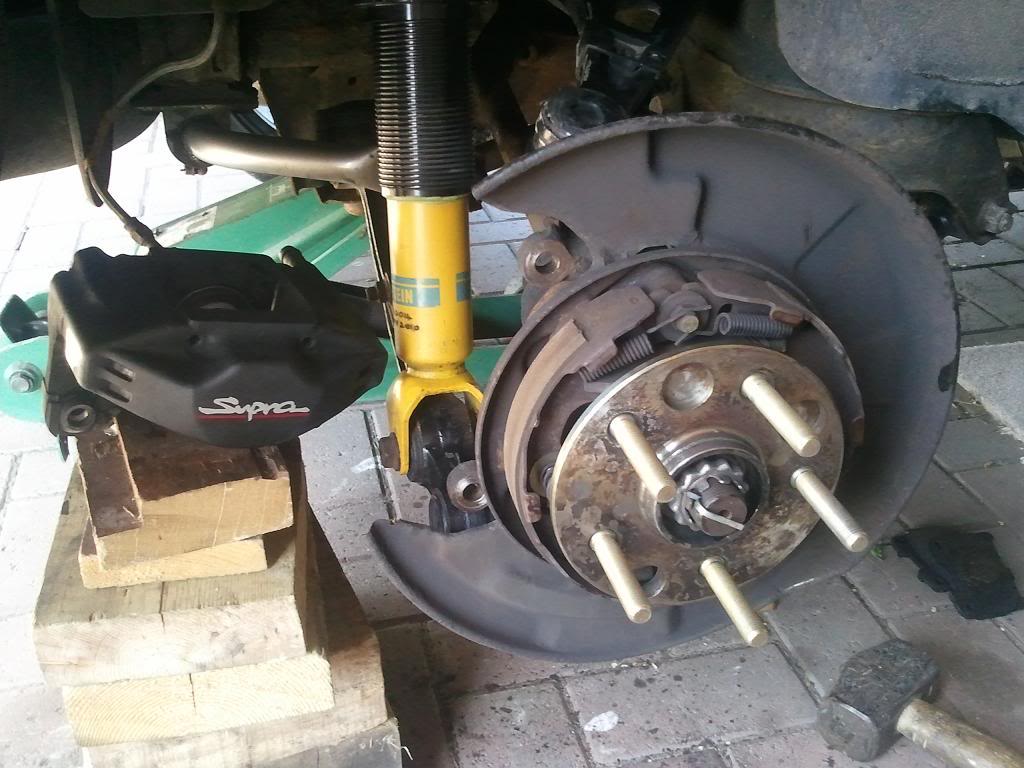
I bought a set of these a while back for my rear wheels as I will be running an 8-10mm spacer and needed the extra stud length. Mine came from MVP but a lot of people sell them. I’ve read a lot of different opinions about these things and problems with fitting them so I thought I’d post up my side of things as that might make life easier for other people fitting them. A couple of things to bear in mind: 1. I think the ARP number for these is 1007715 but I'd need to double check the packet I threw away 2. The standard rear studs are 45mm long, these are more like 70mm long. 3. The studs need a minor modification to the shank area to make them fit reliably – this makes them press in like the Toyota studs and means they don’t need welding as suggested by Titan/PHR. 4. They can be fitted on the car, with no need to remove the hub, shorten the stud or drill a hole in the backplate. First thing to cover is the slight modification needed to get these to fit correctly. Like all studs, these press into the hub and the anti rotation is provided by a male spline on the stud biting into the female on the hub. The standard studs measure up like this and you can see that the plain diameter shank next to the spline measures up at 13.7mm with the spline ranging from 14.08-14.18mm. The ARP stud has a larger diameter on this plain shank that measures 13.93mm: The important thing to note is that the female splined part in the hub measures 13.8-14.0mm and so the plain shank of the stud fouls on the female spline in the hub. If you go ahead and try to press (or pull using a wheel nut) this stud into place then the plain shank of the ARP stud will wipe out some of the female spline which can cause two problems: 1. The stud is a total £&%$! to press in as it is basically too big. 2. If you do press it in like this and destroy part of the female spline then the anti rotation properties of the spline will be partially lost and you may end up needing to weld them into place as suggested by Titan or PHR – just to stop the stud from turning when you torque up your wheel nut! So I turned this plain shank diameter down to match the Toyota stud. You can get someone at an engineering/machine shop to do this or you could do it using a pillar drill with a couple of files if you have the skill, patience and time and can measure the diameter accurately enough. Once it is done then the stud will sit into place properly (with the splined portions ready to be pressed into each other rather than standing off on the plain shank of the stud. Without turning down plain shank the stud will not sit into the hub properly and stands off. After turning down plain shank it will sit it properly, waiting for the splines to be pulled into each other: So – now to move on to fitting them. They are too long to simply feed into place so I had to do a slight modification to the back plate. I had to orient the hub like this so that the larger diameter through hole lined up with this part of the hub and backplate. Next I placed a drift through the hole and gave it some gentle - meduim hits to put a small dent in the thin backplate material. This creates a little bit more room to accommodate the extended stud length. Once I had given it a few taps and created a bulge of 1-2mm it looked like this from the back (not easy to see). Once the old stud was drifted out, all that had to be done was feed the stud in carefully.. Rotate the hub until the stud starts to poke into the splined hole.. And then wiggle the hub back and forward and ease the stud through the hole.. Then pull it into place with your fingers and put on the washers and some oil on the threads ready to pull it through with a wheel nut. Put the wheel nut on and start torquing the nut to pull the stud into place and keep doing this until they all sit in position. I hope that's useful to someone.
-
wanted fittings for aem solenoid boost valve
dandan replied to spiderpigcity's topic in Parts Wanted
Do you want straight or 90degree fittings or does it not matter? I may have some and will have a dig around in the garage this afternoon. -
-
I have a brand new genuine 16401301 and the cable to connect that to the likes of an Emanage. I was gonna post it up for sale next week when I get back from holiday. Any good to you?
-
Sad to hear you're getting rid mate.....nice motor for someone though
-
I've got three of these and they are excellent in my opinion. Night vision is good but as with pretty much all CCTV stuff - lighting for night time illumination is a definite benefit. http://cgi.ebay.co.uk/700-TVL-CCTV-Camera-30M-IR-Night-Vision-Vandal-Dome-/230582191439?pt=UK_CCTV&hash=item35afc5054f
-
Are they steel or aluminium?


