
Kaan W
-
Posts
5360 -
Joined
Content Type
Profiles
Forums
Store
Blogs
Events
Downloads
Supra Articles
Gallery
Everything posted by Kaan W
-
What the Speedo dials? Edit; Here - http://www.metal-monkey.co.uk/acatalog/Supra_MKIV_Auto_220mph.html
-
Looking at the dial clusters on that web site do these still allow the light to pass through?
-
 Nothing wrong with Rota's
 -
Yeah Noz makes them.
-
Wow that is some serious air filter Wheels look great!
-
Your in luck I can't copy the link from the eBay app but they are called UNIQUE_PERFORMANCE and it's under Toyota Supra DU front bumper. I ordered mine two years ago but they still stock them. I must mention that the two holes in the wing where the bolts go into the bumper might want filling or new holes drilled just to line up with the threaded holes in the bumper. I had to do this only took a few minutes but fitment around the lights etc is perfect.
-
I'm just looking through I can't for the life of me remember the name of the company. I might be able to check my PayPal or eBay feedback but no promises mate as it was months ago!
-
You can get away with 6j wheels with spacers, as said fit the kit then buy a wheel that fits. There's nothing worse than a fat rear end then looking underneath to find no rubber it looks silly. You might wanna consider a custom wheel with the correct offset etc that fills the arch, then a 355/30/19 tyre. You will also need to cut a few inches off your original arch to allow for the wheel to tuck into the wheel under compression.
-
I got my DoLuck bumper from eBay, fitment is perfect do you want me to try find the seller again mate?
-
You gunno polish the housing?
-
3600 should still be ok at 700hp. Will it be ready for Suprapod?
-
Nice mate, looks a beast!
-
Kaan's SRD1000S - 3.4 Stroked Wide Body Project!
Kaan W replied to Kaan W's topic in mkiv Supra Projects
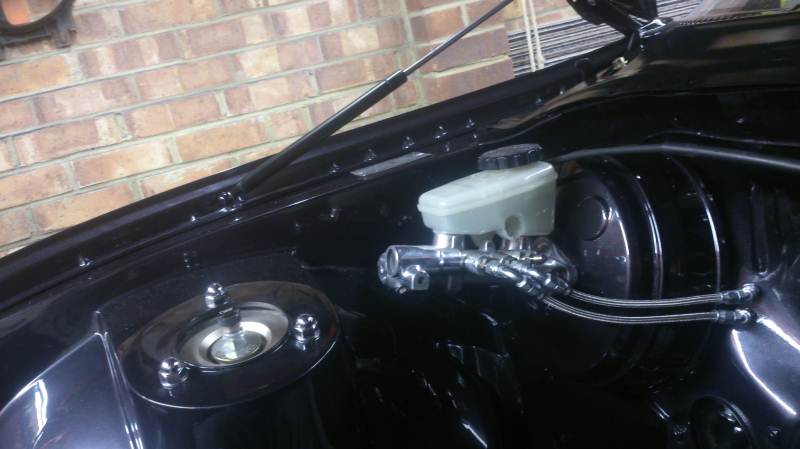
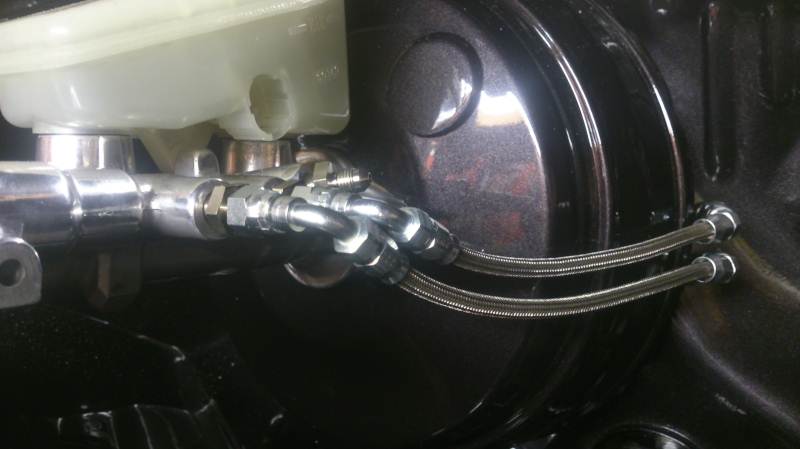
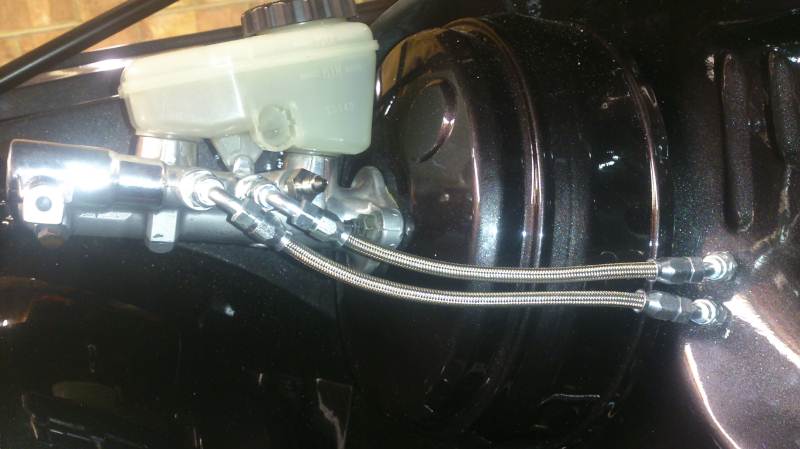
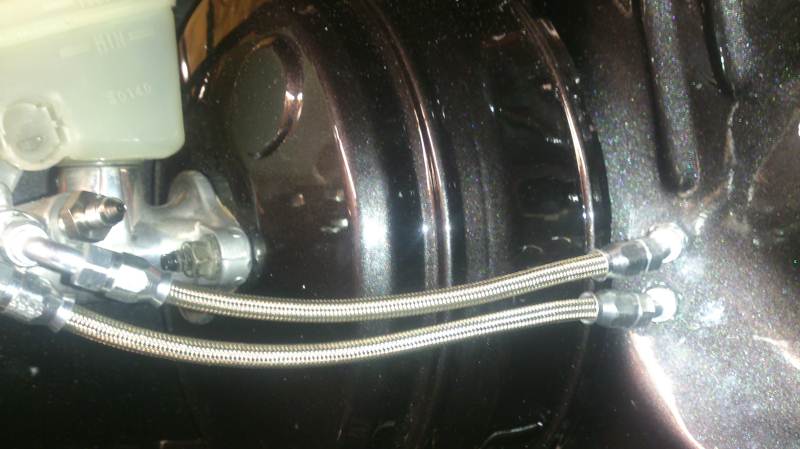
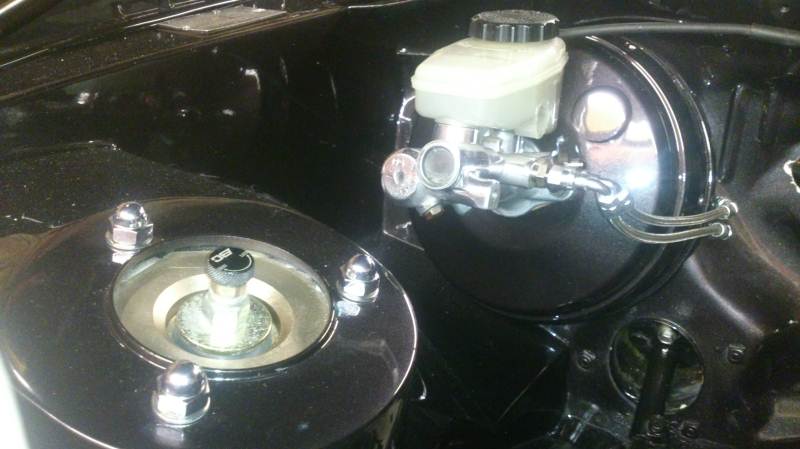
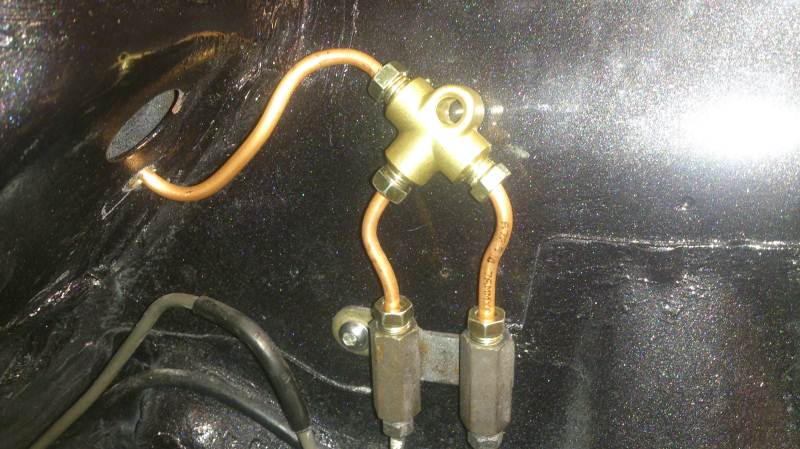
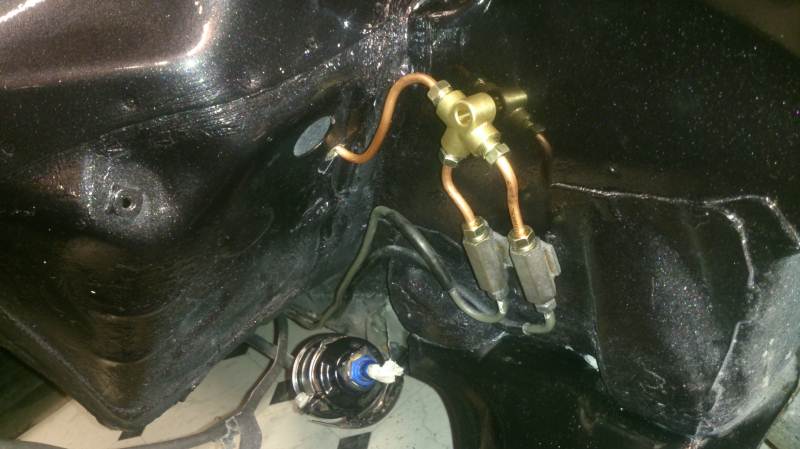
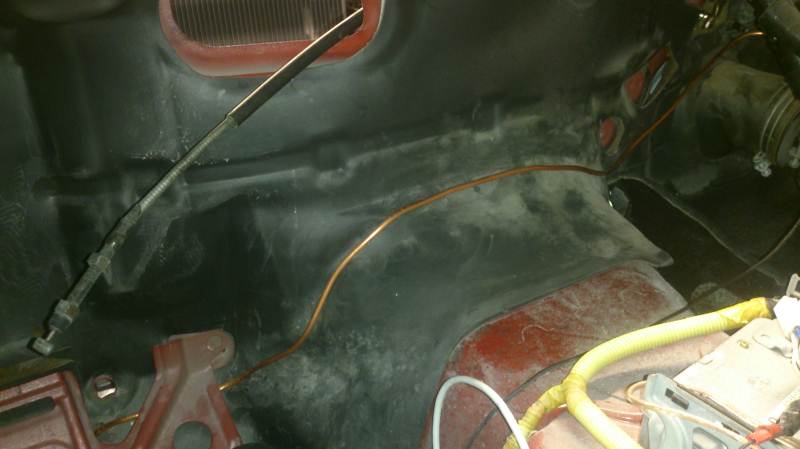
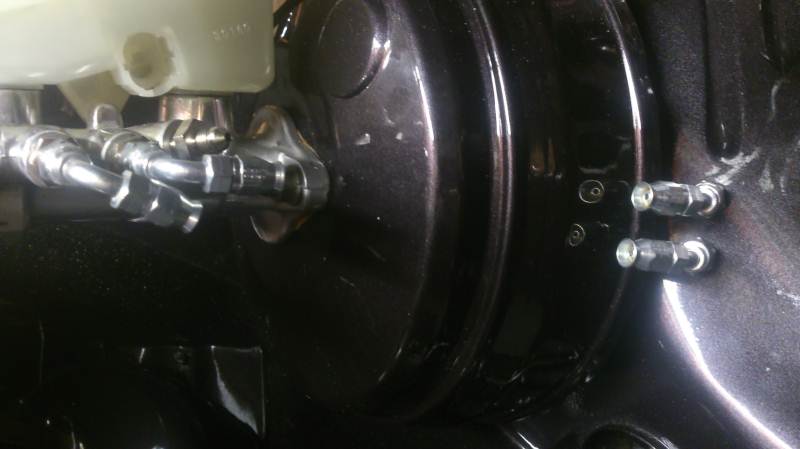
Not alot to update as ive been ill, again! But I have the Aeroquip hose and fittings for the brakes and started making the lines up and test fitting everything. Box of goodies Started with the two bulkhead fittings for the rear brakes and the front passenger side brake - The third port you see is for the front drivers side brake which goes straight down into the wheel well, I will get round to this one after ive completed the rest. On the other side of the bay by the passenger footwell you can see the newly routed copper pipe where it comes through and Tee's off onto the back brakes. How it looks inside the cabin, from bulkhead fittings copper runs below the heater matrix and behind the ecu plate into the engine bay which you saw on the picture above. Bearing in mind there will be a second copper pipe taking the same route but exiting a bit further along into the passenger wheel area for that brake. If you look close at the top right of the picture you can see where the two bulkead 90 degree fittings come through, they still need connecting up. Thats the rear brake lines almost sorted next will be the two fronts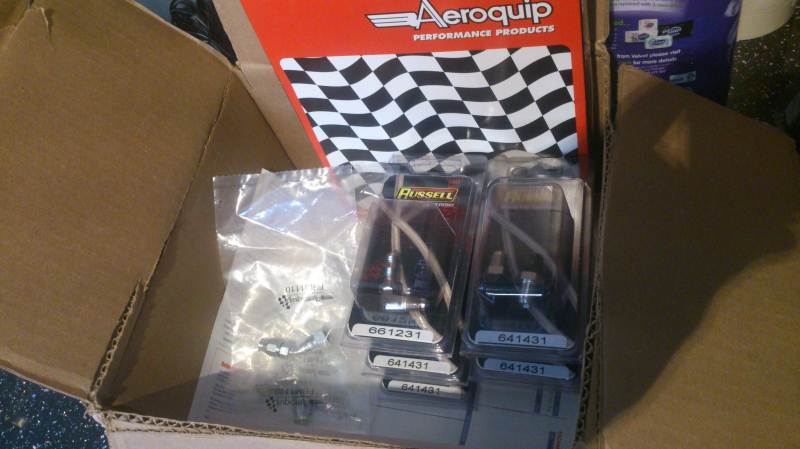
-
Same They'll look like space savers with that kit.
-
I have veilside arches I believe stick out as far as the gt300 arches and I have Rota gtr-d 12x18 et20 and have to use 20mm spacers. Someone may correct me but am I right in thinking a et0 would eliminate the use of spacers and add more dish? If you wanted you could probably fit a 14" wide rim under those rear arches.
-
Project: Good things come to those who wait...apparantly!
Kaan W replied to Poshmalc's topic in Supra Chat
Yeah getting there mate it should be done around July -
Project: Good things come to those who wait...apparantly!
Kaan W replied to Poshmalc's topic in Supra Chat
Hi Matt, nice work so far you've done a brilliant job transforming the car. Keep the updates coming and just remember, it's your car so do what you like -
Oh what I would do to that chassis What power you aiming for to get that 8 or 9? That's bloody quick! Are you staying with the 3800 stall?
-
Such a lovely car!
-
Top work, looks fantastic mate
-
Glad I could help
-
Me vs you and Rog
-
Where do we leave our cars if we stay at a hotel?
-
Have you tried using your teeth?
-
A little cutting disk to make a slot then a flat head screwdriver?


