Mike2JZ
-
Posts
2662 -
Joined
-
Days Won
55
Content Type
Profiles
Forums
Store
Blogs
Events
Downloads
Supra Articles
Gallery
Everything posted by Mike2JZ
-
You must be a hoot at parties
-
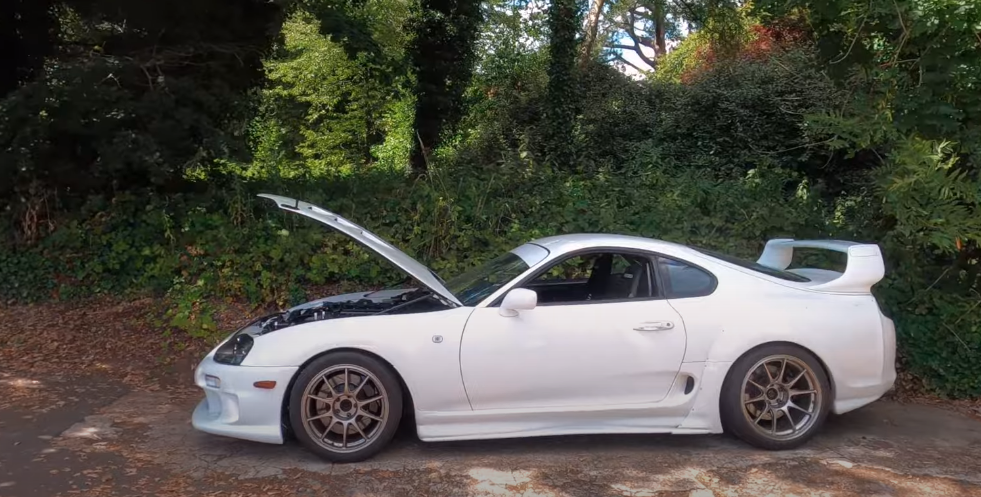
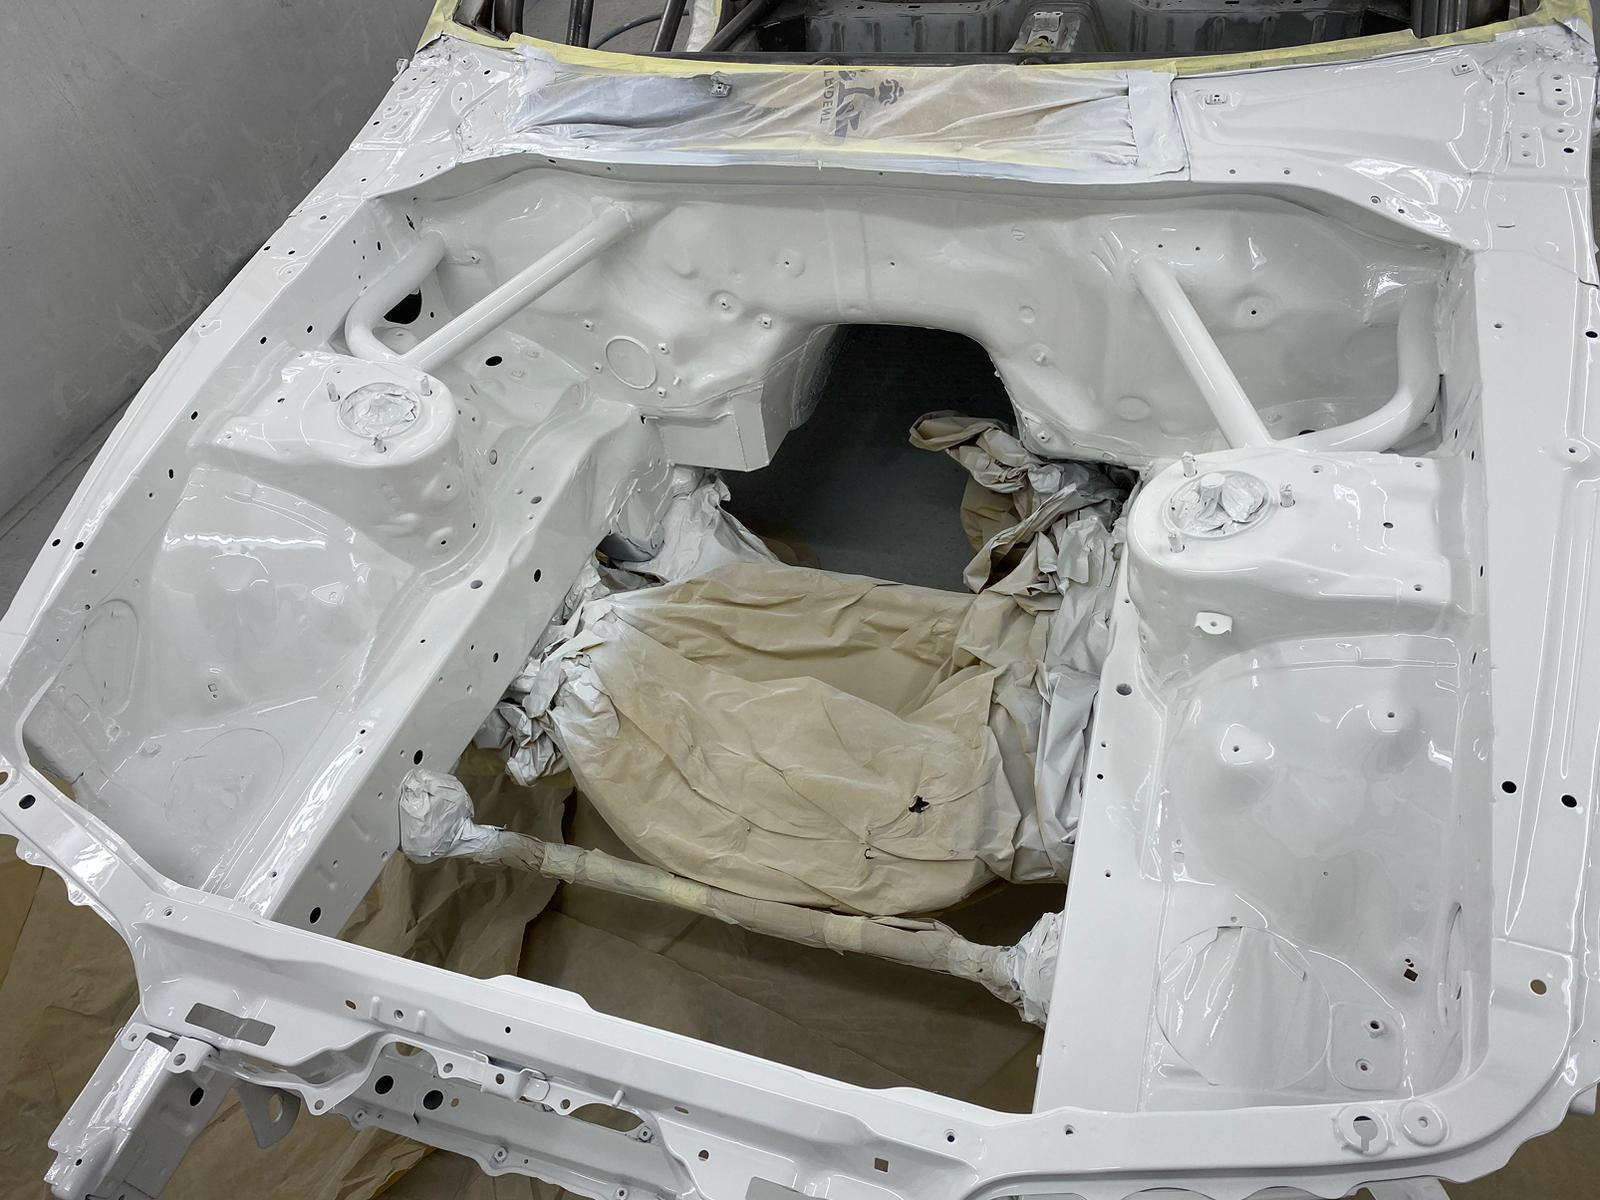
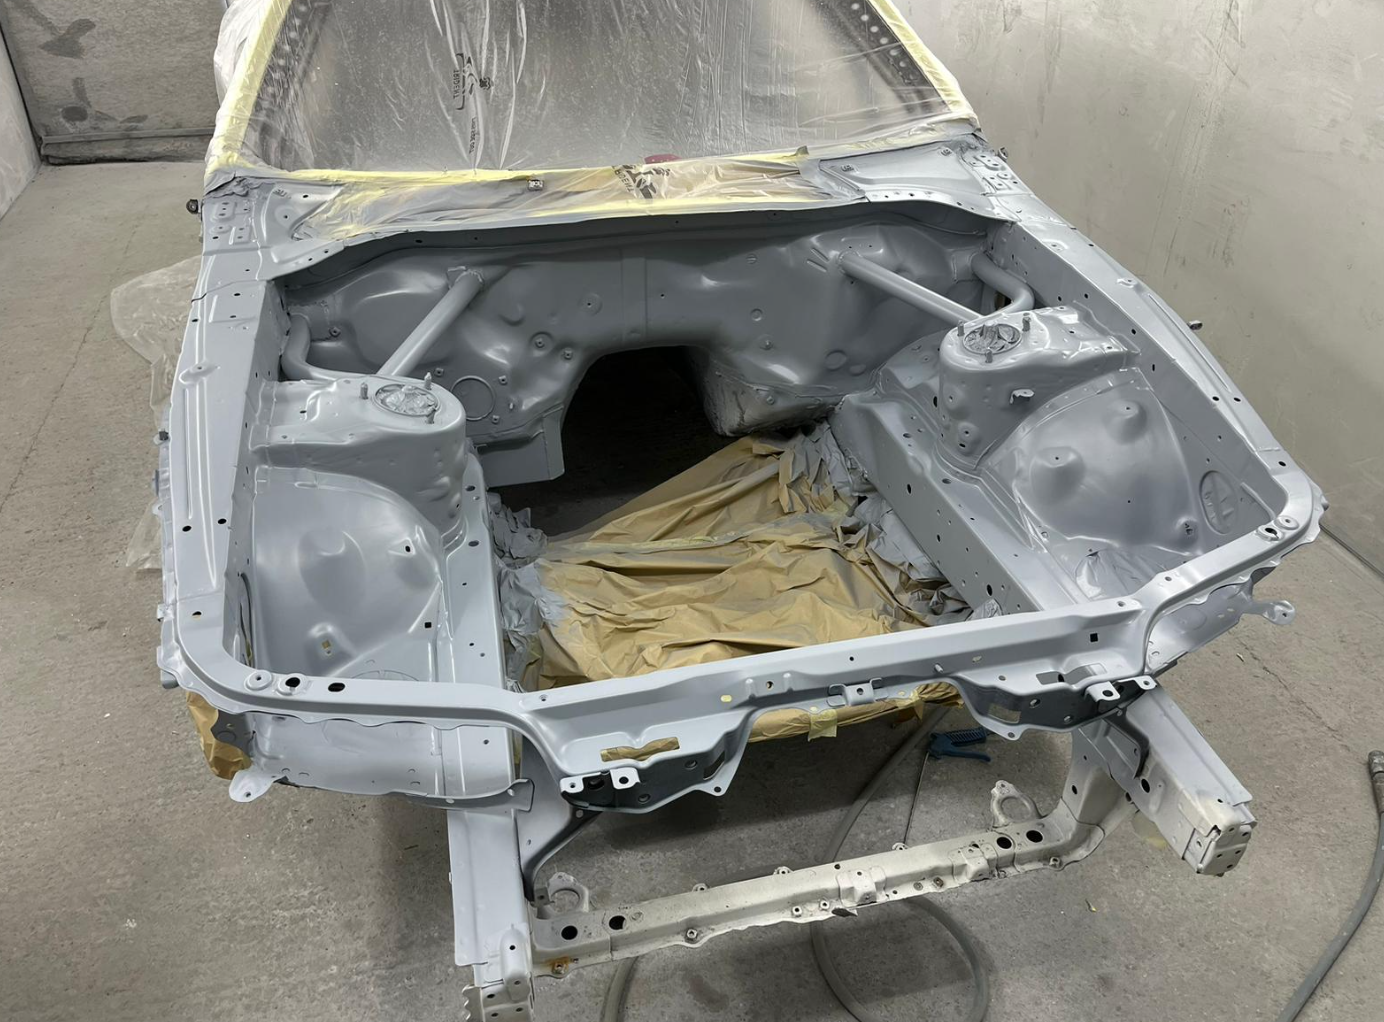
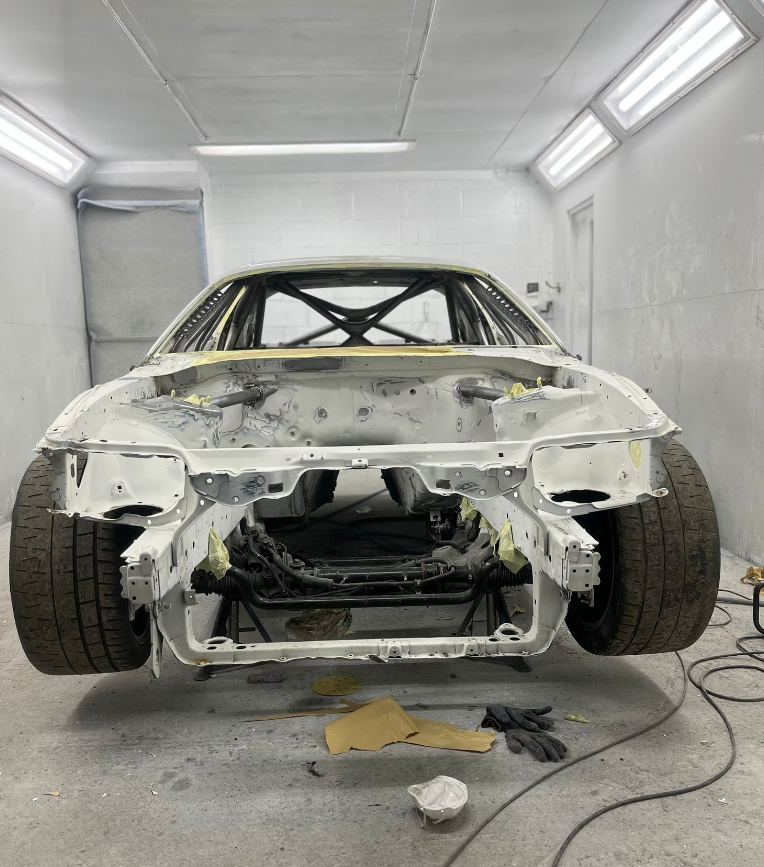
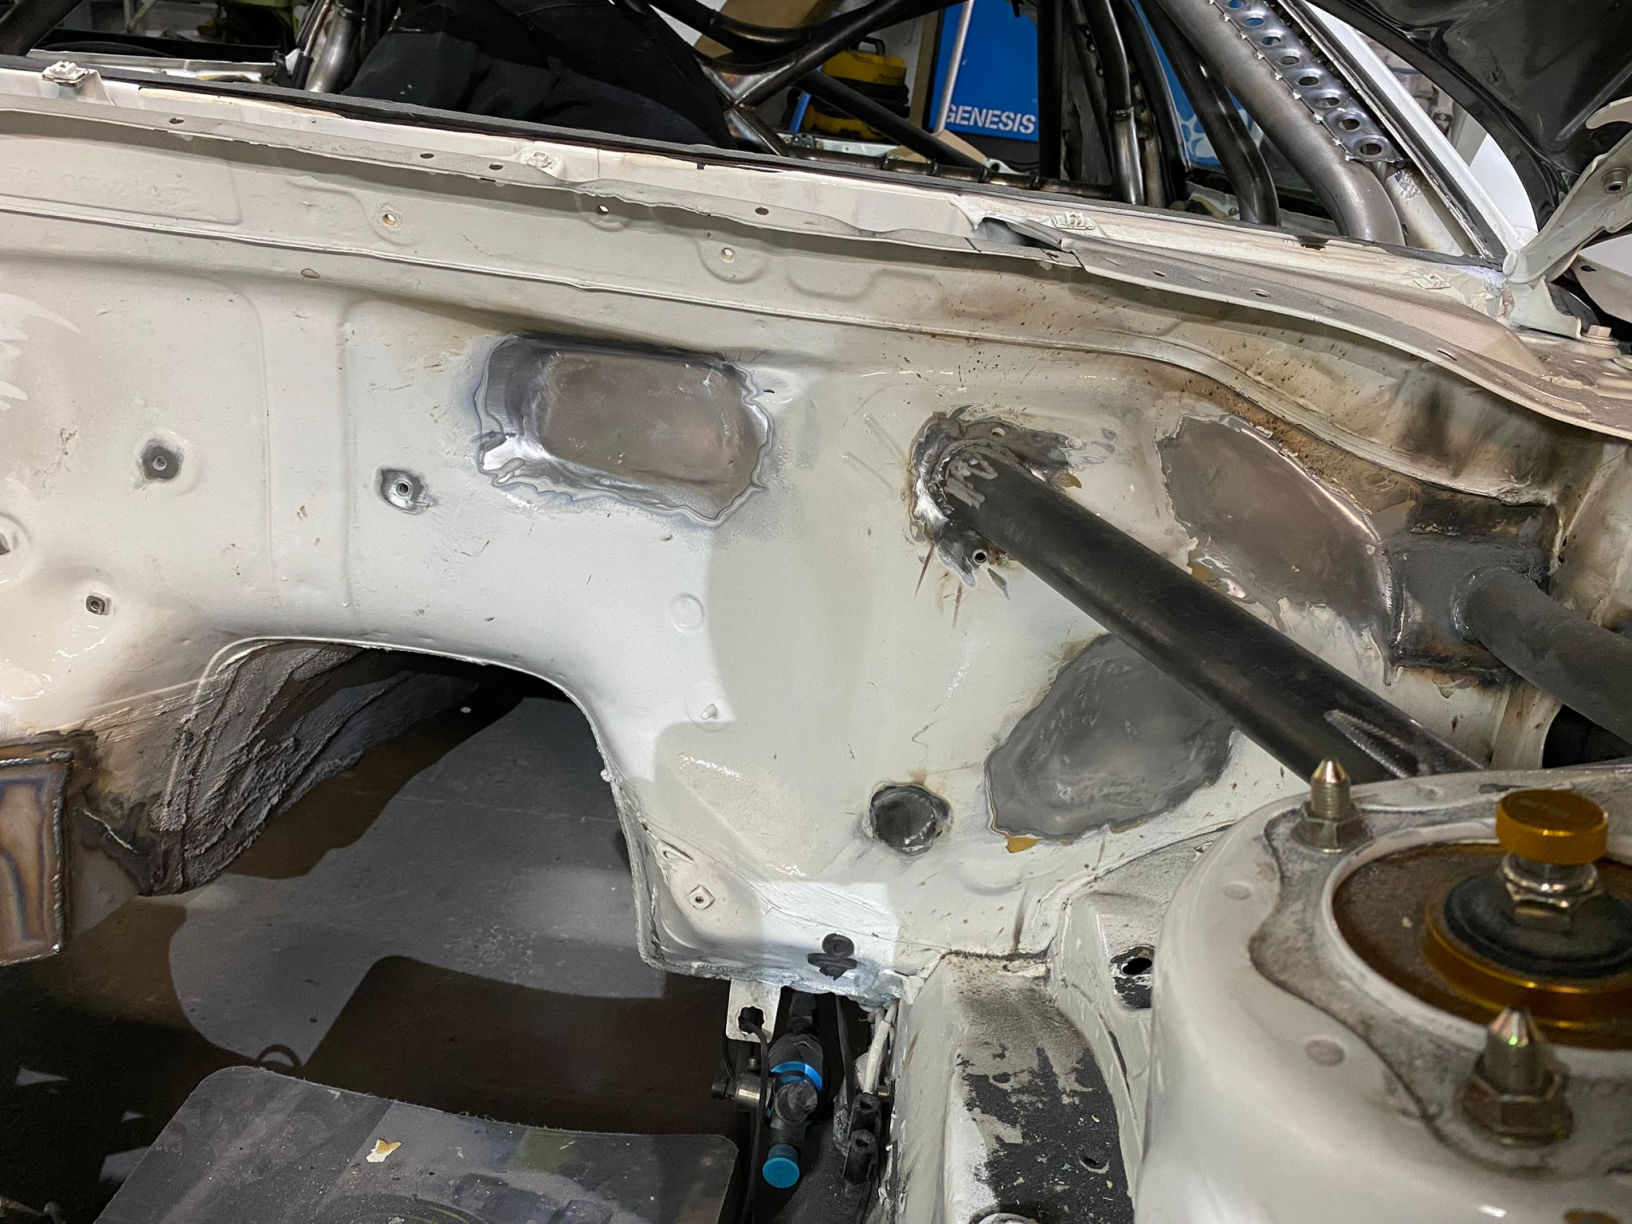
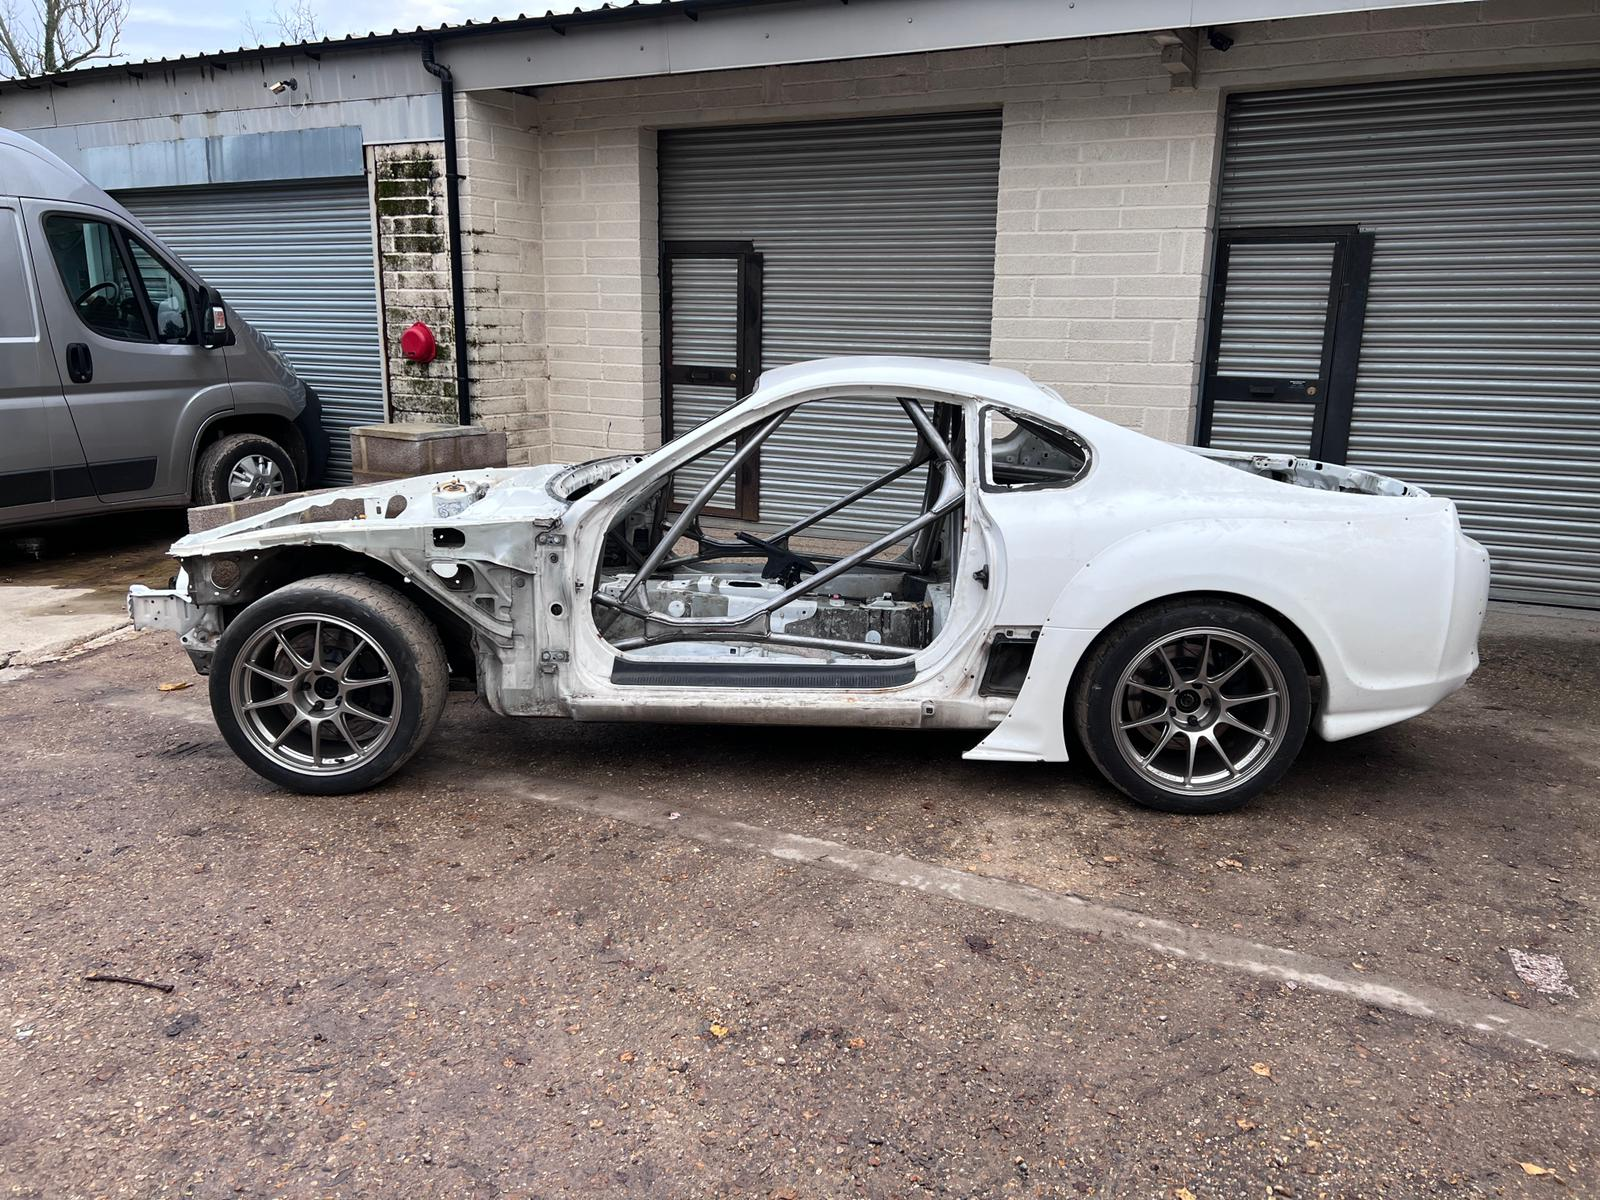
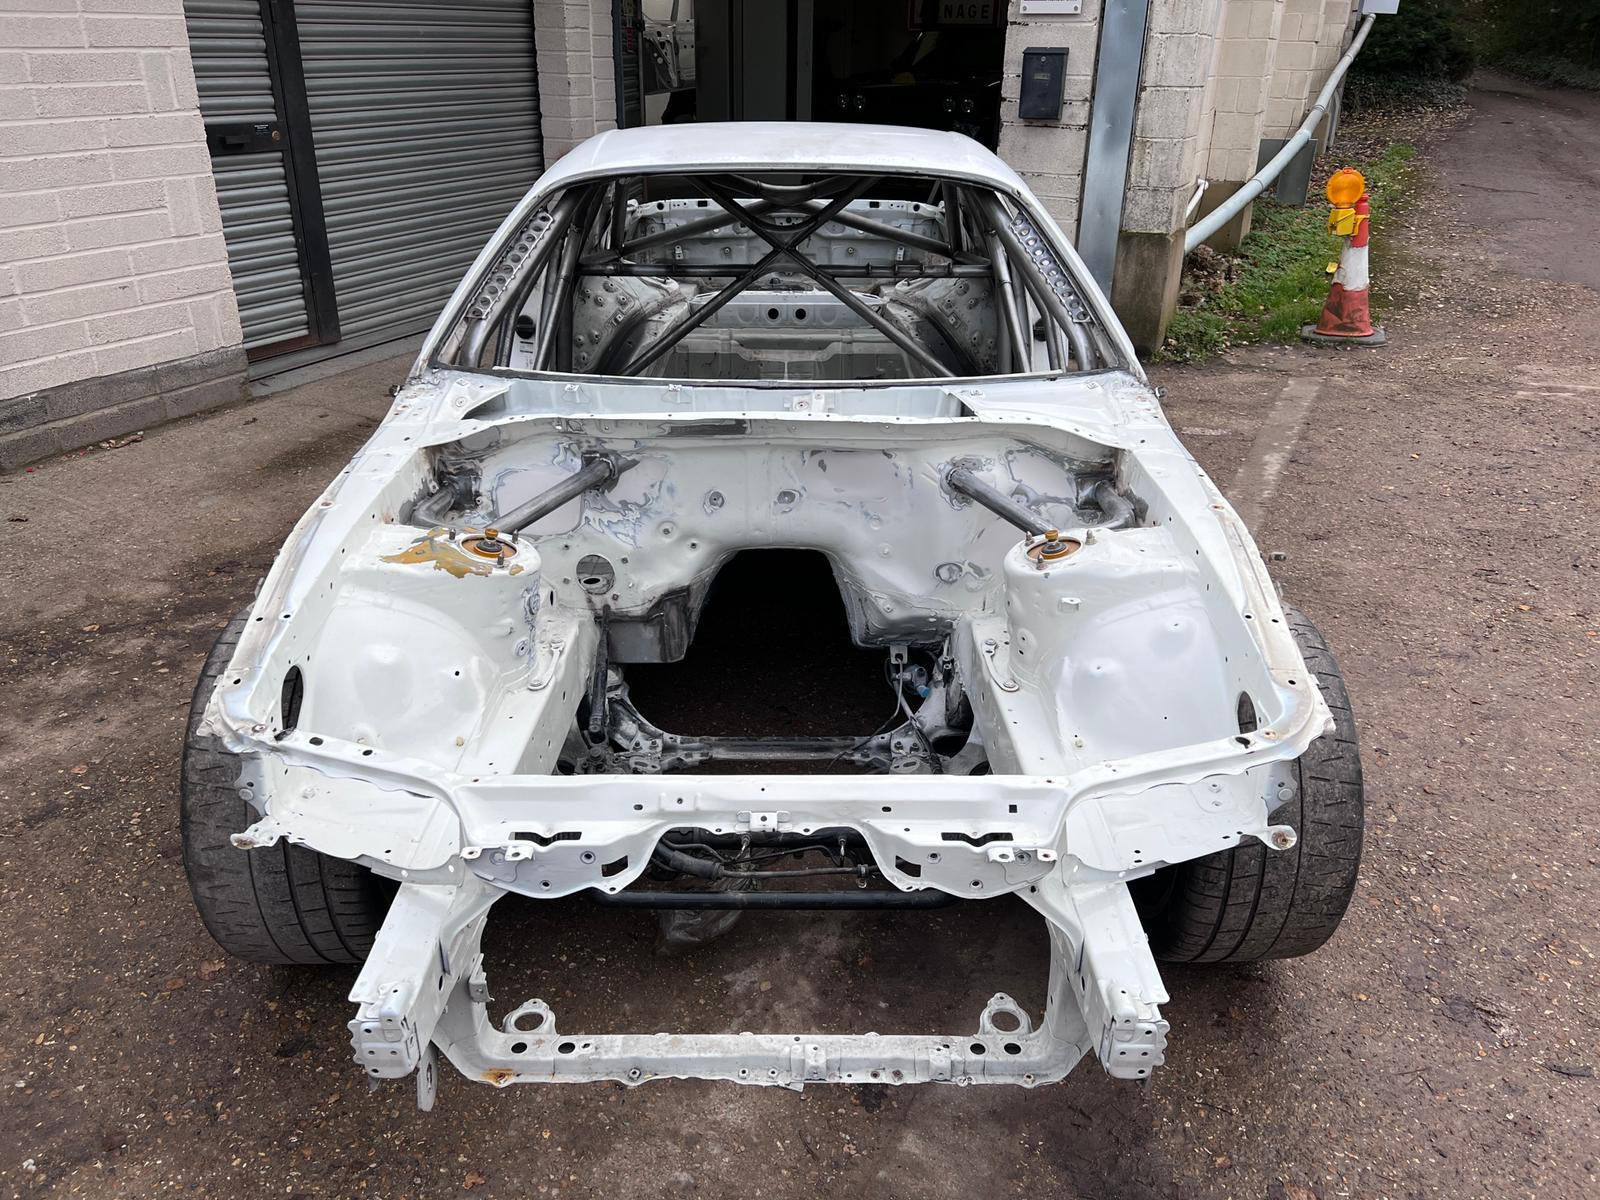
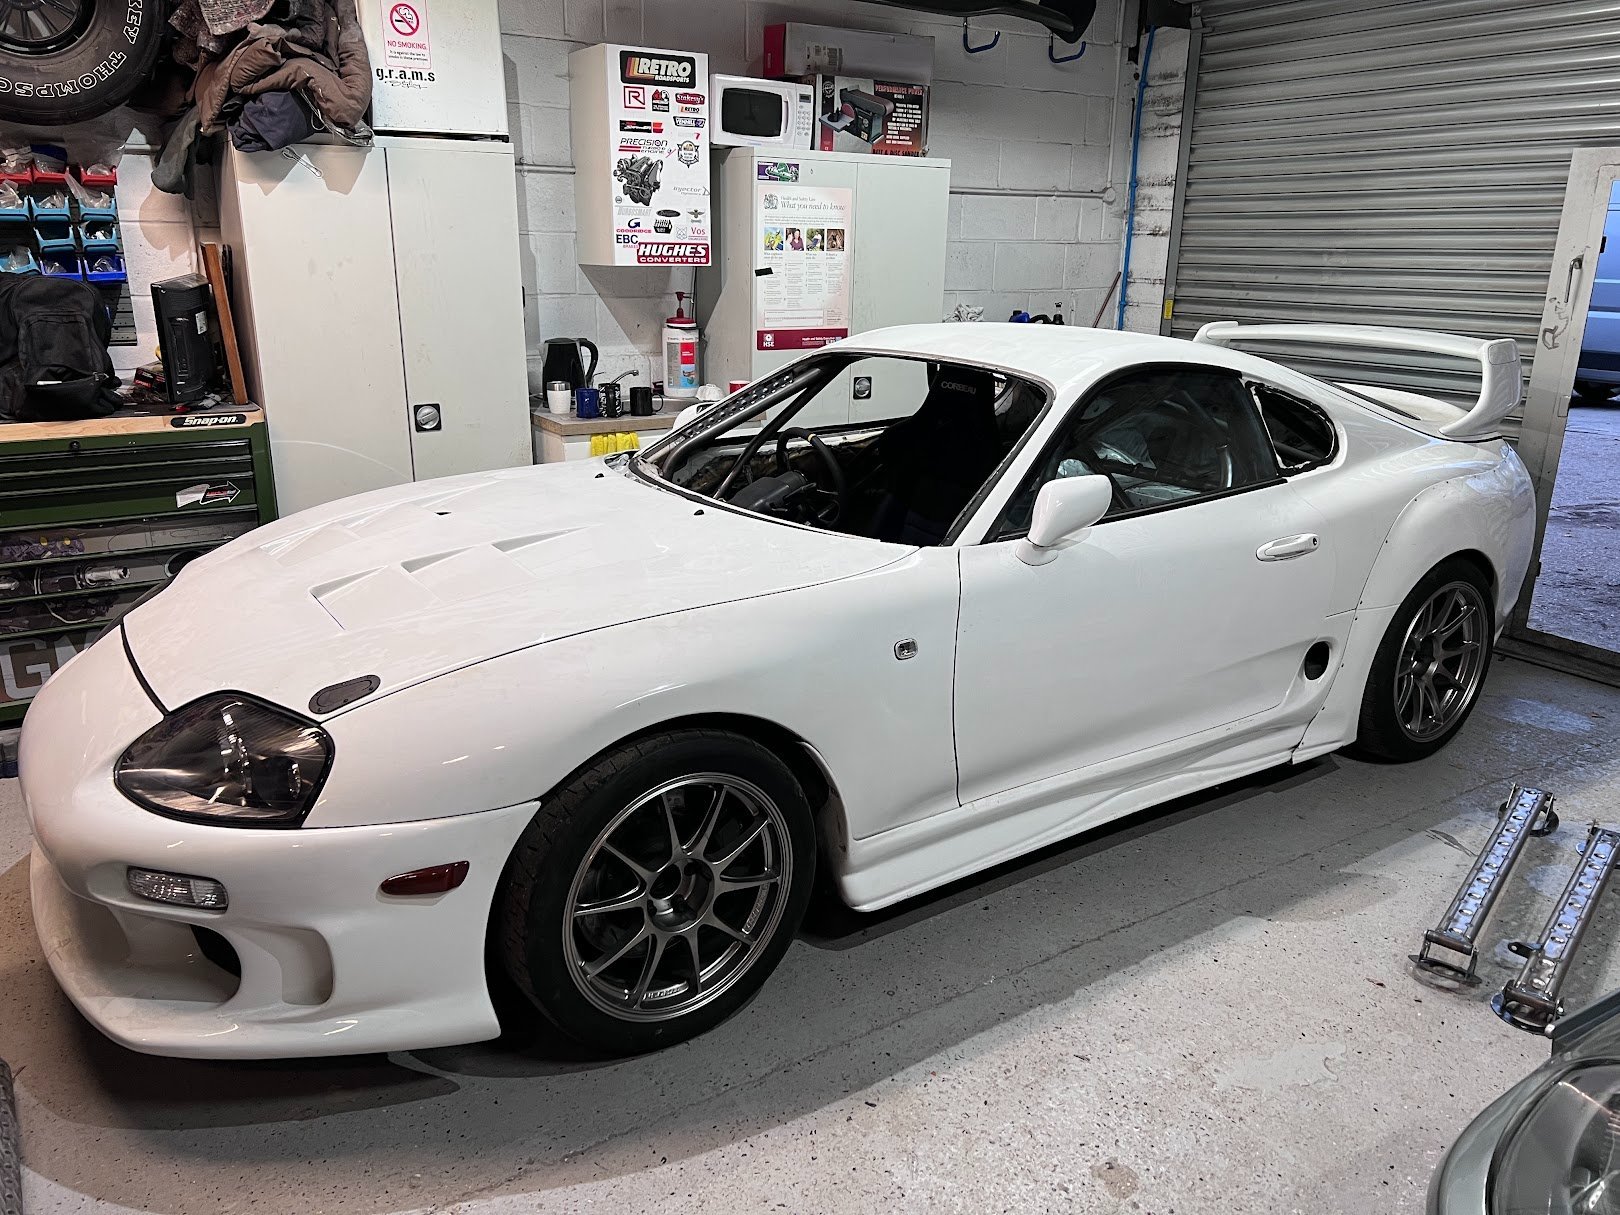
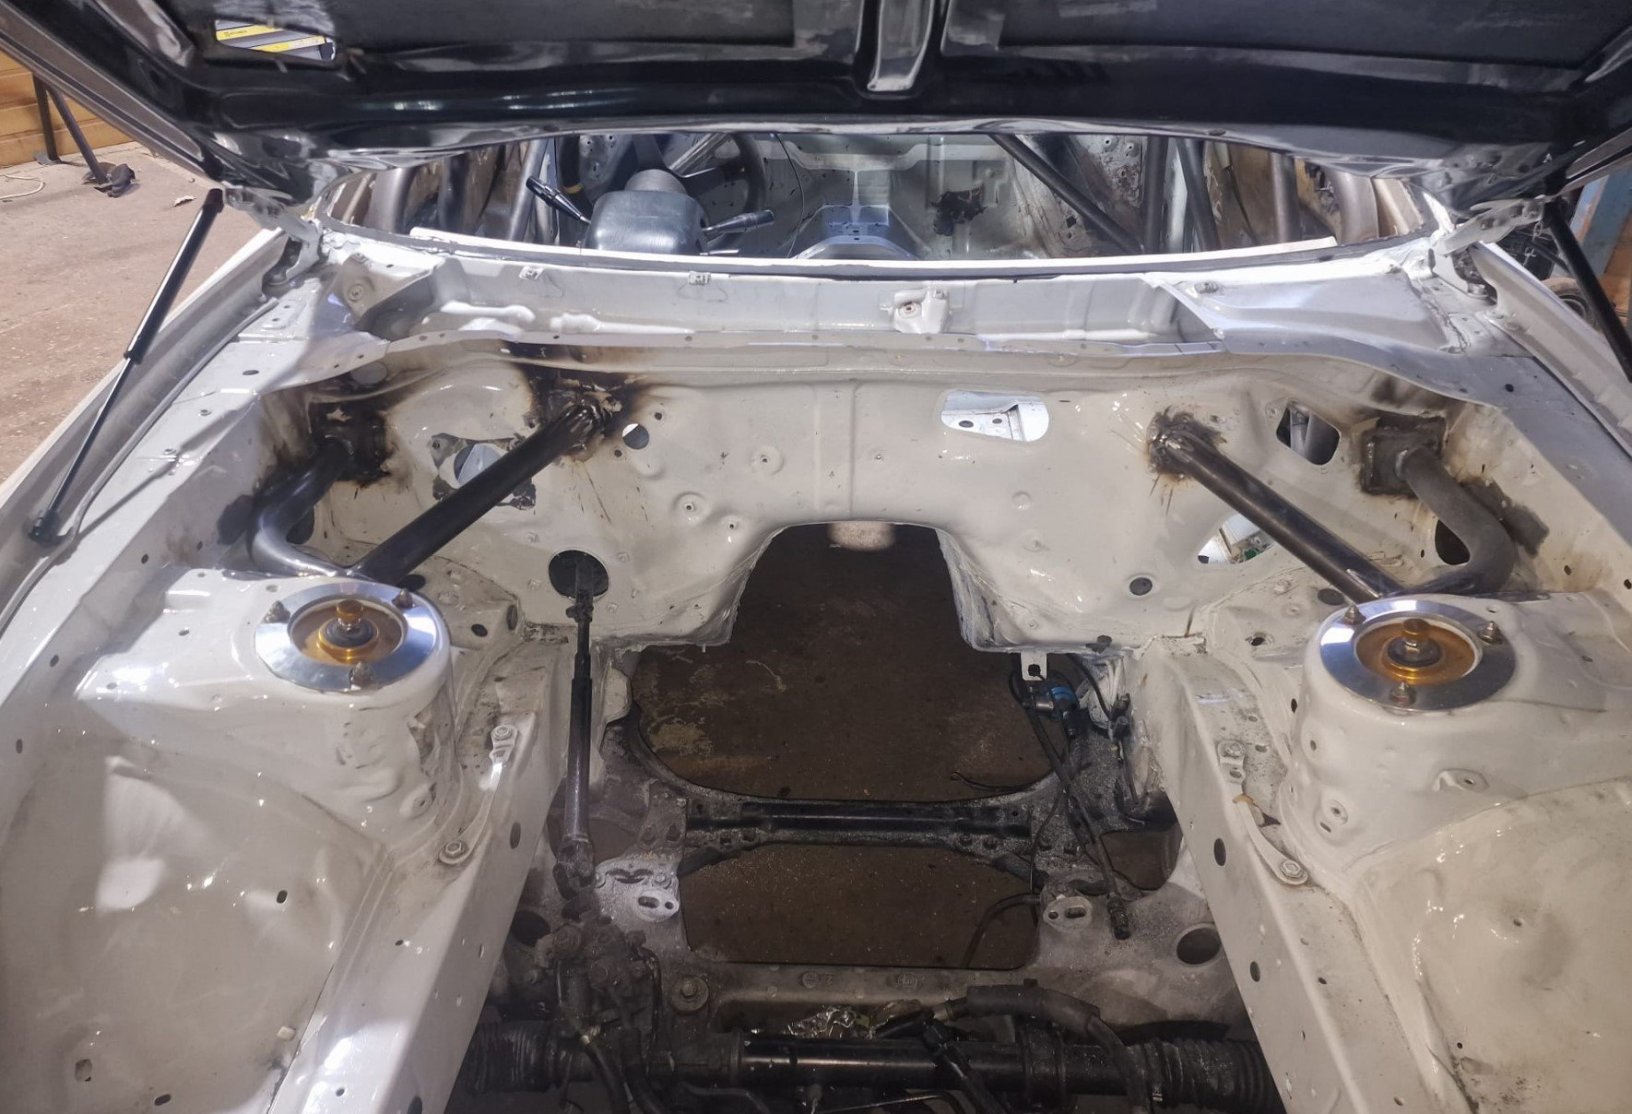
And we are white. Engine bay done.

-
RRS teasing me with more progress. Have had some slight damage to my front bumper frame support for many years. Luckily it was just cosmetic and I've always worked around it. Also had some bonnet pins installed in a weird location due to the bonnet I bought many years ago that I wasnt happy with, so after some gentle persuation by James it was decided to replace the whole thing whilst we were at it. New frame installed and now engine bay is primed ready for paint. I'm not really a christmas kind of guy, but these daily updates are as close to an advent calendar as I'm gonna get. Can't wait for the next day!
-
Didn’t even know it was repainted to be fair, thought it was oem it was that good
-
Bare metal takes fuxking ages to be fair. Especially if they do dent repairs etc. was this on the silver supra tayr ?
-
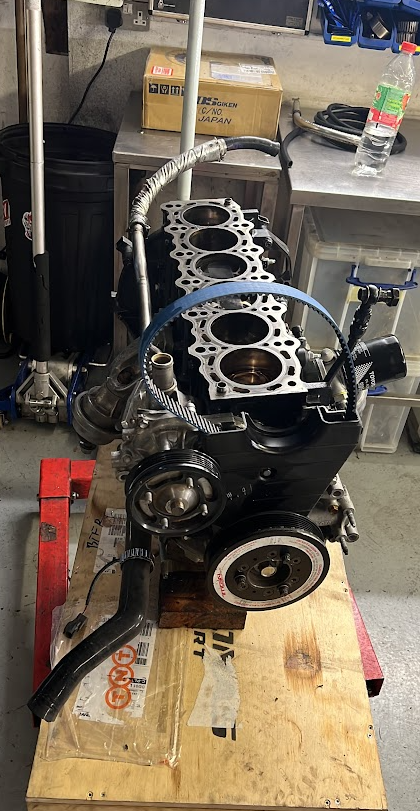
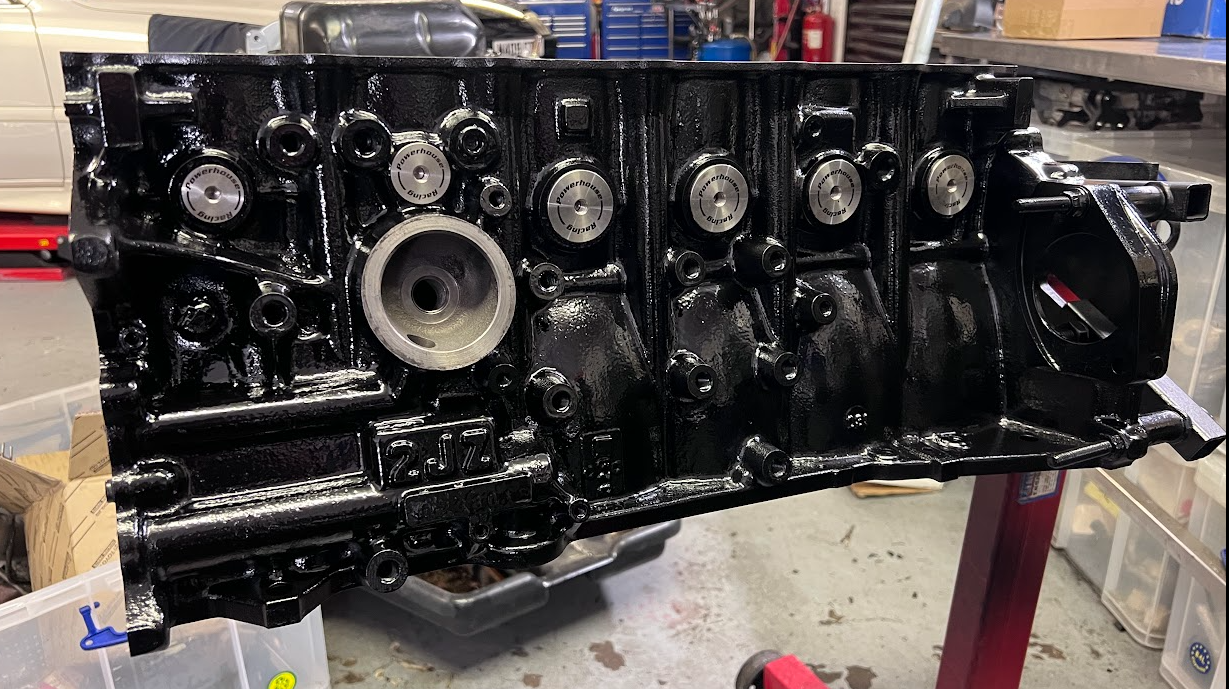
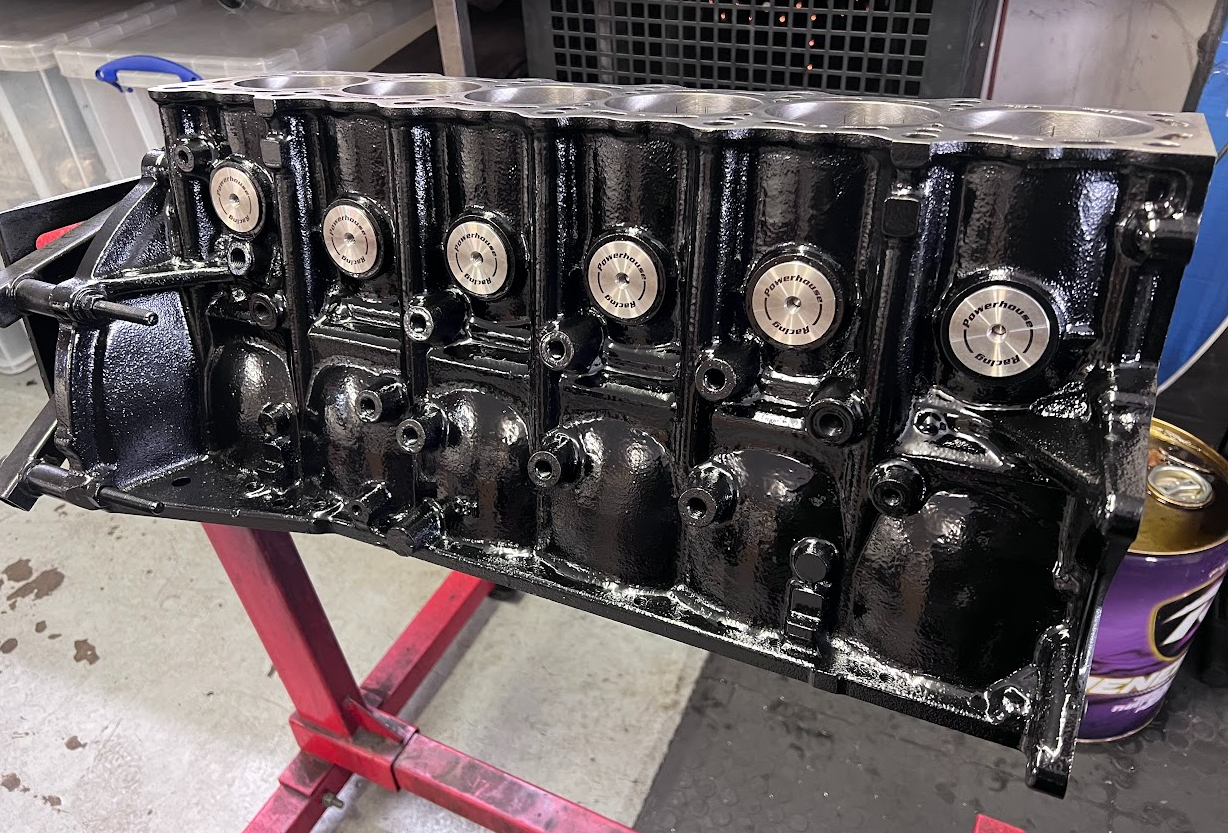
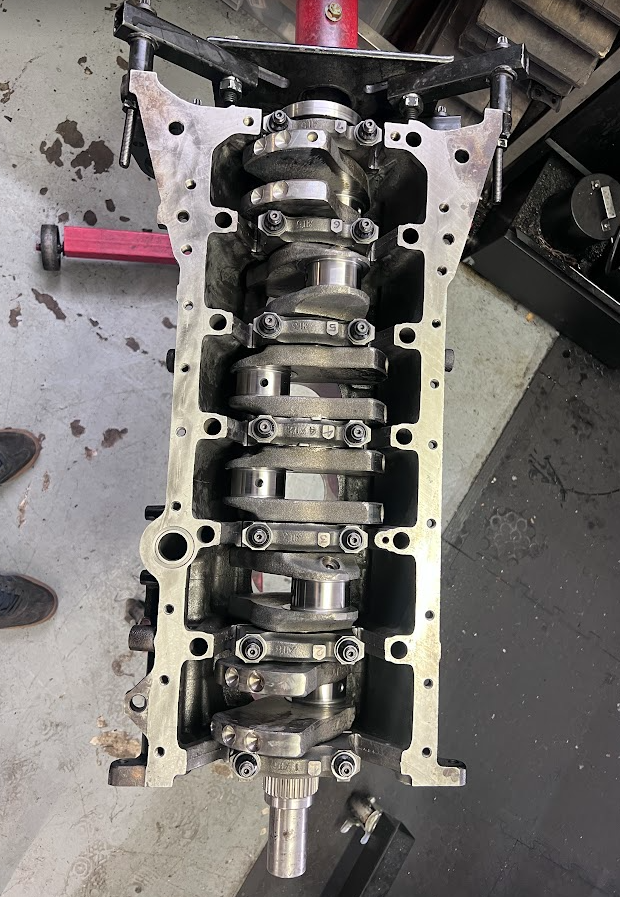
After removing the head a few months ago I stripped the block down to inspect the state of the rotating assembly components shortly after. The engine didnt do a lot of miles but used to get the shit kicked out it and occasionally had around 900ft.lbs of torque going through it, so I was expecting some accelerated wear in places. Back when I built this engine, the machinist found some slight egging in the center main journals on the crank and wanted to sort this by undersizing the crank. Depending on who you speak to this is a nono with 2J cranks, but I was up for an experiment so he ground the main journals down and I've been running 0.25 oversize bearings since. I thought for sure after the abuse it had gone through I would see some sort of wear on the mains, but upon inspection they were still in great shape, so decided to run them again with the same bearings and continue to monitor how they get on. The rod bearings had some slight wear on the edges of the bearing, but nothing abnormal or anything to made me worried so decided to keep them again. So as everything is in good enough condition to reuse it will serve perfectly as my test mule whilst I gather some data once its up and running Specs are: Stock 3.0 Crank (0.25 Mains, STD Rods) Factory Main Caps with ARP Main Studs Manley Platinum Pistons 9:1 87mm Manley H-Tuff Rods Clevite Bearings OEM Oil Pump The aim of this shortblock is to support this next stage of development as best it can, getting abused mainly on the dyno and maybe a few events in the real world. I'm sure it will meet its demise at some point as the components arent exactly all that exotic so will be interesting to see where the breaking point is. Whilst the engine was in pieces I had to block sent to machinist just to give the bores the tiniest bore/hone possible, compared to the last bore finish we are going to try and very coarse finish on this to see what it looks like after seeing lots of E85, and if ring seal is any different with lots of boost relative to the last bore finish. Other than this rest of the block is going back together exactly how it was. I want to forget how many sets of core plugs I've changed on my engines over the years as I normally install a new set when building a new engine. Luckily PHR to the rescue with this with their stainless core plug kit. A bit pricey, but reusable so hopefully can transfer to any future blocks in future. Install/Removal is super simple with the threaded hole. Stuck them in the freezer for an hour to let them shrink slightly, then using a long M8 bolt, knocked each one into place on the block in seconds. Was done in a few minutes, awesome! Gave the block a clean and quick lick of paint and looks great with new core plugs Then installed the crank back into block Got pistons to go next and headwork at machinist was just finished, so might have a longblock ready to go by the end of the week.

-
Not sure on black paint, could be from when it was manufactured. I see similar colour markings on Borg warners every now and again. The shaved bit on the turbine shaft is normal
-
Hybrid/highflow twin turbos VS small single turbo setup
Mike2JZ replied to Rashed's topic in Supra Chat
Did you have to delete the AC rad to get the intercooler sitting so far back? -
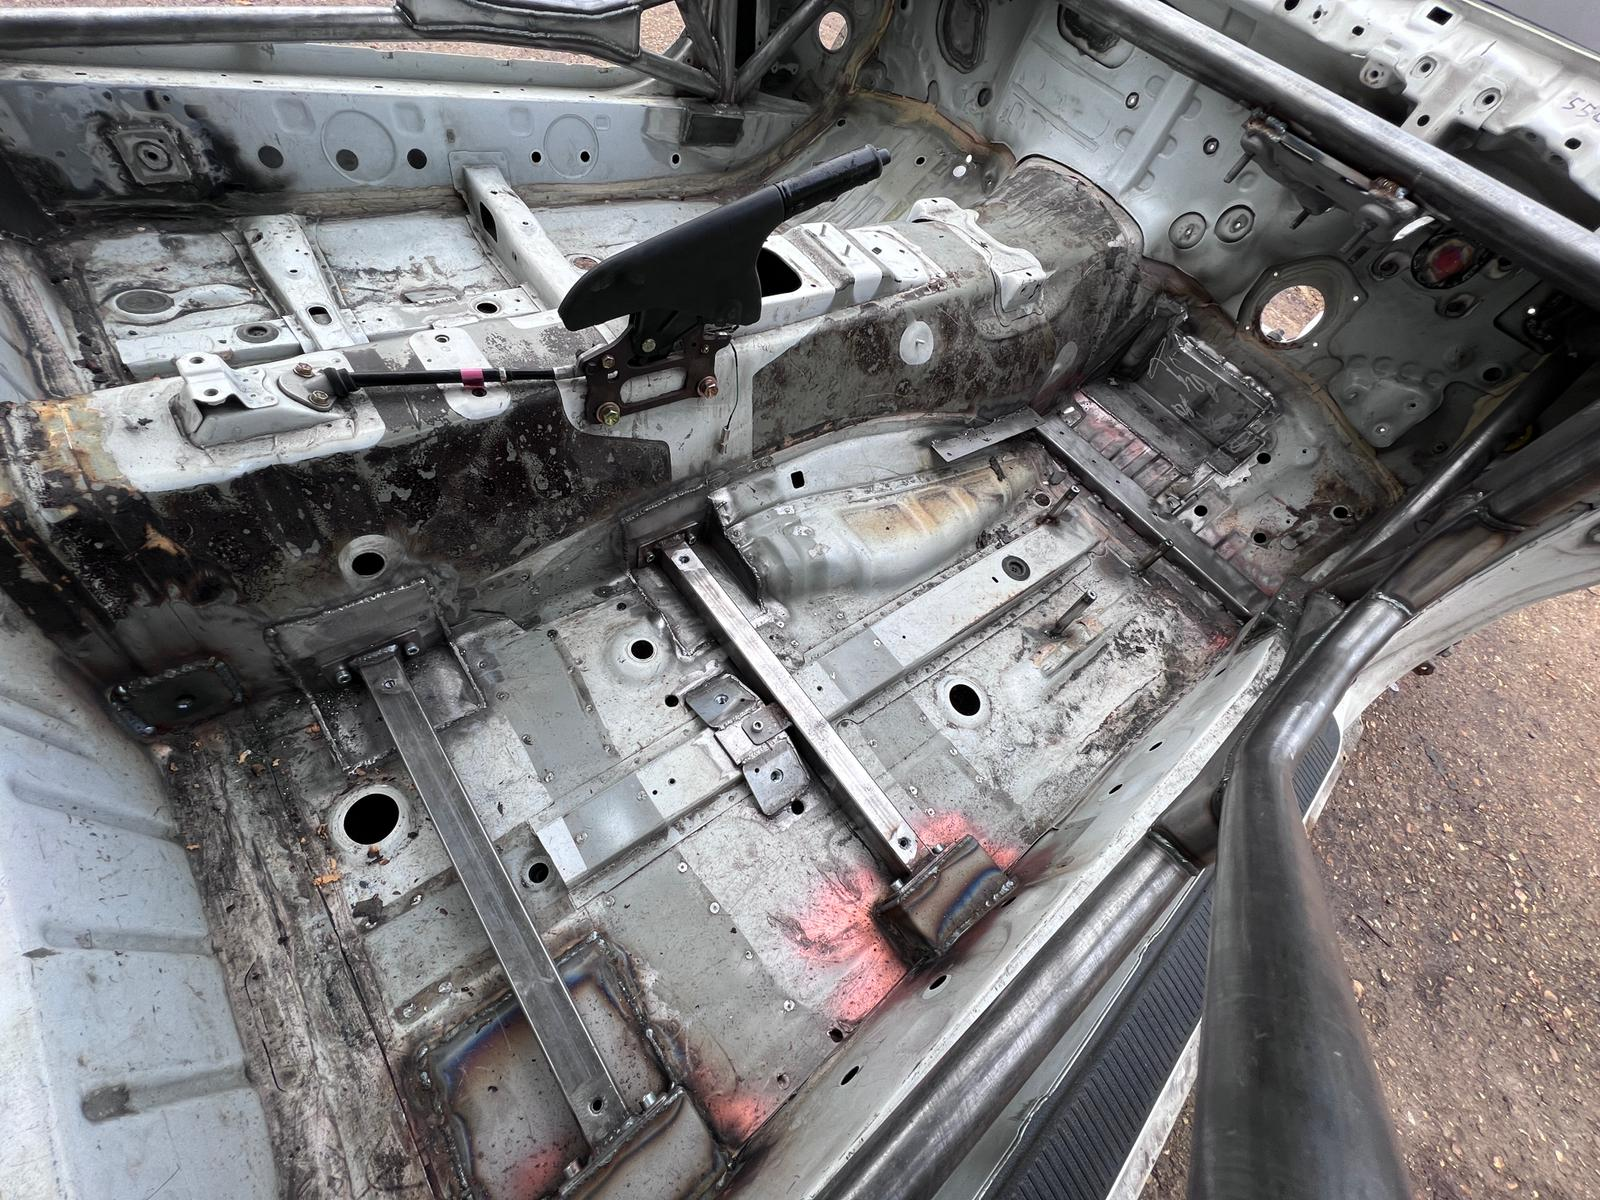
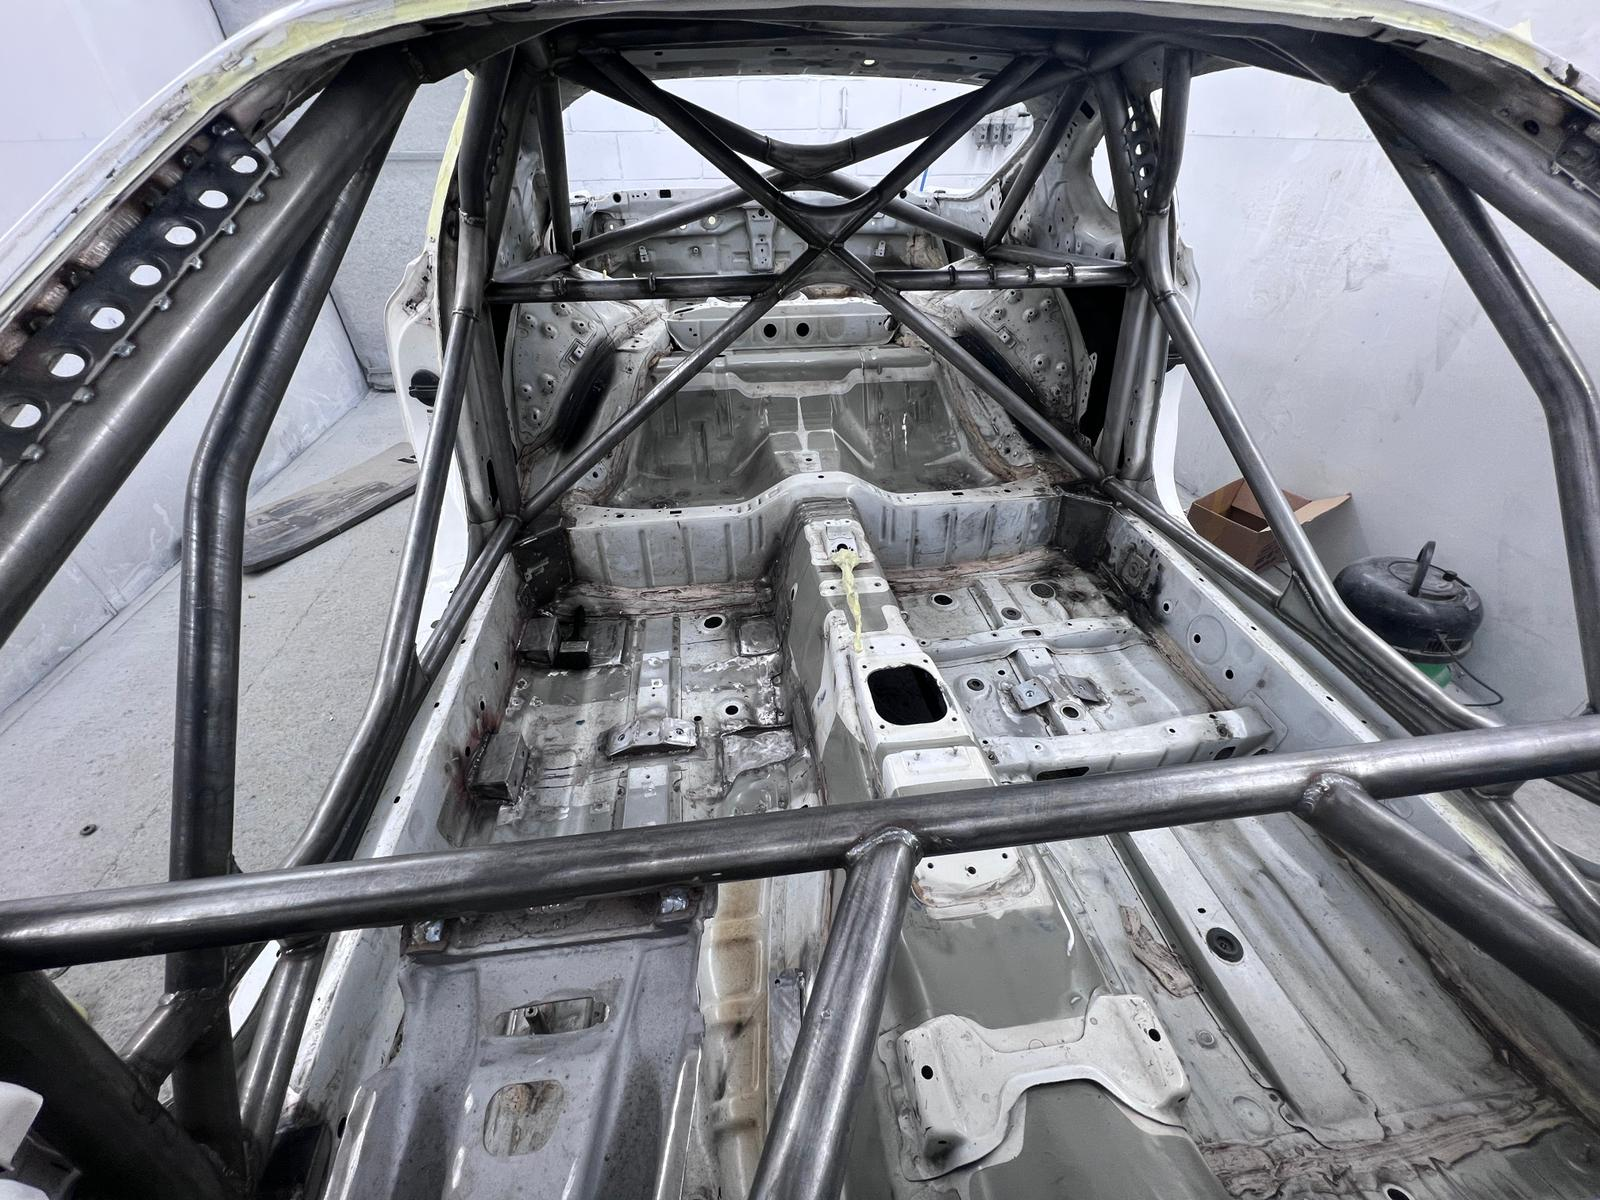
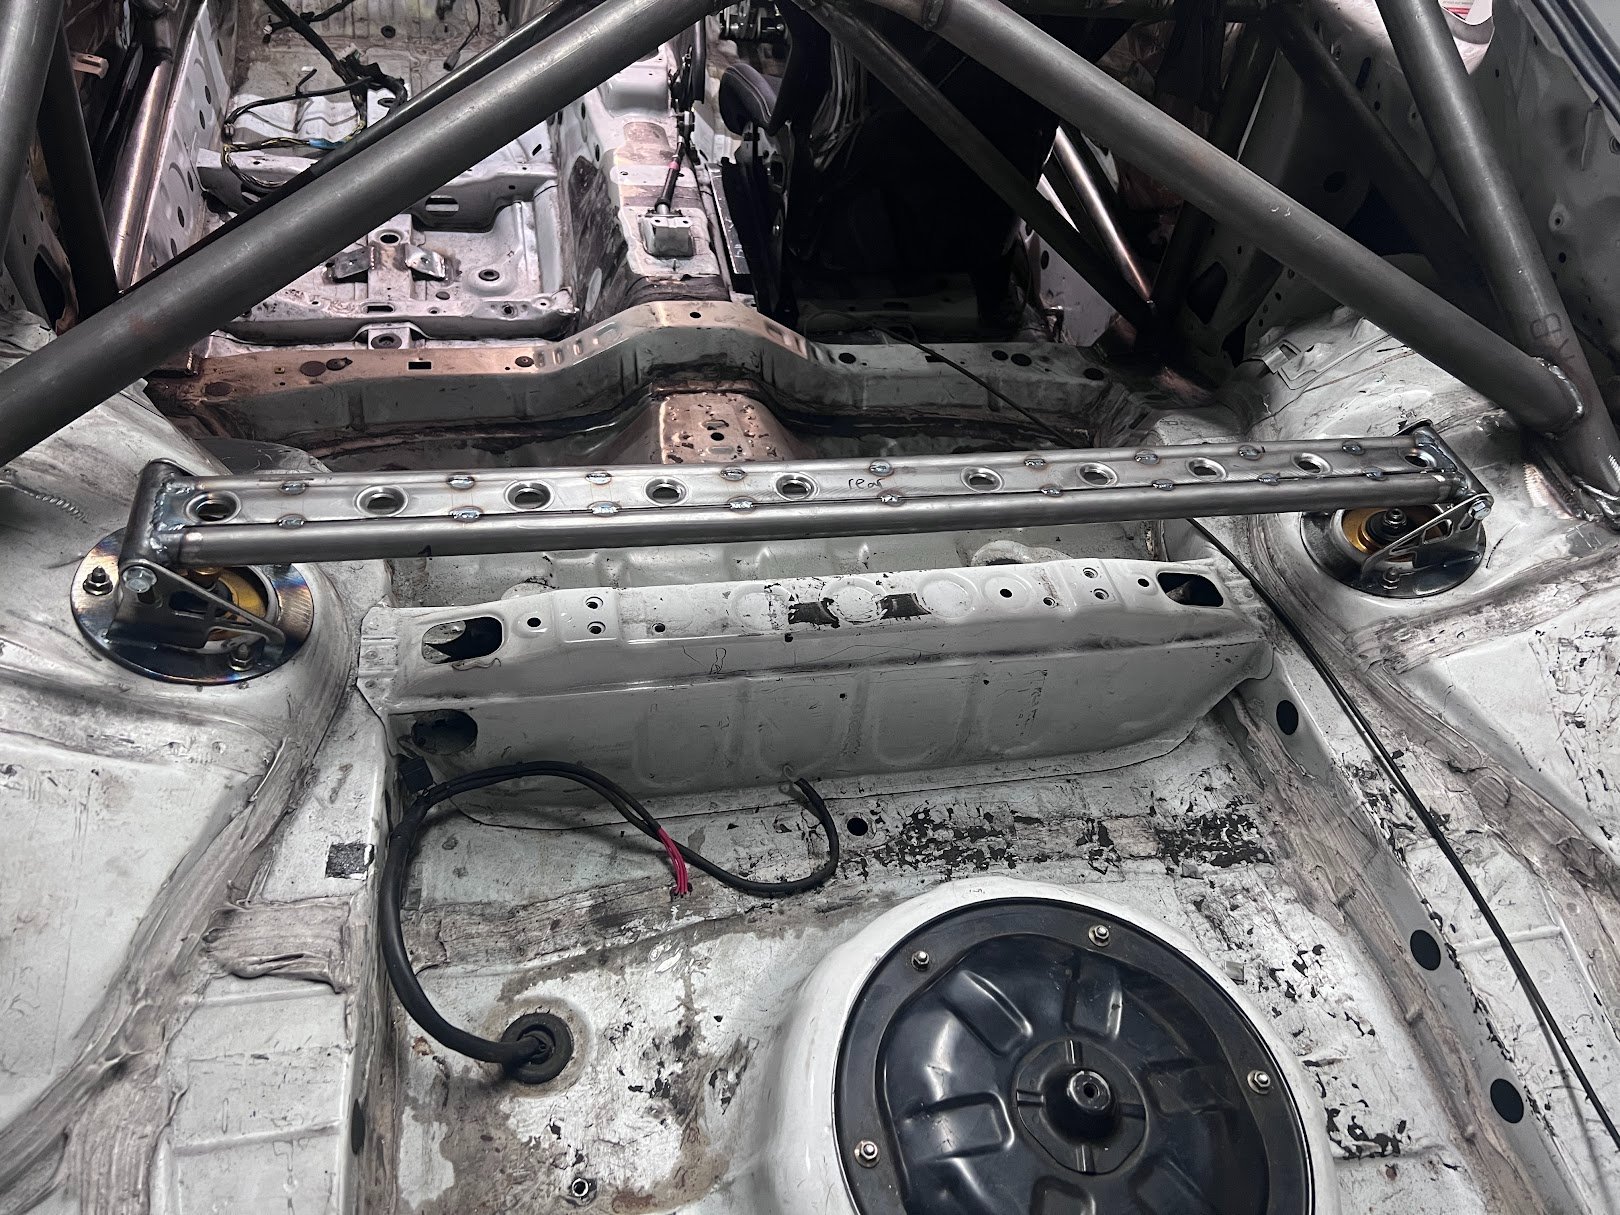
Manged to squeeze in a few more hours of prep work on saturday with Kane before I had to head home. Kane sheeted up parts of the car that needed protection from the incoming paint job and I removed the rear panel in the boot so I could get some more clearance for fitting some components in the boot. Interior got its first pass with a sander and panelwipe to key up all the various panels and parts. Hopefully the next large update will be with the new paint in place, but the guys at RRS still have some more time to continue prepping and doing some last minute jobs before that can happen. Looking forward to the paint being done as I wont have to worry about the cage or interior rusting out over the coming months whilst I piece together the rest of the build. If all goes to plan then might be done by next weekend.


-
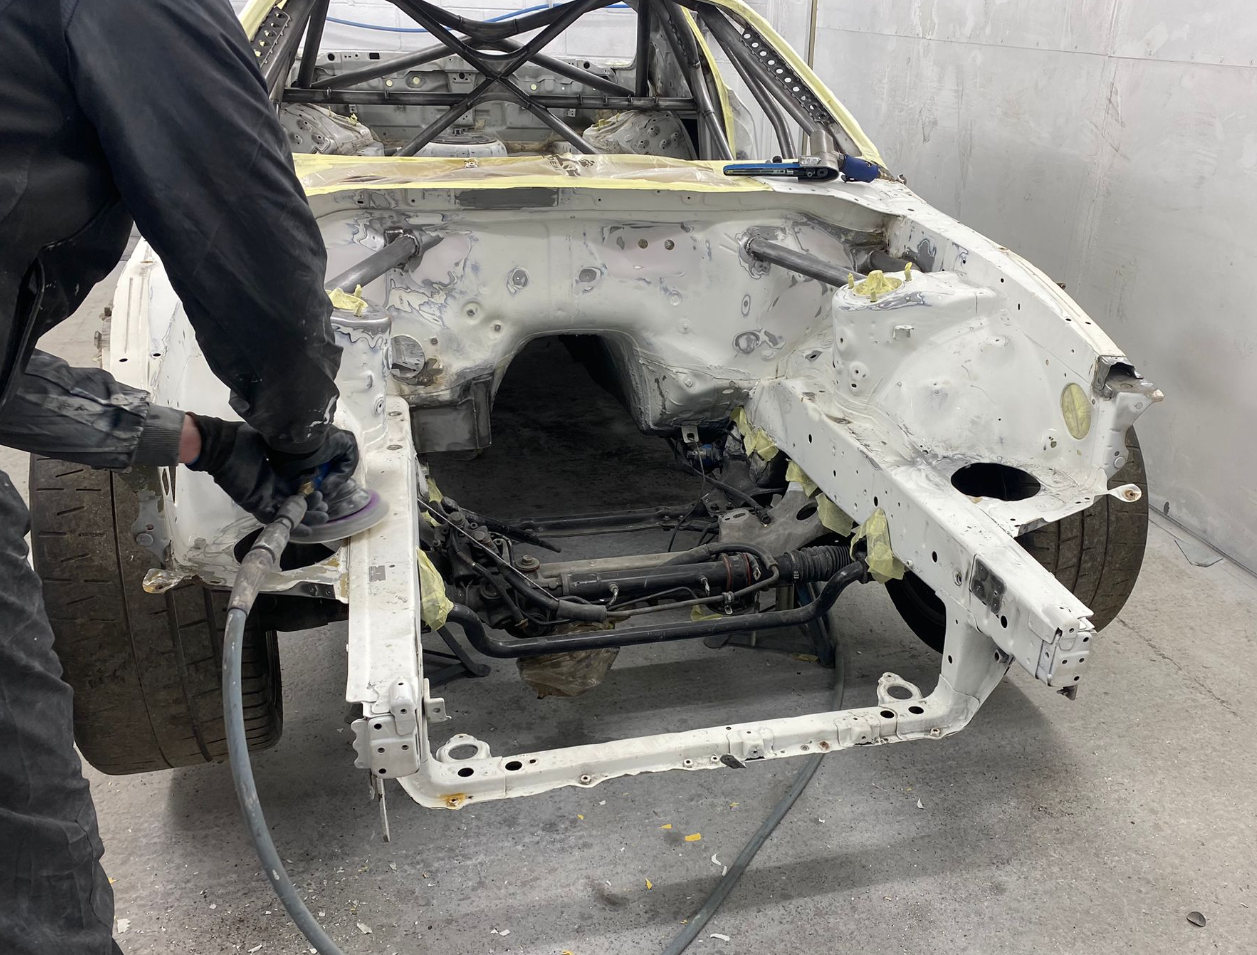
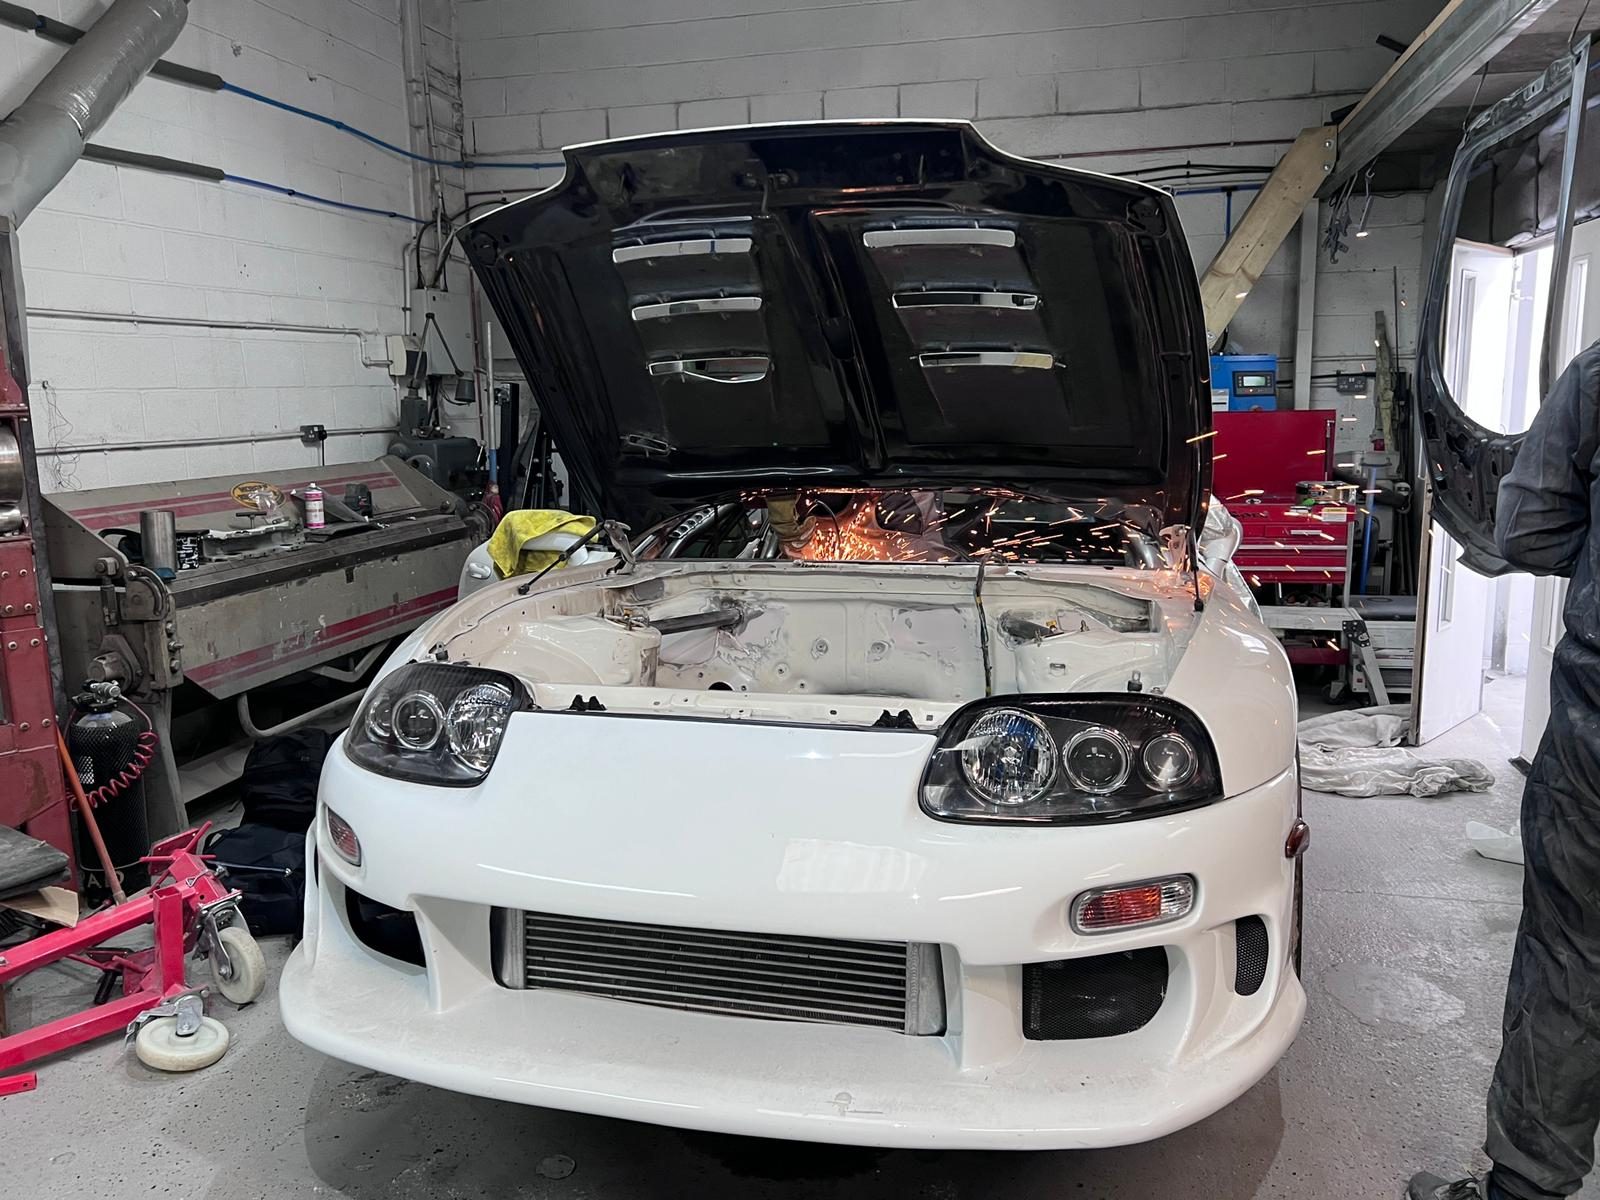
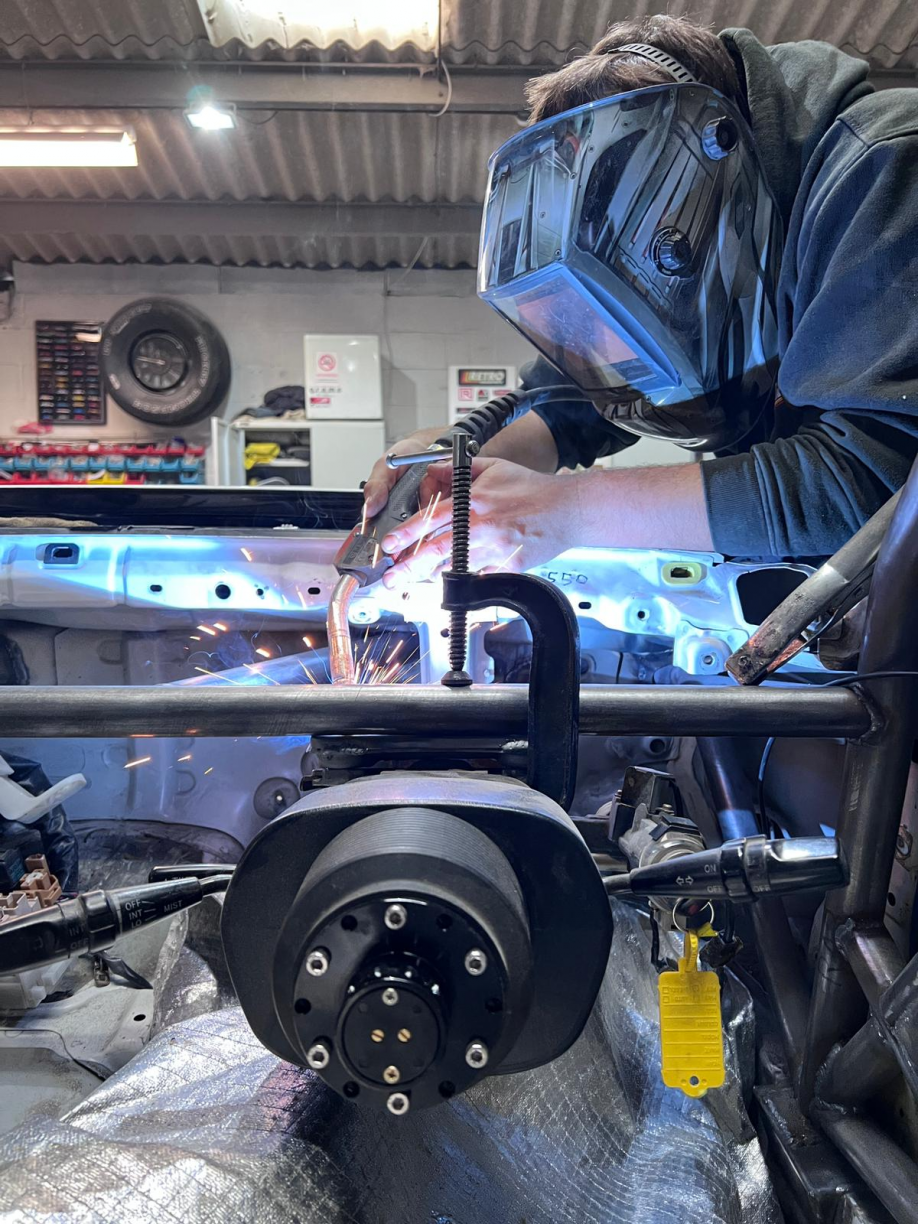
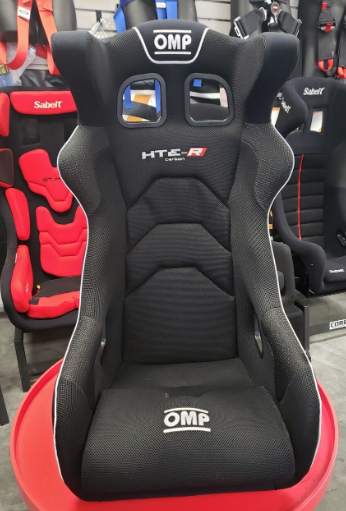
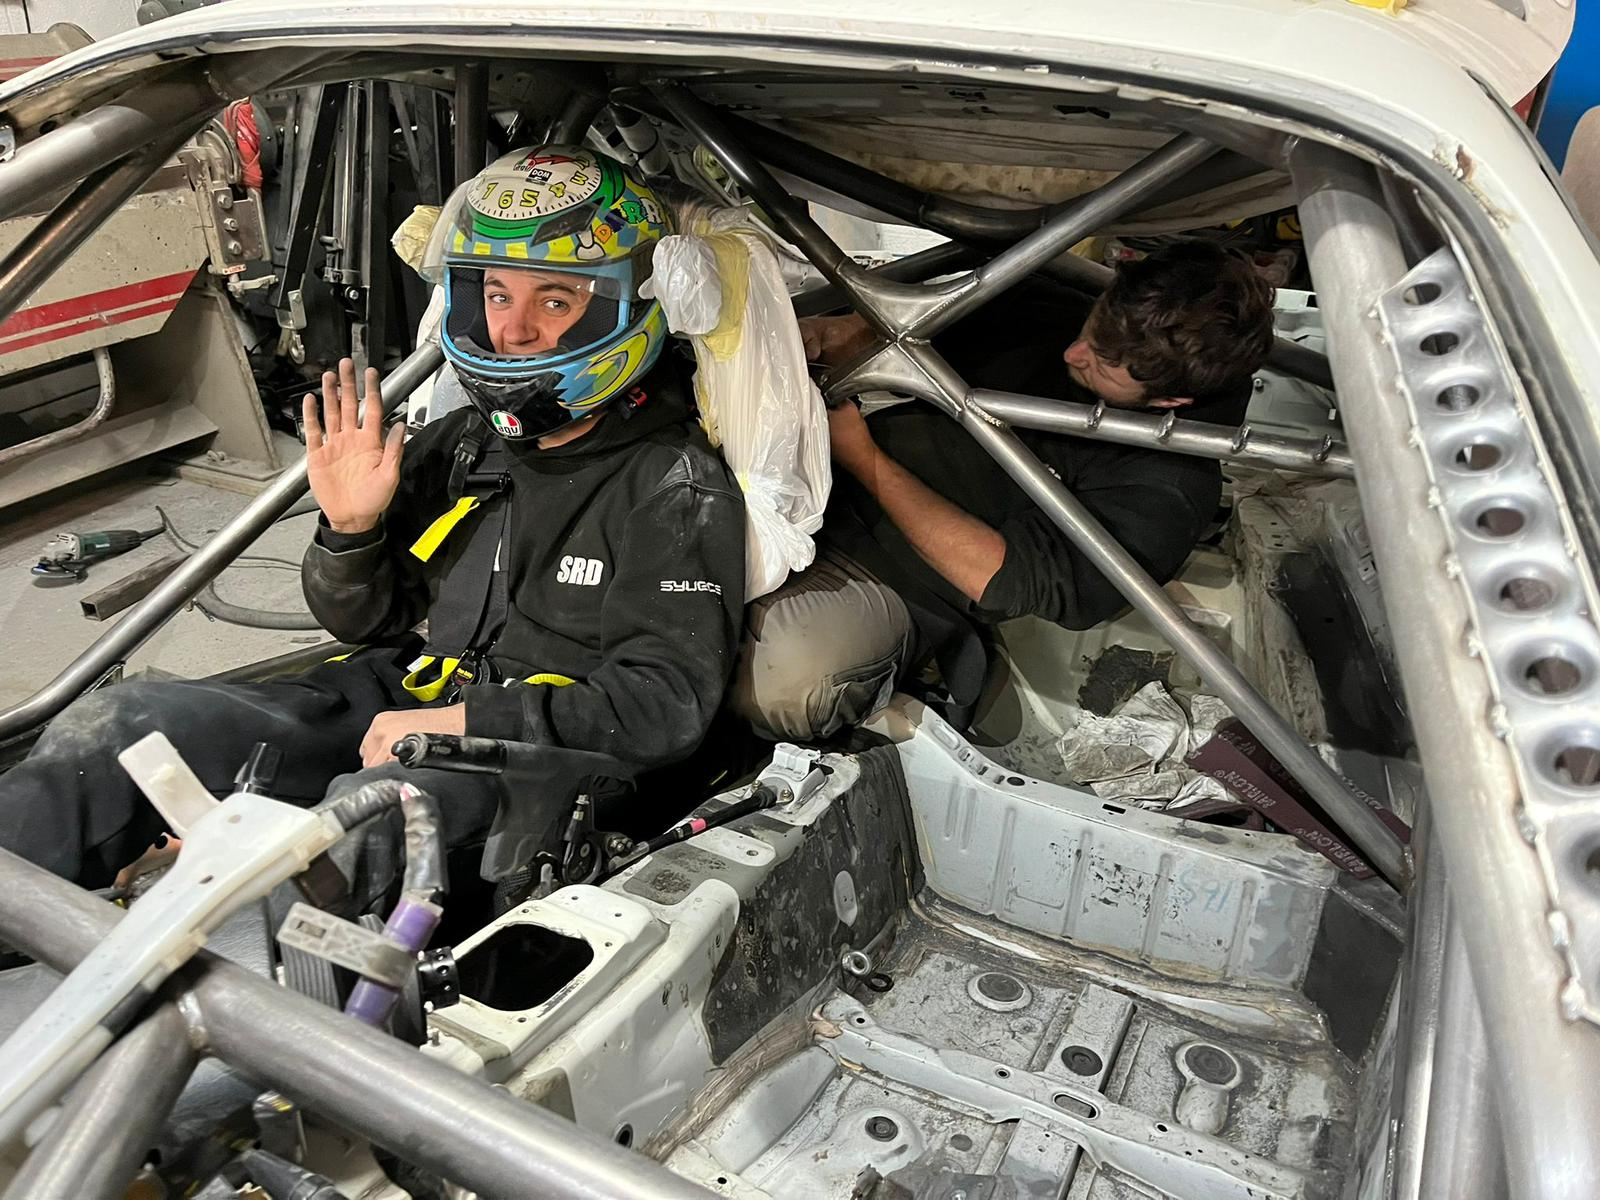
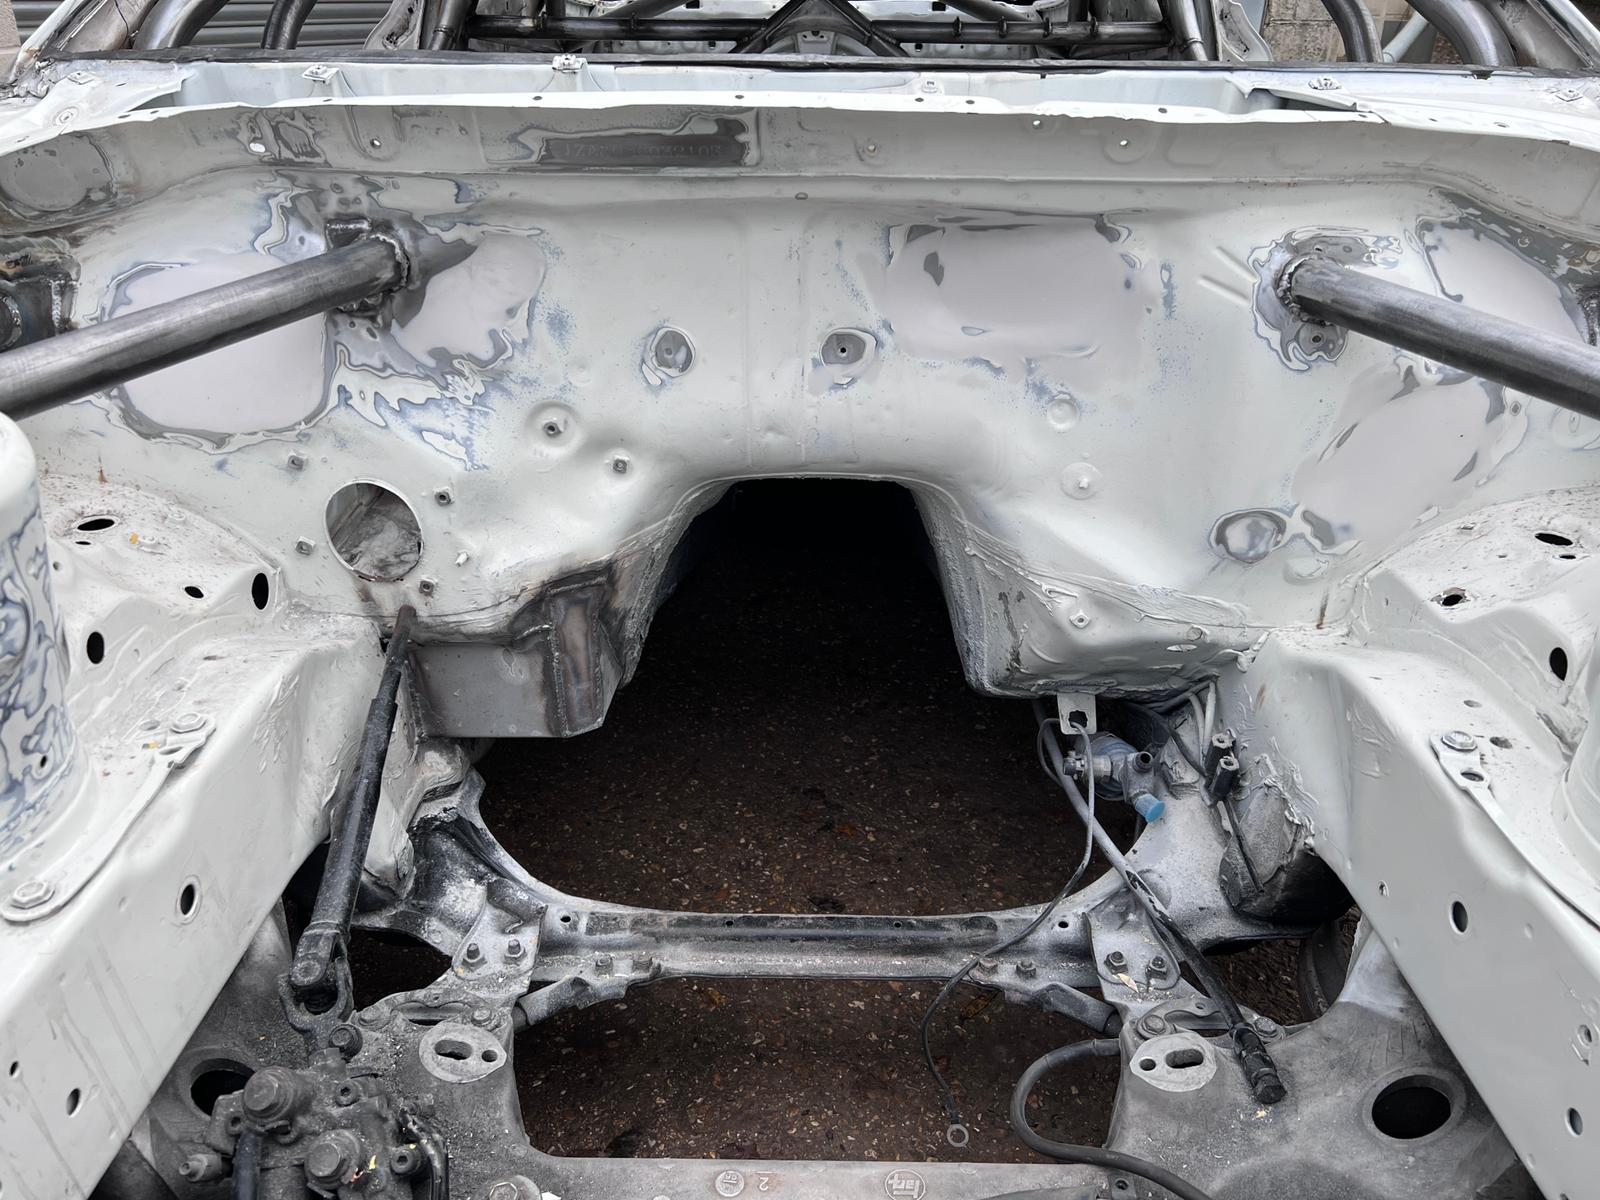
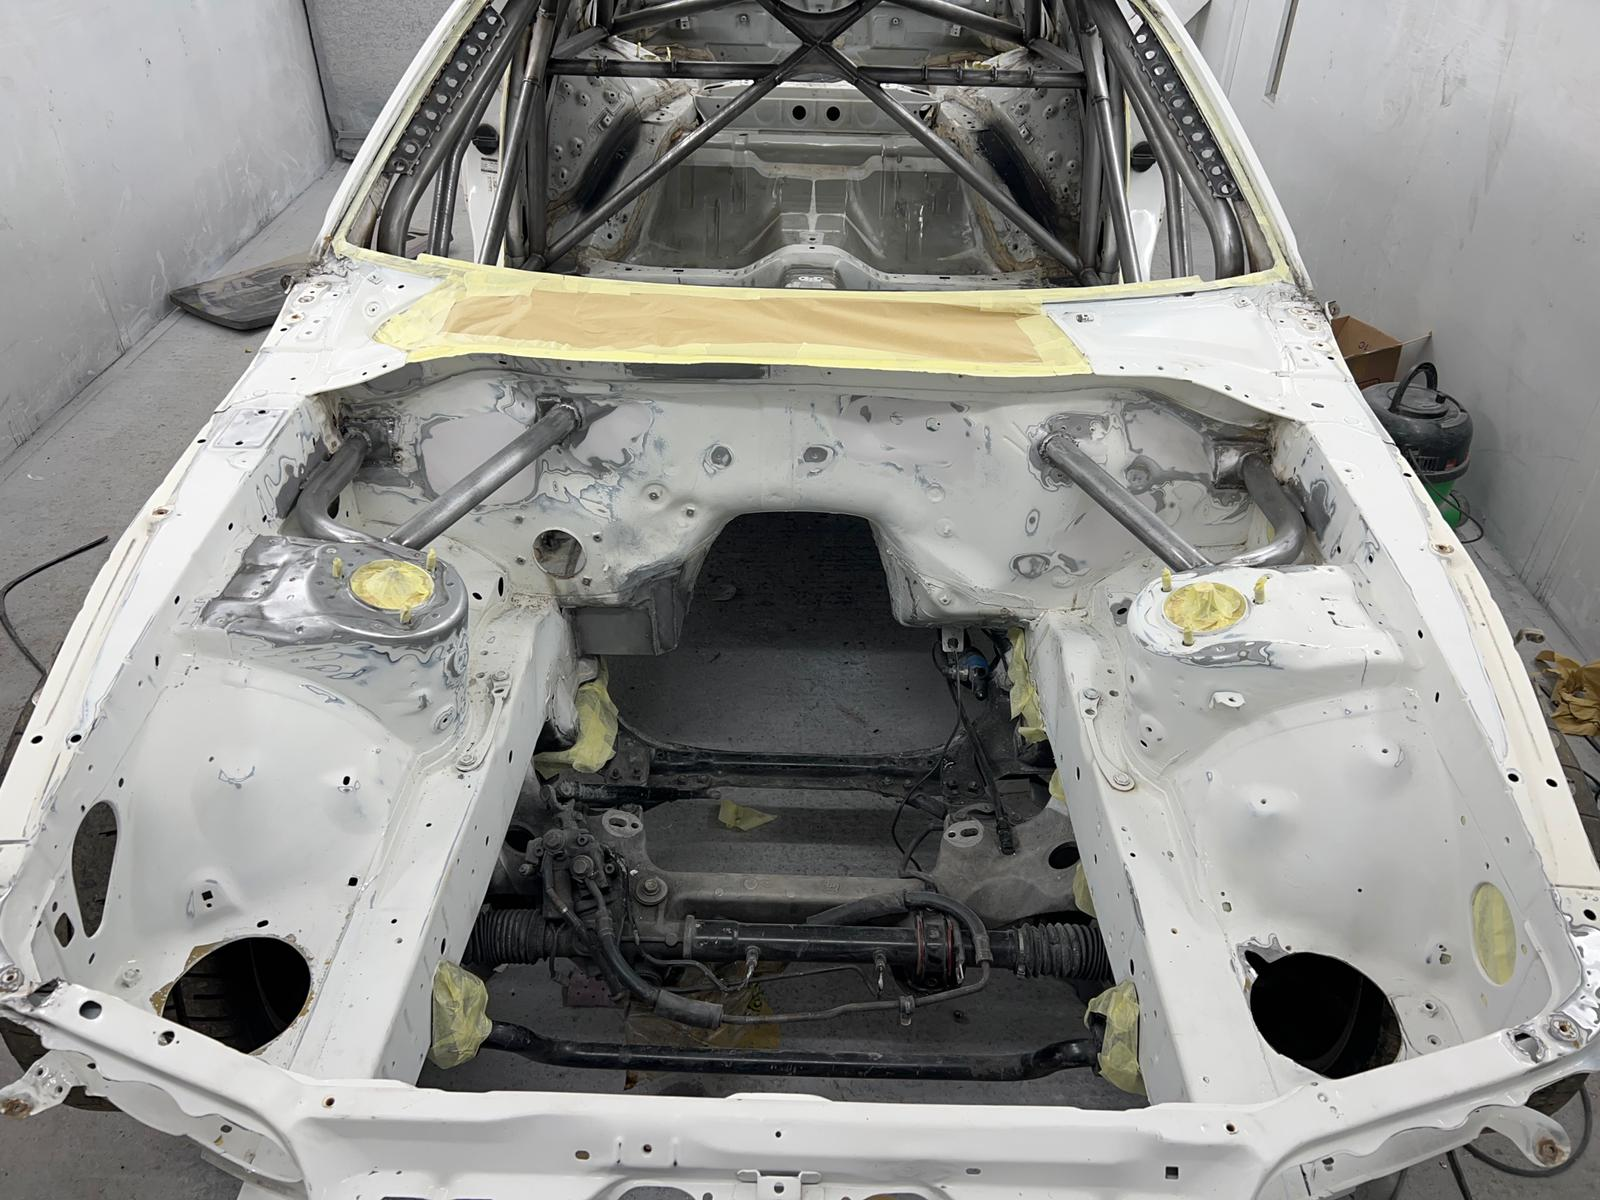
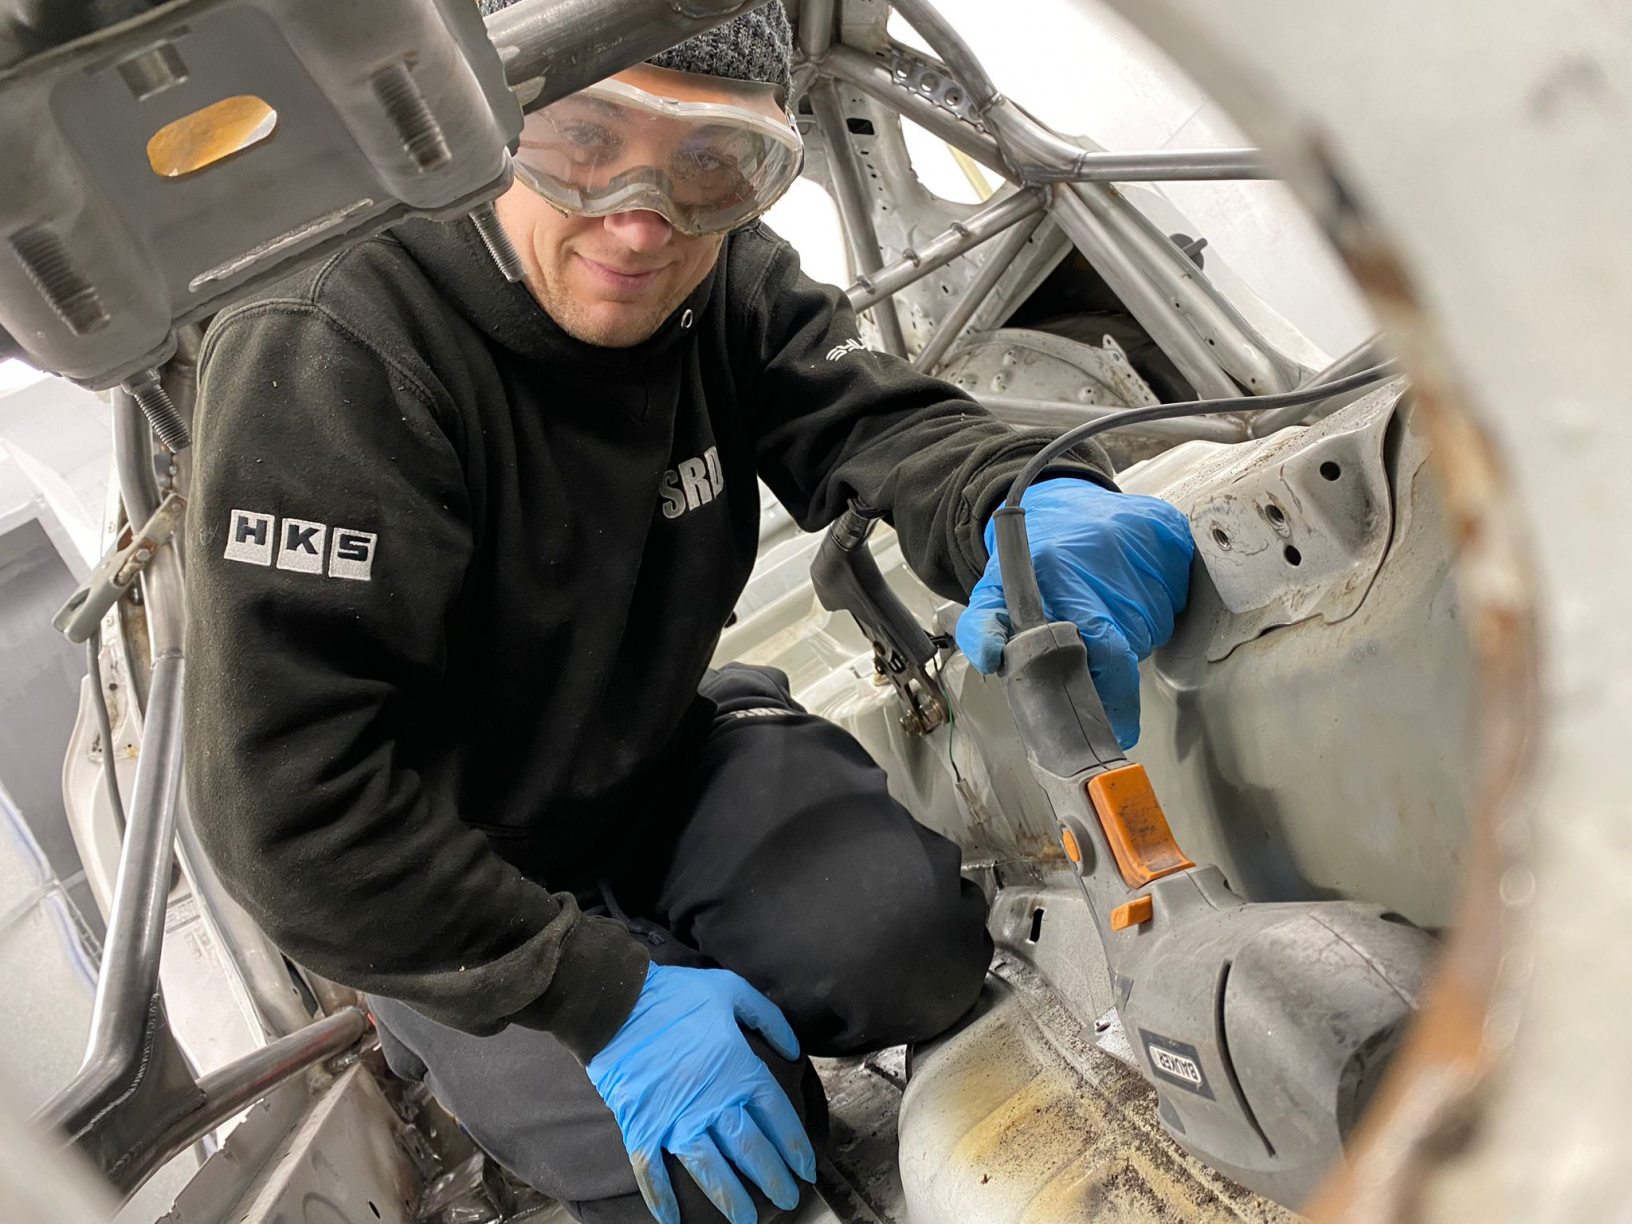
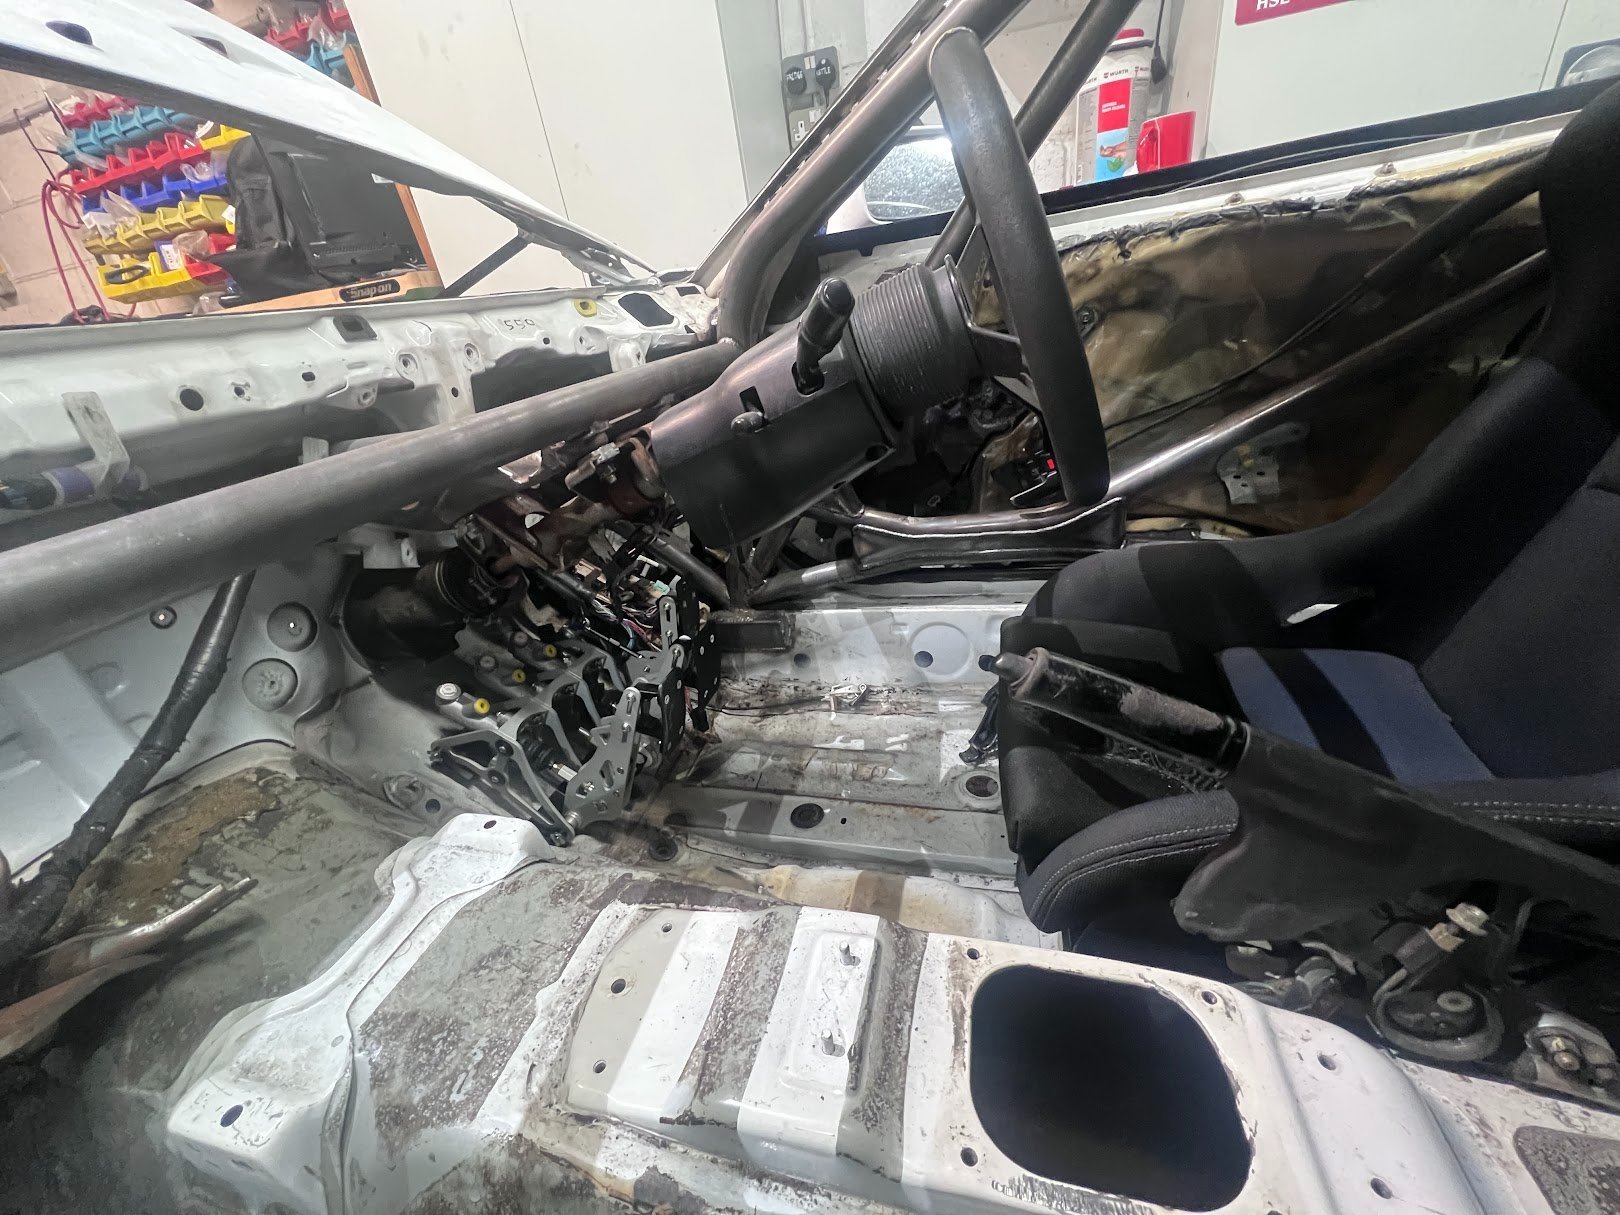
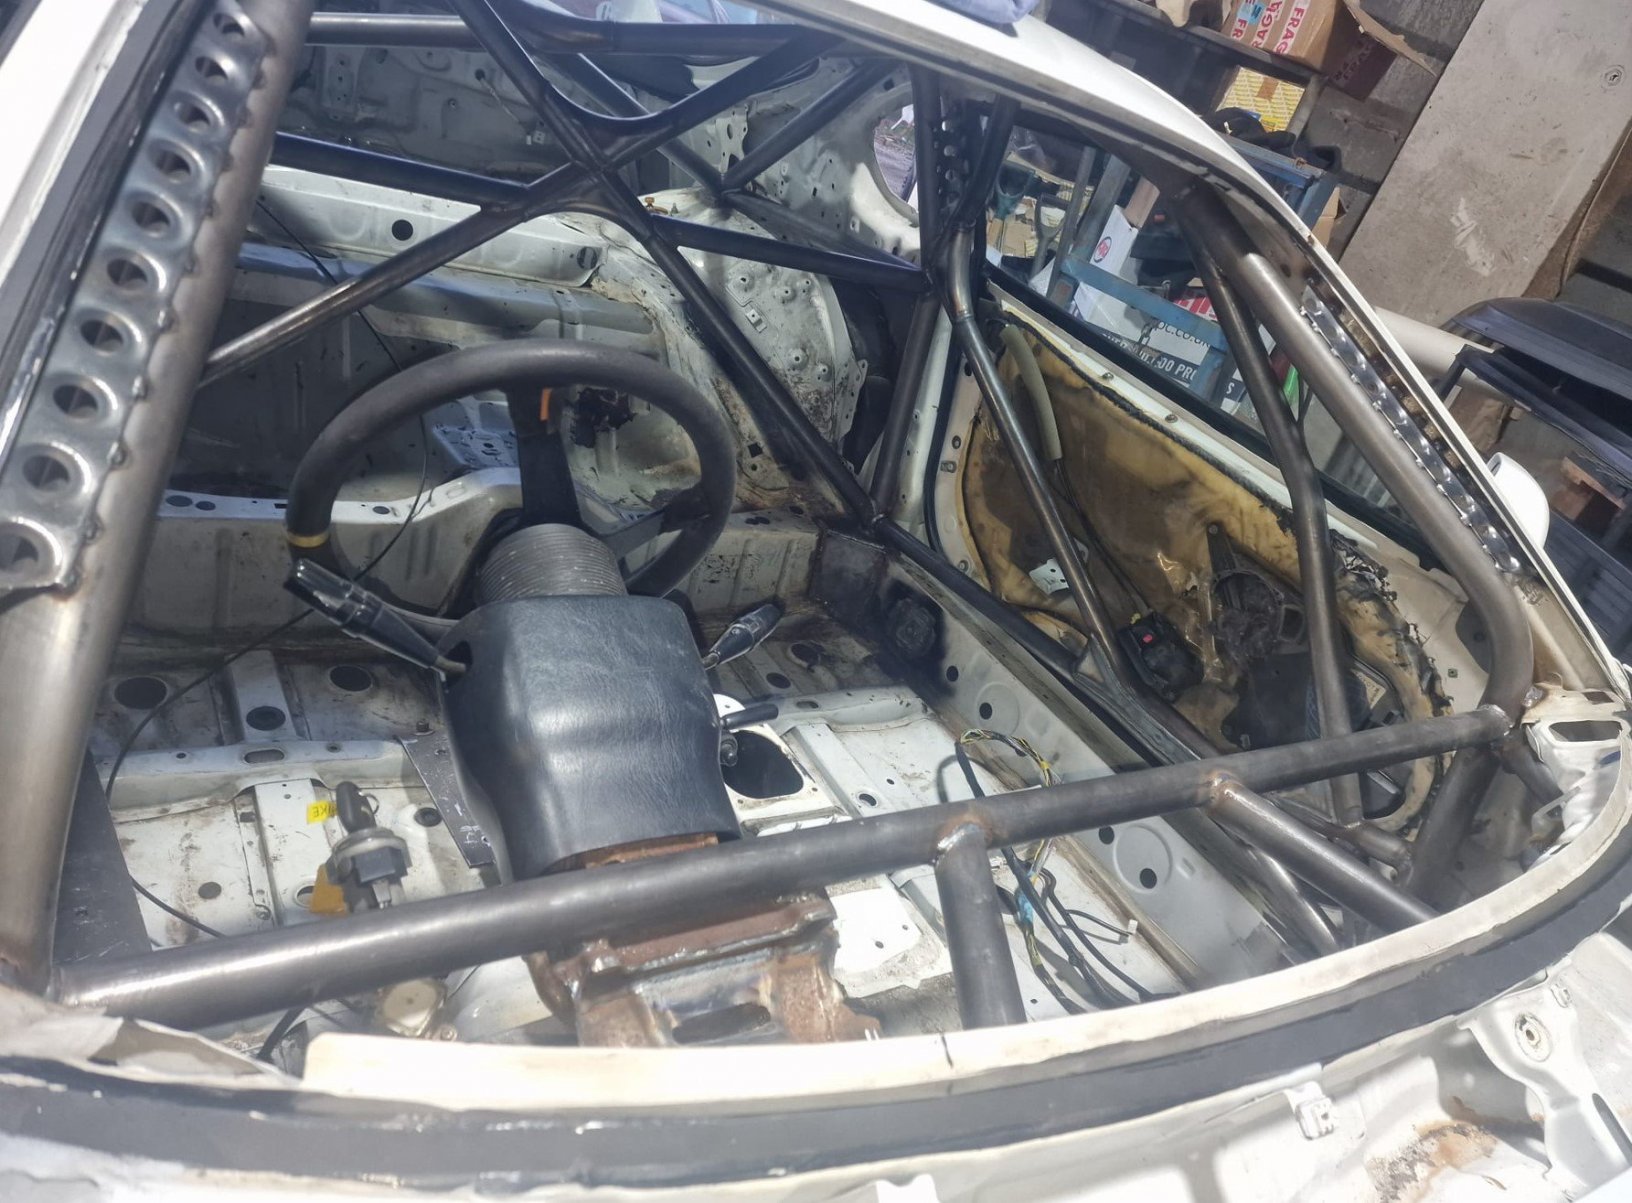
Supra has been at RRS for a week now and james & kane have been making some good progress It turns out me eyeing a set of pedals and thinking yeah that will probably fit was off the mark by a few inches, measure twice cut once and all that. With the constrains of the cage and the pedalbox position, the seat had to be moved lower, further back and closer to the trans tunnel, and the firewall needed a small extension built into it to allow the pedals to be mounted further back. Luckily james is similar in size to me, so he was able to place and fabricate all components in a location that suited him well, which ended up working perfectly for me. Next the firewall inserts were welded into place Fast forward a week and I joined the party at RRS for a couple of days. Pretending to be useful with some of the prep work on the car and allowing James to dial in the position of a few bits with me in the car. Steering column was mounted slightly too far to the right by the cage builders, so James on his favourite tool cutting the column out. Then welding it back into place after aligning it with me in the driverseat. Speaking of the driverseat, changed from my corbeau to an OMP 400R after an evening of comparing dimensions between lots of available seats and opting for these as they seemed to be the best fit for myself and the available space in the cabin. Specced something right for once and seat fits lovely for me & very comfortable to sit in. With the seat, pedals and column in place the final piece of the puzzle was getting the new 6 point harnesses installed. Heres me sitting pretty whilst James contorts himself around the bars to get the straps mounted and tight. With the new seat setup I have tons of room between me and any part of the cage even with the padding, helmet and hans deviced installed, so once strapped in should be adequately safe. Here you can see the new framework and fabrication for the driverside. Opted to leave passngerside on the stock setup as there is more room that side so can use normal mounts and probably wont have a passenger seat installed most of the time, so not high on the priority list. With the main interior parts done for now, the rest of the panels and parts still on the car were removed in order to start prepartion for upcoming paintjob. Next we moved to the paint booth to finish few last jobs and start prepping Master painter kane was feeling the love at all my previous layers of engine bay paint jobs as he started prepping for the next round of paint. Should probably bare metal it at some point, but maybe on the next refresh. After a day of preparation we were left with Engine bay prep is nearly finished. Had some 5'' holes cut out for the incoming intercooler & air inlet setup. Still some more work to do on them before they are completely ready, but end is in sight. Also added some AN8 Bulkhead coolant fittings into firewall in stock location so can pass coolant through to new heater core. I did a thing and started cleaning the interior of remaining sound deadening, bitchumen and anything else that was not required. After a few too many beers the night before I was feeling the burn today, but felt like a new man after a few hours of moaning about the cold weather and cleaning up with some power tools. Got another day of prepartion and last minute jobs on the interior to go before its ready for its paint, so more soon!


- 84 replies
-
- 10
-

-
Don't forget that it costs a grand and some change for new seals and trims which you might well do as most cars that need a repaint also have knackered seals. Very easy to spent 5K these days on paint and other shit if you want to do it properly.
-
Only lights controlled via PDM is the brake lights as I dont have a traditional brake light switch on the pedal anymore. Will use brake pressure threshold to activate an output on PDM that will join the factory loom like a brake light switch and feed power to rear brake lights that way. Otherwise stuff like Wipers, Power to interior looms, Interior loom, steering stalks, ignition switch & dash switches, illumination etc will all be factory still (will all be replaced or removed eventually)
-
I believe @JamiePhas one of these and is about to change to a different inlet with DBW, maybe you can get his one. Might be worth asking his opinion on it as hes been driving around on it for a while now
-
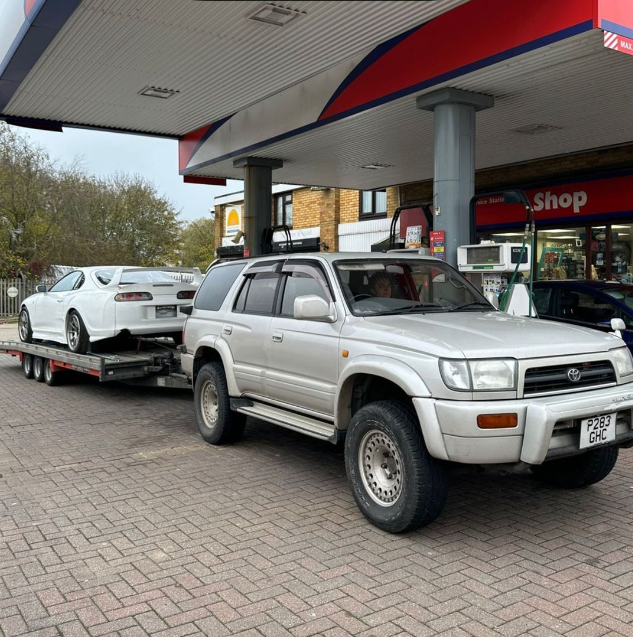
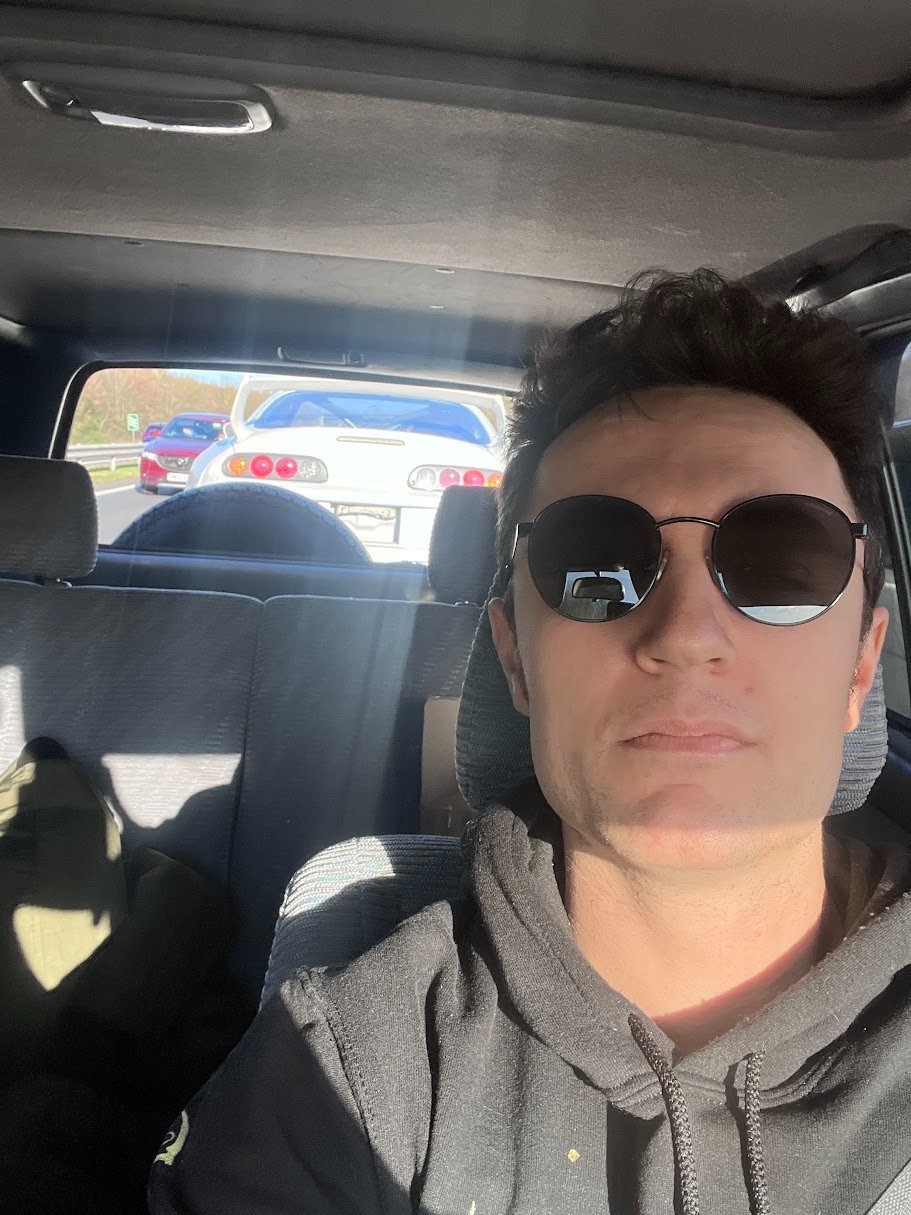
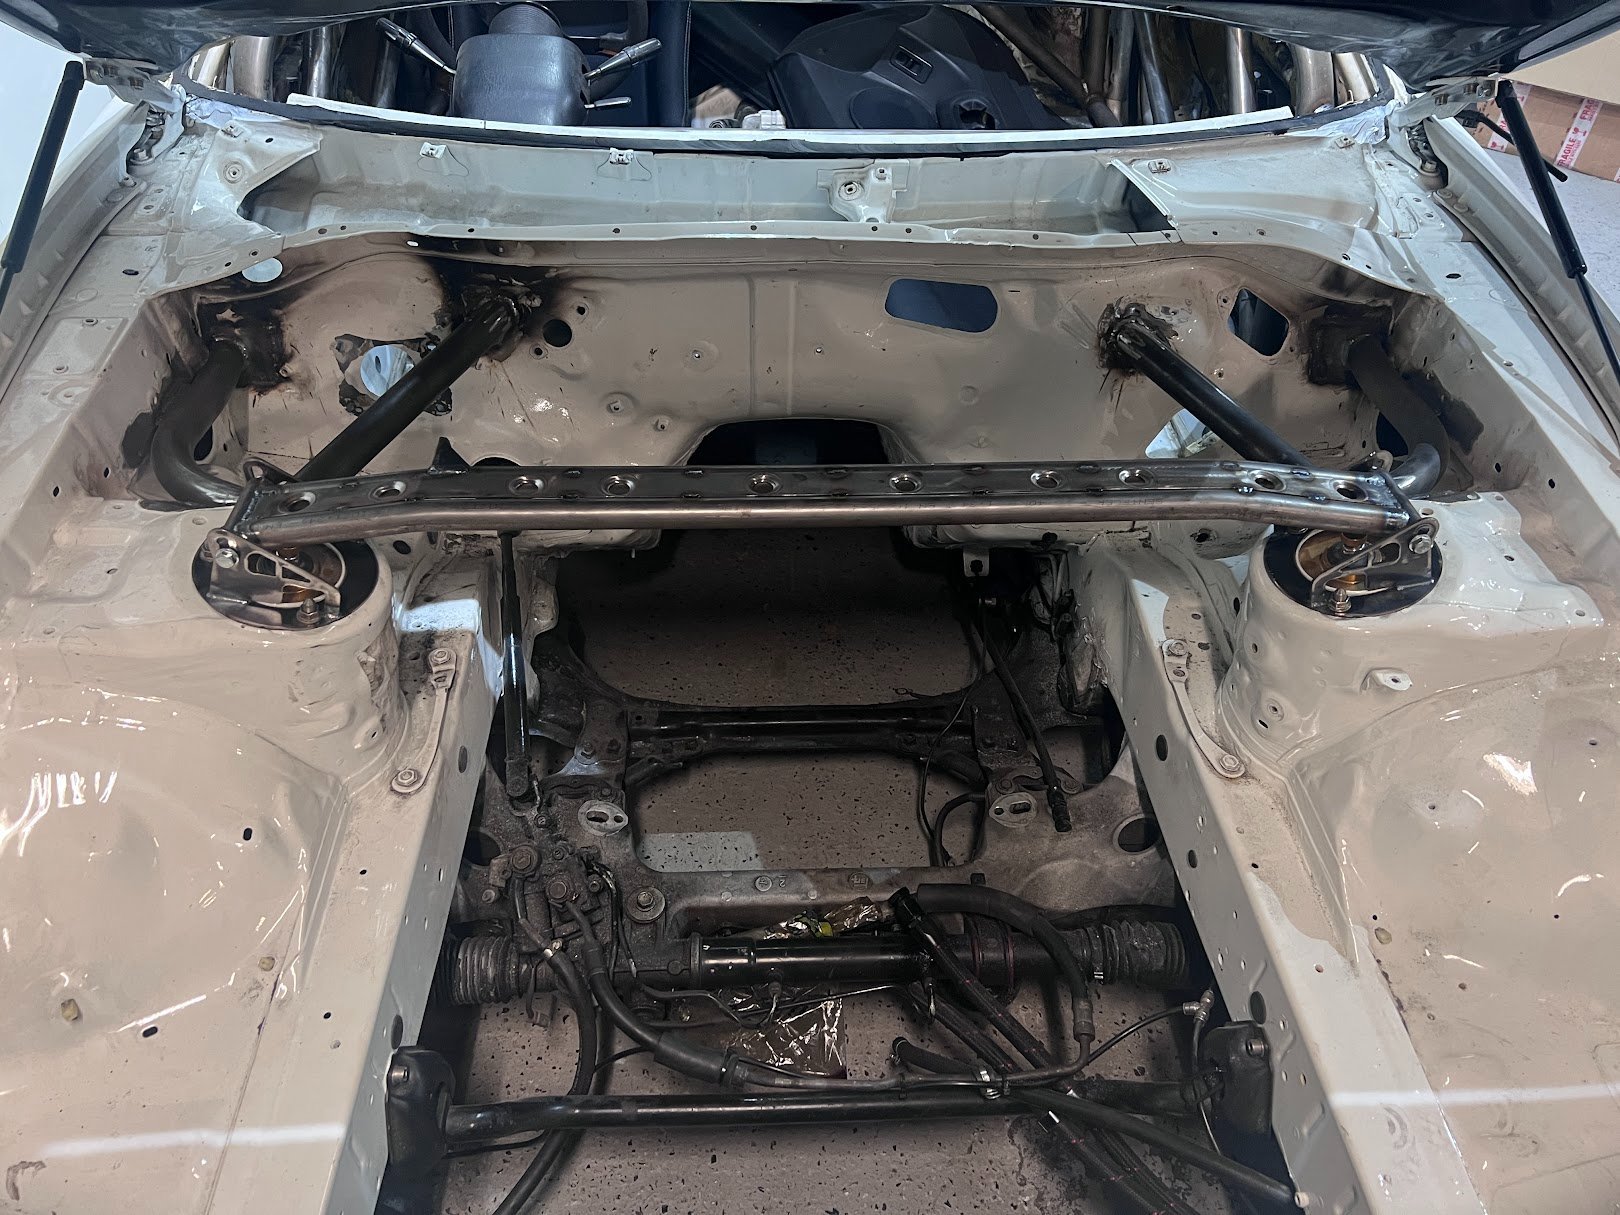
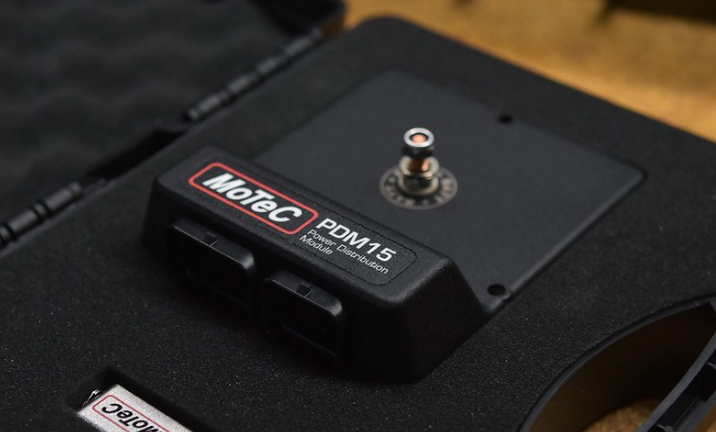
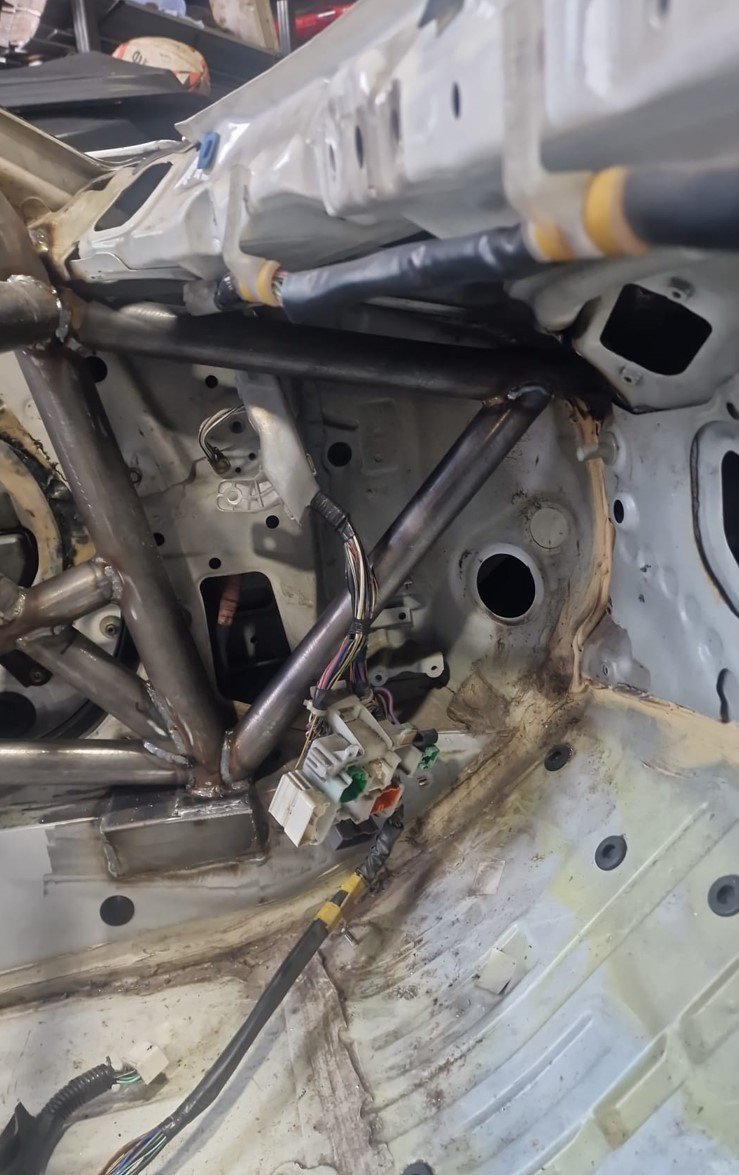
Up at the crack of dawn again to head north to get the car from JP Cages. Thanks to Mr @Wheelynutz towing in true 90's fashion. Covered 550miles round trip, and I was a useful passenger only falling asleep a few times throughout the long haul. (This is my excited face) Landed and ready for the next bout of work at Retro Road Sports Josh at JP Cages was interesting in making some front/rear strut braces for the JZA80. So after showing a few popular designs and features that they included he came up with some test pieces for me to take back to SRD HQ and fit on various Supra's to see what fitment is like. This front strut is just tacked together for testing, but is based on the TRD style that we all know and love. Only this one has adjustable height for the strut beam, so might be able to clear a big single and has a brake master support bracket. Here is the TRD style rear strut brace which I think is very cool, never seen one for the rear before. This also has some height adjustment available and access to suspension dampeners. Will see how these fit on a supra hasnt been gutted and maybe after a few revisions will be available soon. Cool to get some simple but new parts available for the platform. Didn't have much time to test the pedal positioning properly, but threw them quickly into where they should be going and grab a quick photo. Need to adjust the pedals further back slightly, maybe mount the base slightly higher up the firewall and maybe move the seat back another inch and should be onto a winner. Will be back to RRS in the next week to continue with this. In the meantime need to get a new driverseat sent to them so we can dial this in finally before the rest of the fab work on the firewall begins. Finally, managed to get a sweet deal on a Motec PDM15 that I couldnt resist This PDM hasn't got enough I/O to take over all the functions of the vehicle, but is large enough to control all the new & non oem electronics that are going into the car. So rather than having to integrate my new systems into the OEM fusebox and wiring, I can now leave all that largely stock and run everything else from the PDM15 which is a relief as it will simplify my wiring a tad and make future additions/removals from the wiring system easier as I wont have to touch the stock wiring every time. I smell a large session in front of my wiring diagrams tomorrow as I integrate this little guy into it.
-
I explain in one of the opening posts
-
Not running one due to pedal box. Could technically still attatch one, but not with the OEM firewall mounted booster. Will try without first and see how I get on
-
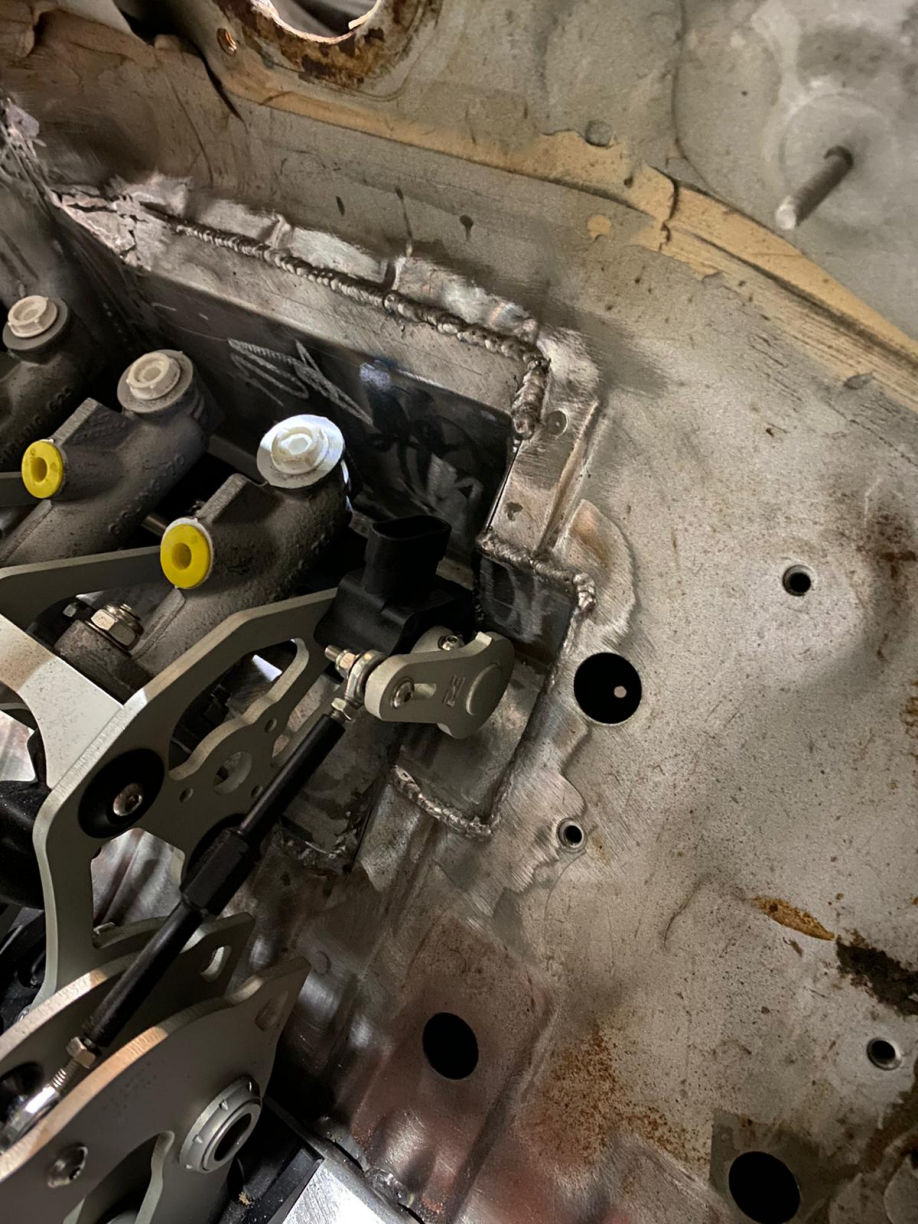
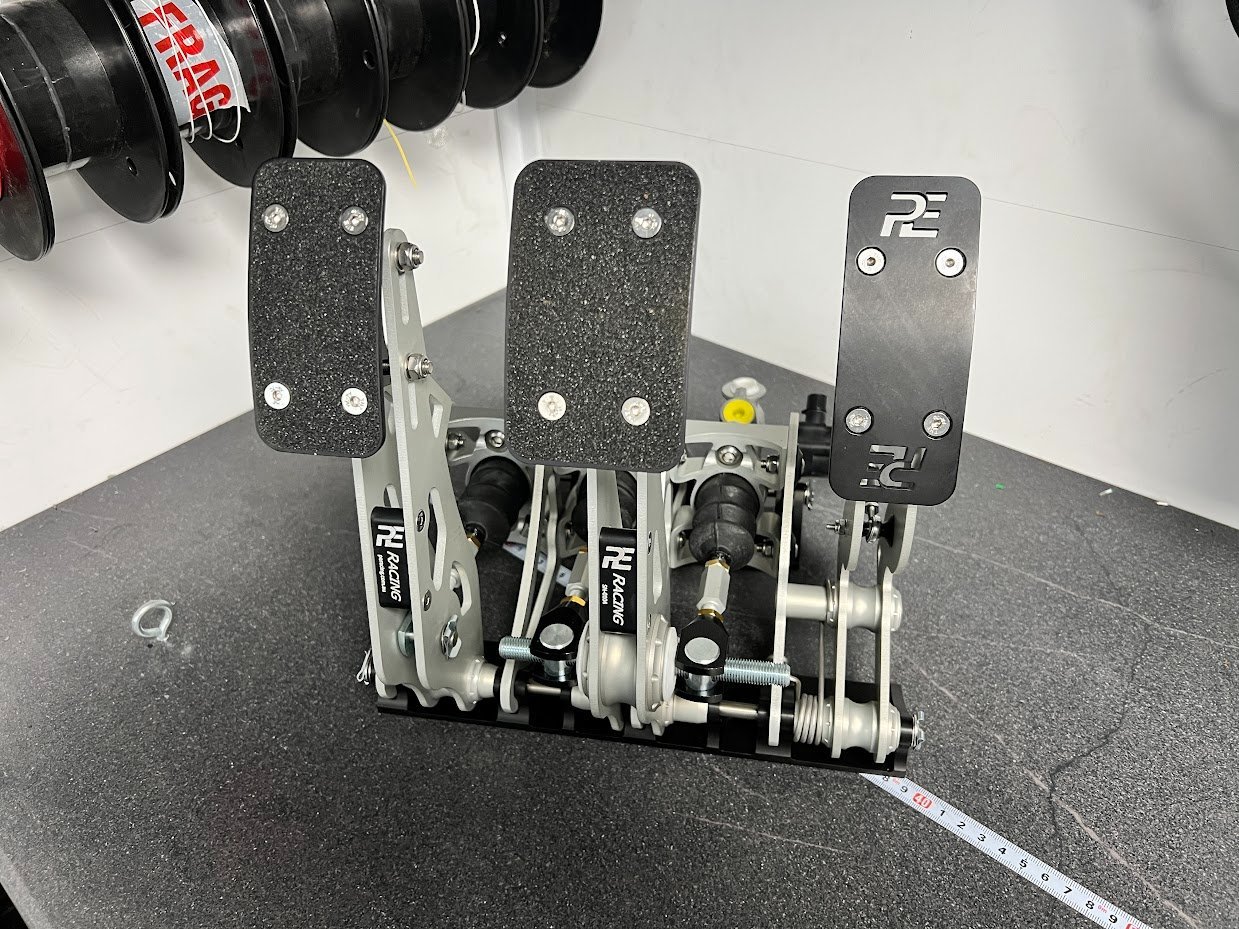
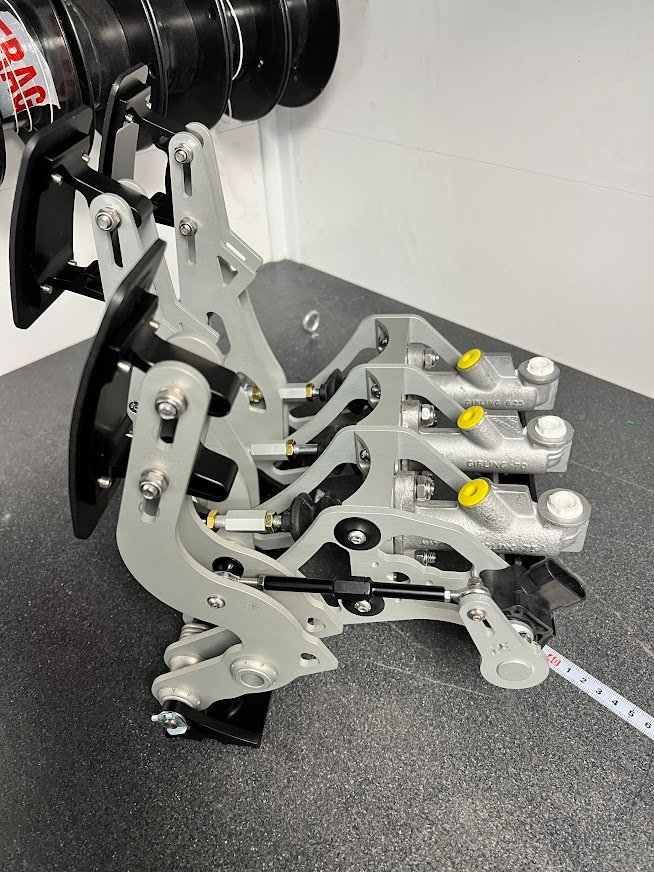
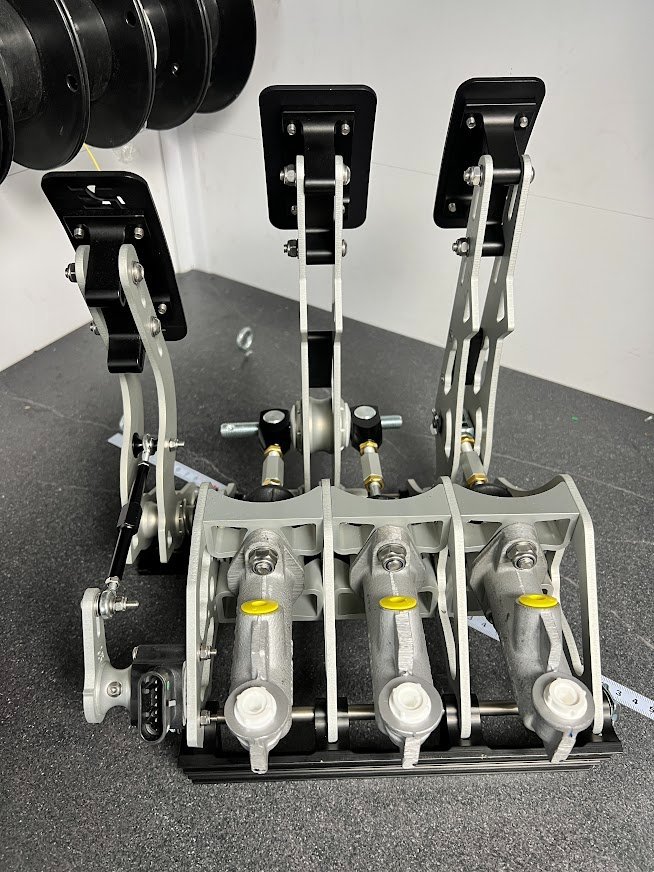
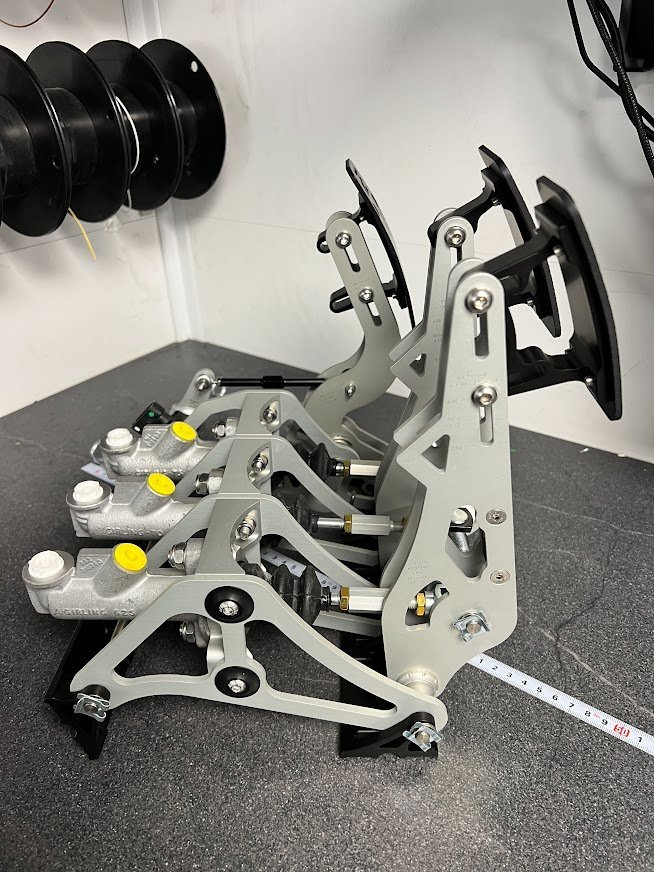
Got an exciting package from Australia this week. Just finished piecing it together for a mock up to be mounted in the car shortly. PE Racing Billet Pedalbox Kit. Nice looking bit of kit, and supports a DBW throttle using an "electronic" pedal setup. Before ordering went over the specification of the car, along with details on brake calipers, pad type etc with PE Racing and they were able to spec me some master cylinders that would be a good starting point to suit the pedal ratio of the kit. Can't wait to play with it but I'm sure it will take some time to setup and optimize as there is a lot of possible adjustments that can be made on various points on the pedalbox, brake bias ratios and master cylinder sizes. Haven't really done a pedalbox setup in a Supra before, so looking forward to seeing how it goes. Remind self, go to Gym and get some leg days in, gonna need it with no brake booster
-
Yup ping me a msg
-
IS200 goes alright with a supercharger on them, tuned one a few years ago, i think someone in the UK makes a kit for them. I probably wouldnt turbo the IS200 engine as its a bit choclate, better off dropping in a 1JZ/2JZ into them if you wanna go mad in it
-
Inb4 drift supra project looks fun nice going
-
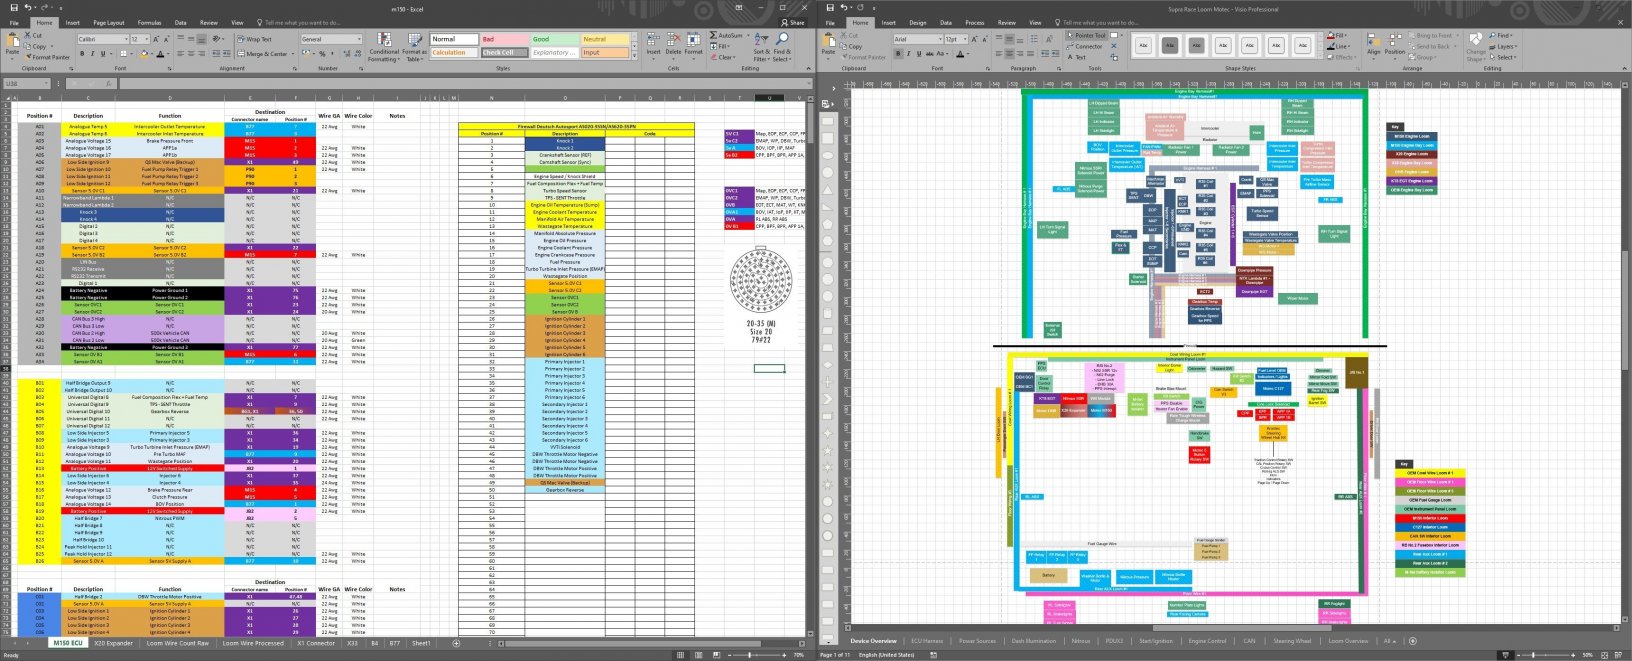
Nothing too exciting this weekend, have just spent a long time staring at excel and visio progressing the loom design & planning documentation. I'm probably like 20% through this, so few more sessions before I can start using it to help me start building the looms. Will have to upload the design file once all is said and done. Otherwise car is organized to get collected at the end of next week.
-
They hold the front of your subframe to the car, pretty important. Go underneath the chassis rail from the wheel arch and you will see the nuts that are underneath that need to be tightened
-
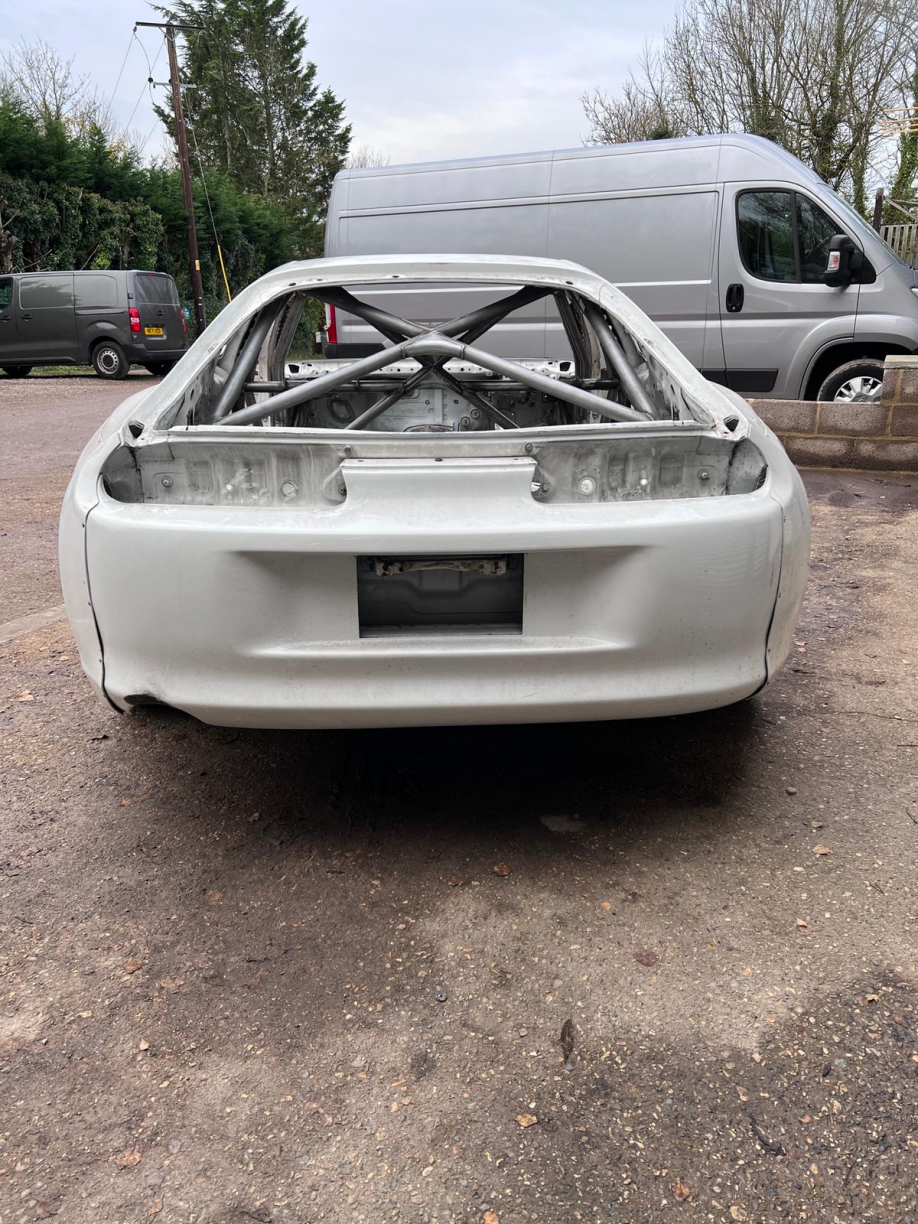
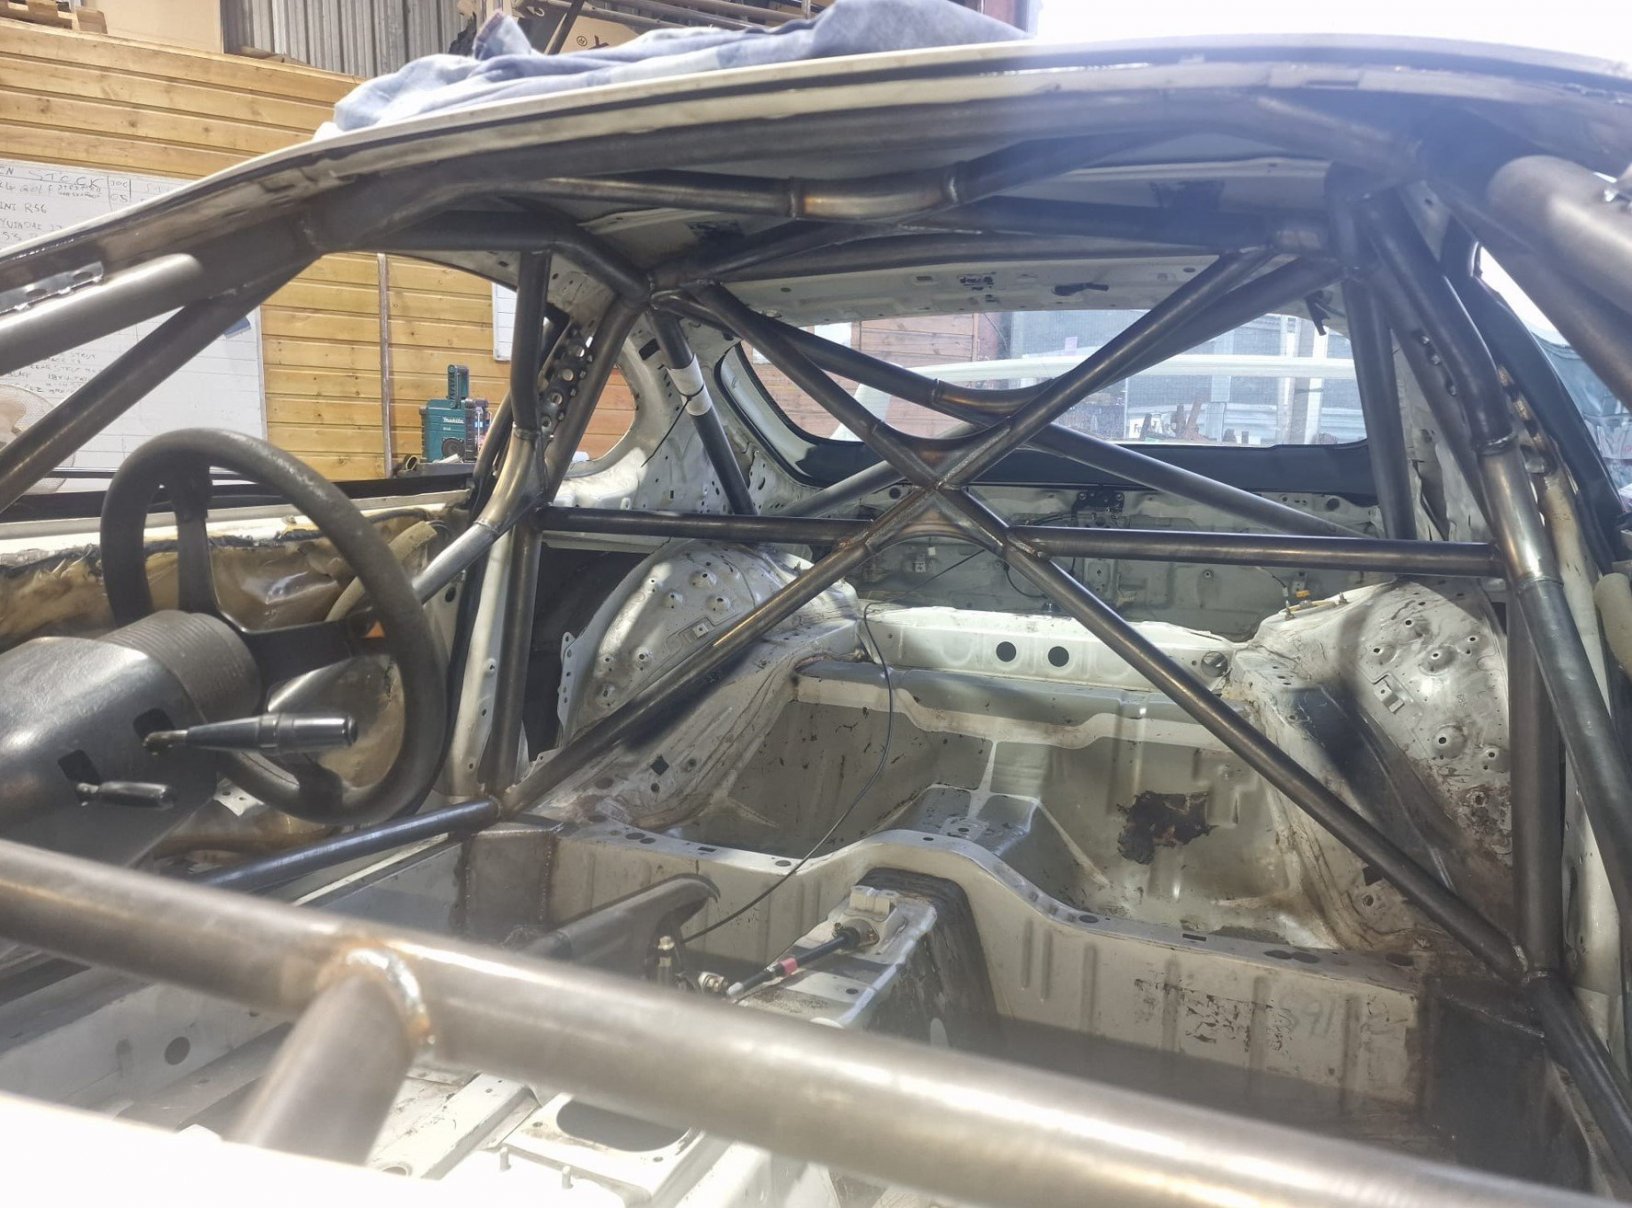
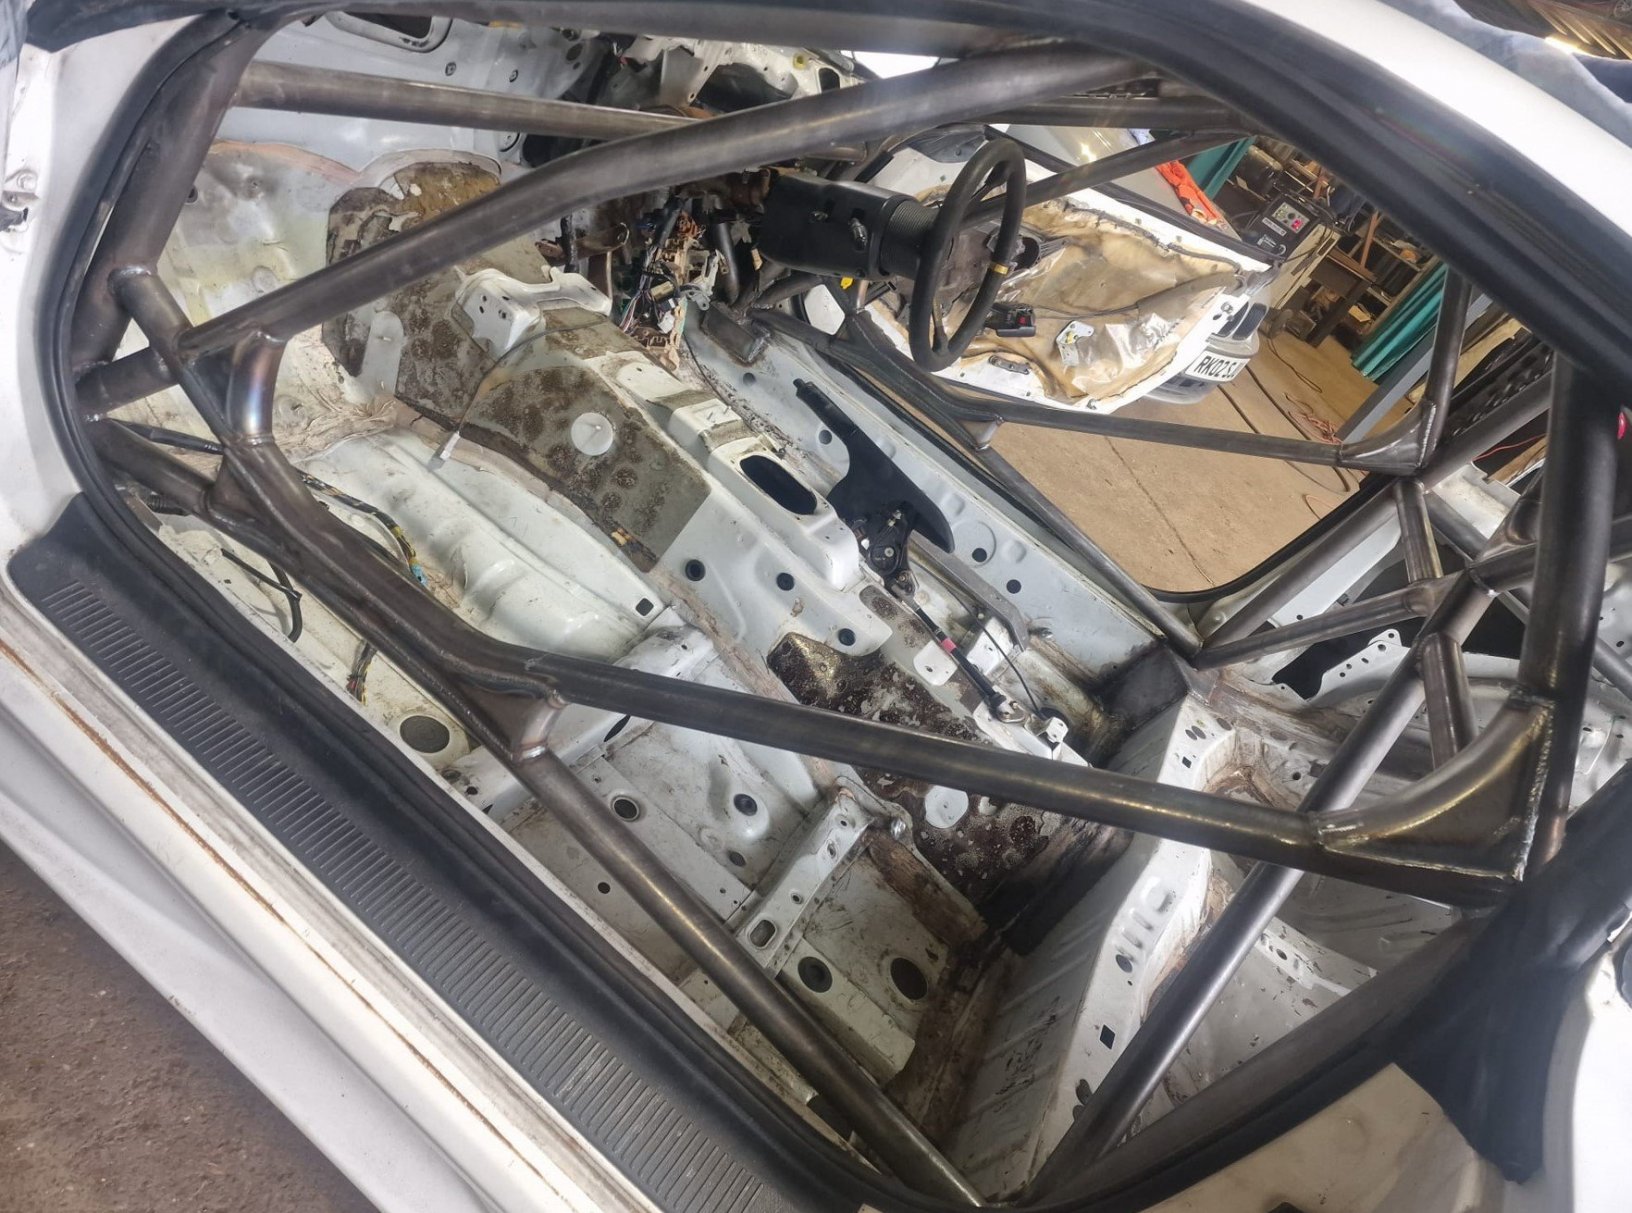
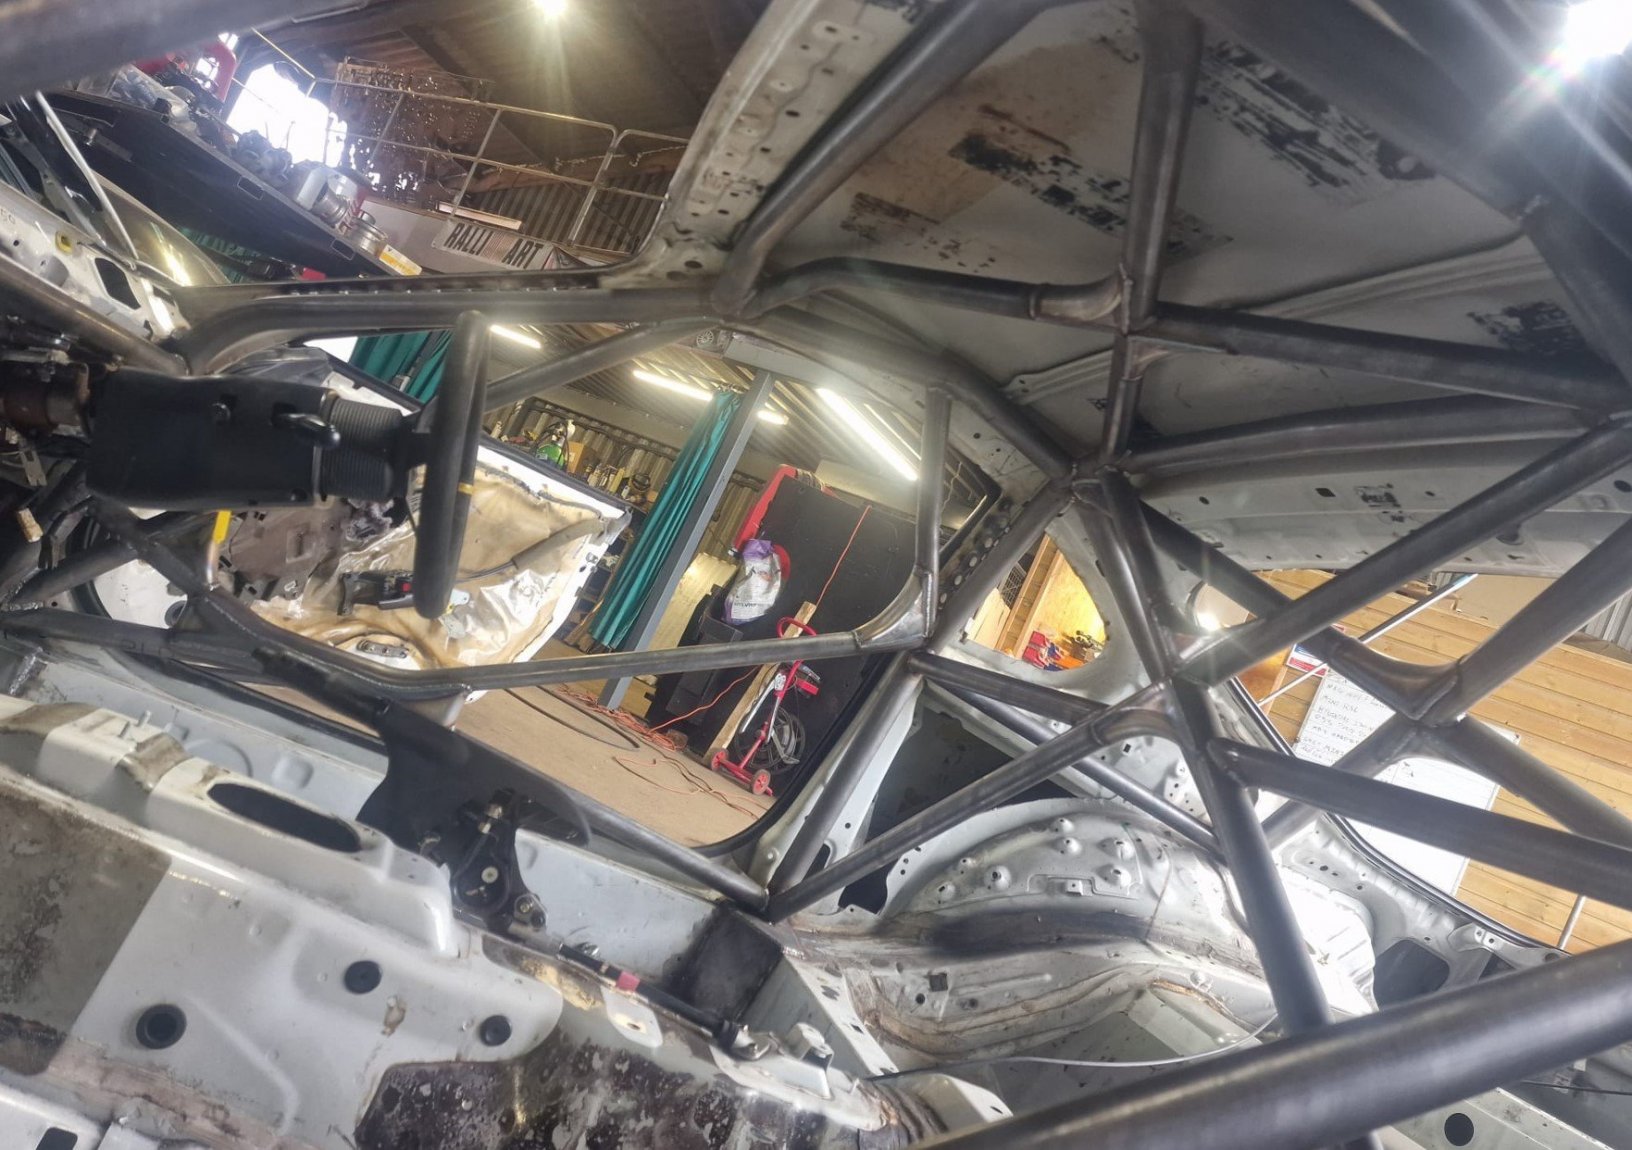
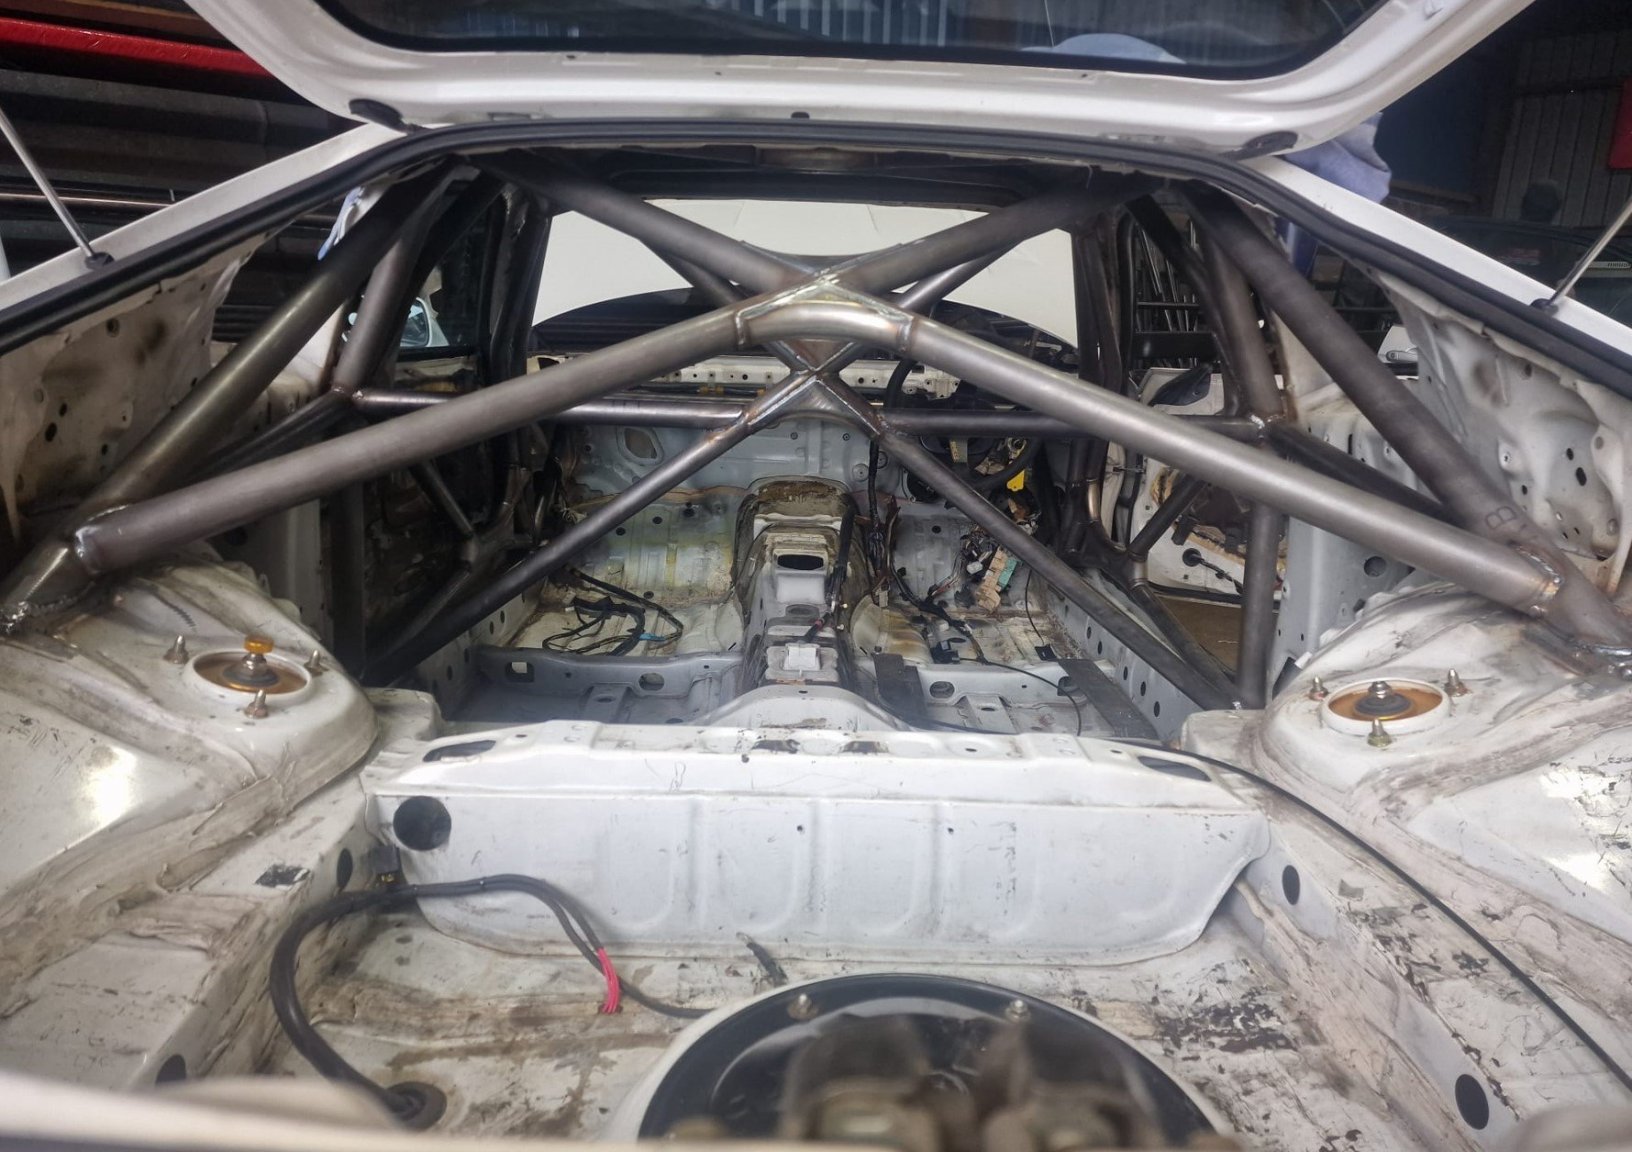
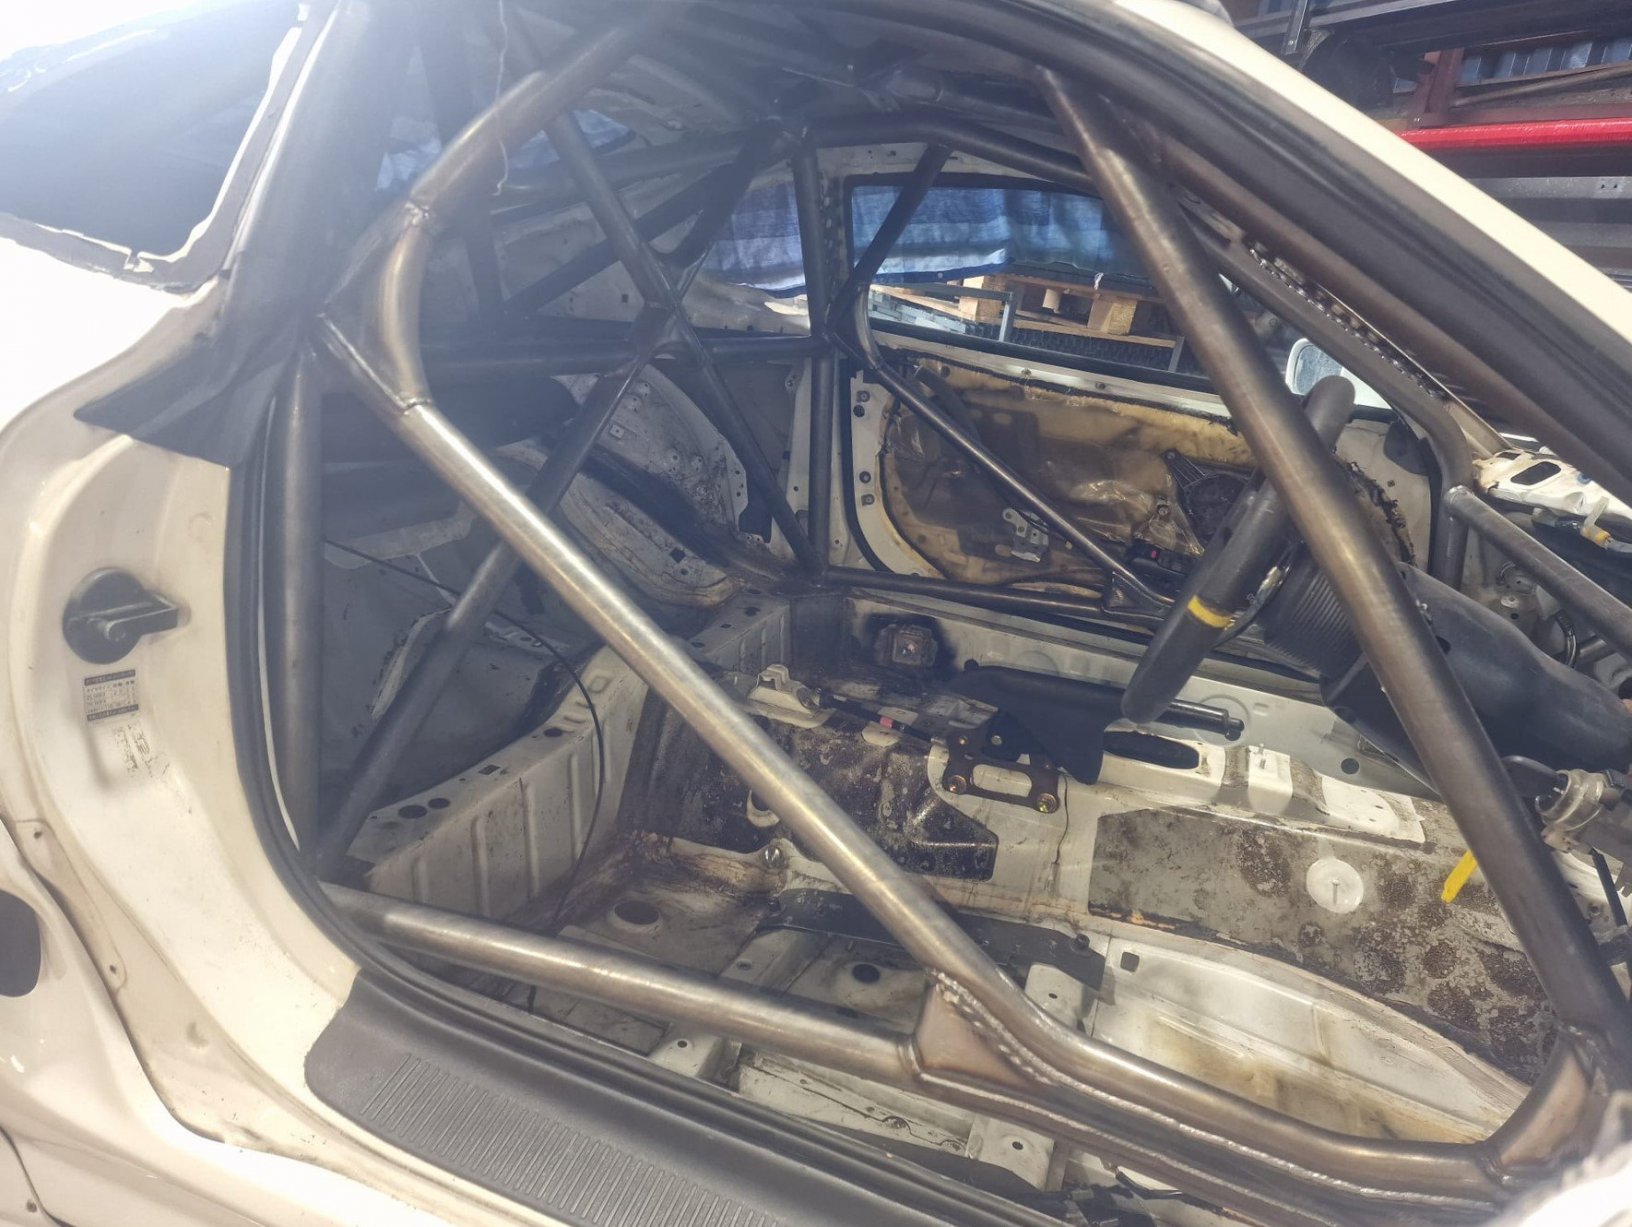
Well I had heard JP cages had a good reputation for turning around work in good time, but they really lived up to it. Cage is done and ready for pickup, wasnt expecting it so quick so dont even have a transport ready but will work on that now. Here is the finished article Had to lose the door cards as they were going to foul on the door bars. Josh didnt want to run the door bar inwards to clear the doorcards as thats a nono with cage building. So will probably move to a different style door card or replace the doors entirely with some sort of carbon replacement that dosent use door cards. Need to make some brackets to hold the OEM interior fuseboxes in slightly different locations to normal, but most of the wiring will fit as intended for the interior which is good. Next stop will be to see @TheTurtleshead & Kane @ Retro Road Sports to get the firewall sorted and get some paint on the interior and whatever other small jobs we can find to do.
-
OEM ECU has some timing and fueling changes around where the valve should open/close. Your mapper should have mapped this out whilst tuning the emanage, but not the end of the world if he didnt.
-
SRD Tuning in Haywards Heath or Magnum Performance in Enfield will be your closest.