
Mike2JZ
-
Posts
2662 -
Joined
-
Days Won
55
Content Type
Profiles
Forums
Store
Blogs
Events
Downloads
Supra Articles
Gallery
Everything posted by Mike2JZ
-

Cylinder head difference 1jz/2jz (GE only)
Mike2JZ replied to Stock.supra.98's topic in mkiv Technical
I could be wrong but to me it looks like both 1JZGE & 2JZGE VVTi heads are cast from the same forging, then machined differently. Intake & Exhaust flanges appear to have the same bolt hole patterns on both heads, so manifolds for their respective side should be interchangable. -
Cylinder head difference 1jz/2jz (GE only)
Mike2JZ replied to Stock.supra.98's topic in mkiv Technical
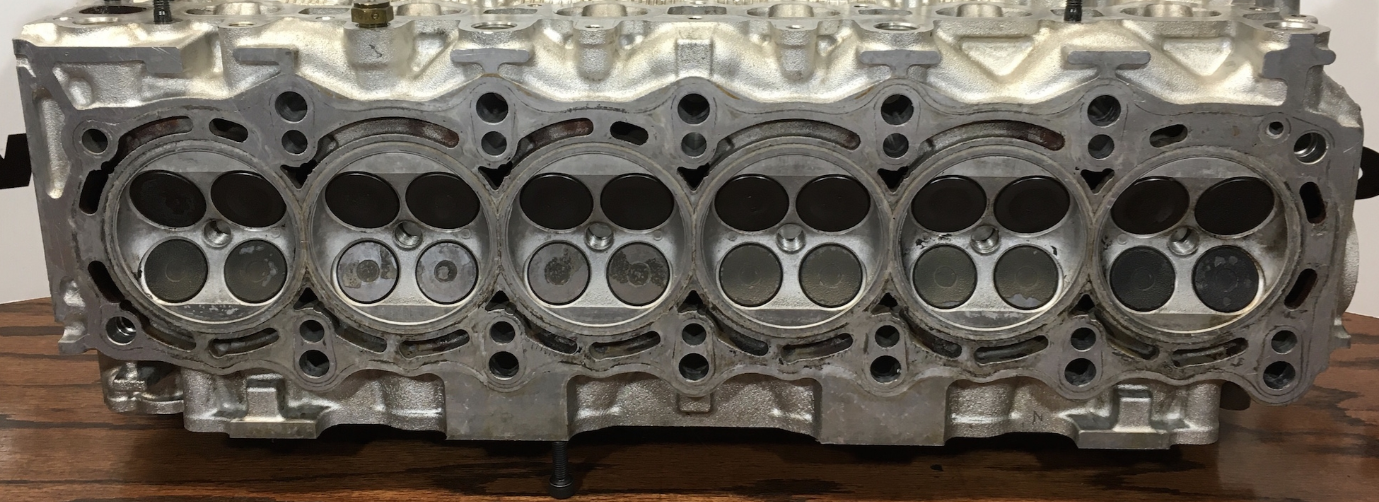
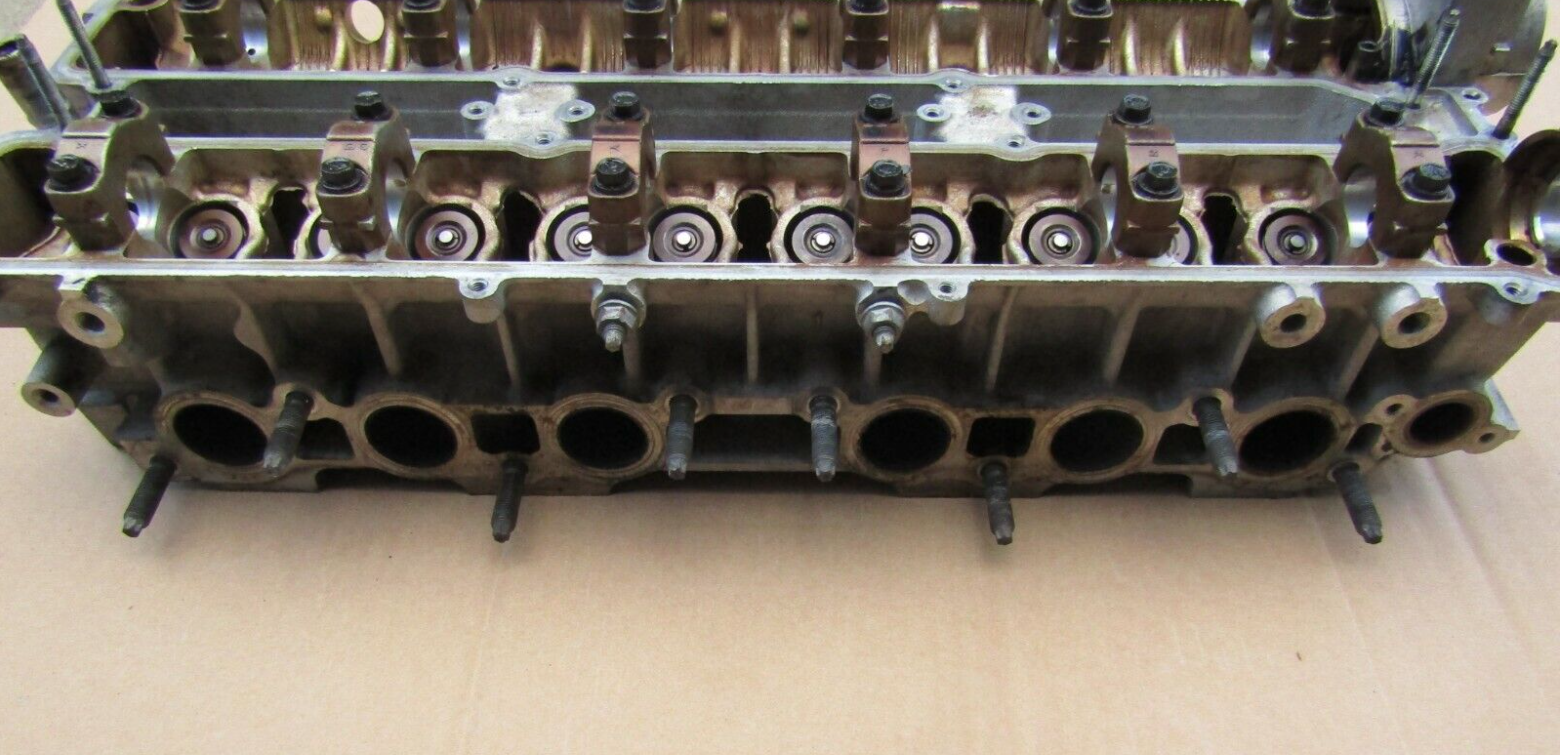
Also the combusion chamber and squish area on a 1JZGE VVTi is a lot tighter compared to 2JZGE VVT 1JZGE VVTi 2JZGE VVTi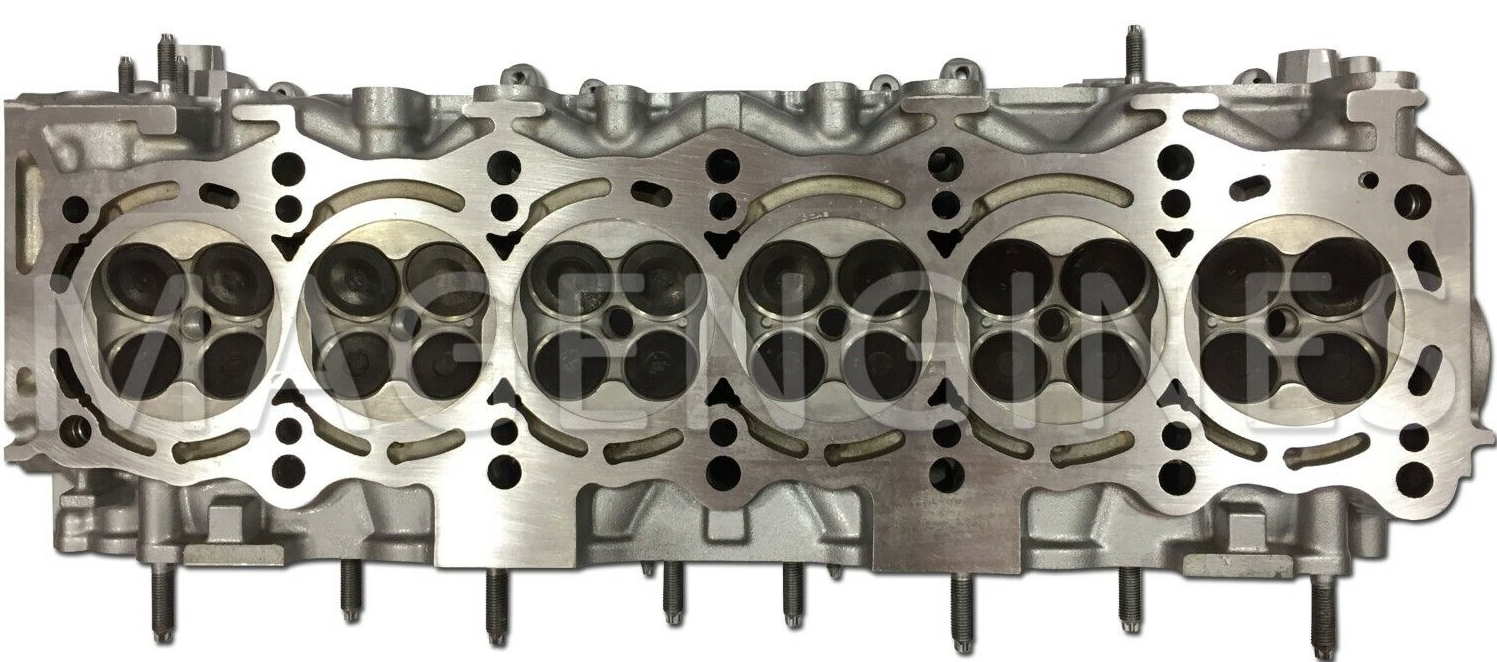
-
Cylinder head difference 1jz/2jz (GE only)
Mike2JZ replied to Stock.supra.98's topic in mkiv Technical
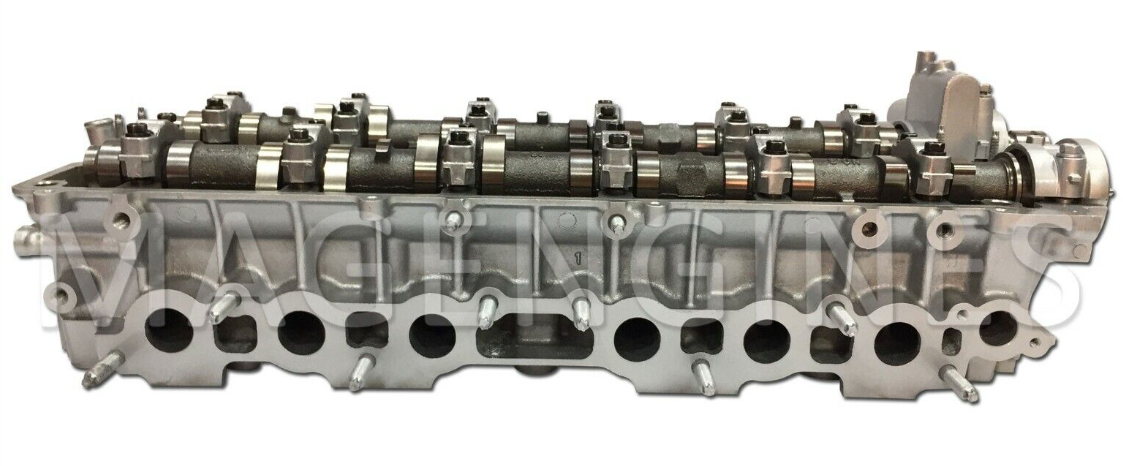
All 2JZGE VVTi's I've worked on have 3.0 printed on the back of the head like so Also like the GTE versions of the head, the 1JZ head has small exhaust ports compared to 2JZ 1JZGE VVT Exhaust Ports 2JZGE VVT Exhaust Ports
-
This car would be sick with about 1200hp
-
Try another NA Engine ECU from a friend if you can. When capacitors on the board fry themselves they can make the engine do weird things, had symptomes similar to the above before. If you can rule out ECU as not being an issue then continue diagnosing the rest of the systems. If ECU is the culprit then you will go down a long rabbit hole try to diagnose it starting from the outside working in otherwise.
-
£800 if you want them fully loaded. £400 if you just want the bare doors.
-
they can do yes
-
Yes was an interesting day of them filming and hanging out. I believe they want to turbo it, will have to see if it comes to fruition. Cant really spill too more than that for now
-
Damn, there goes my dreams of selling doors for a million pounds lol. Ah well guess I'll have to dig deep for these carbon replacements then
-
AEM Water/Methanol Injection + Failsafe + Flow Solenoid Kit
Mike2JZ replied to Mike2JZ's topic in Parts for Sale
Now sold -
Updated with some items that sold.
-
Driverside Pillar Sold. Passengerside Pillar Remaining £40 posted
-
Looking to swap my doors with some carbon replacements, but need to sell current ones first ideally. Full doors with windows etc, no door cards. Not a clue what to ask for them. Any ideas?
-
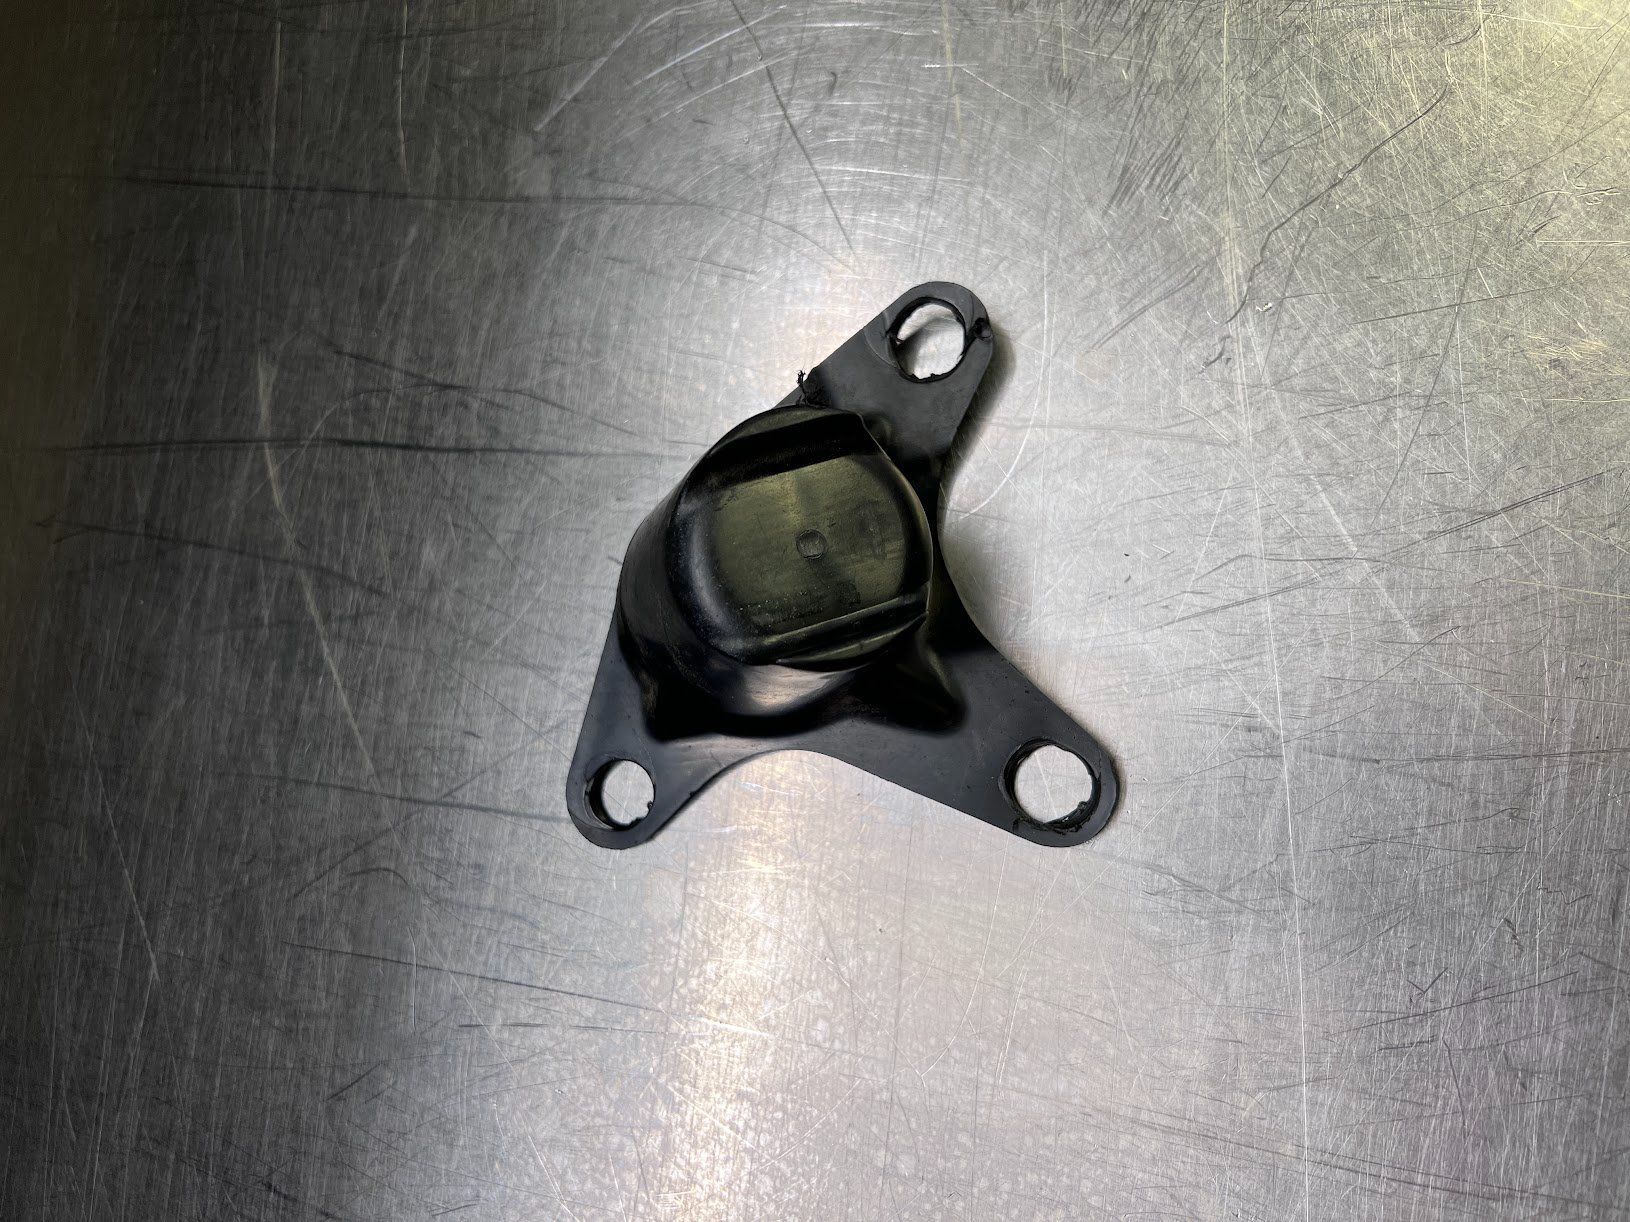
Looking for water neck from 2JZGE from a Supra, not from gs/is300 please.
-
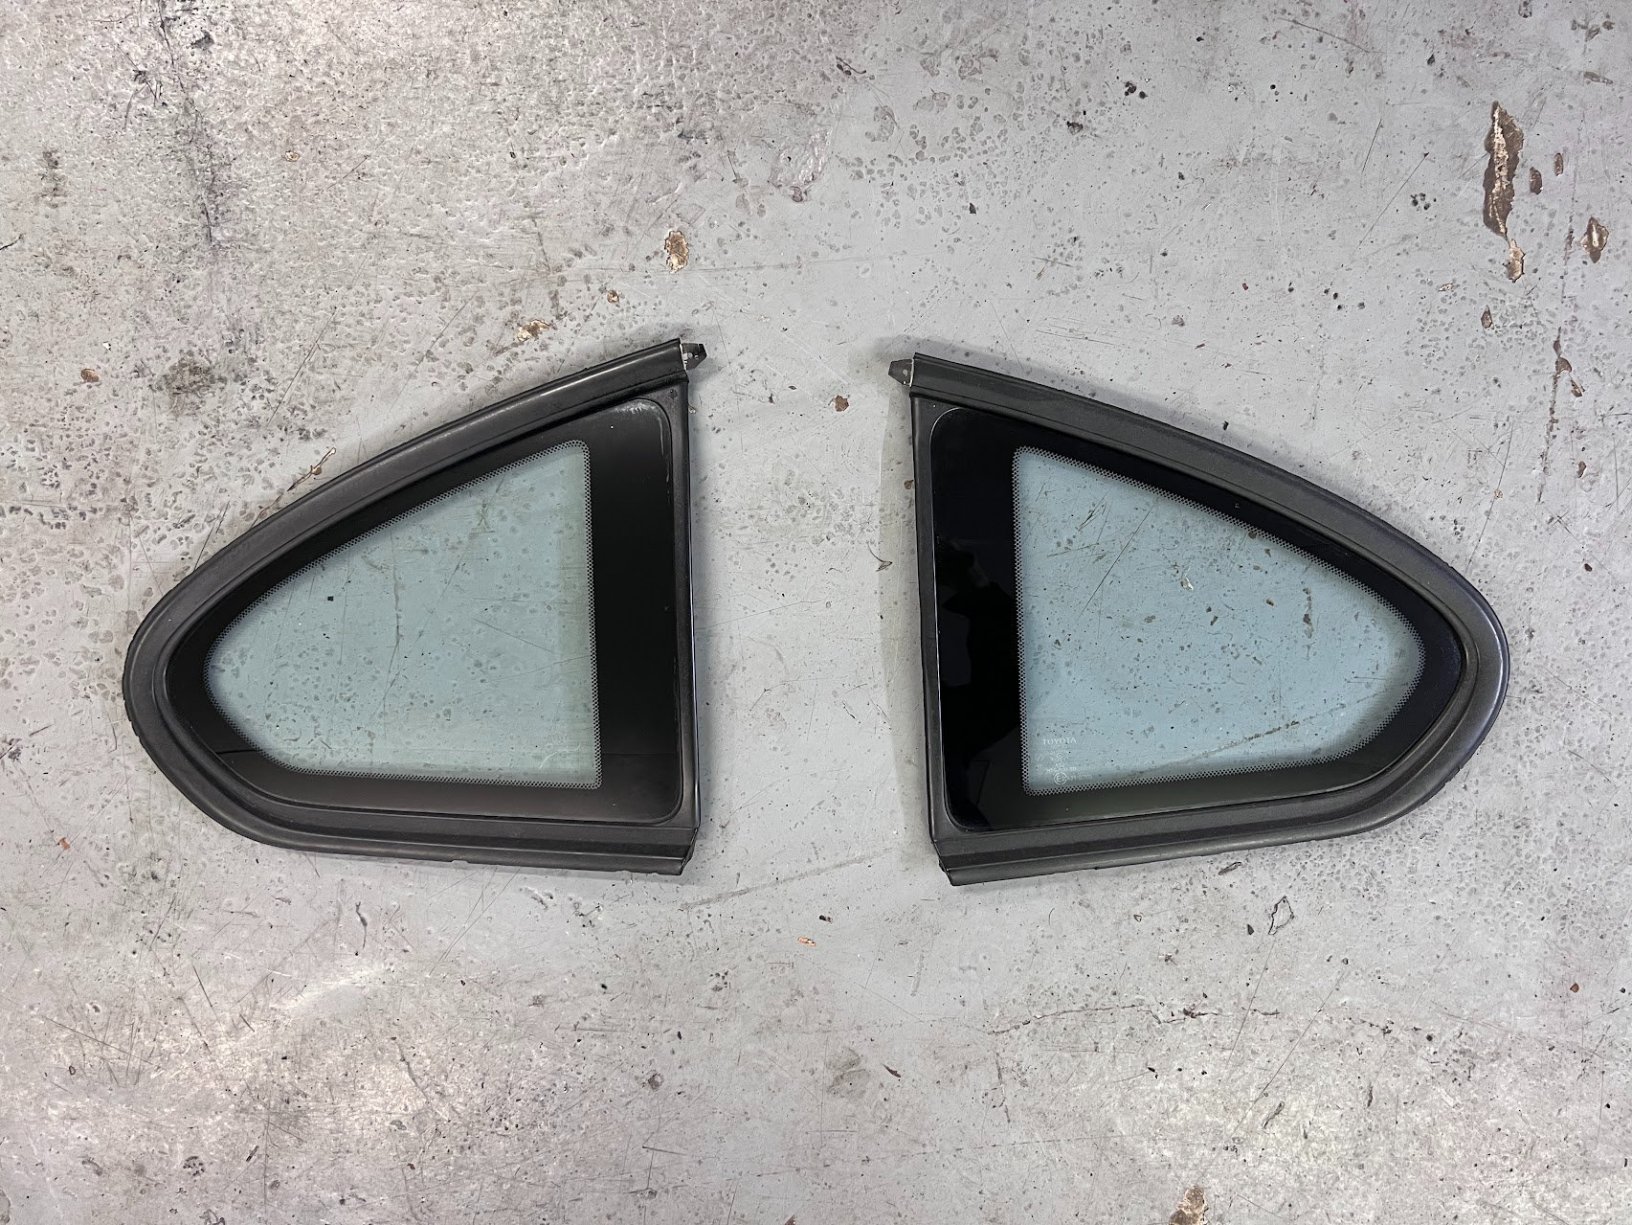
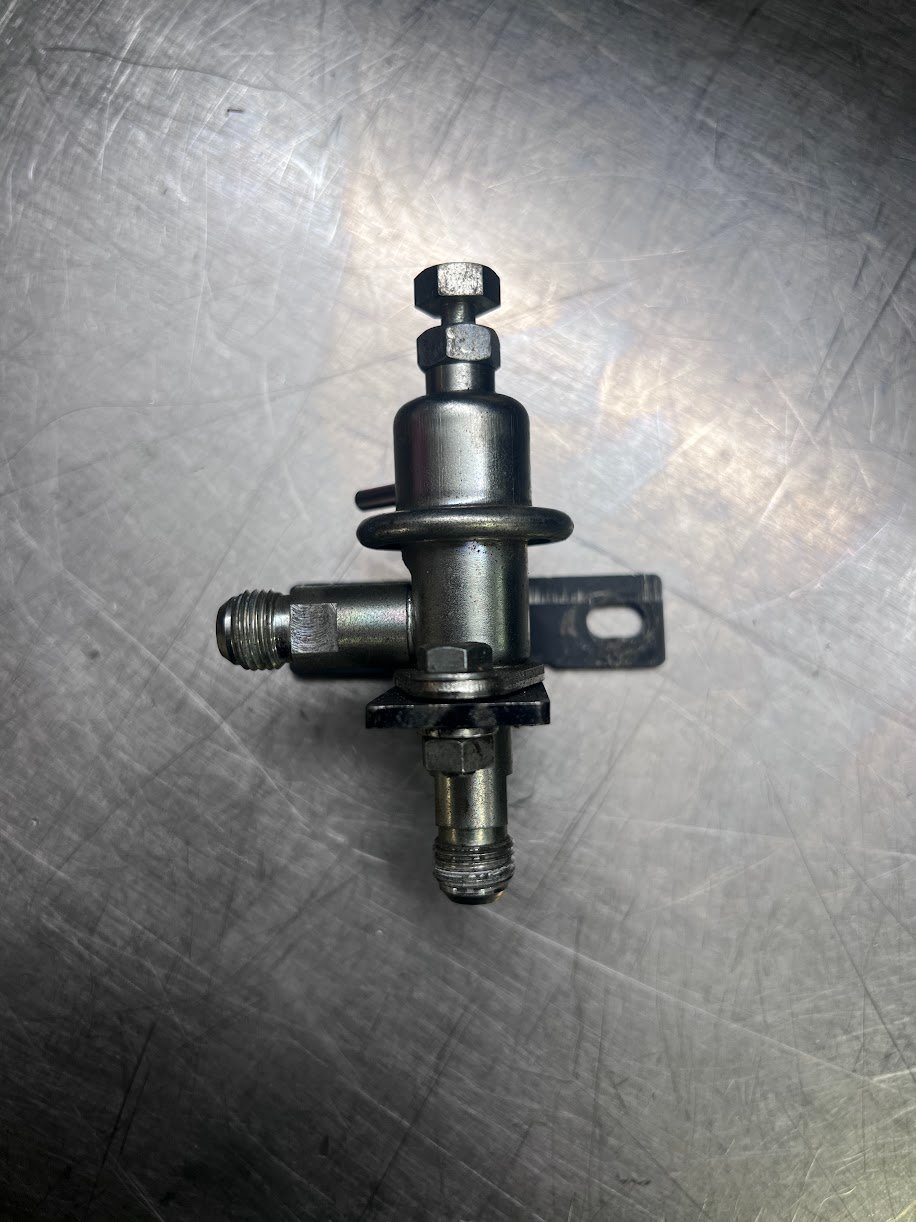
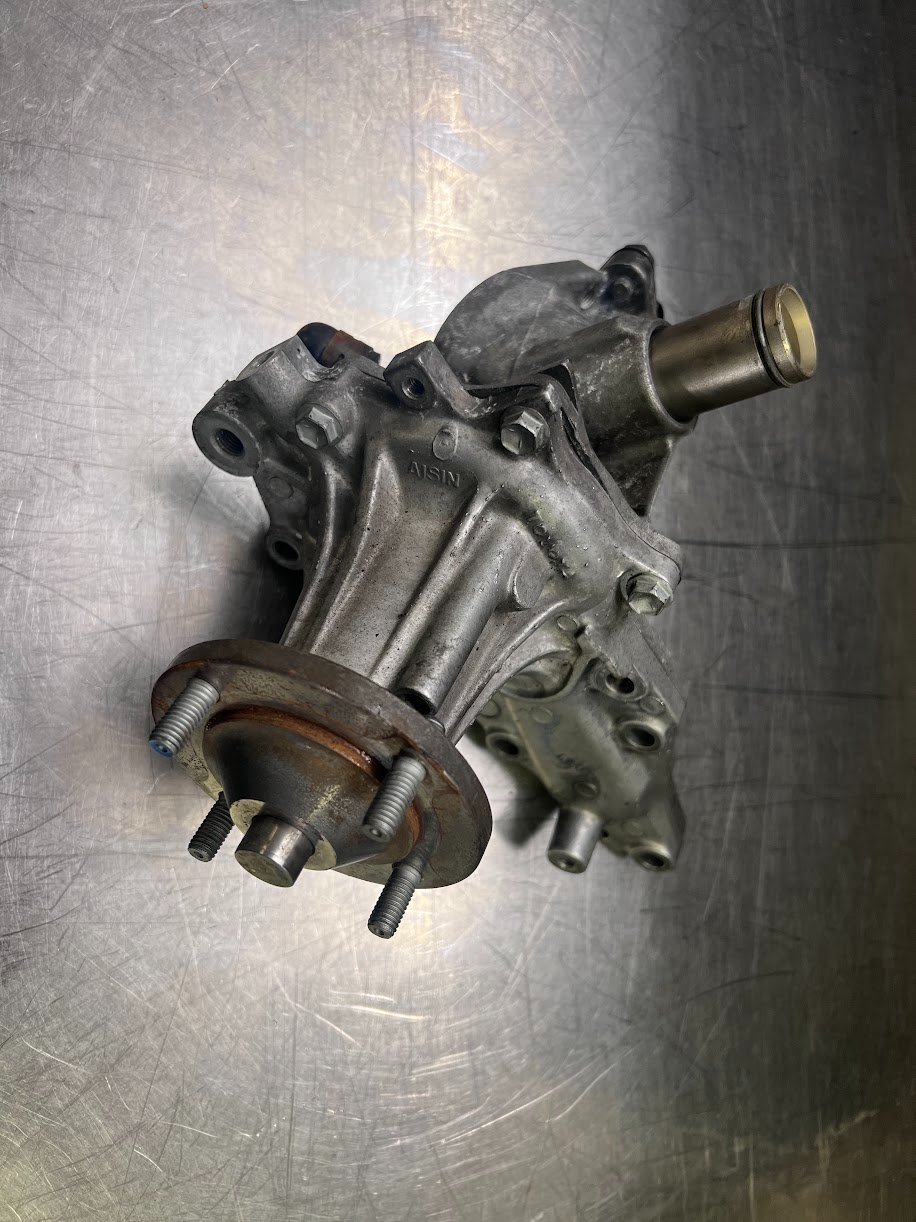
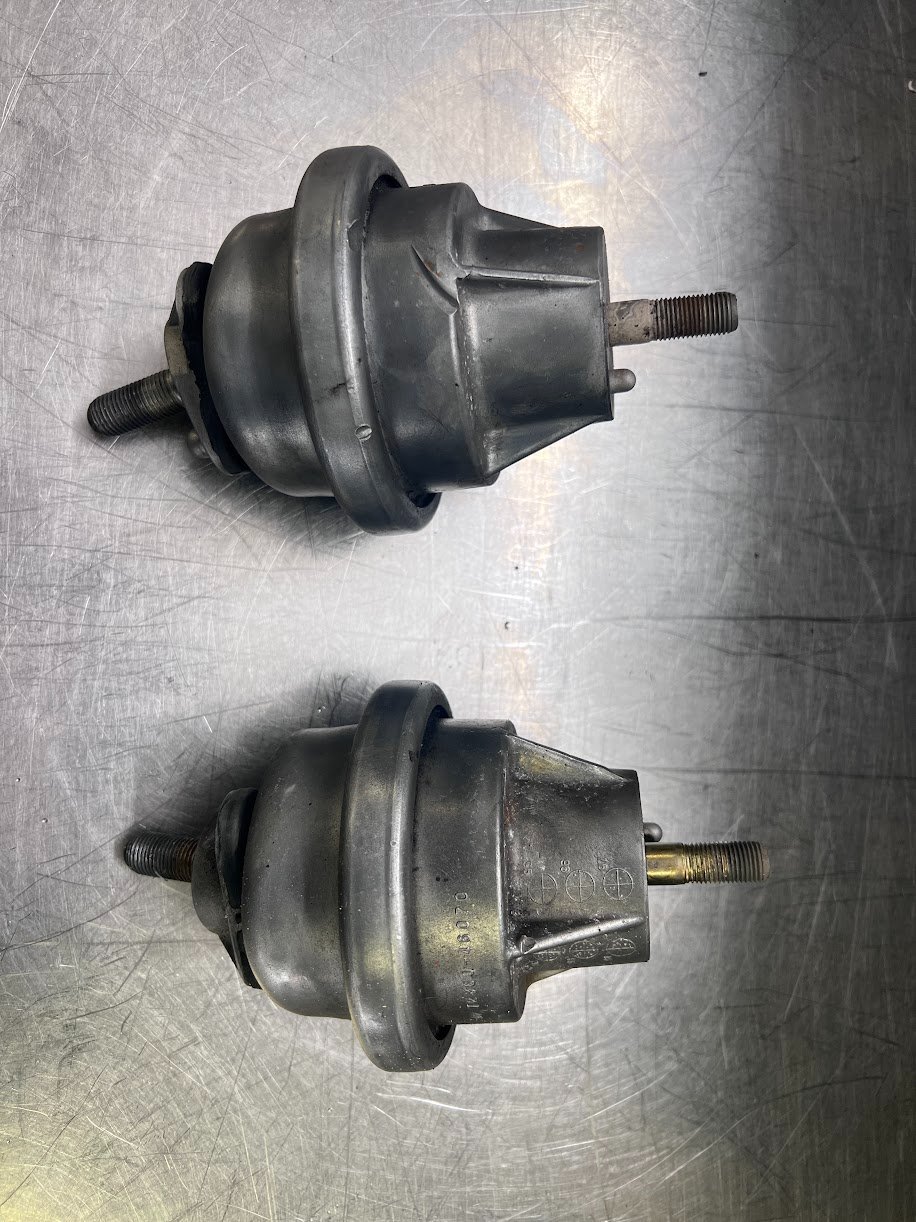
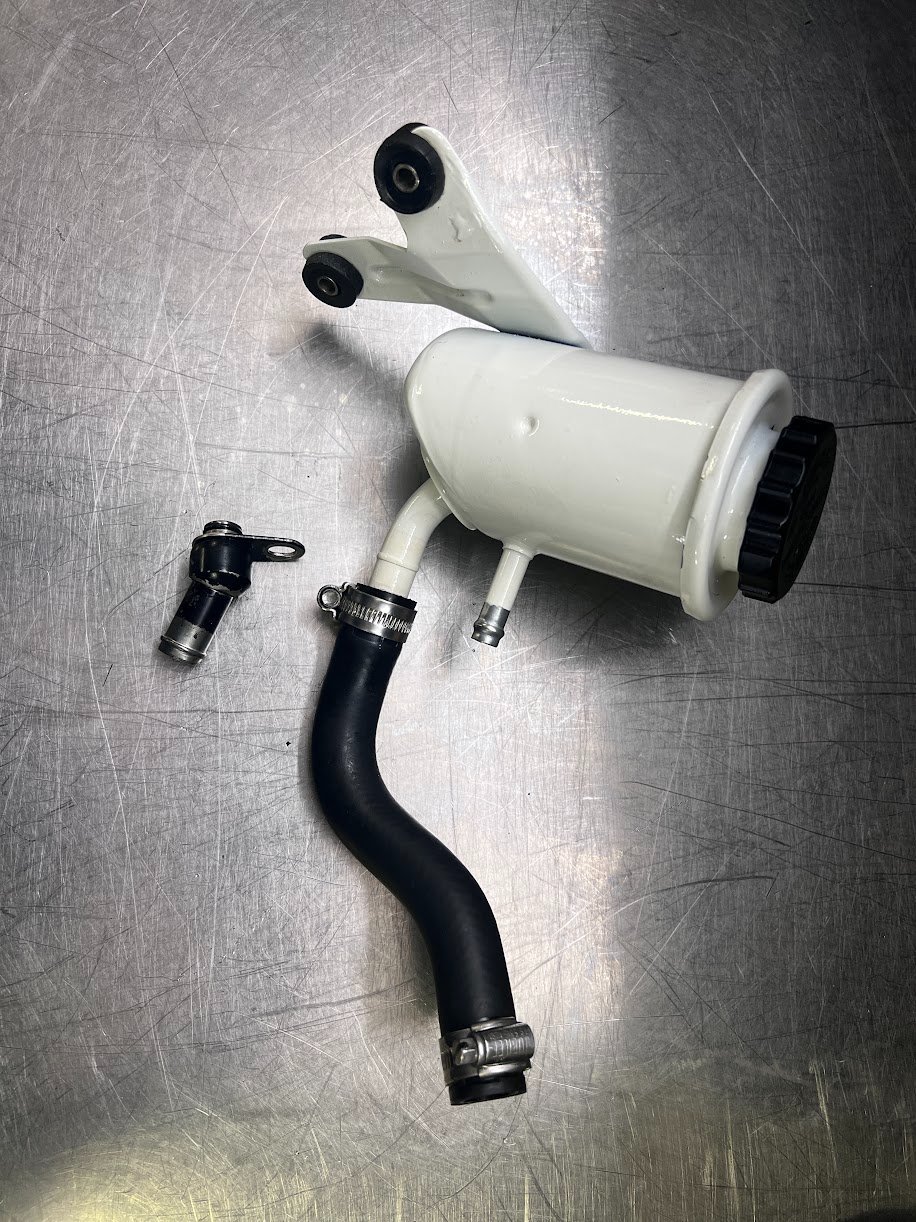
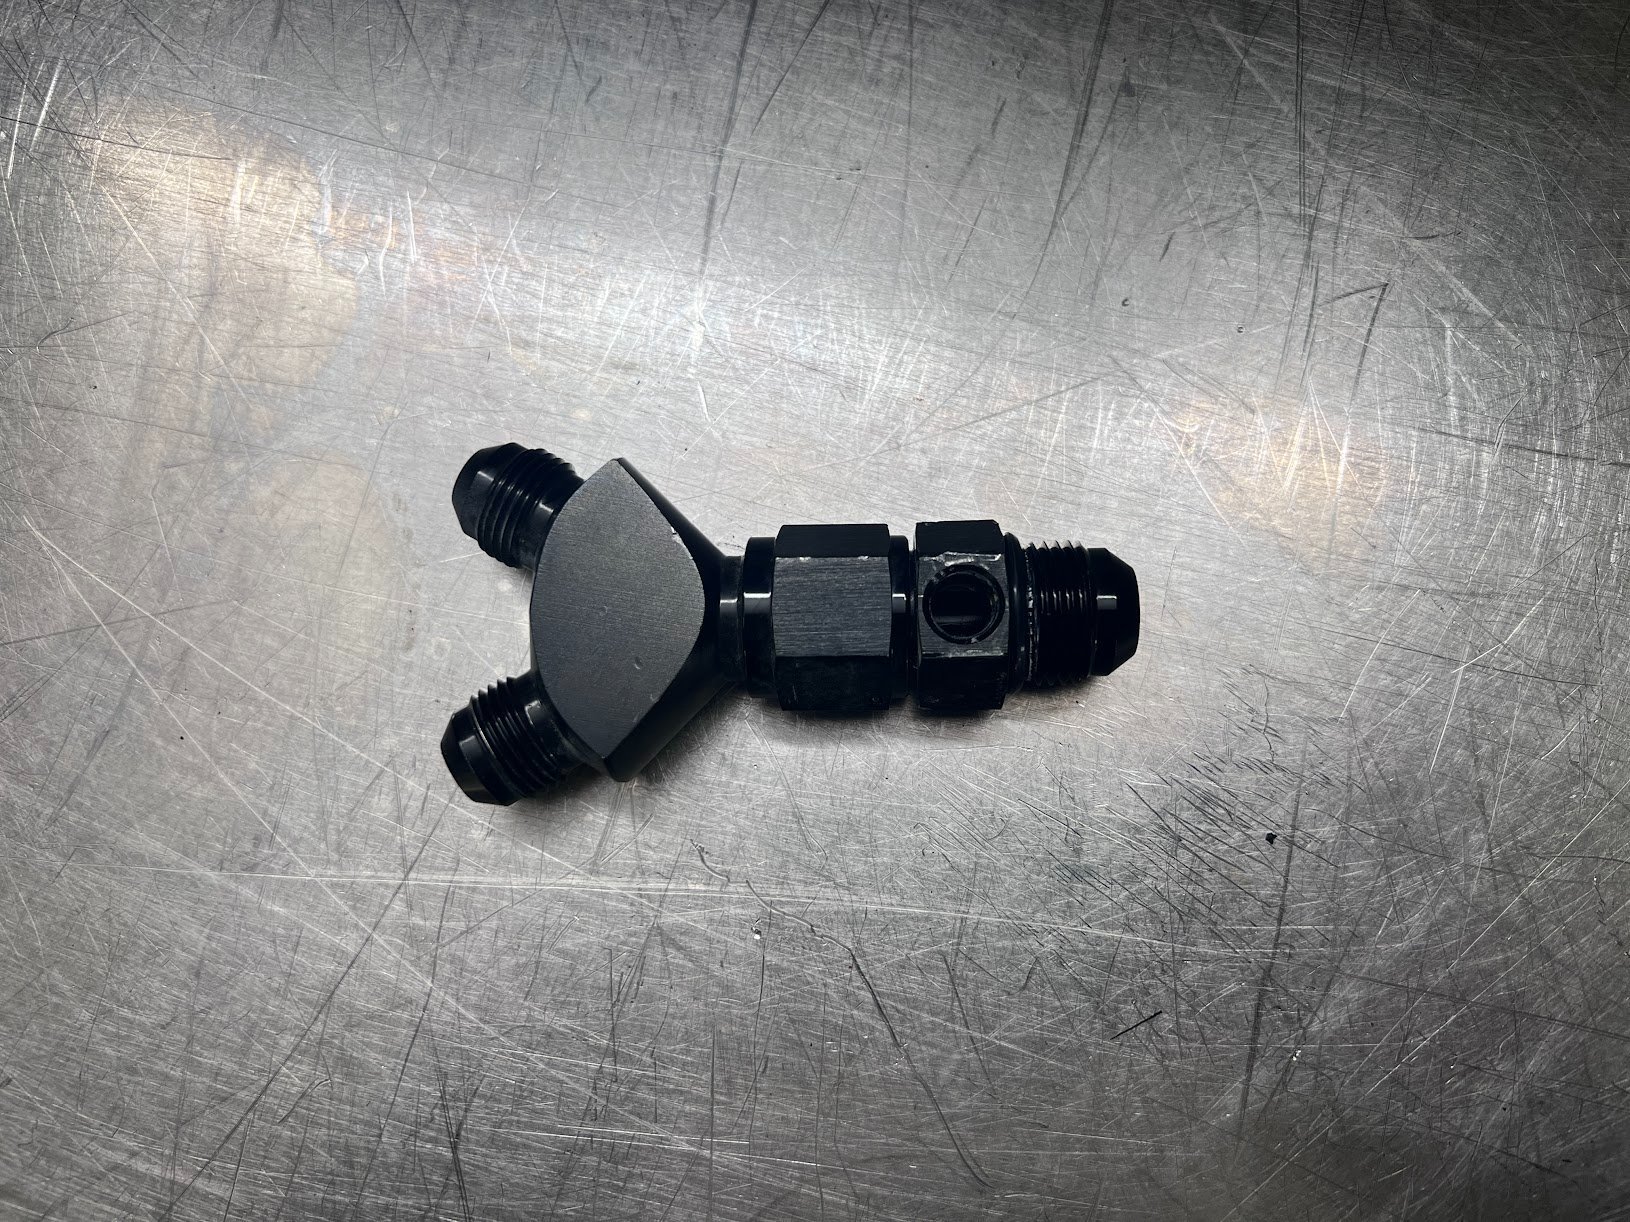
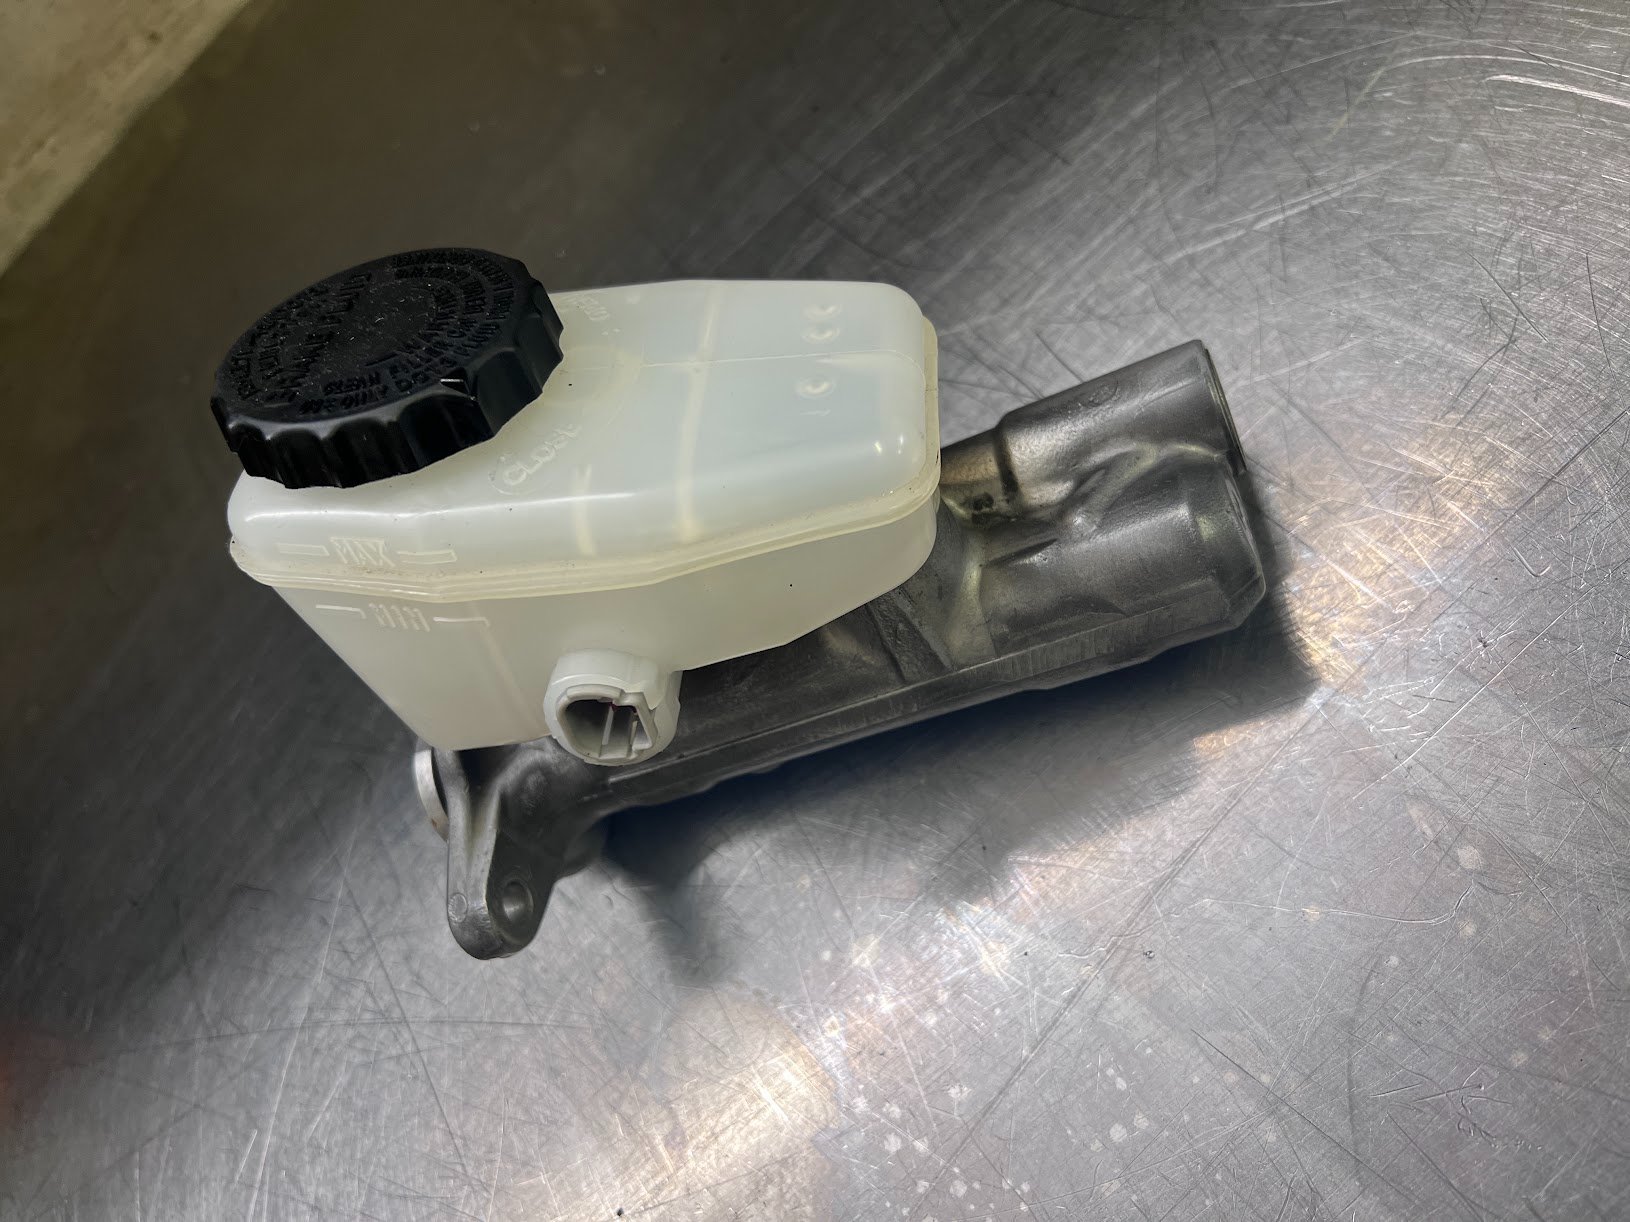
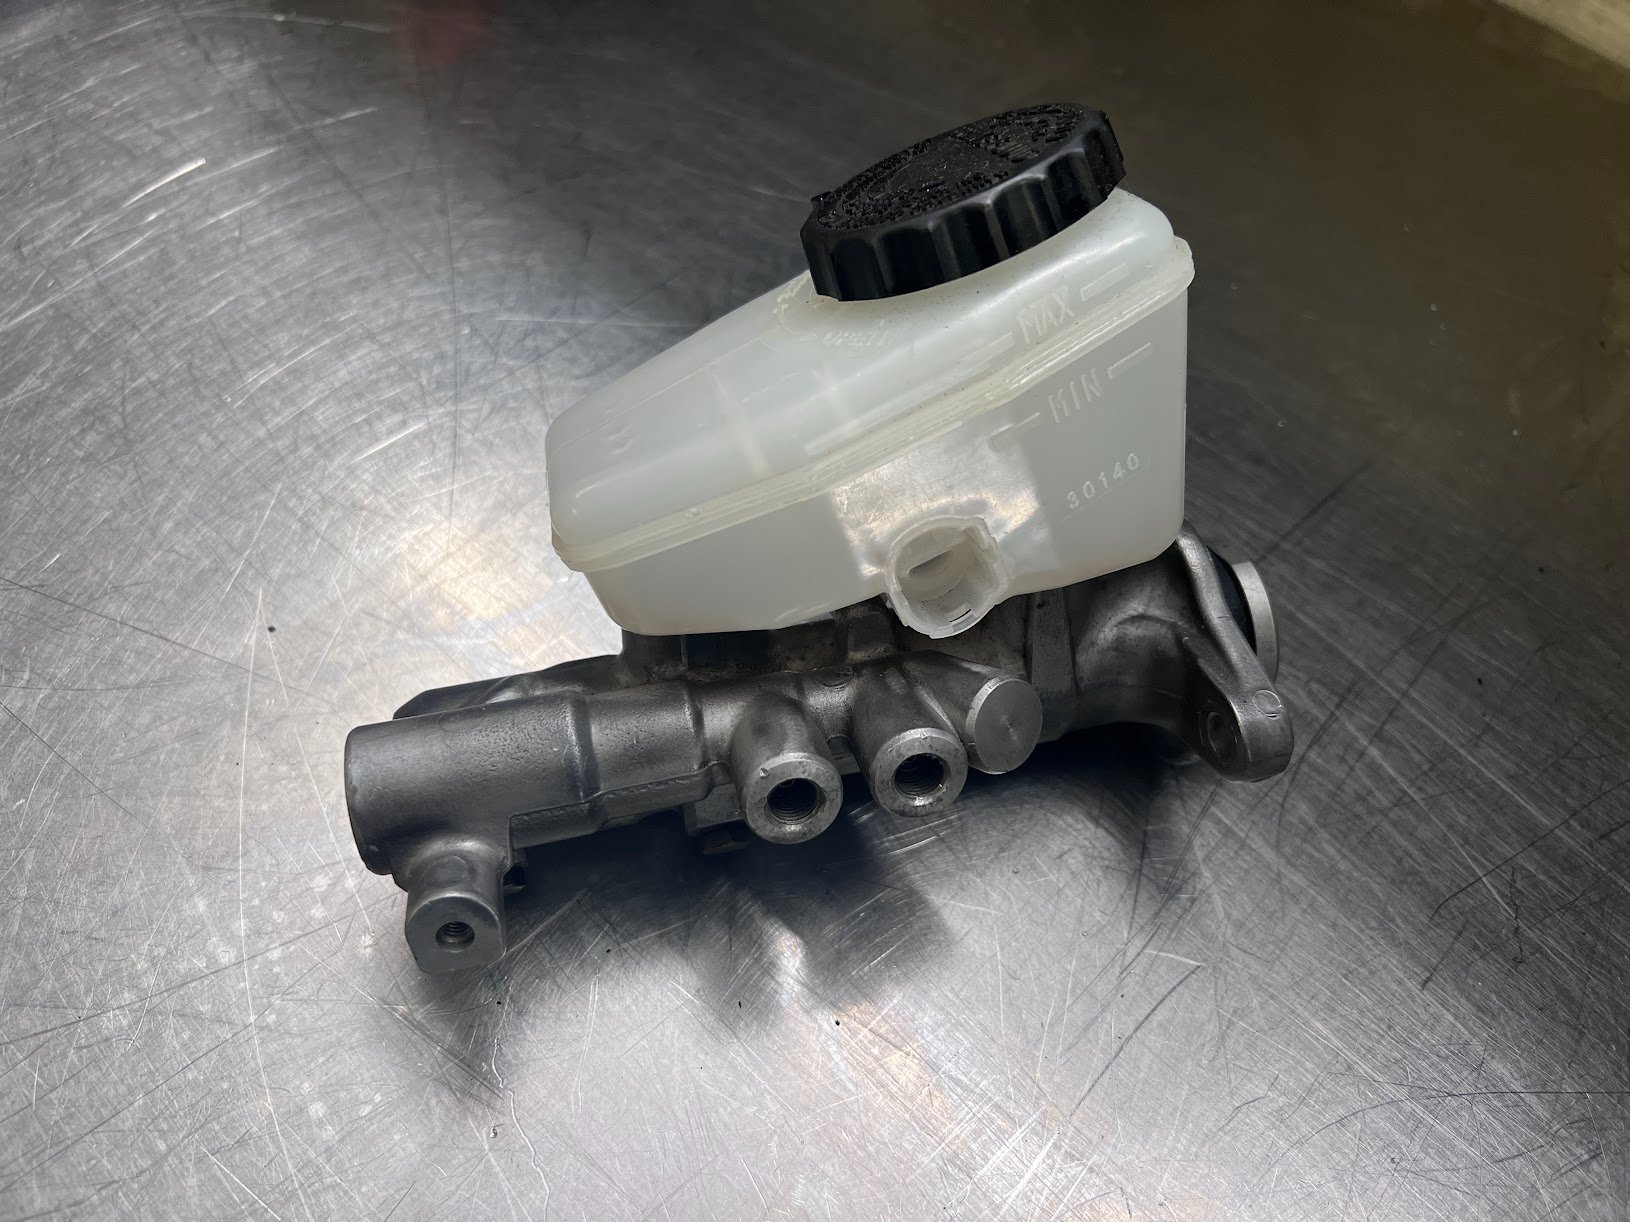
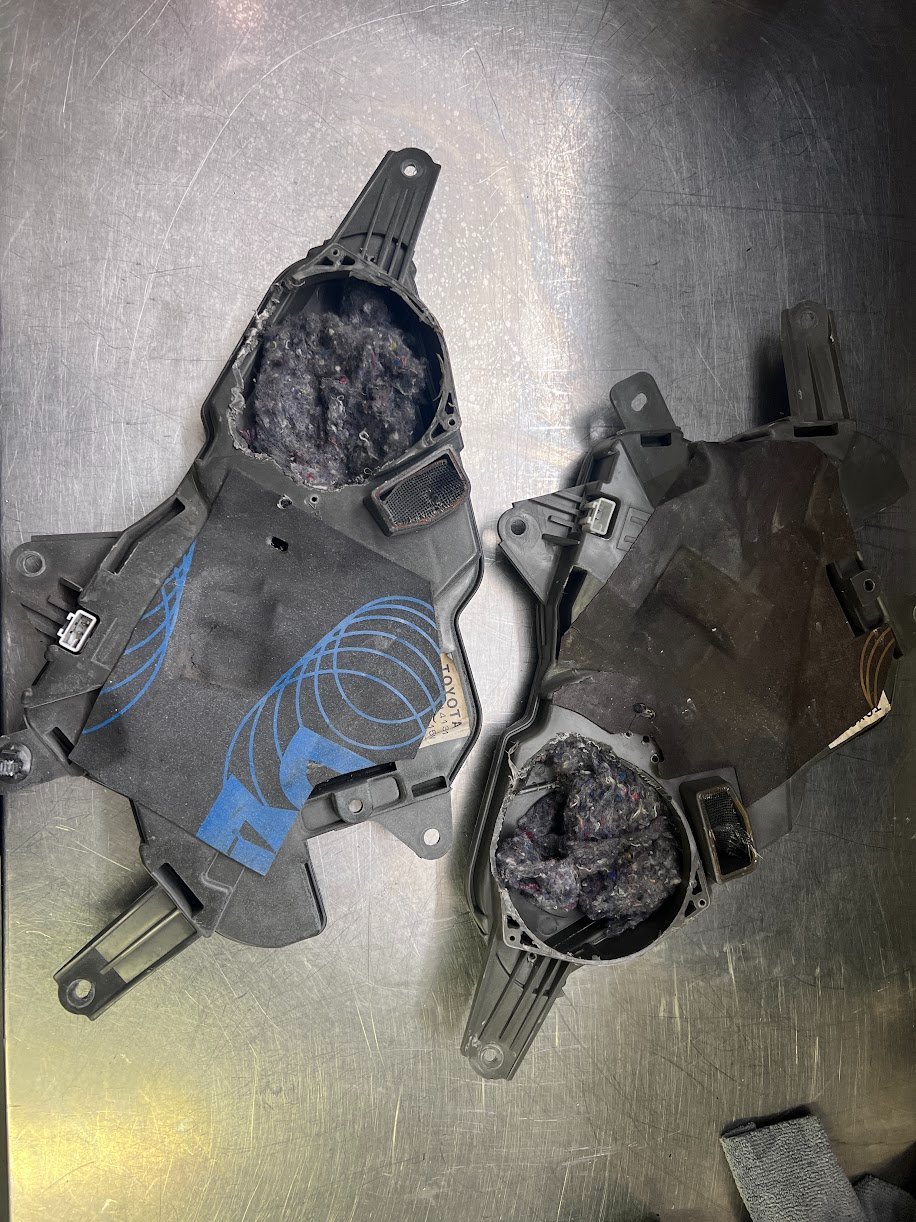
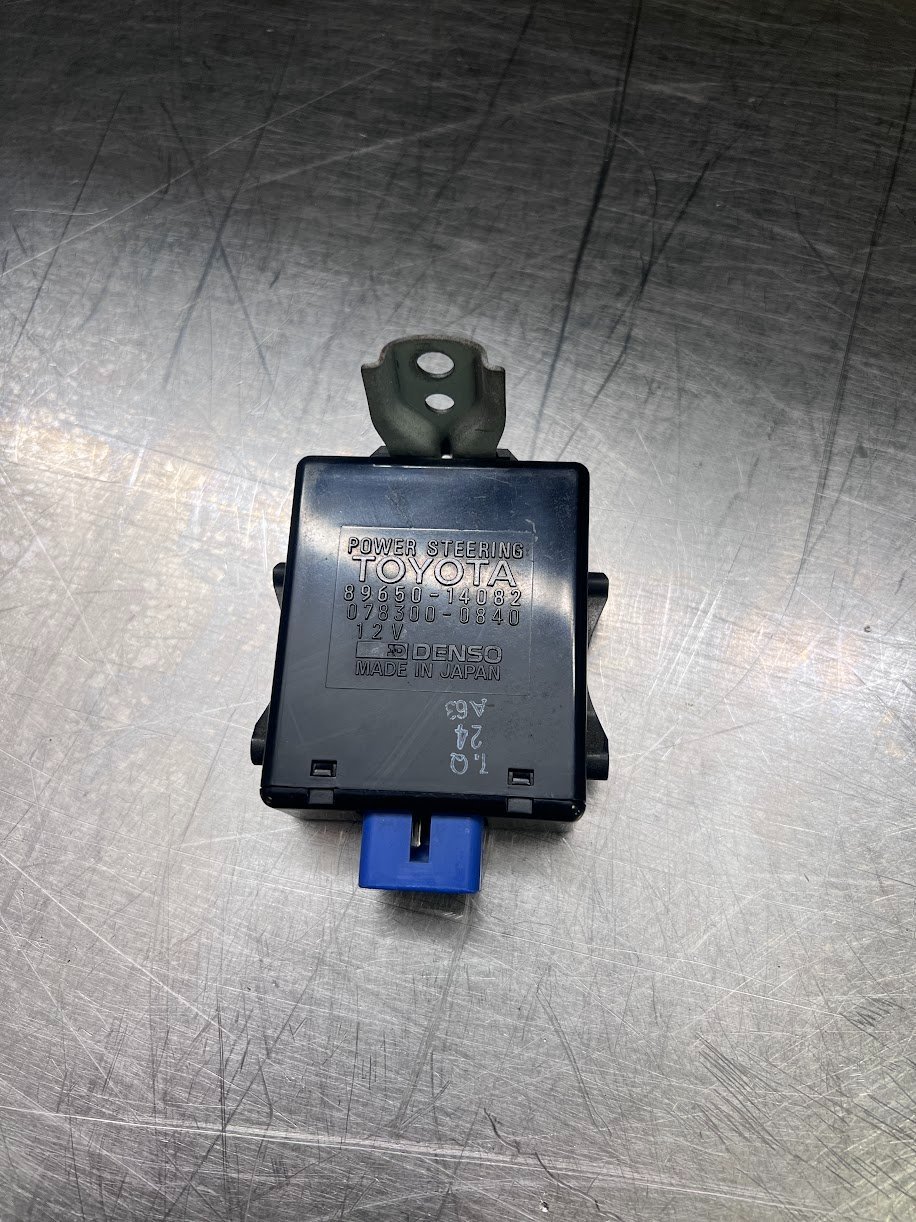
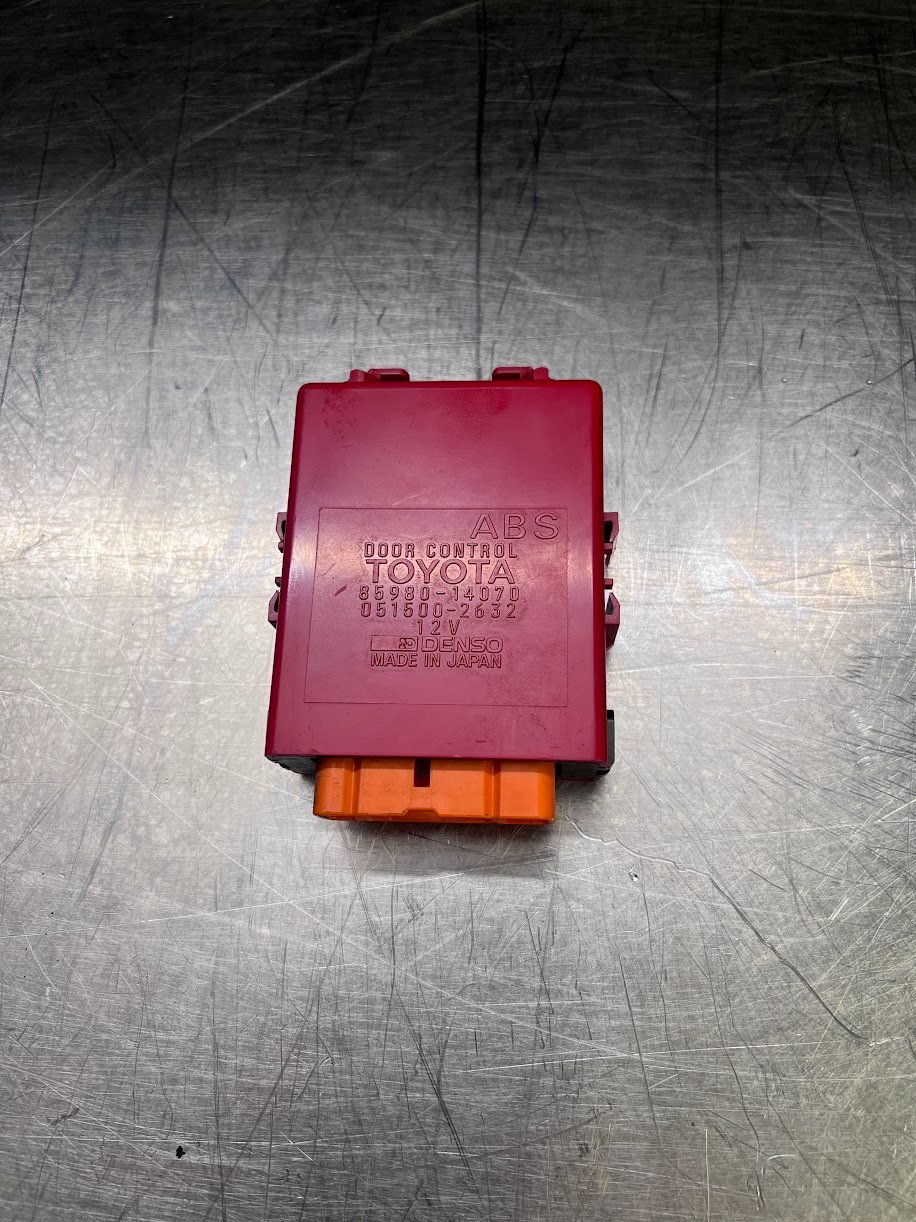
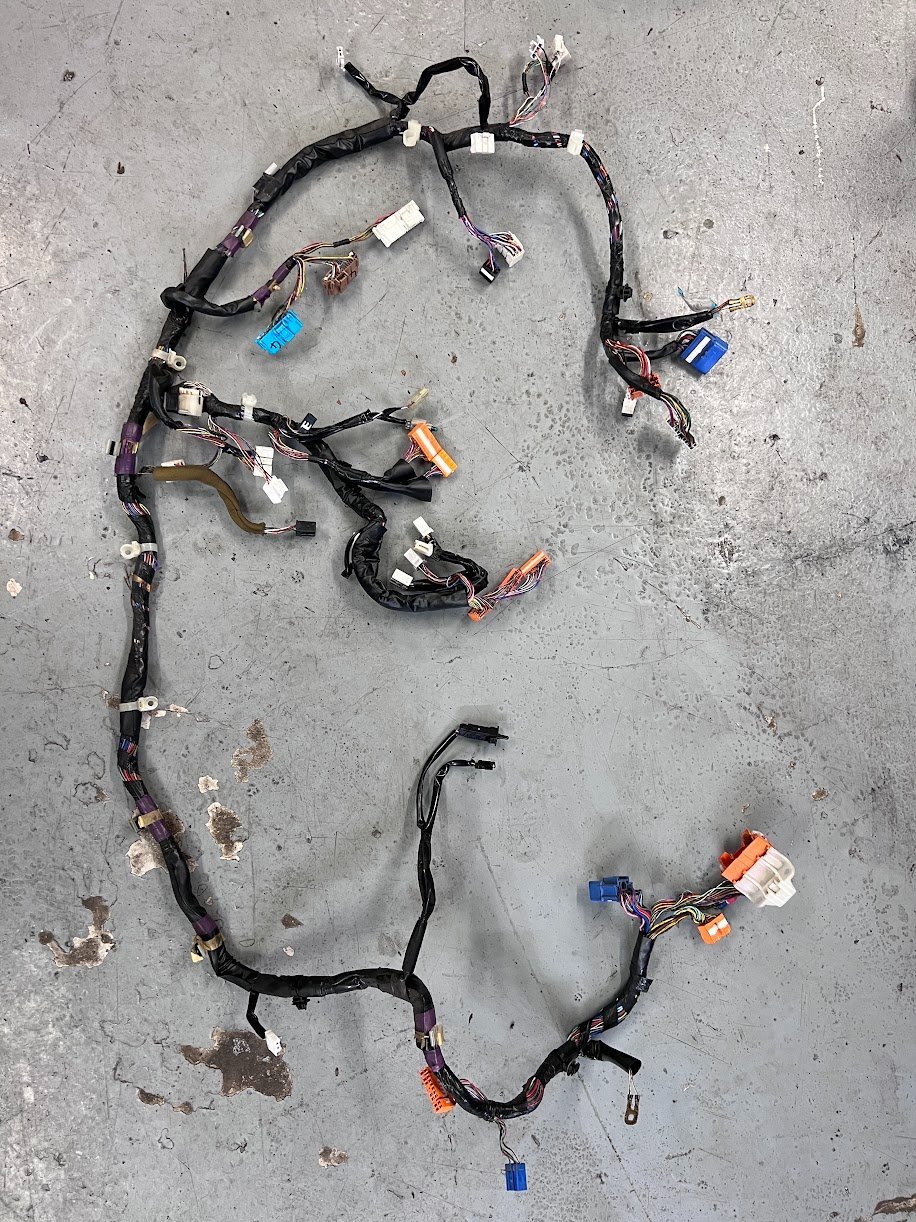
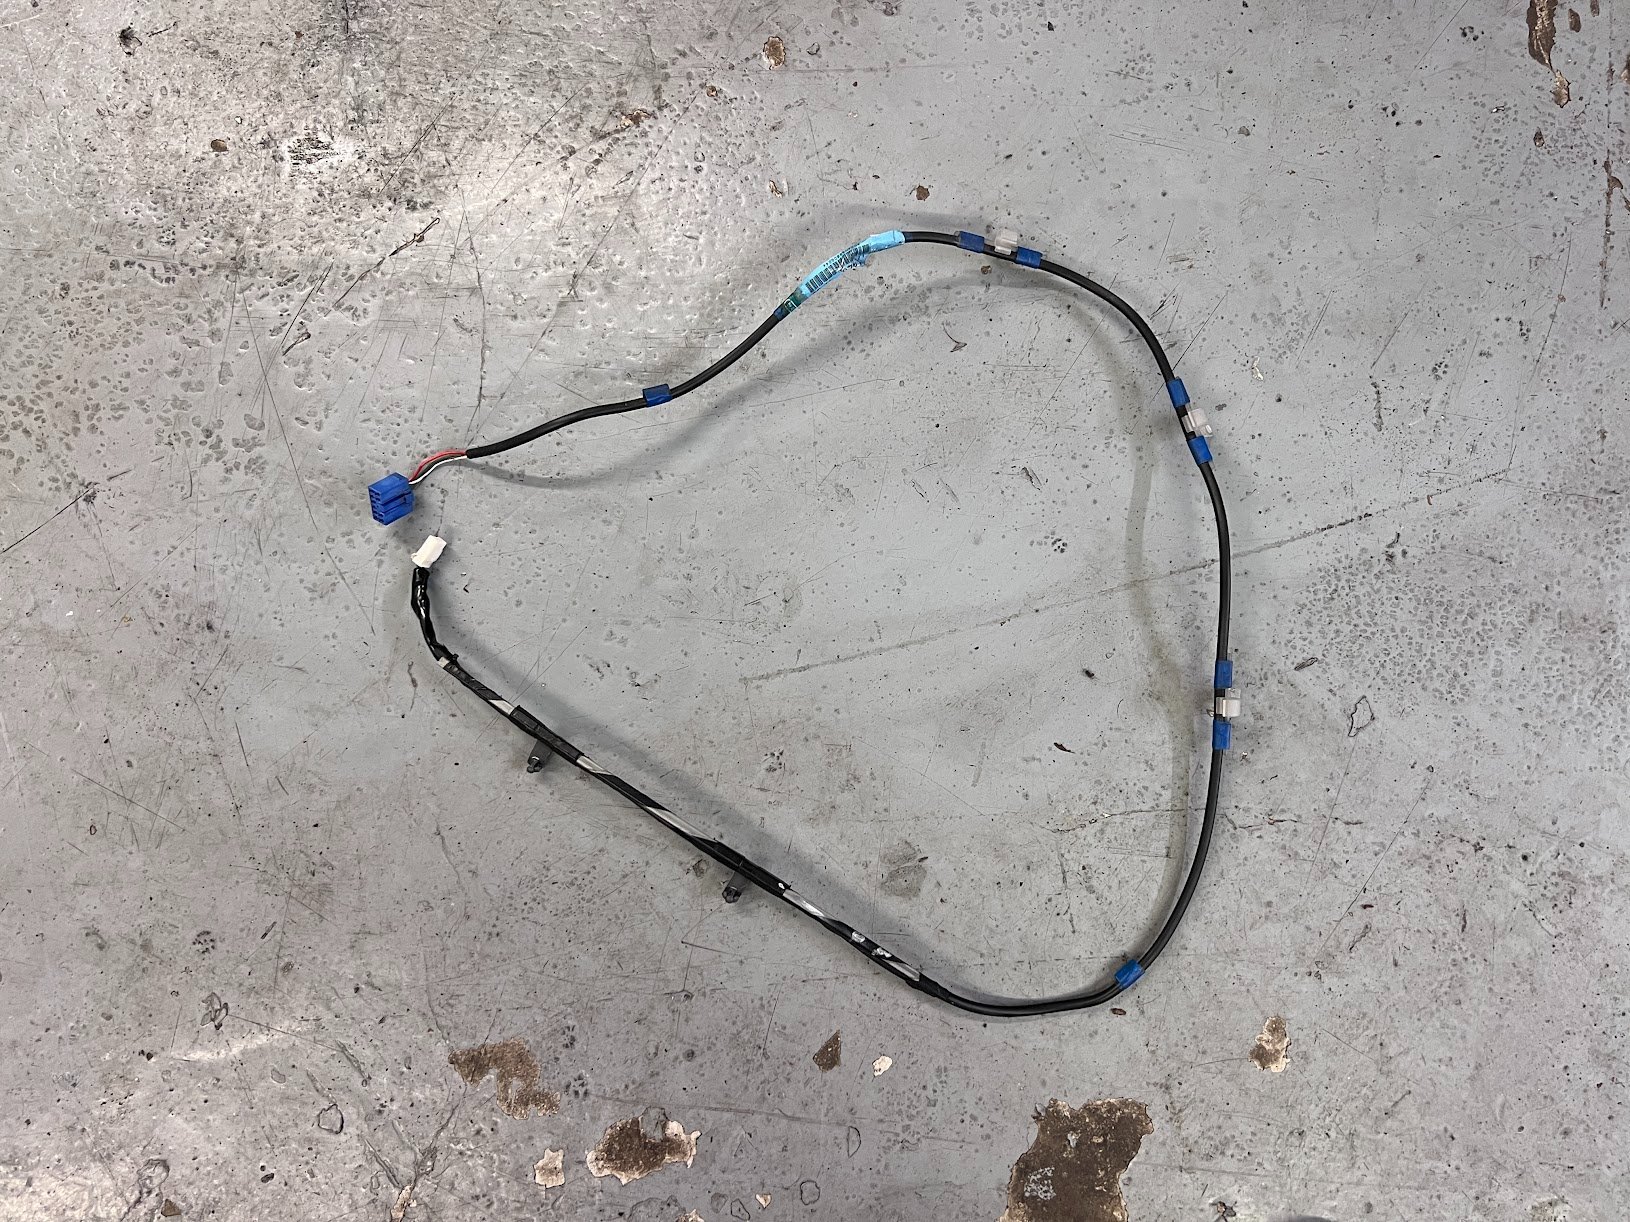
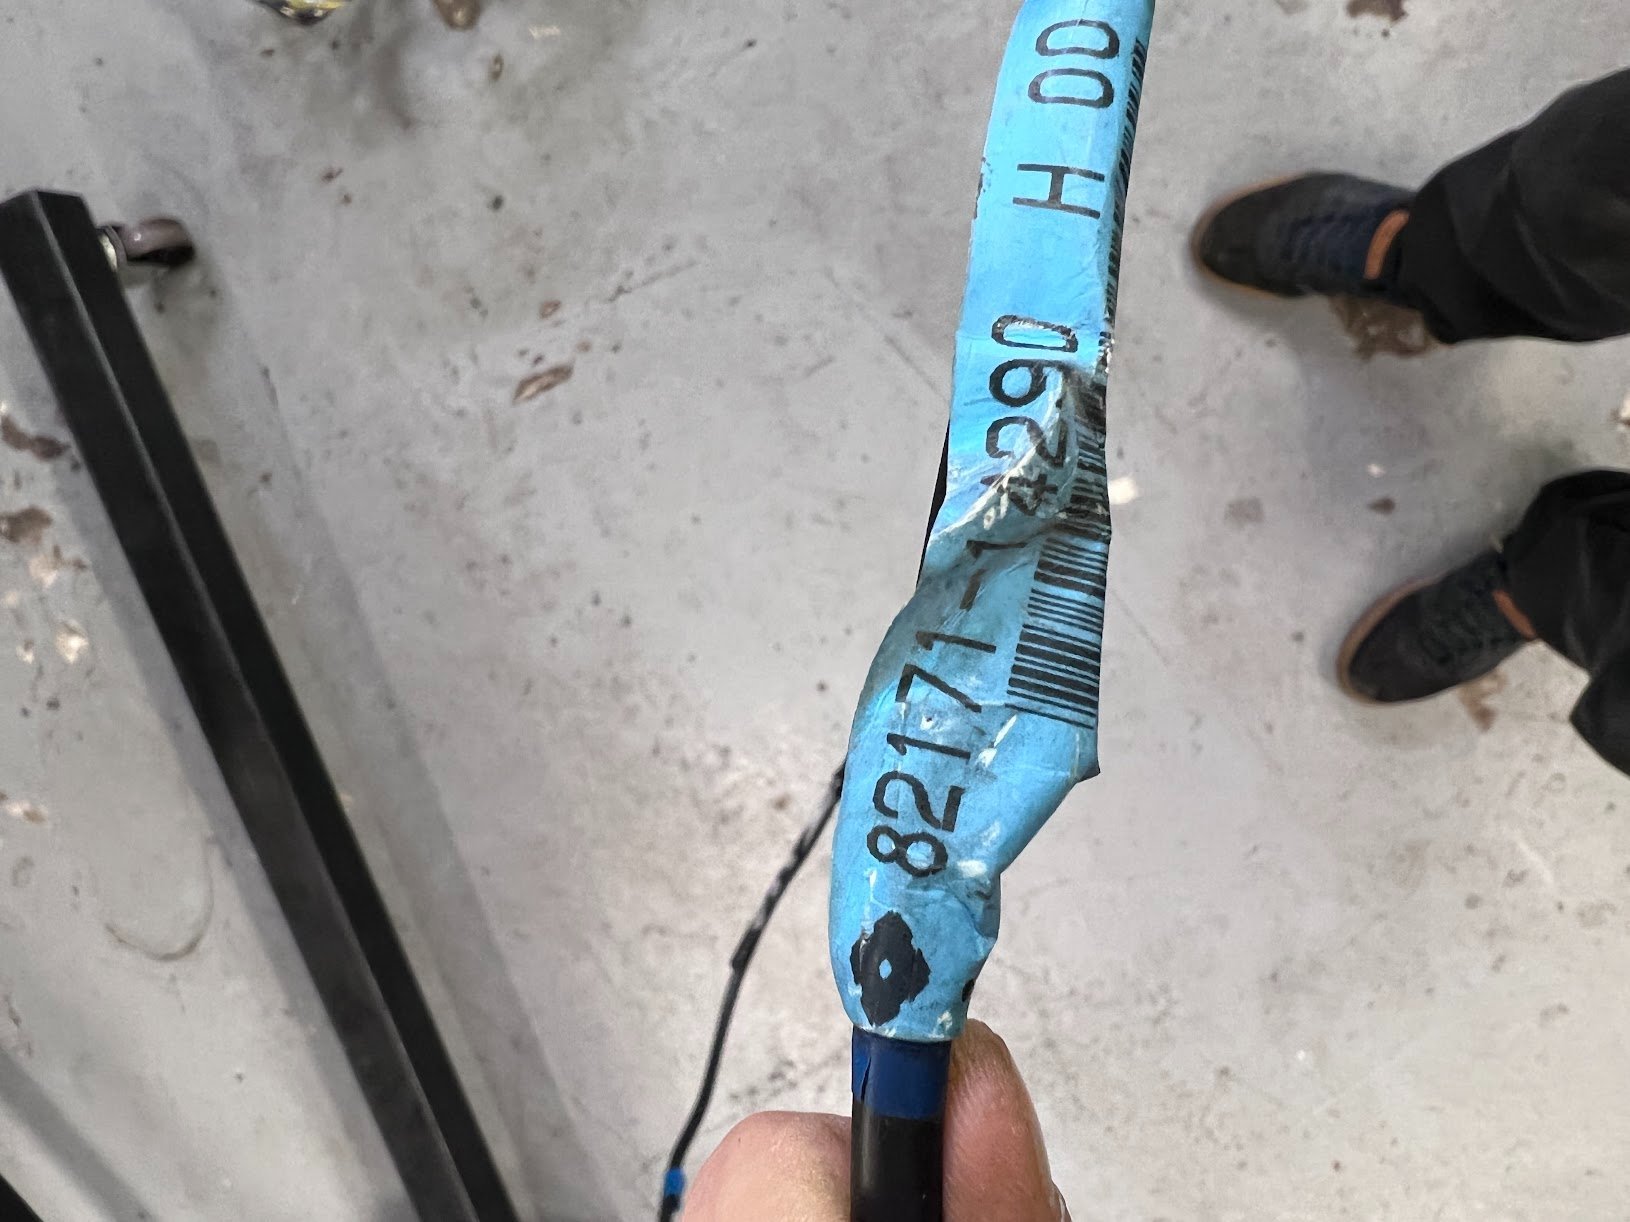
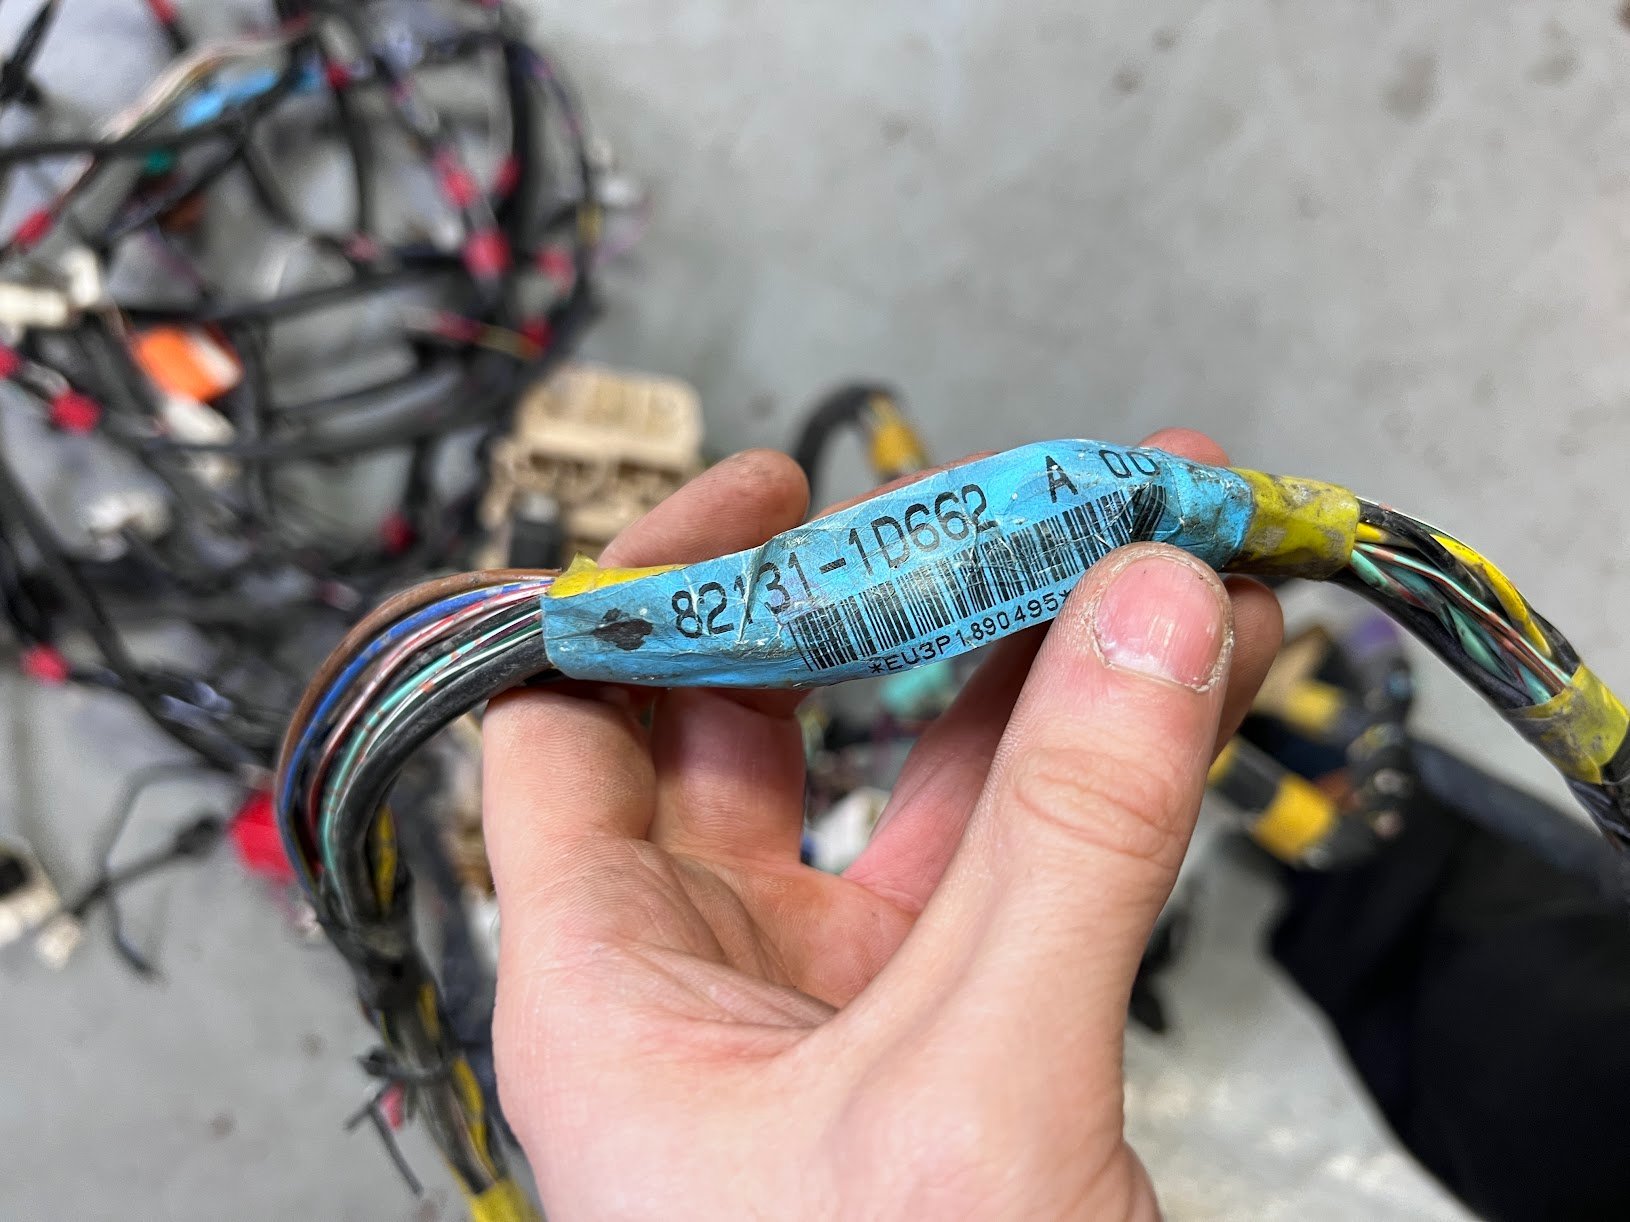
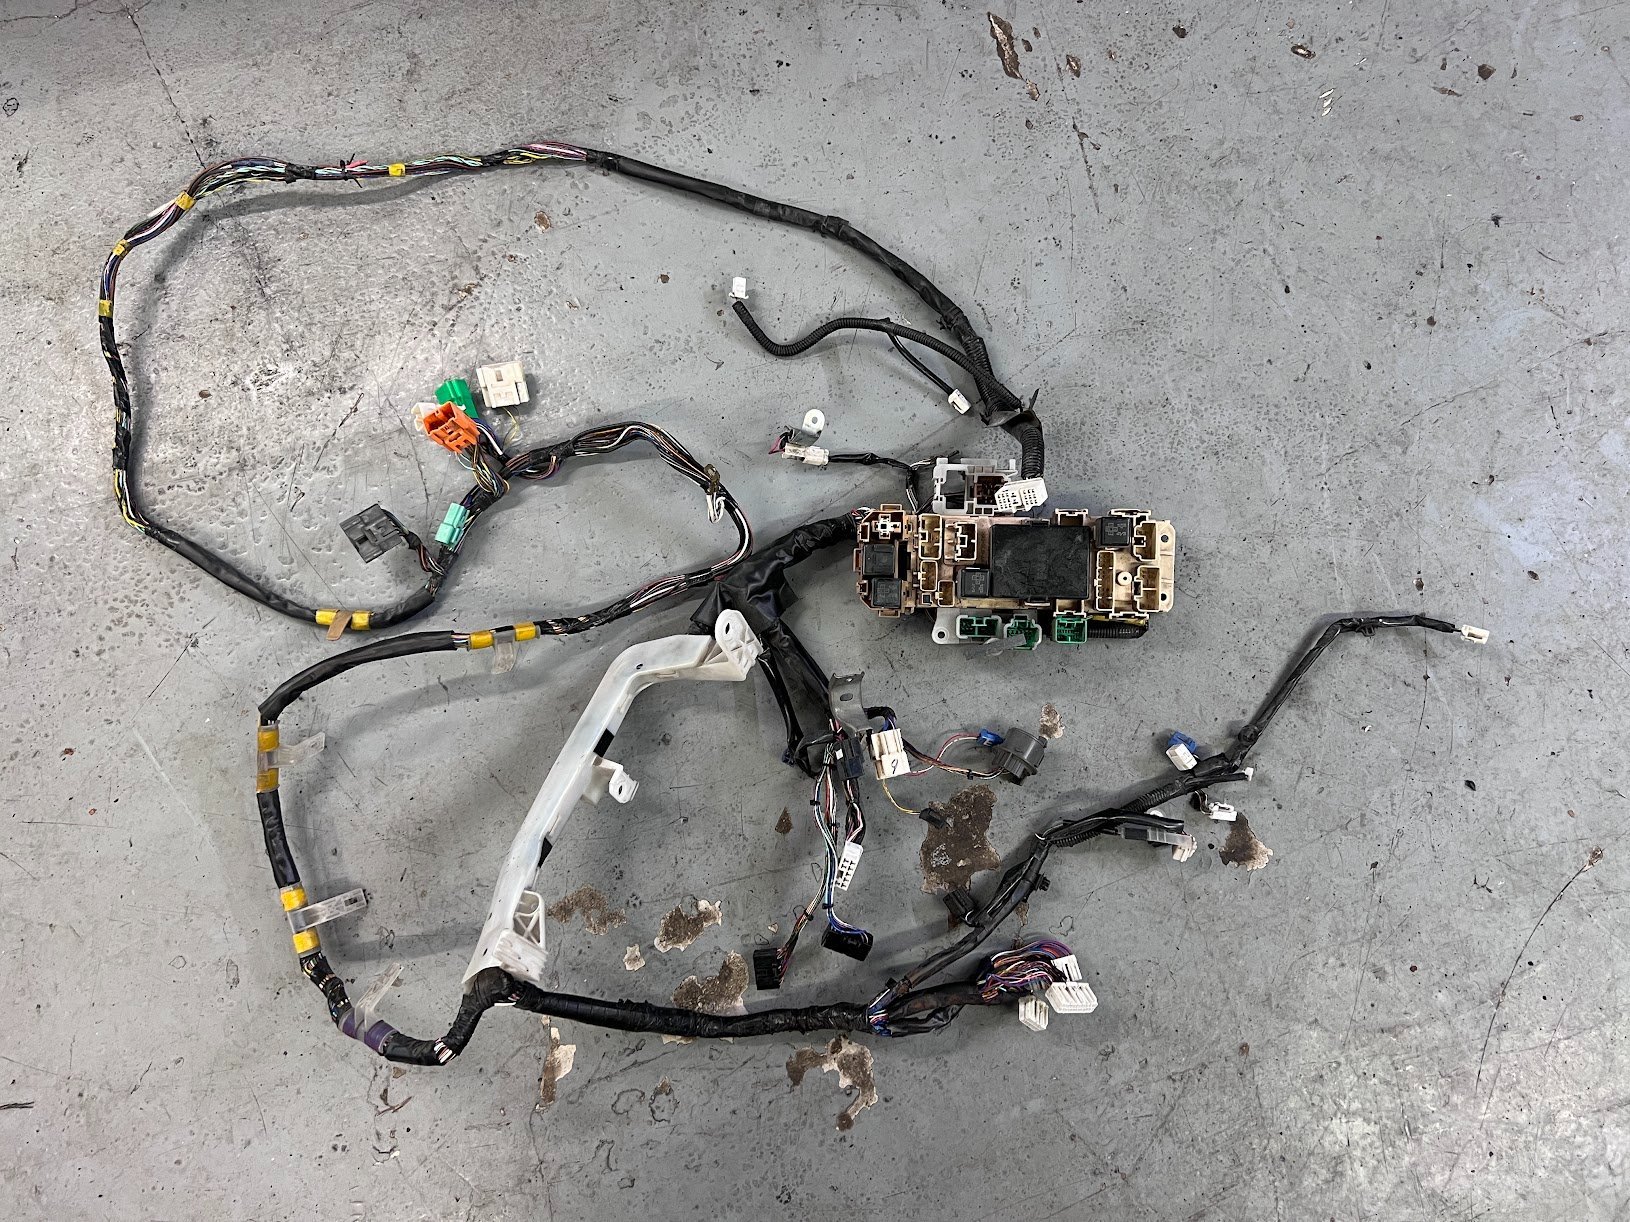
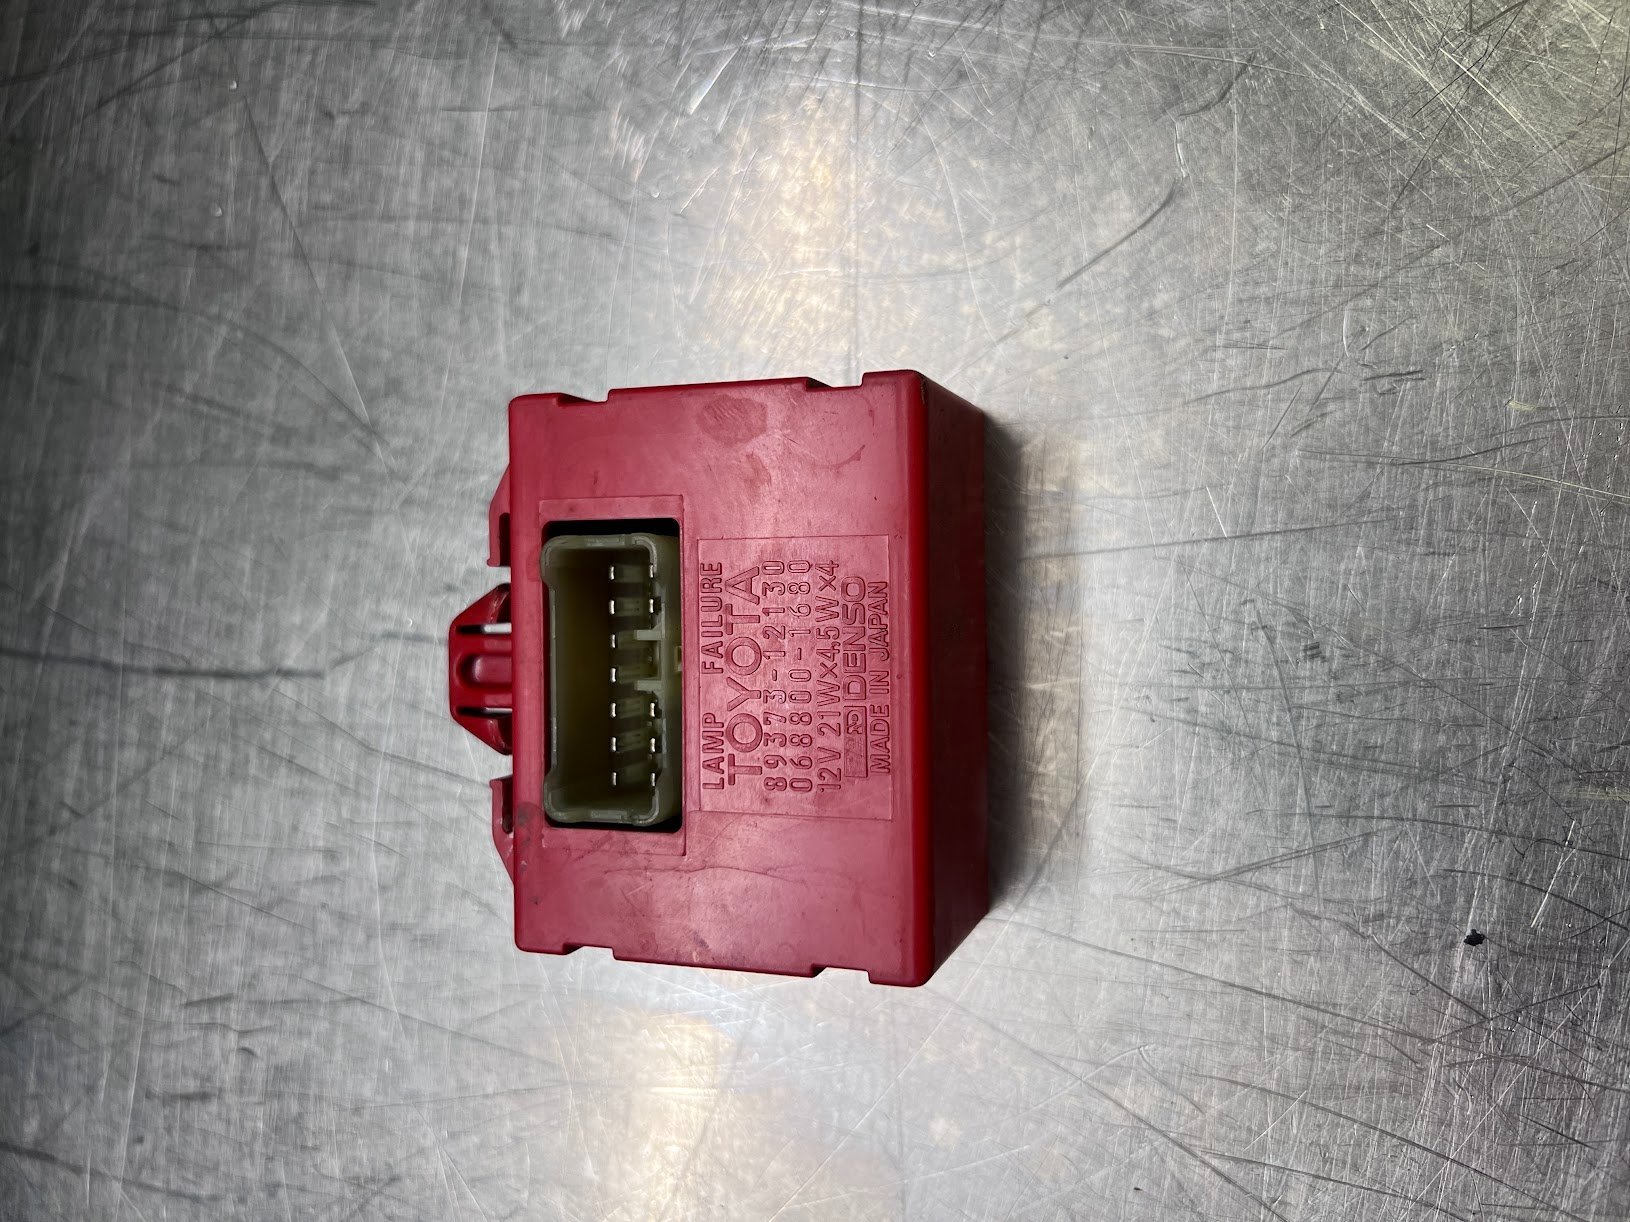
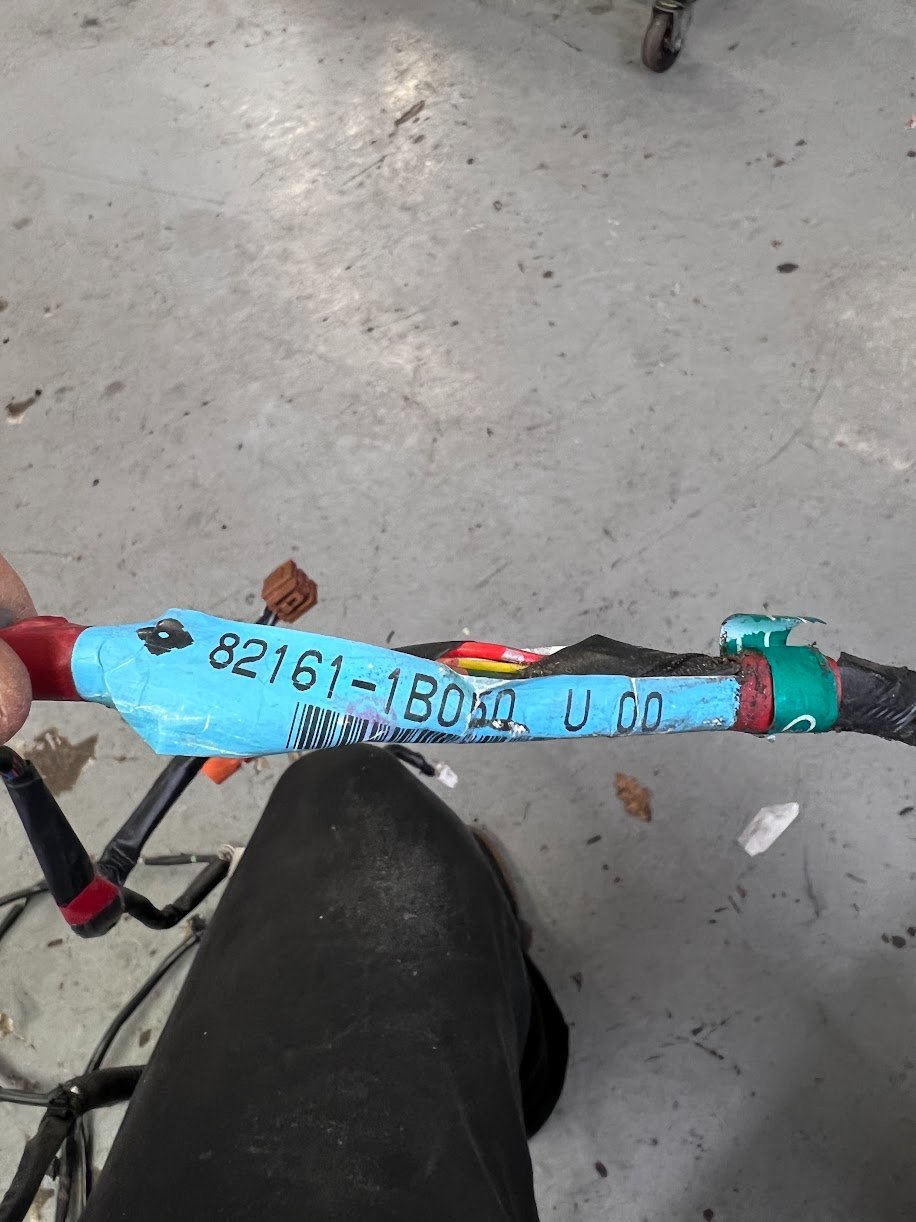
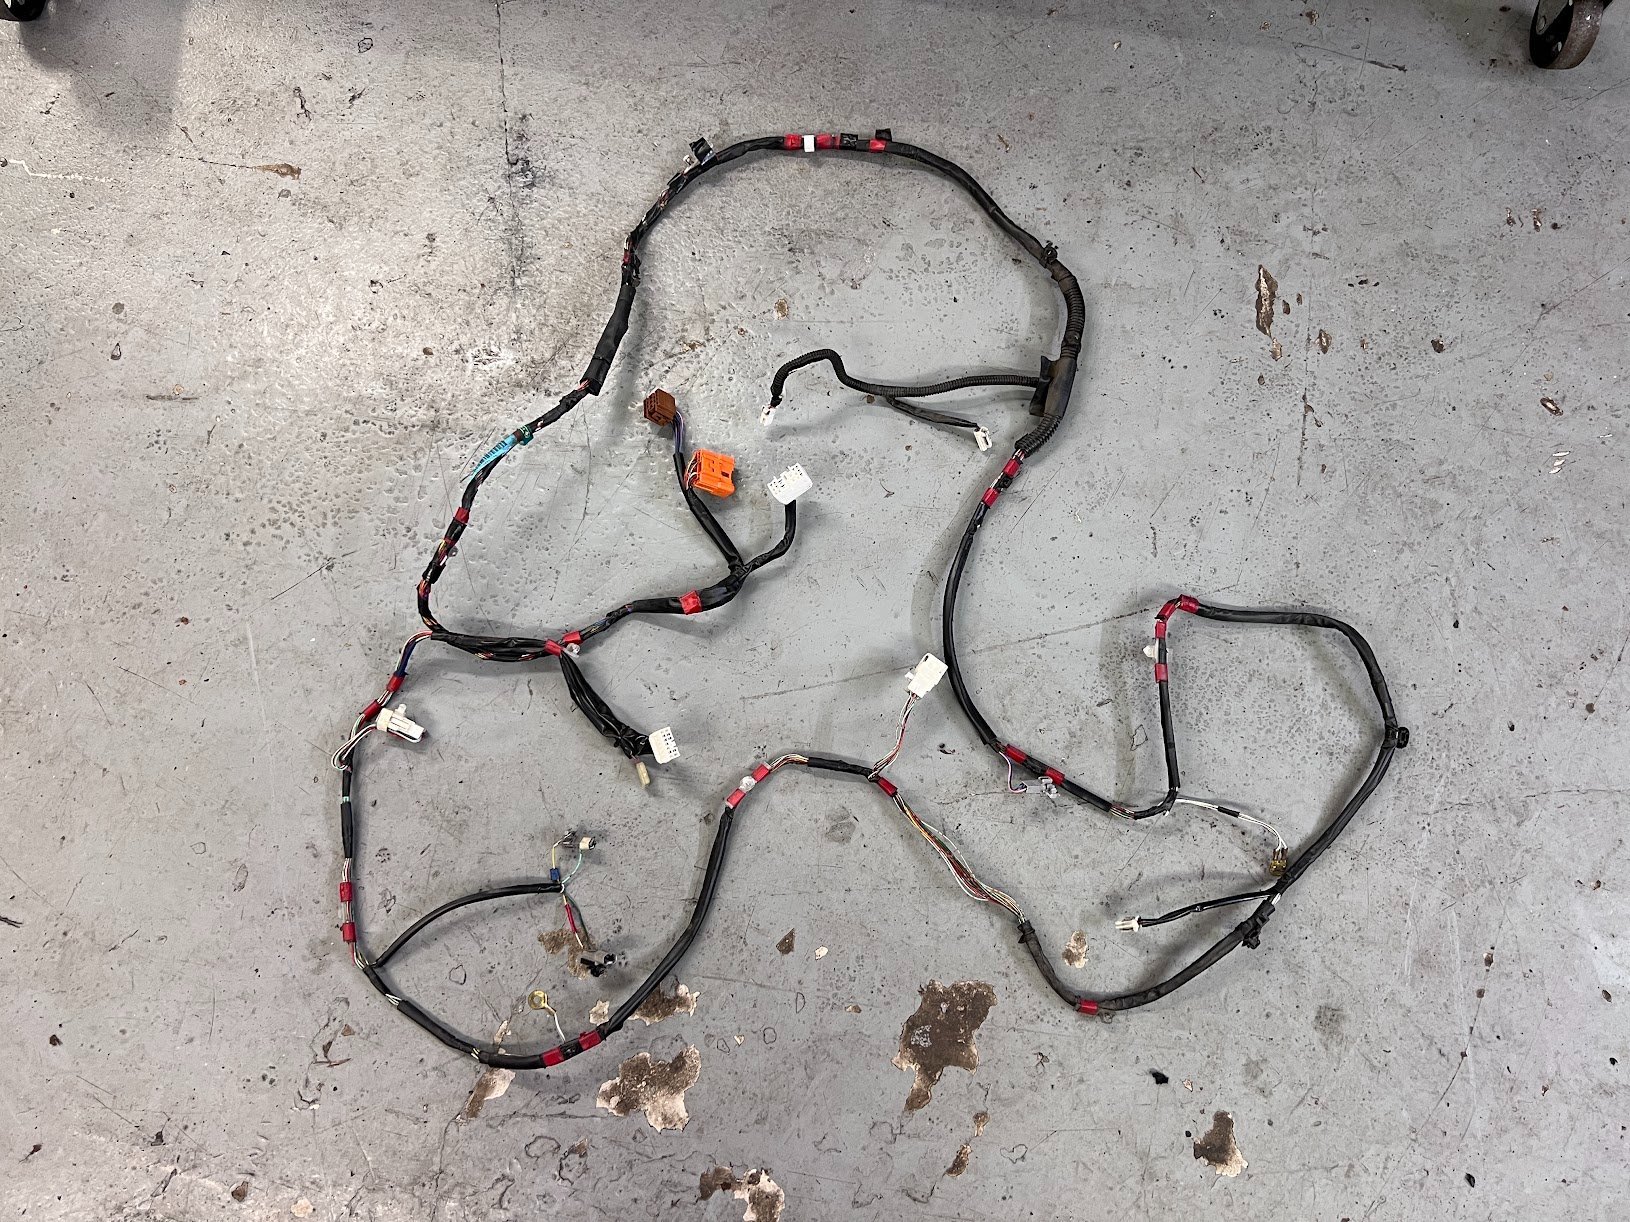
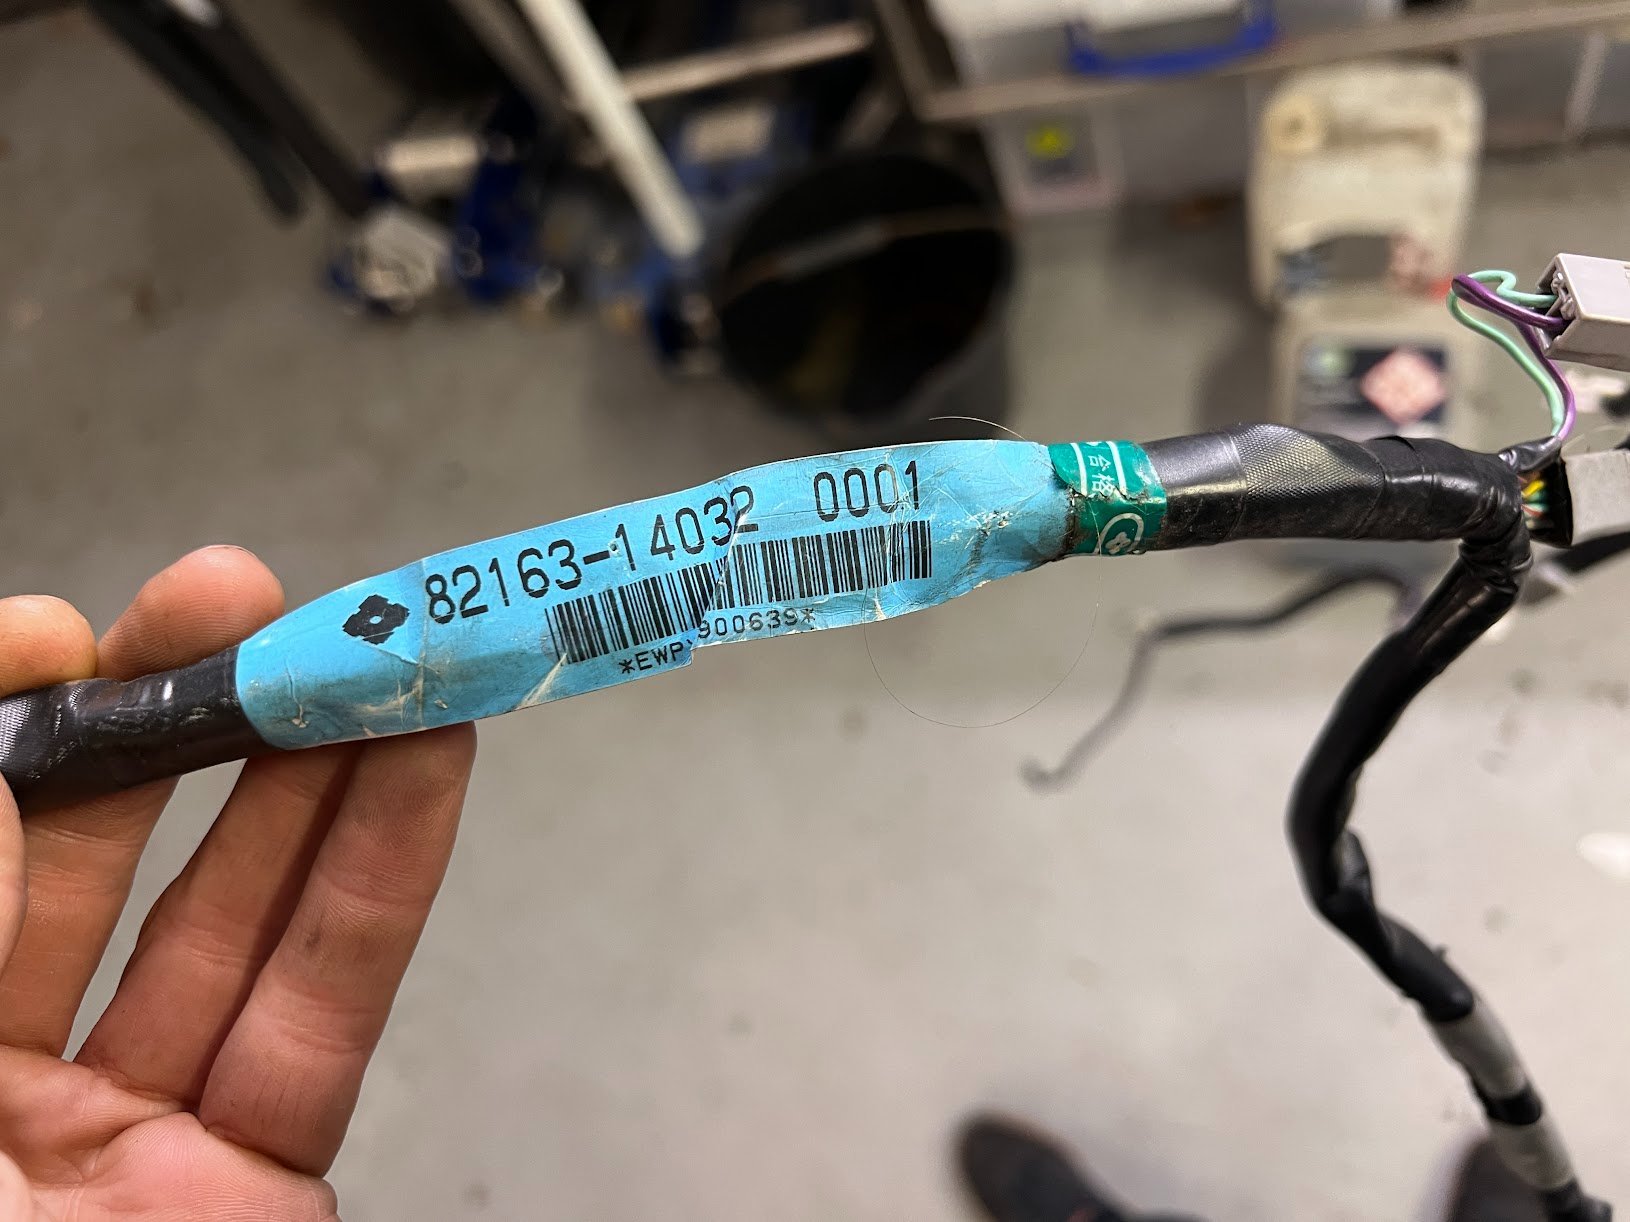
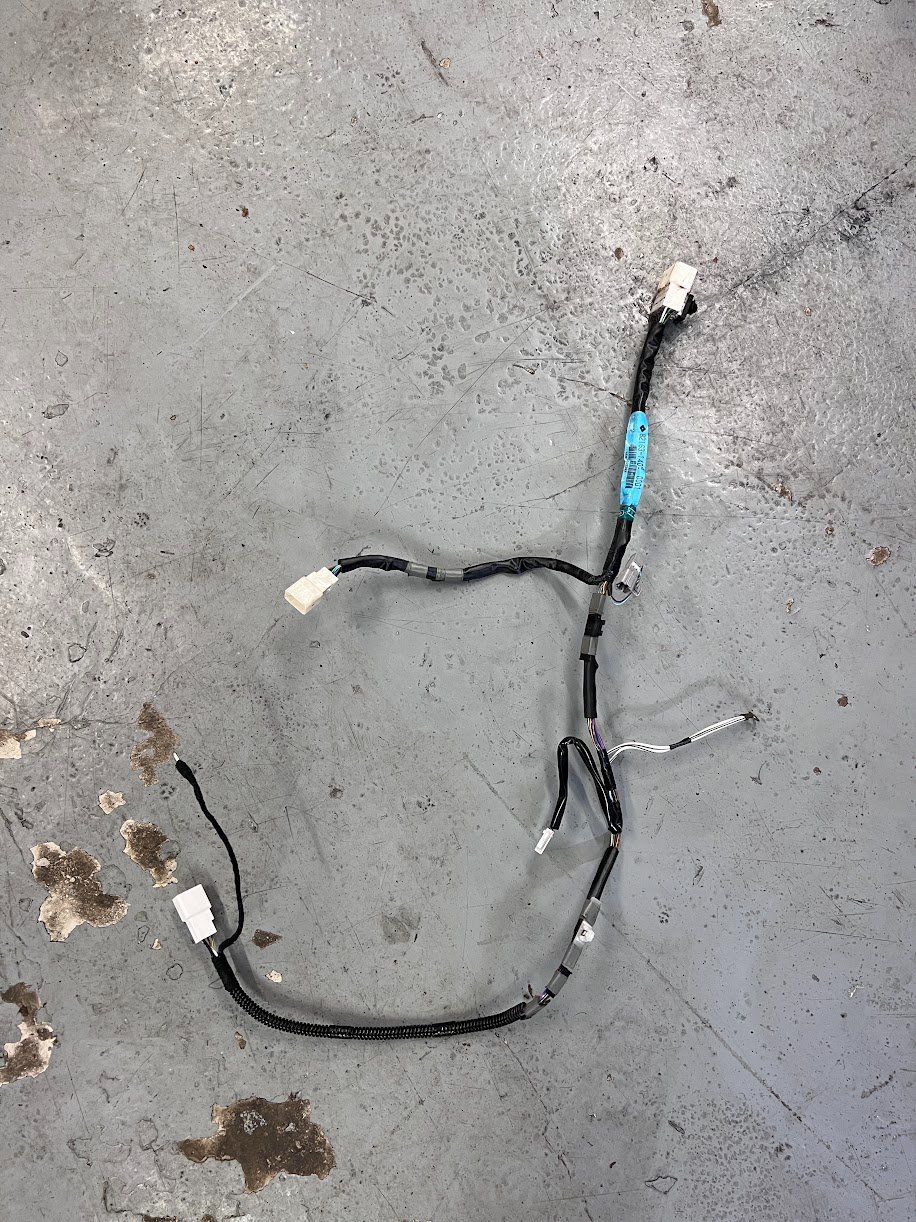
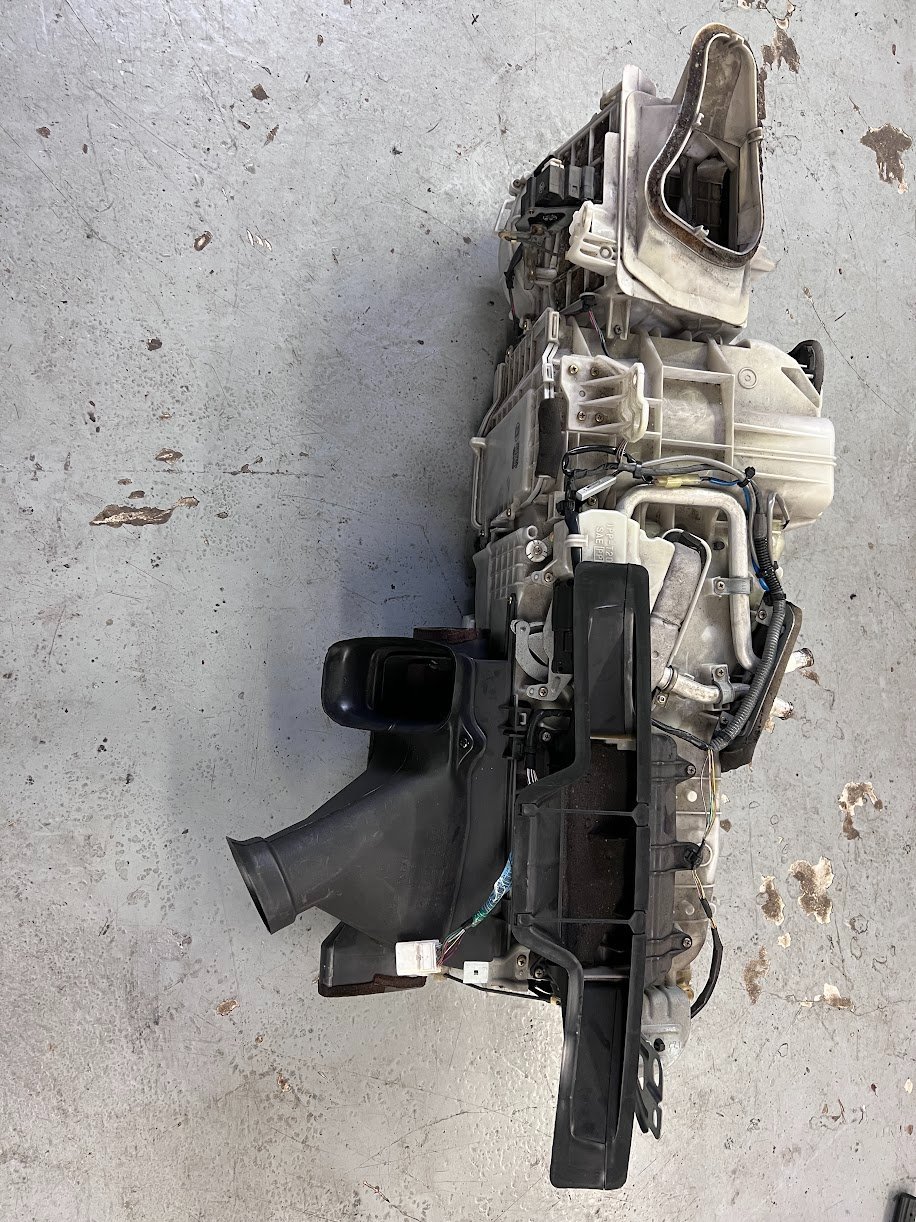
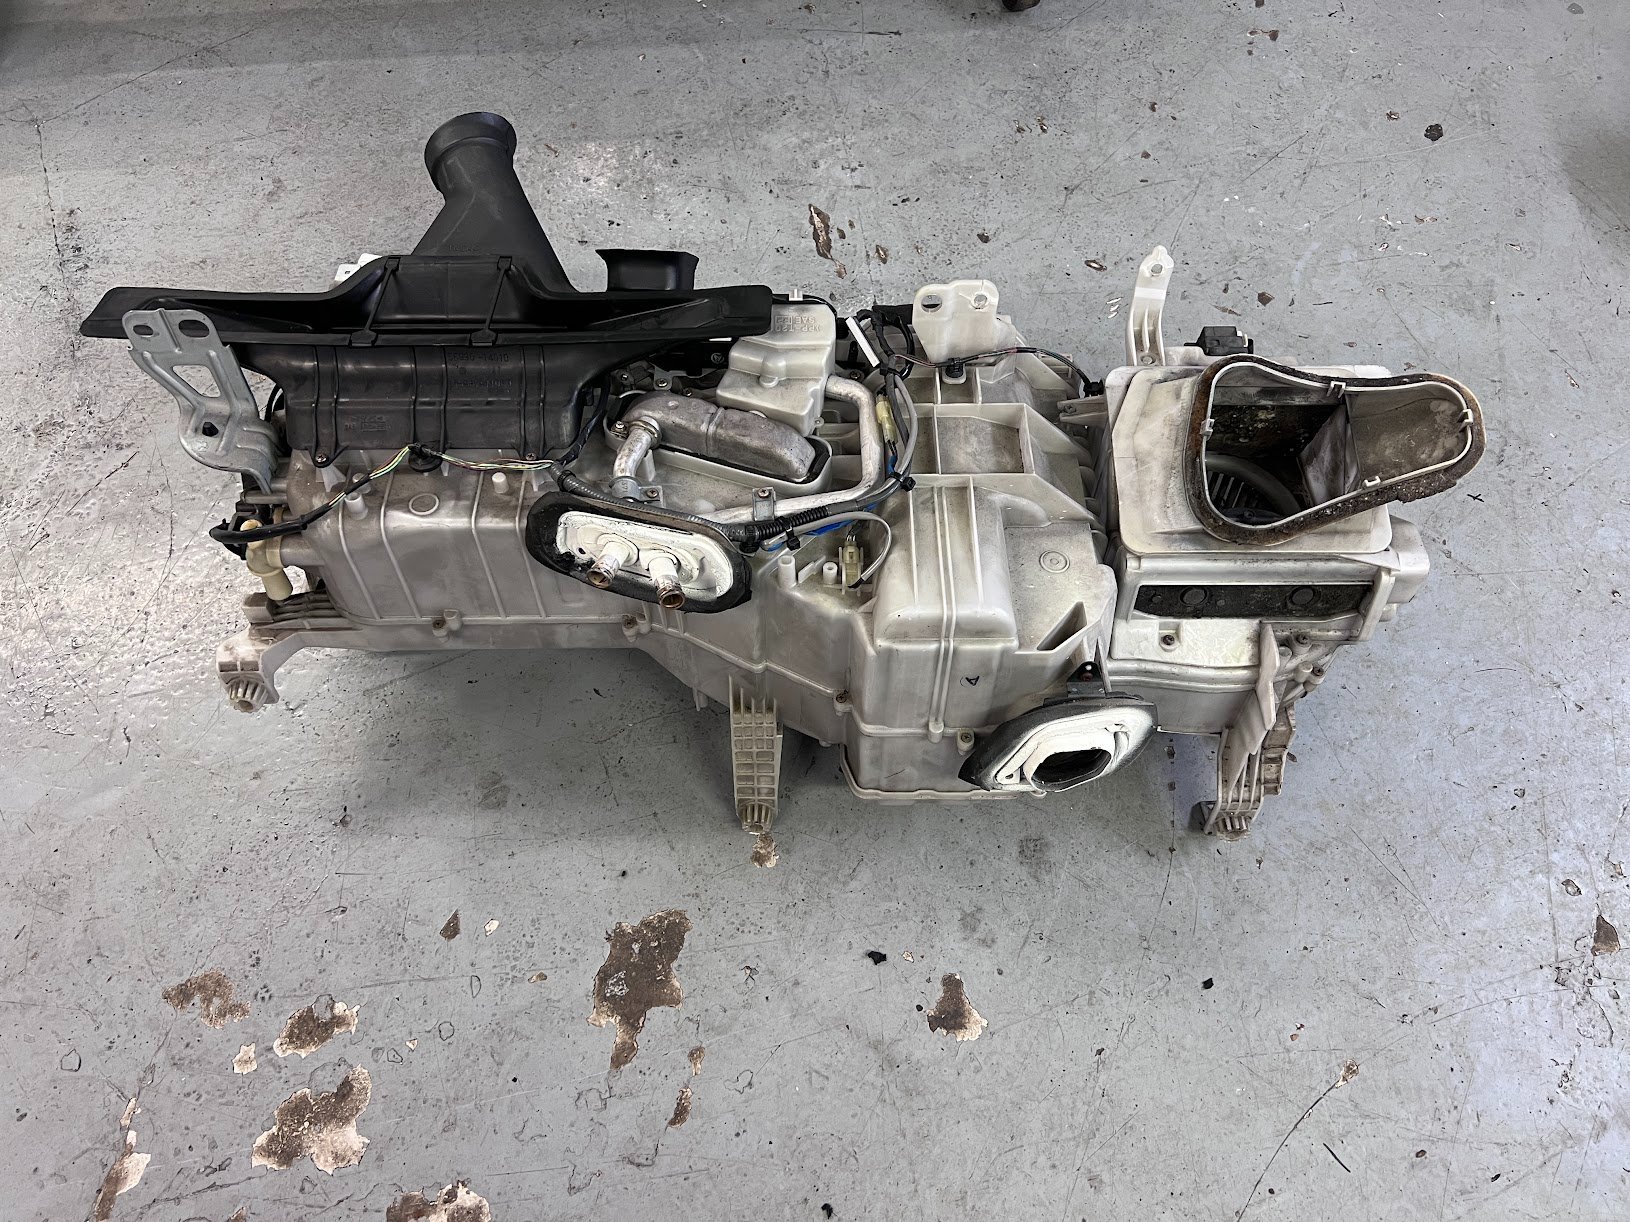
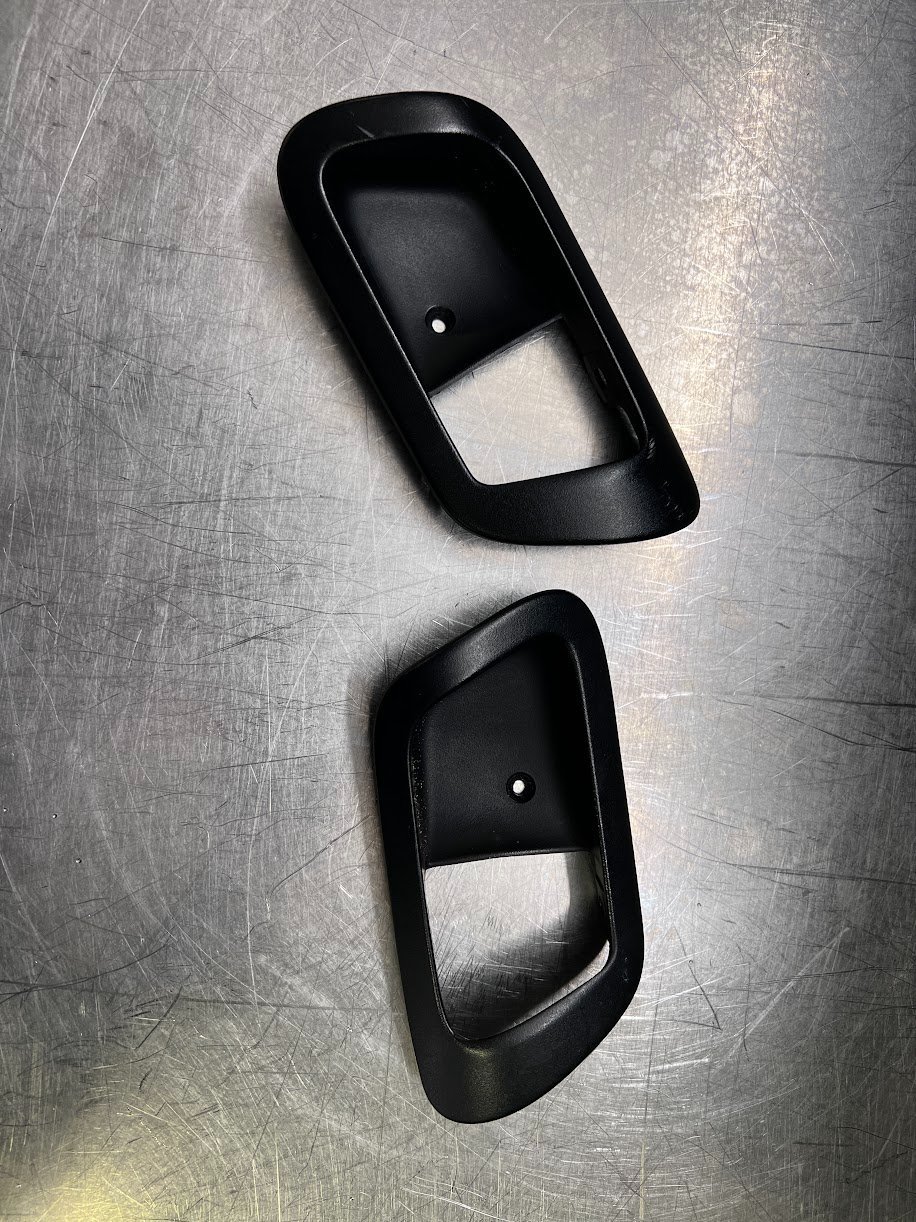
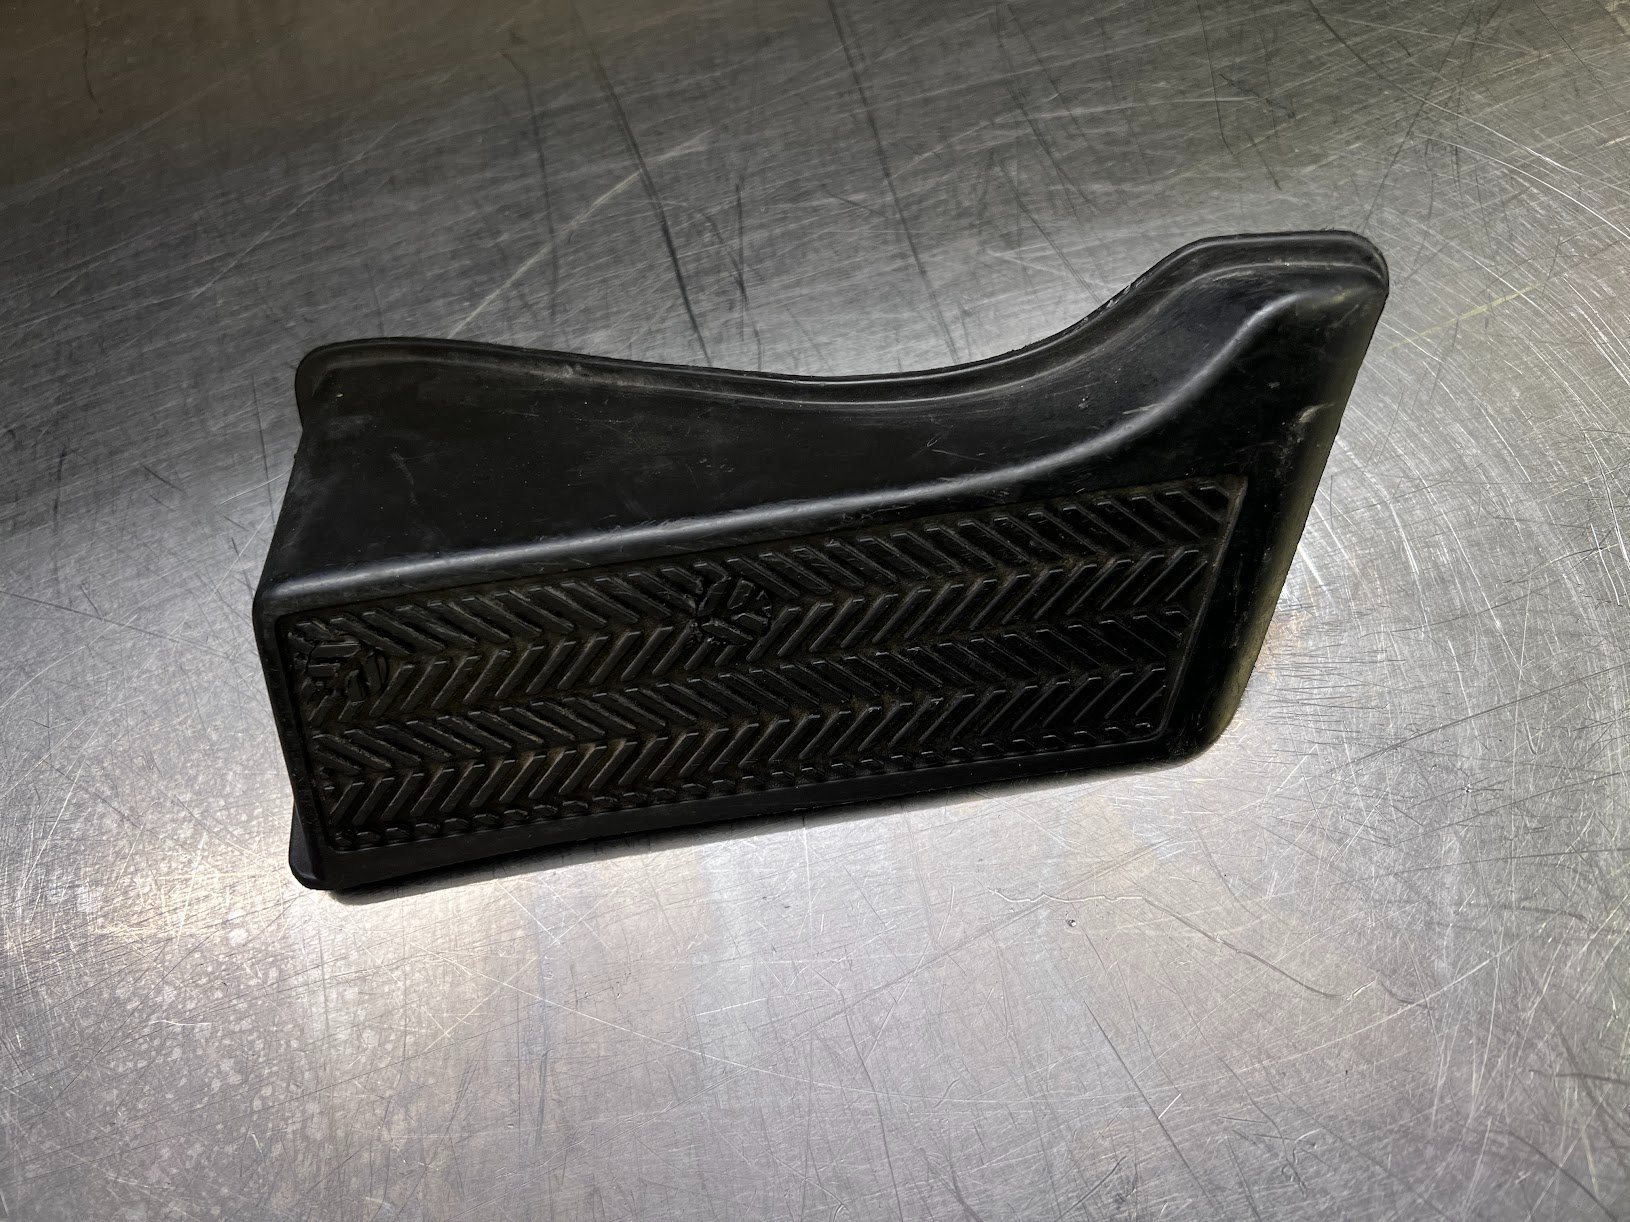
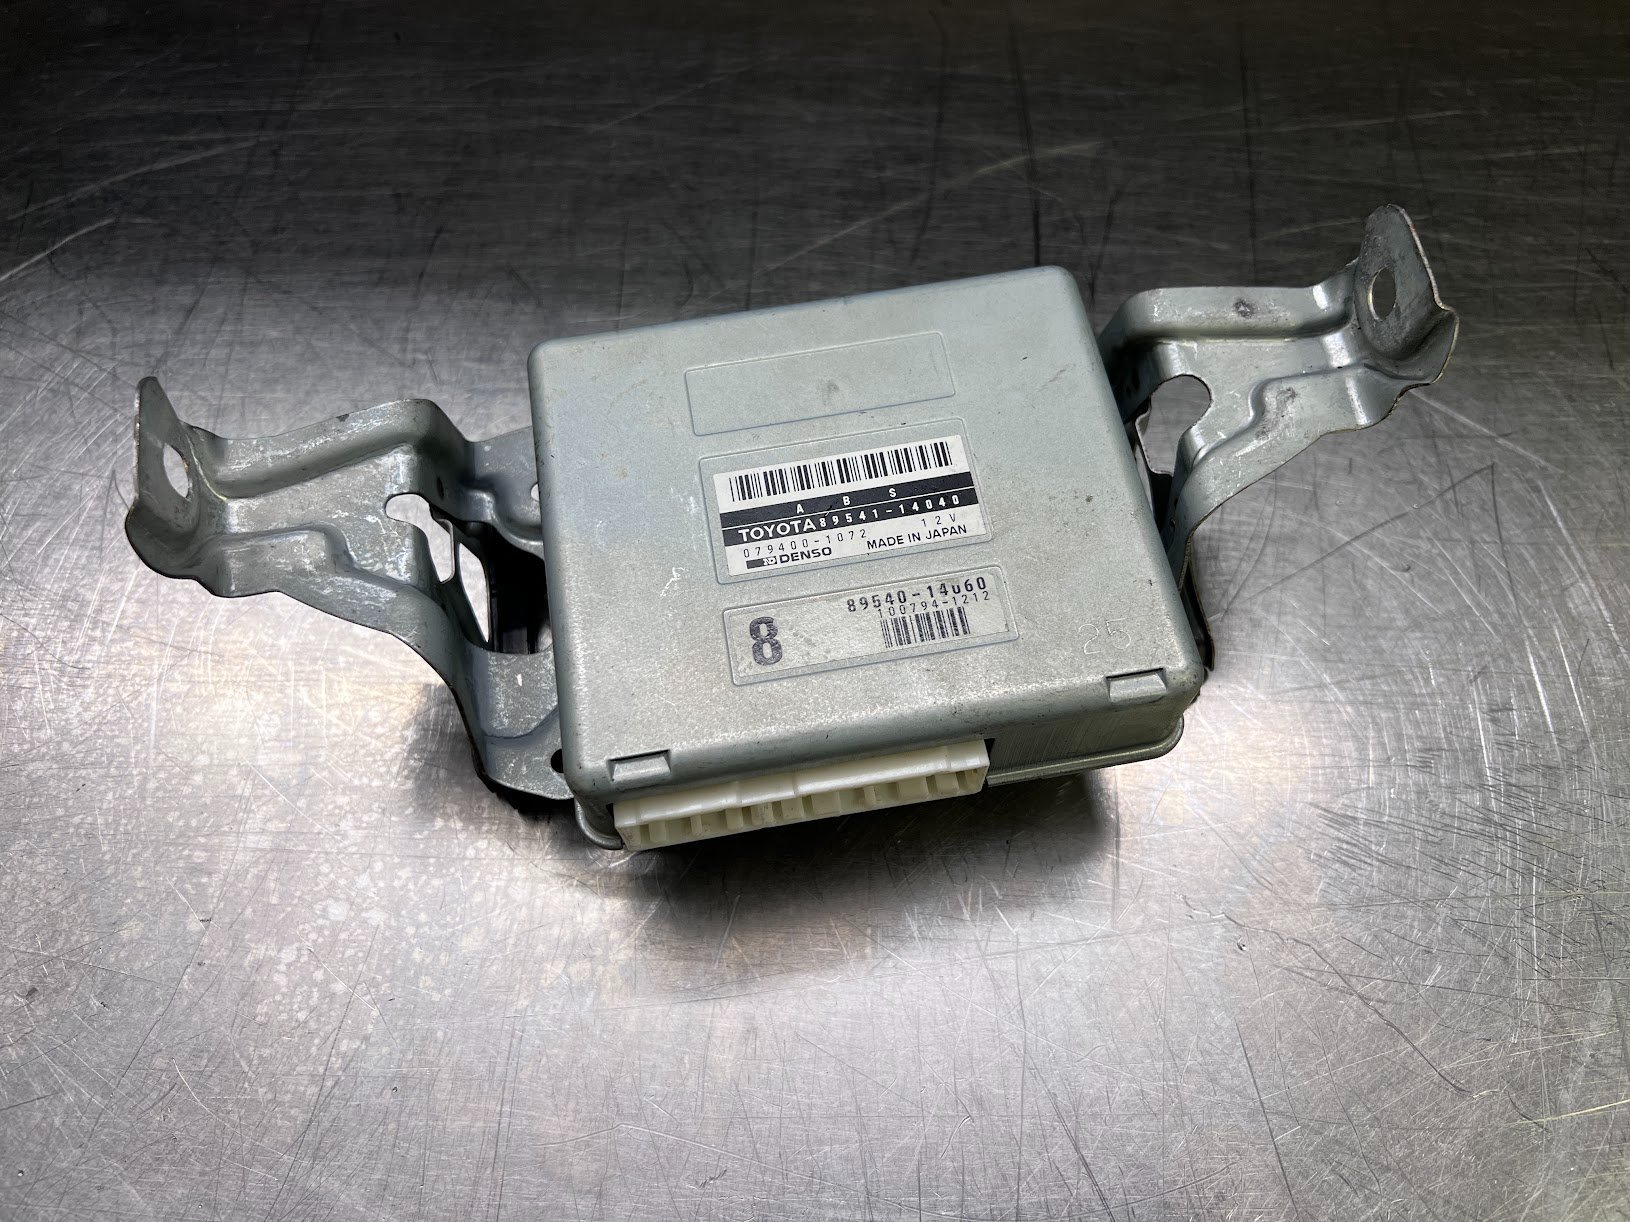
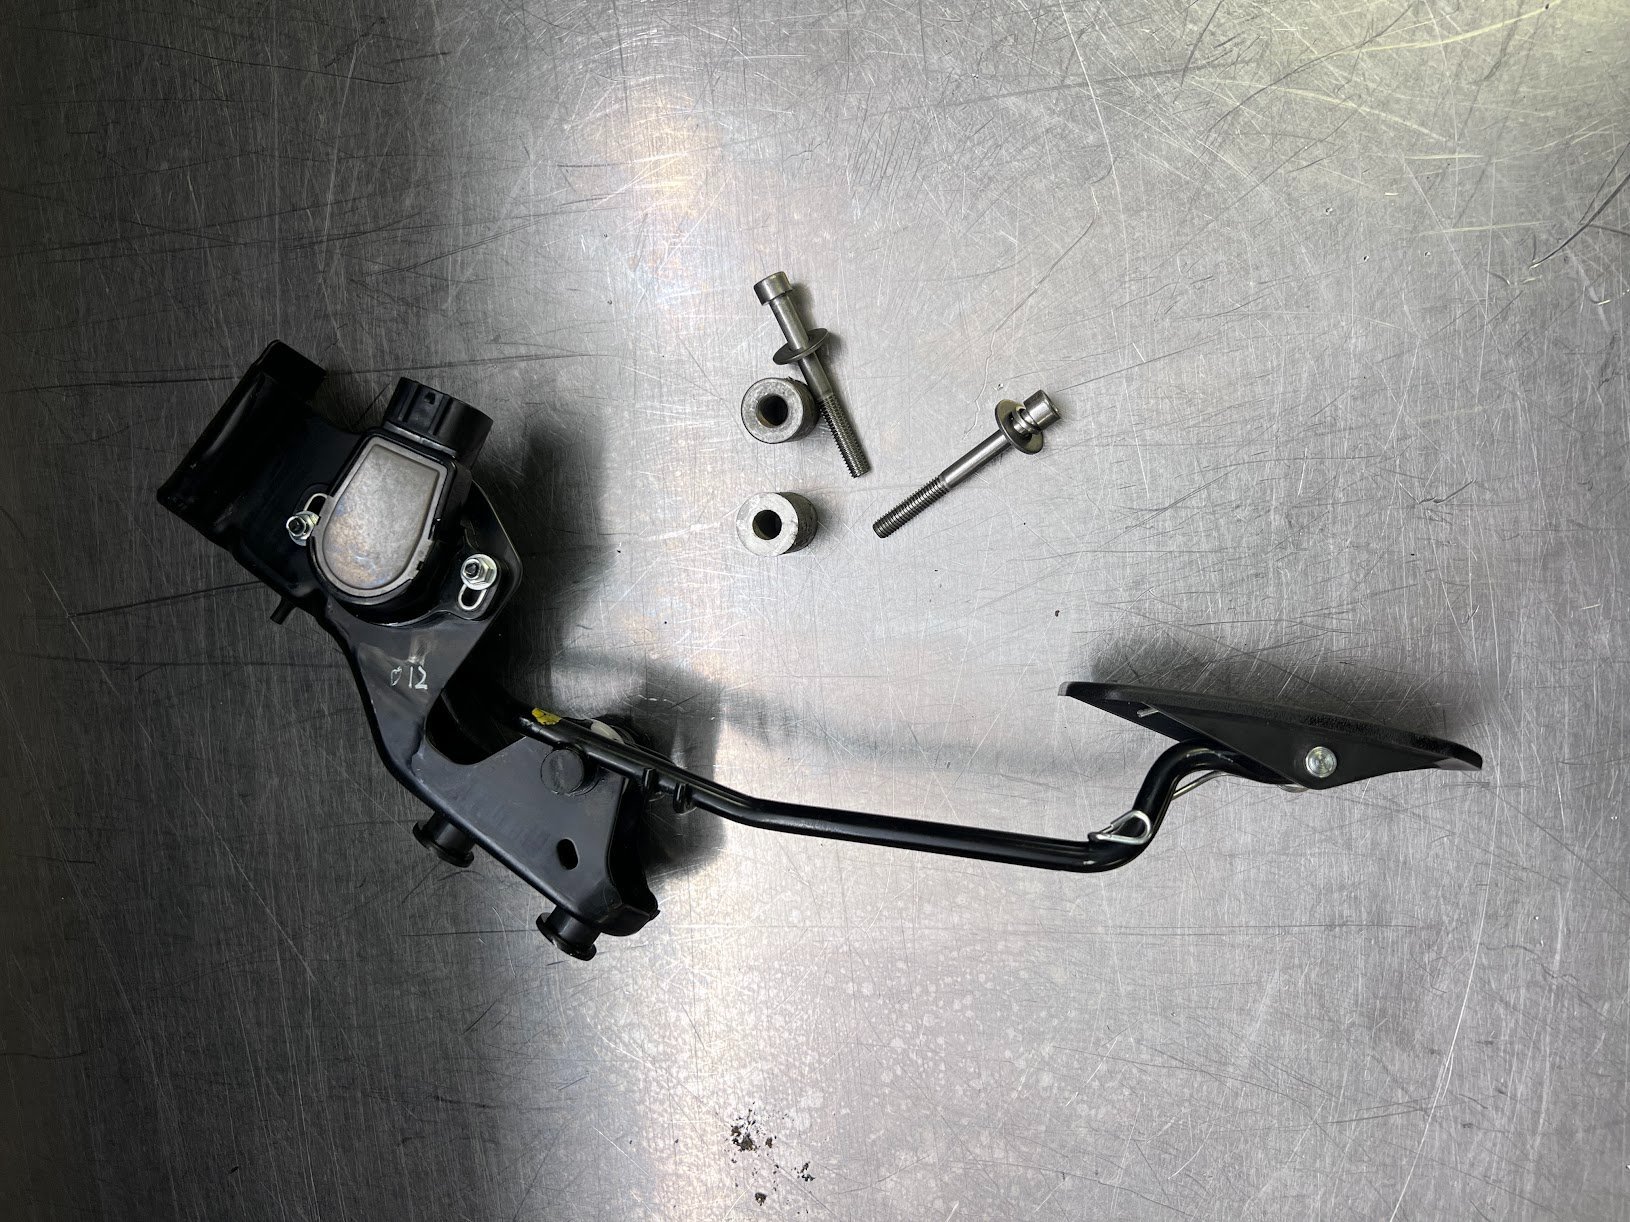
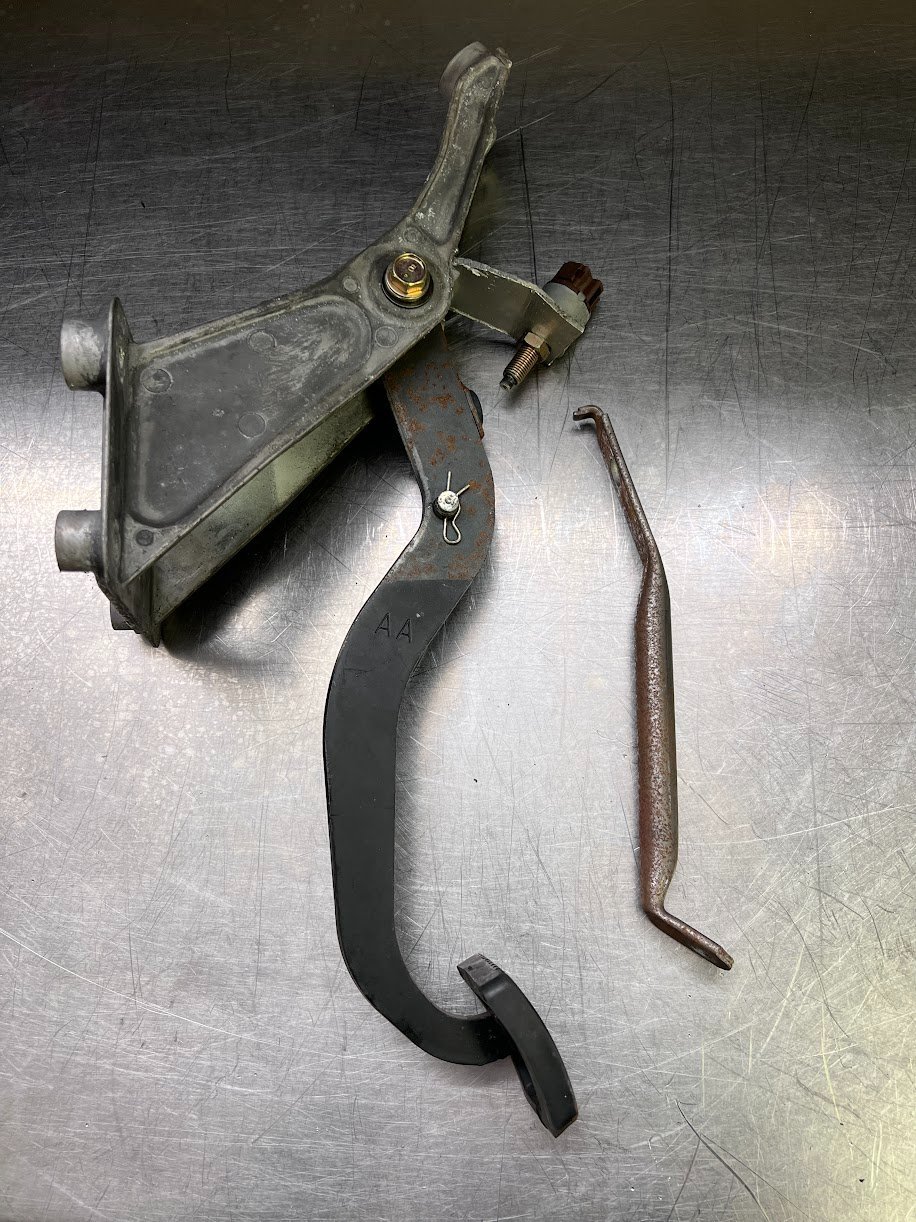
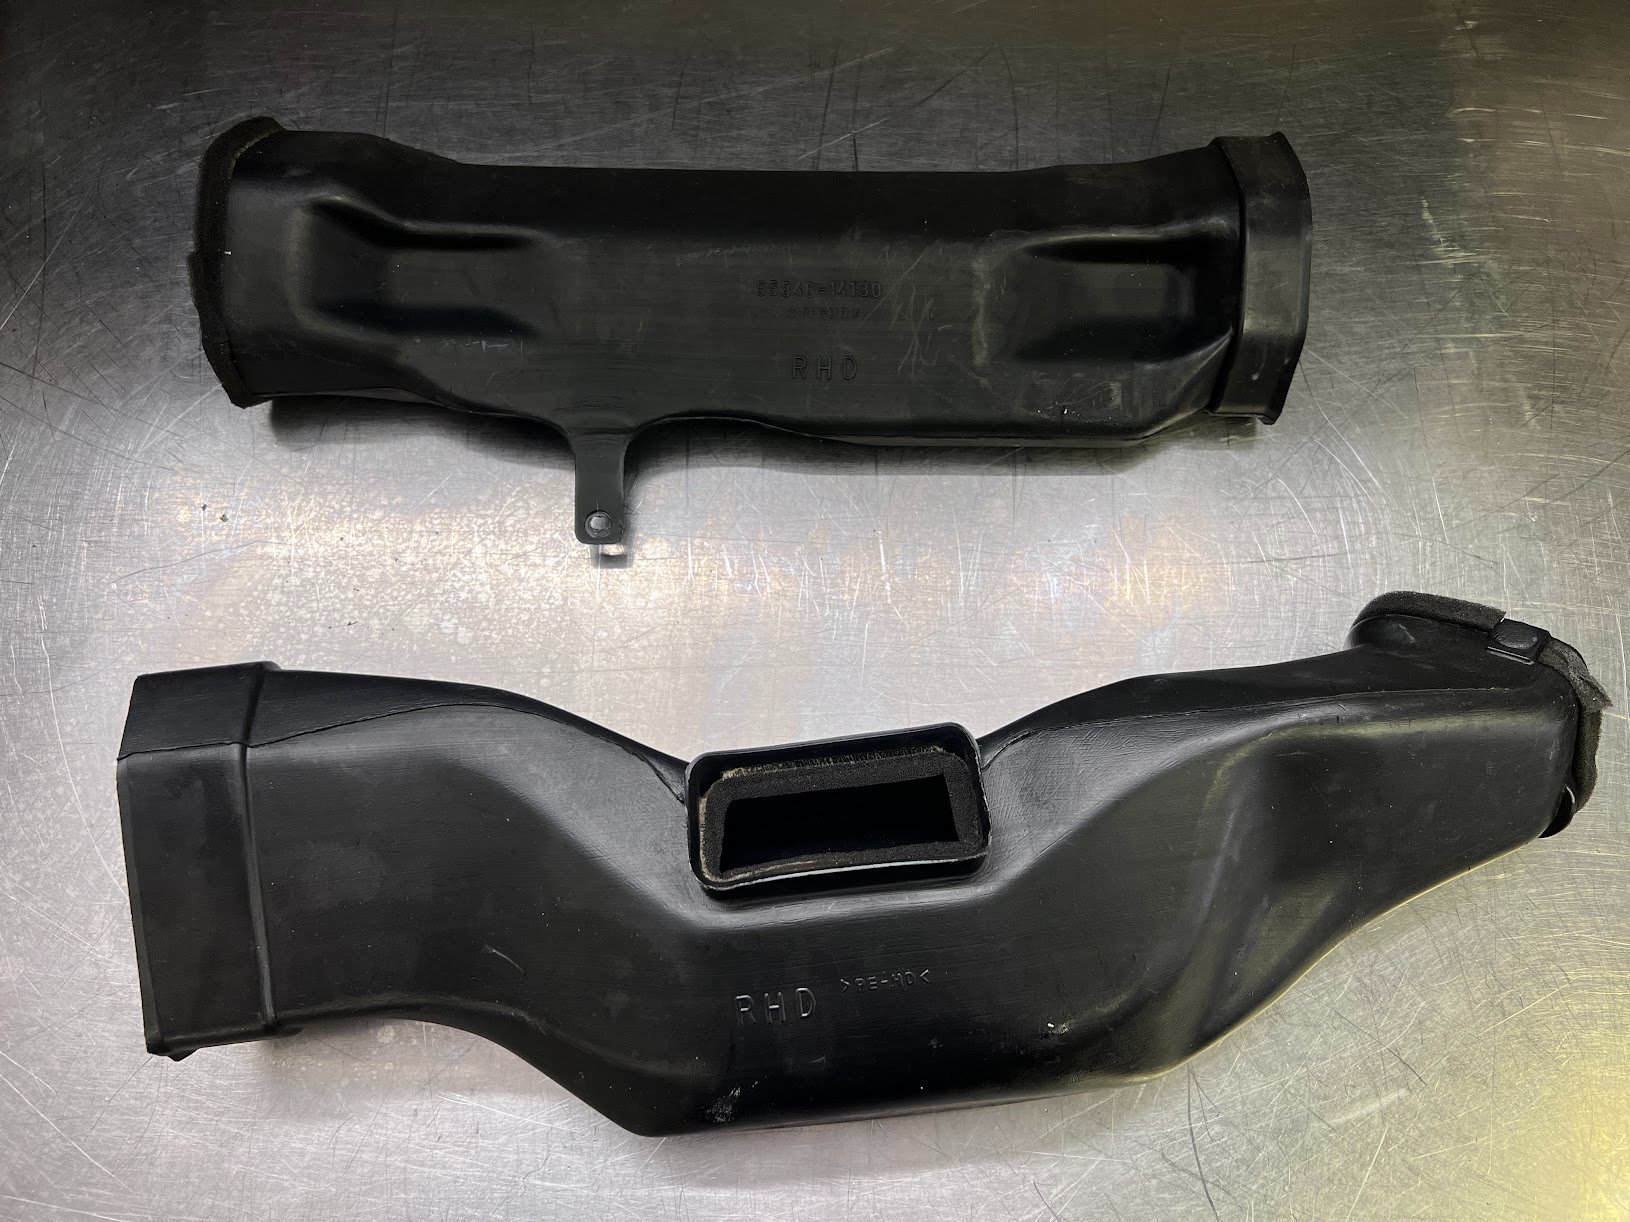
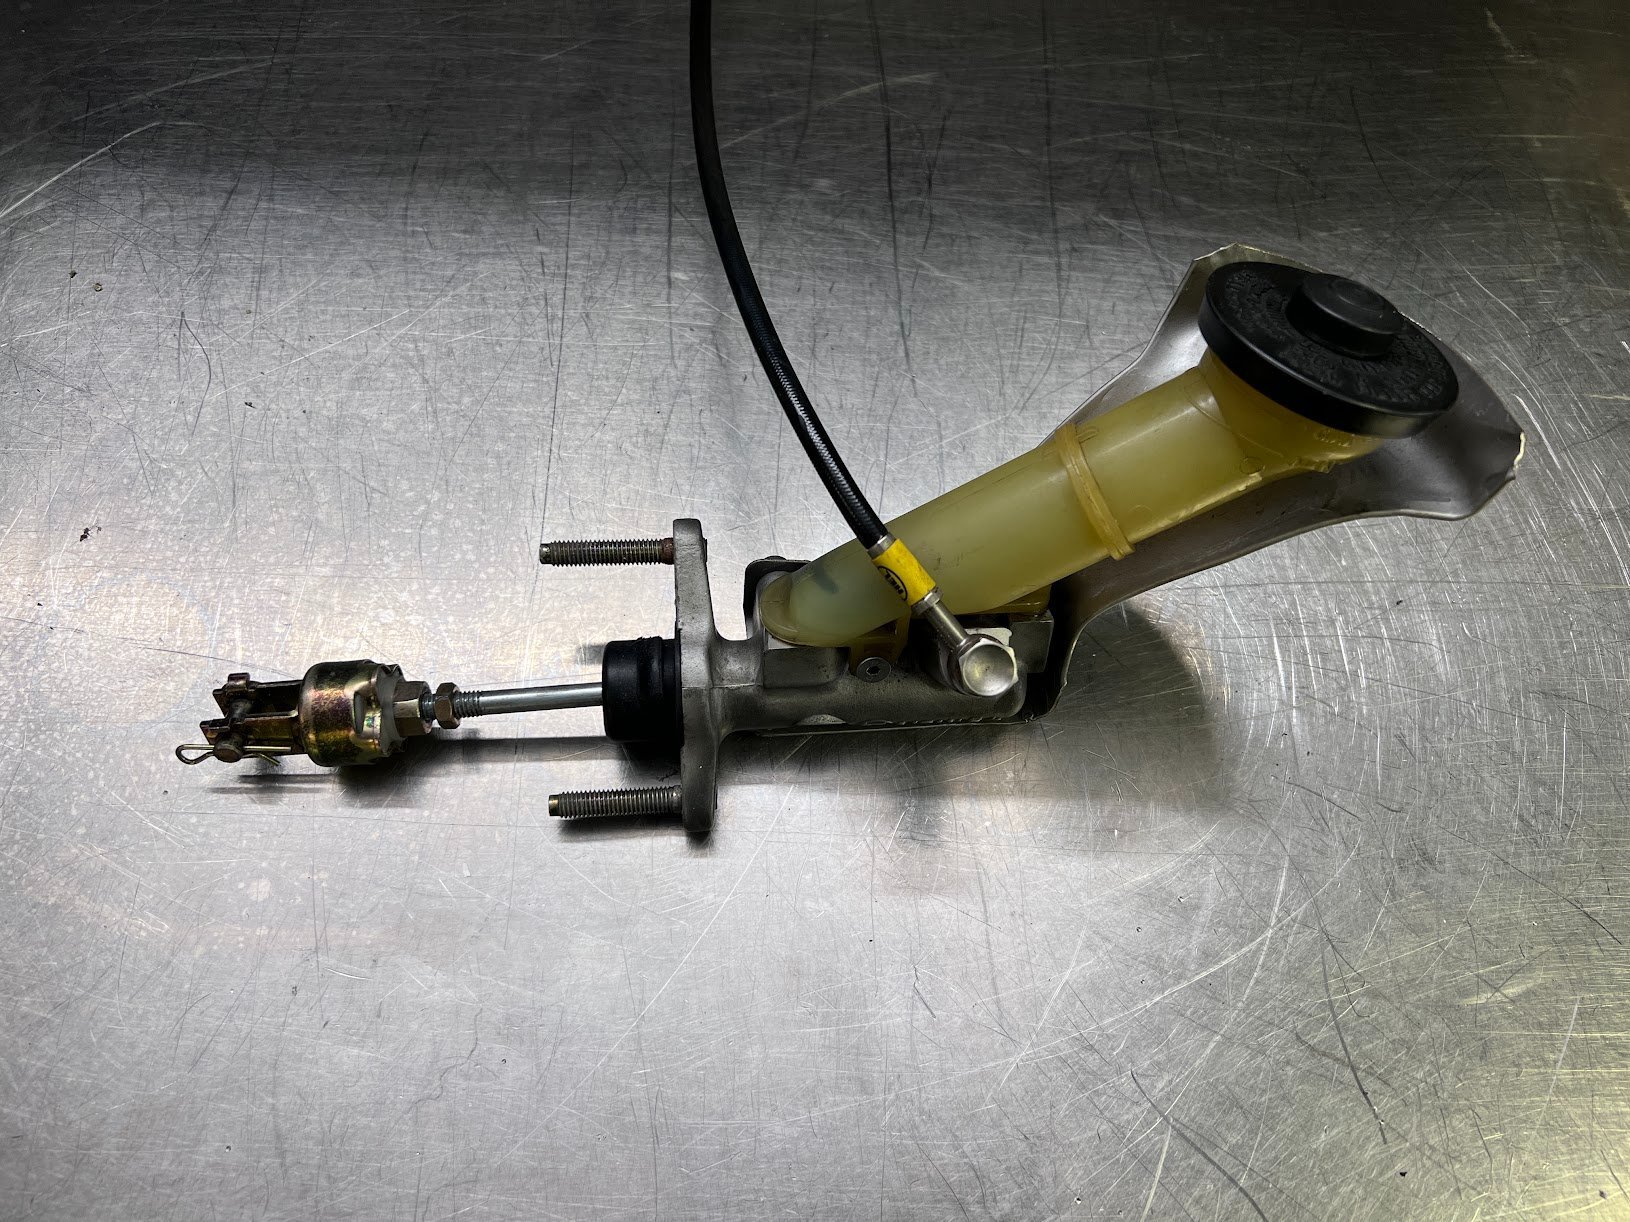
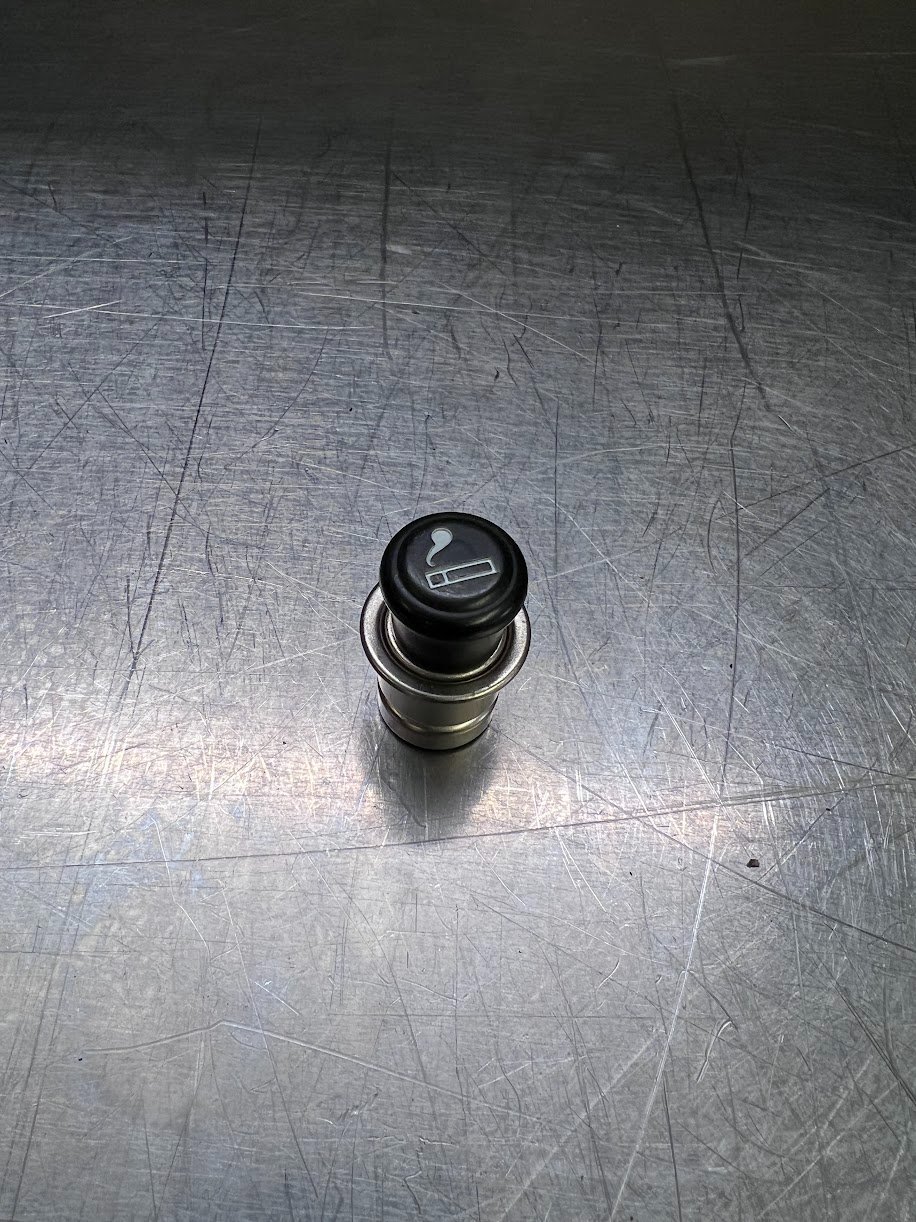
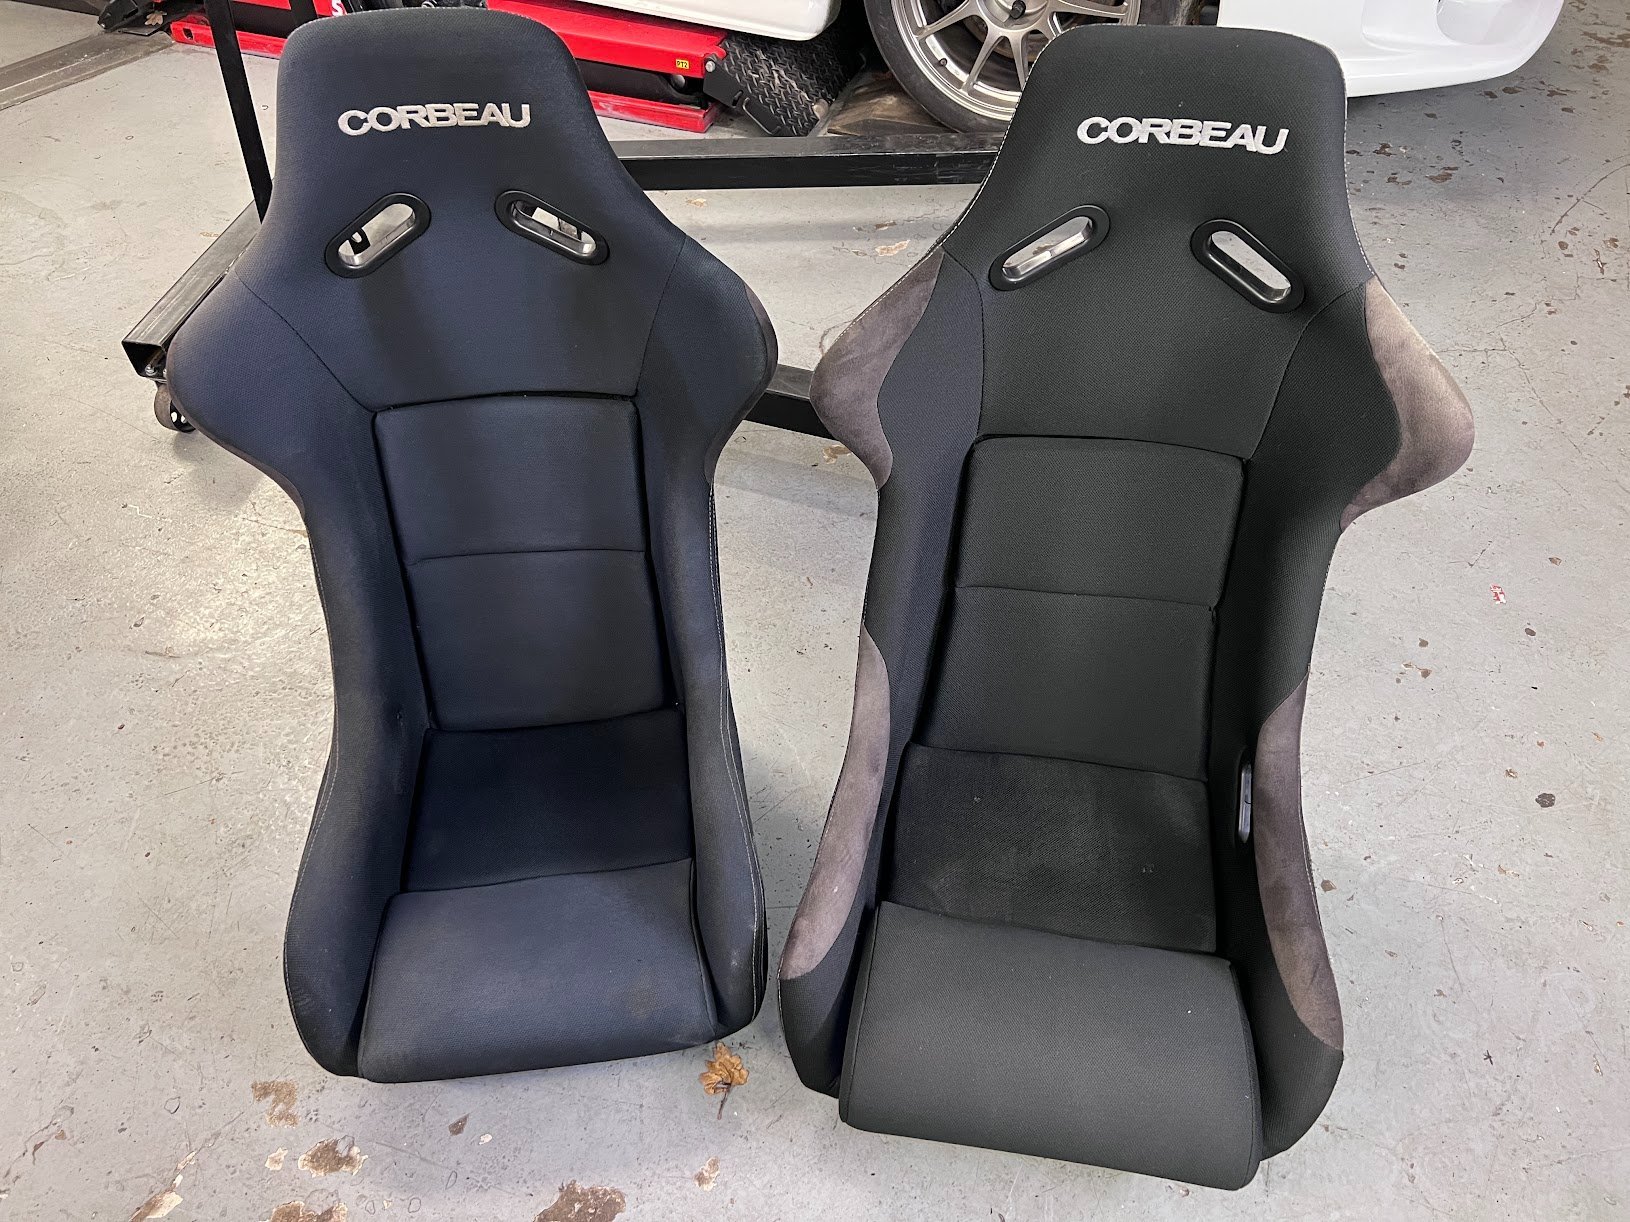
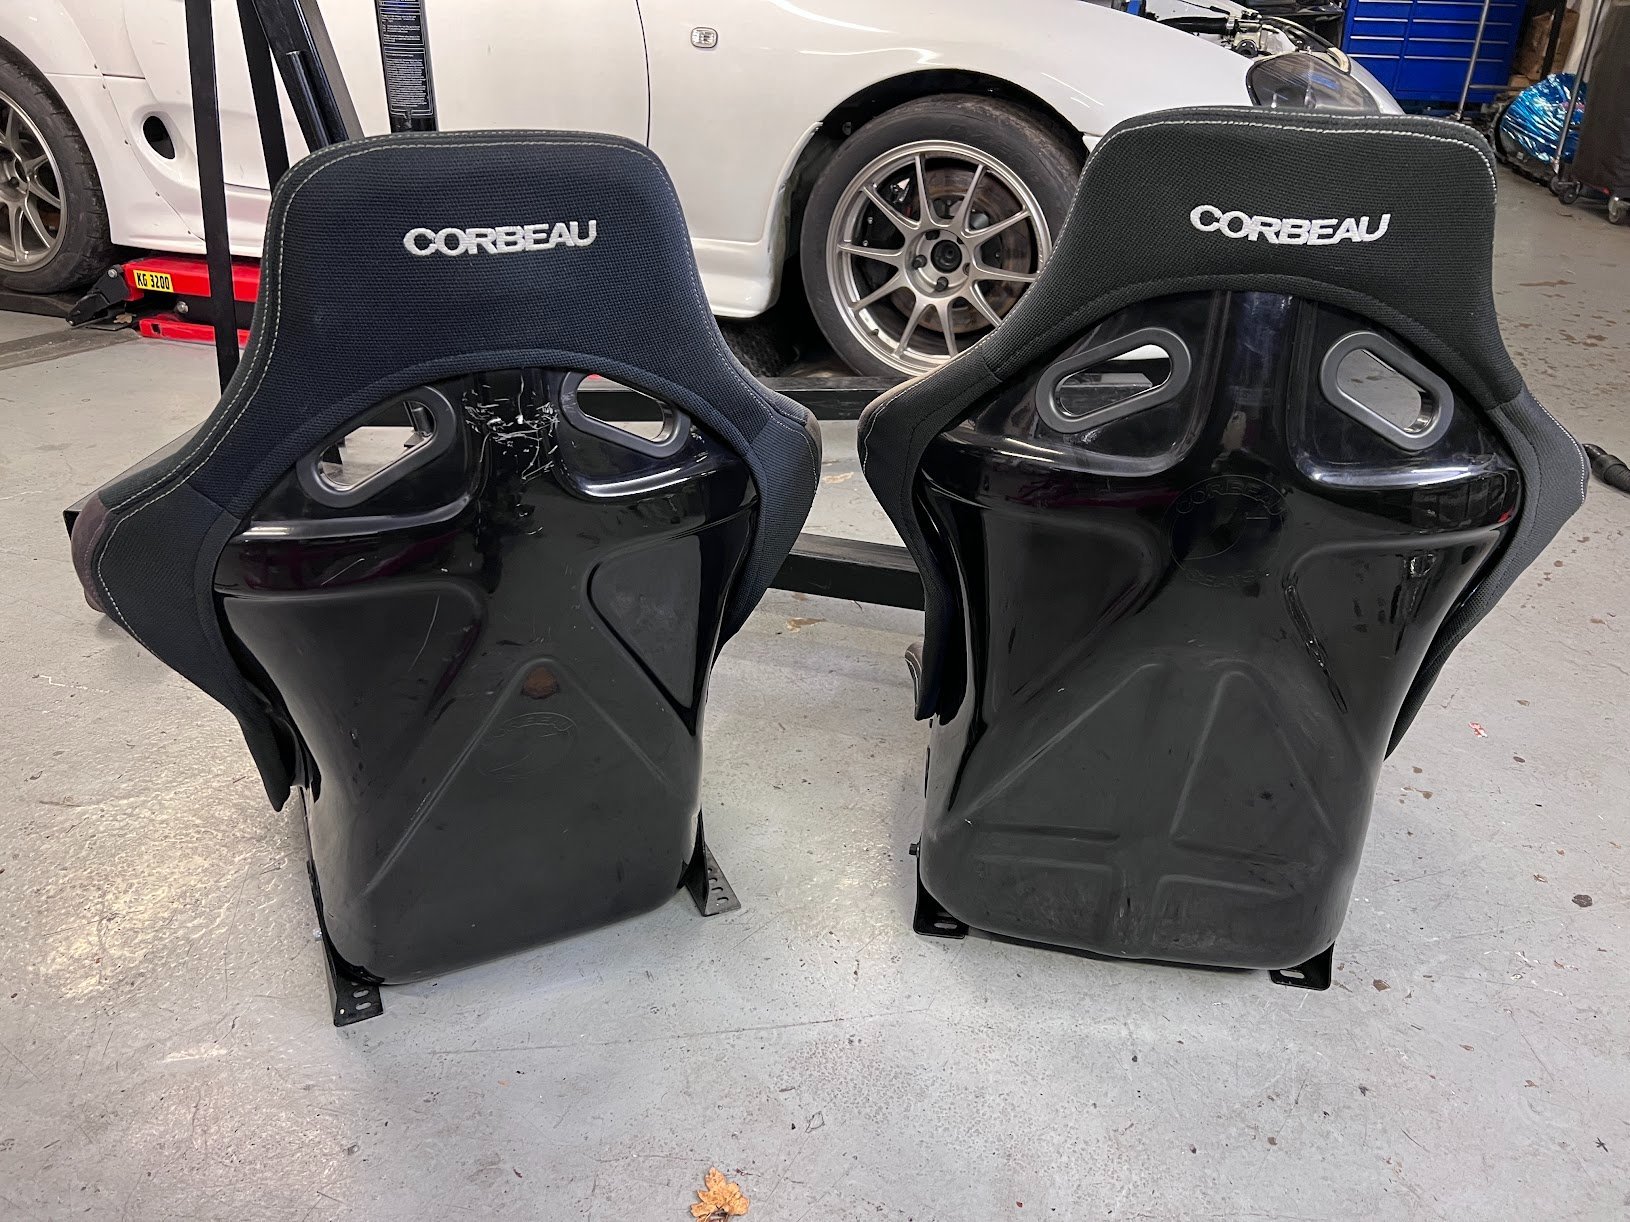
Prices do not include shipping. Most smaller items can be shipped for £12 mainland UK. Larger items will need quoting. All can be collected from SRD All items in good and working order Corbeau Club Sport Seats. One Standard Size, One Wide Size. Come with Corbeau Side Mounts & Supra Lower Mounts. Will bolt in to factory rails £125 - Sold OEM Cig Lighter - £5 Heater & AC Bulkhead Covers - £10 SOLD TT Clutch Master Cylinder & OEM Shield - £60 Sold Dash Hvac Air Ducts - £10 Sold Manual Brake Pedal - £60 Sold Whifbitz Electronic Throttle with spacers for P&P Fit. £60 Sold Pre-facelift NA/TT ABS ECU - £40 Supra Manual Throttle Pedal Stop - £10 Sold Supra Dead Pedal - £10 Sold Doorcard Handle Trims - £10 HVAC Unit no A/C - £100 Sold WIRE, FLOOR, NO.3 (Modified for Direct Control of fuel pump) [82163-14032] - £30 Floor Wire Loom (82161-1B050) - £100 Lamp Failure Unit - £25 Cowl Wiring (82131-1D662) - £150 Roof Wire Loom (82171-14290) - £25 Dash Loom - £100 Door Control Module - £100 Powersteering ECU - £40 Supra front door speaker brackets (modified) - £10 PHR TT Waterneck Rotator + Lower Rad Hose - £40 Sold MRX Custom Strut Tops (Discontinued) - £150 Brake Master Cylinder with new Resevoir - £75 AN10 to AN8 Y Piece with 1/8NPT Sensor Adapter - £10 Sold Powersteering Resevoir TT Kit - £50 Sold Early Engine Mounts - £25 Sold Manual Aux Tensioner Dampener Kit (Modified slightly to fit around ATI Dampener, but will work on any crank setup) - £60 Lower Timing Cover - £15 Mocal Sandwich Plate - Thermostatic Oil Cooler AN10 Outlets - £30 TT Water Pump ~1500 miles. £30 Sold HKS Adjustable Fuel Regulator (Worked up to 1000hp fine for me) - £50 Prefacelift Rear Quarter Glass - £200


-
Yes they are
-
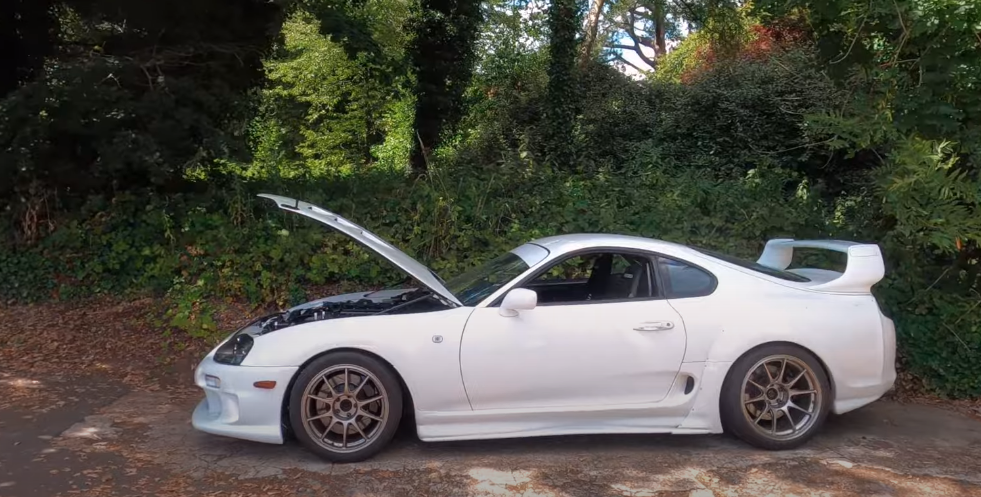
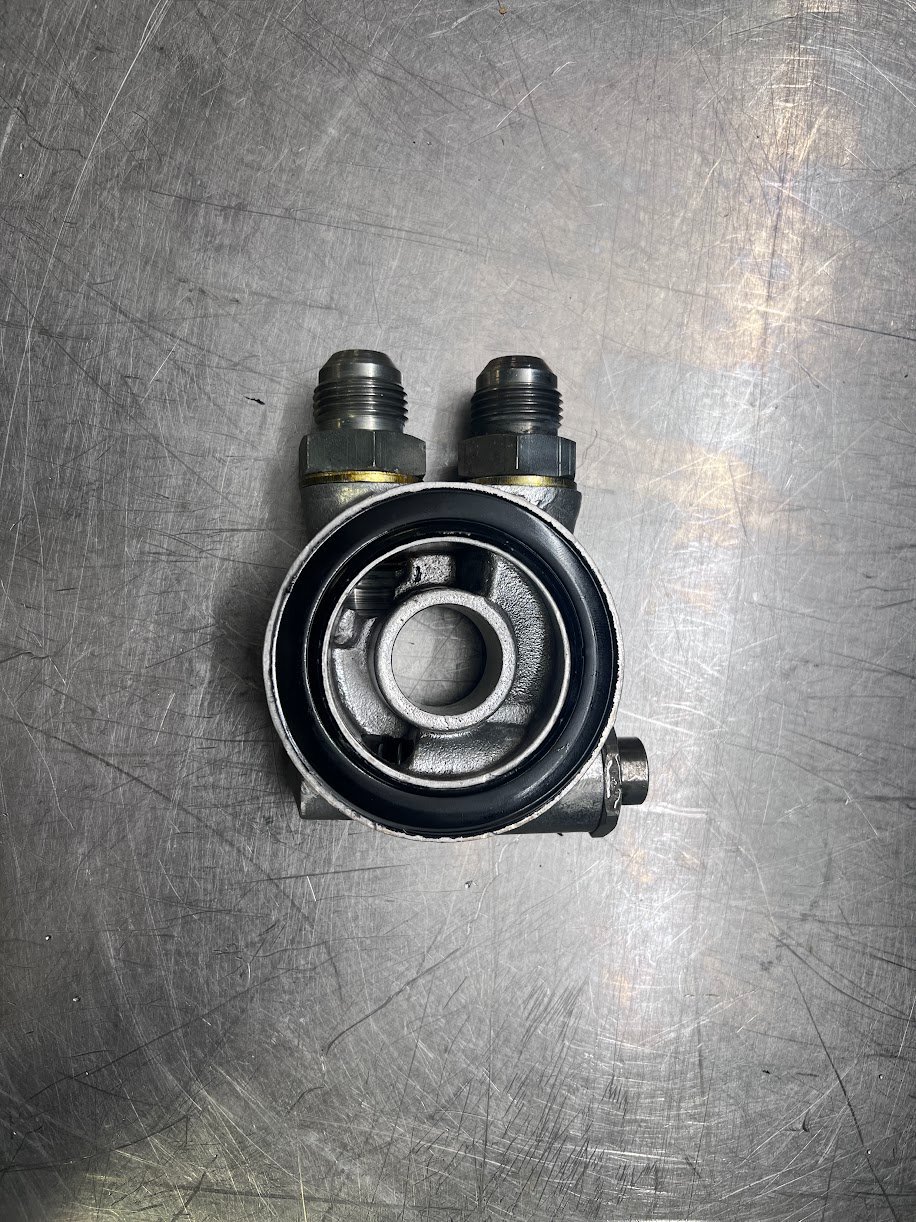
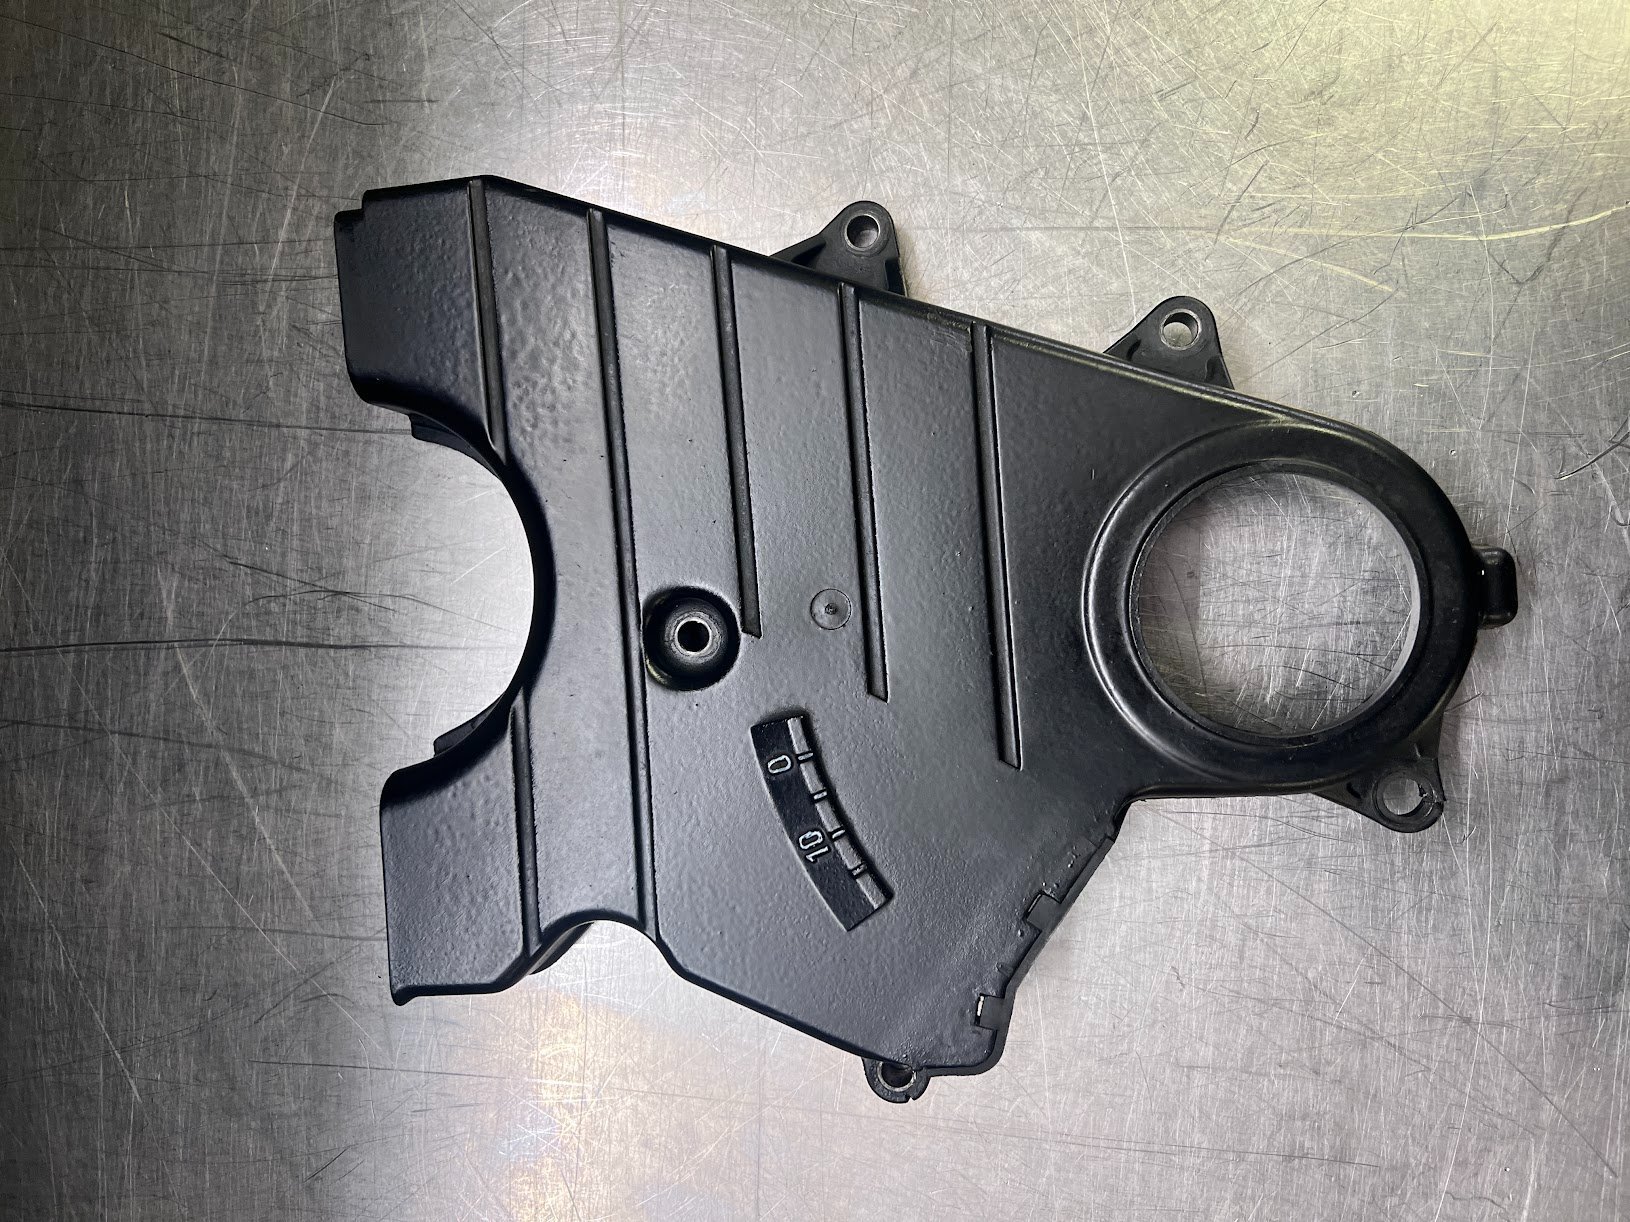
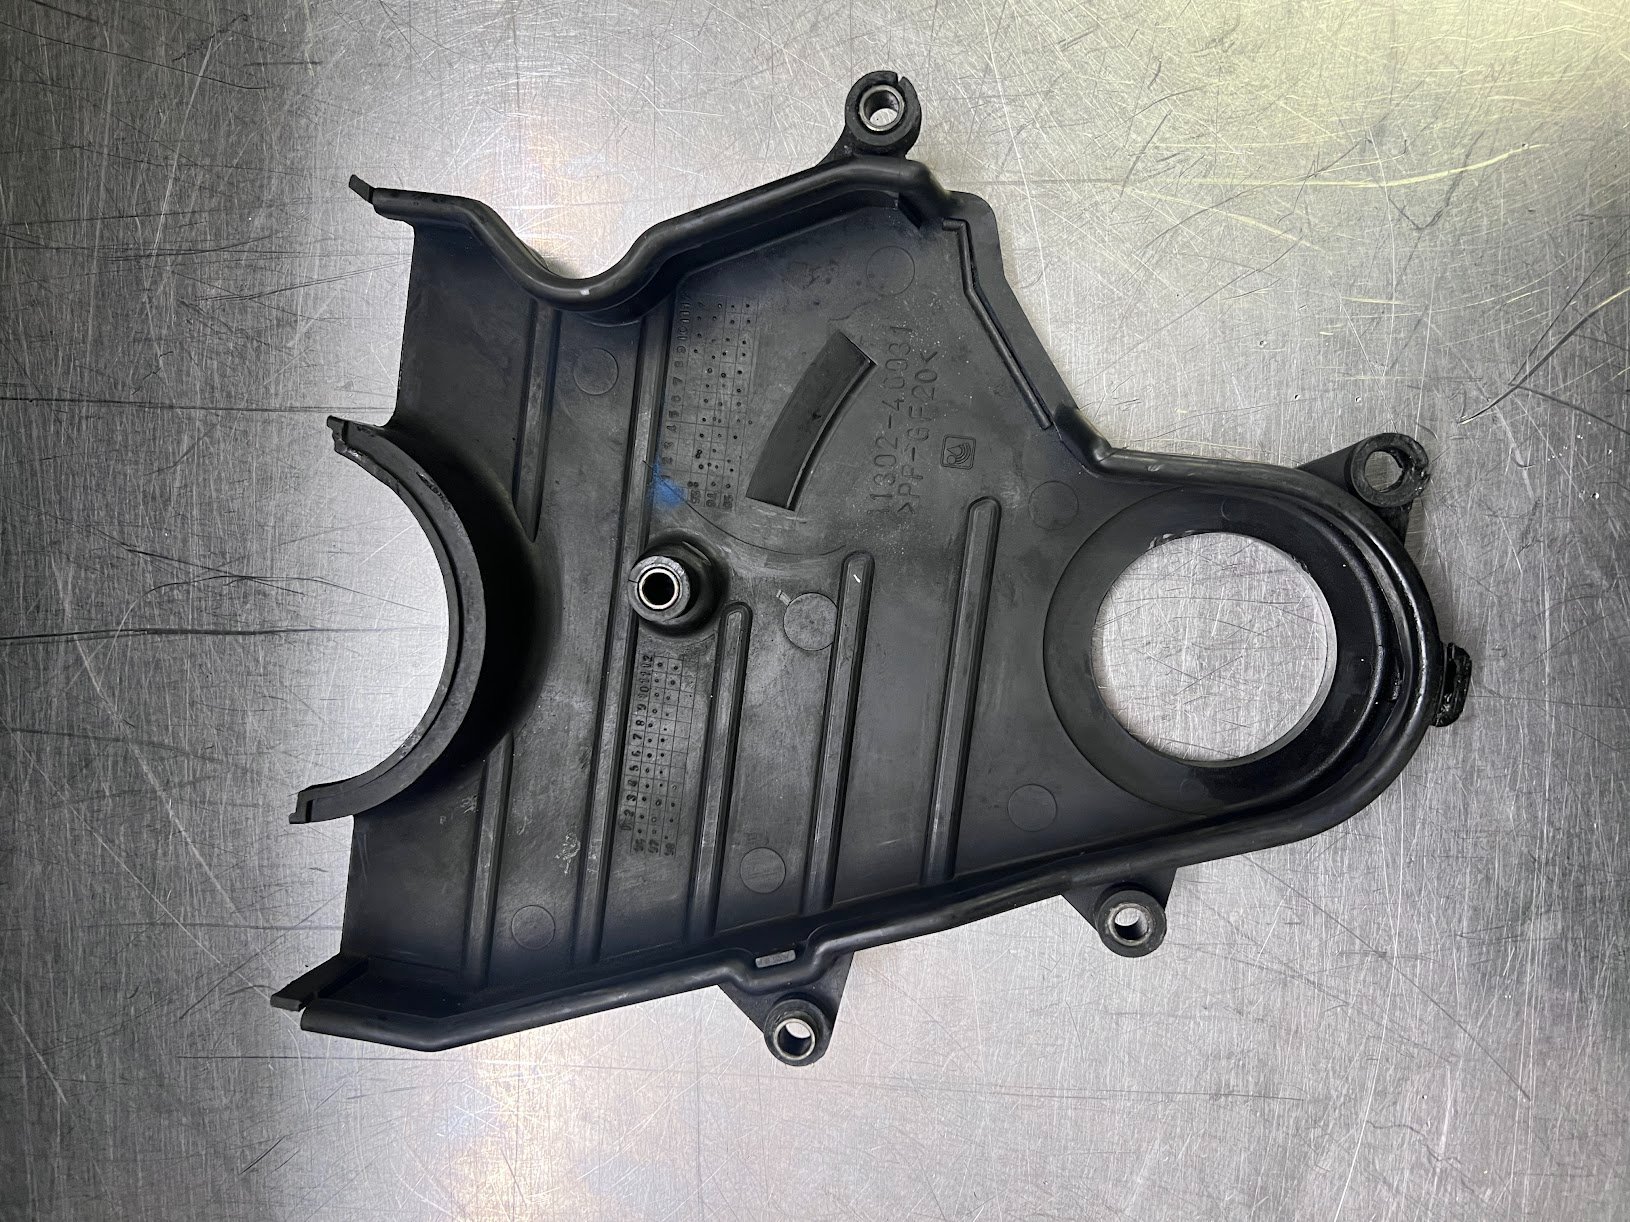
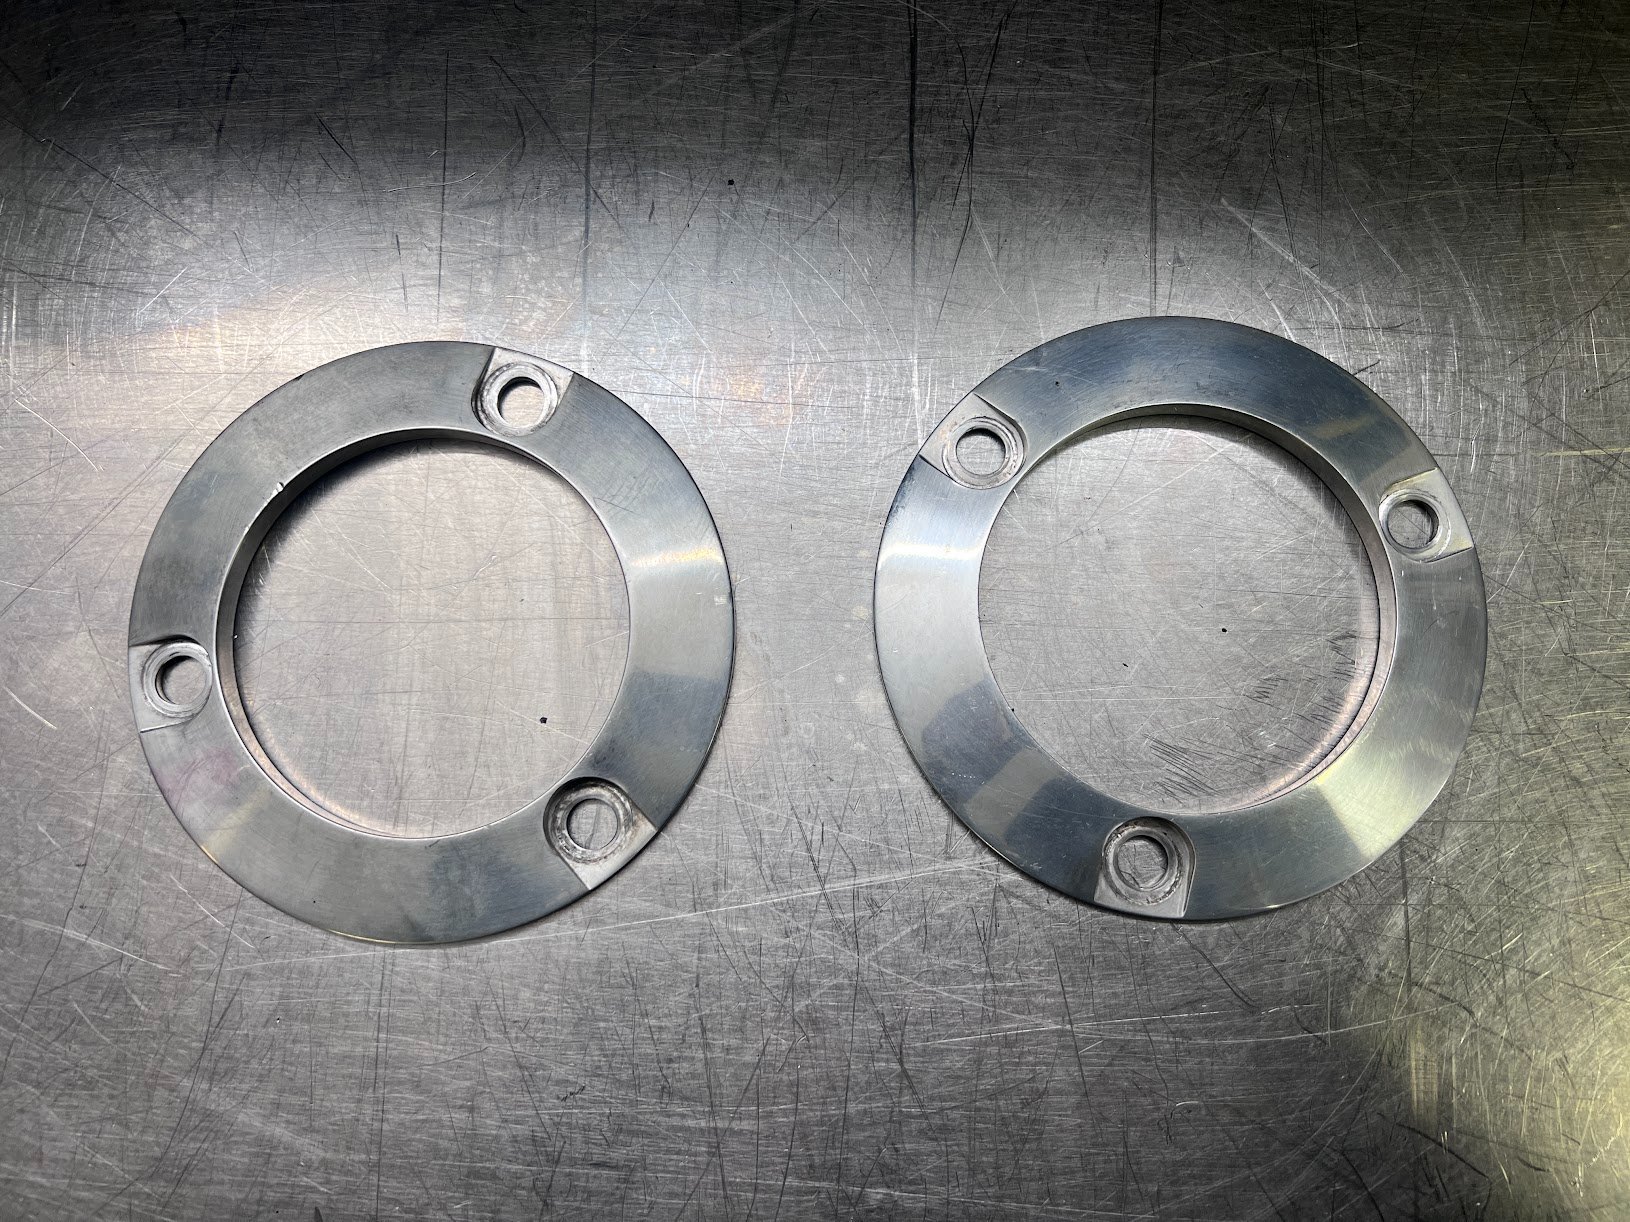
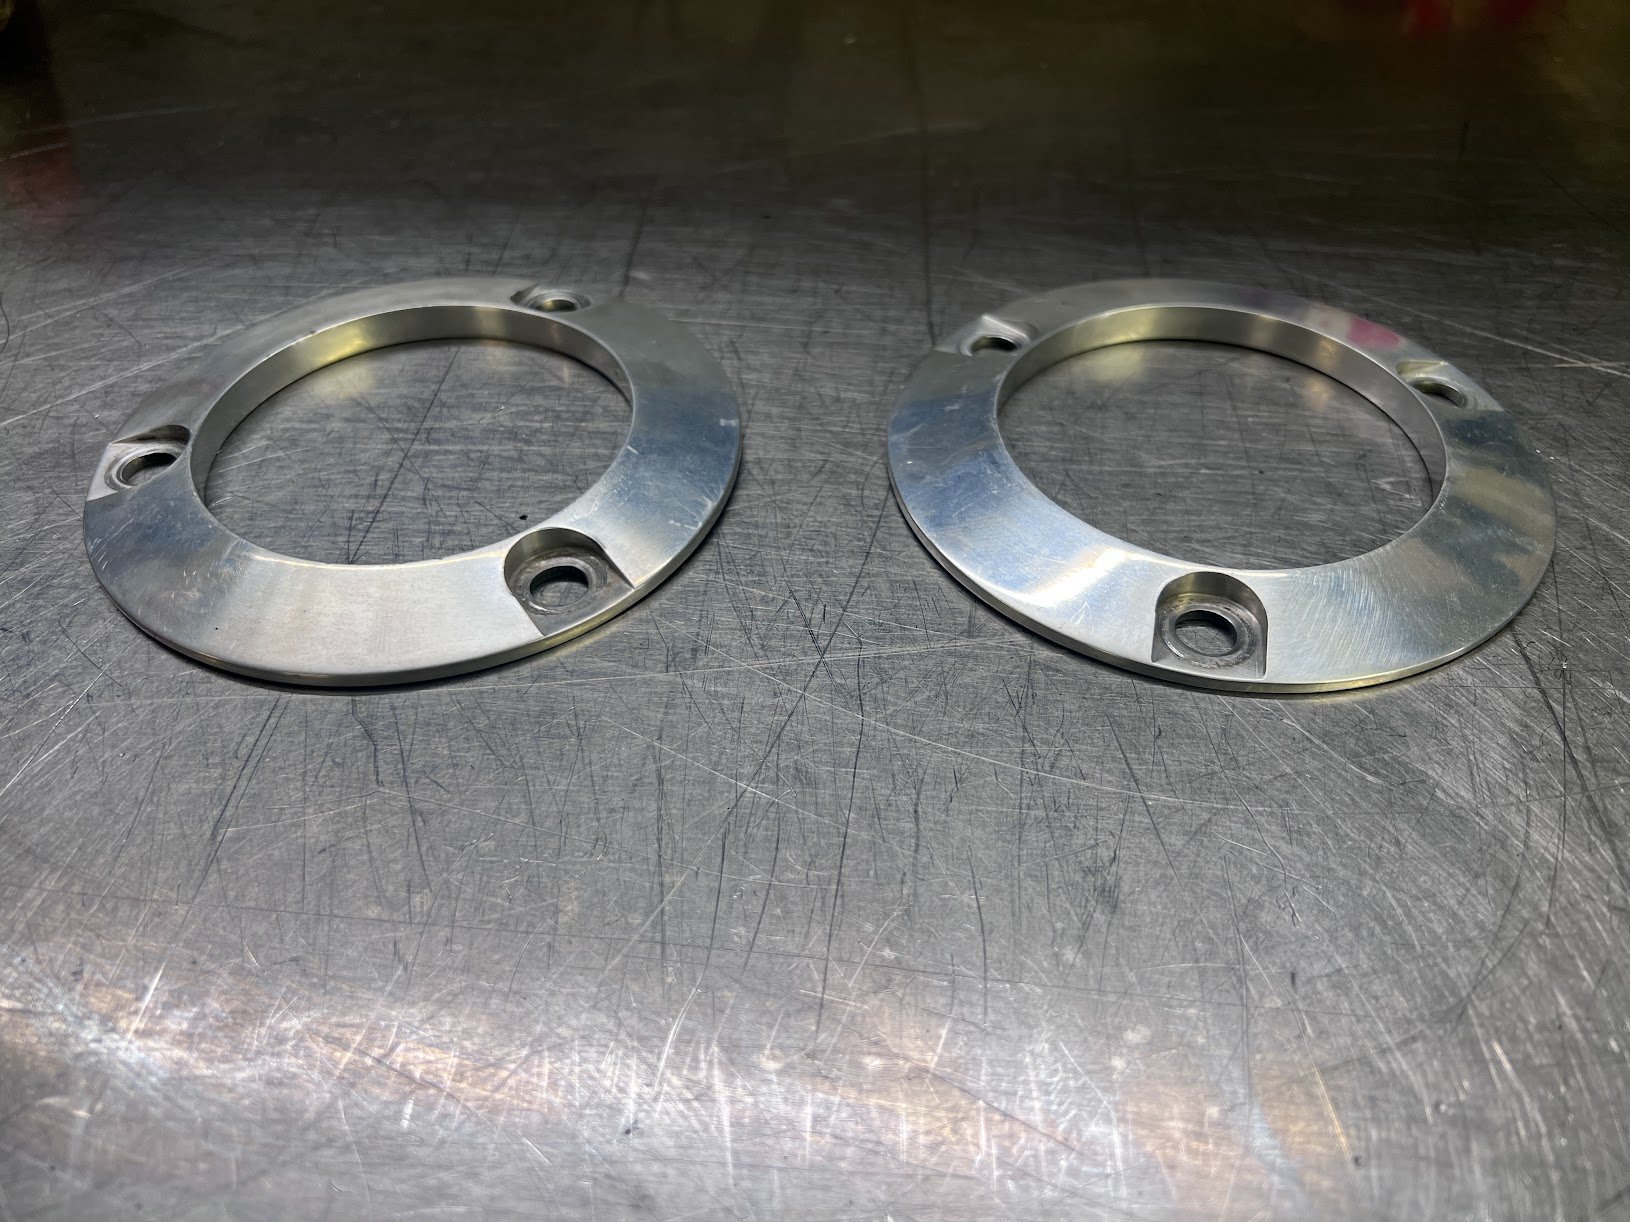
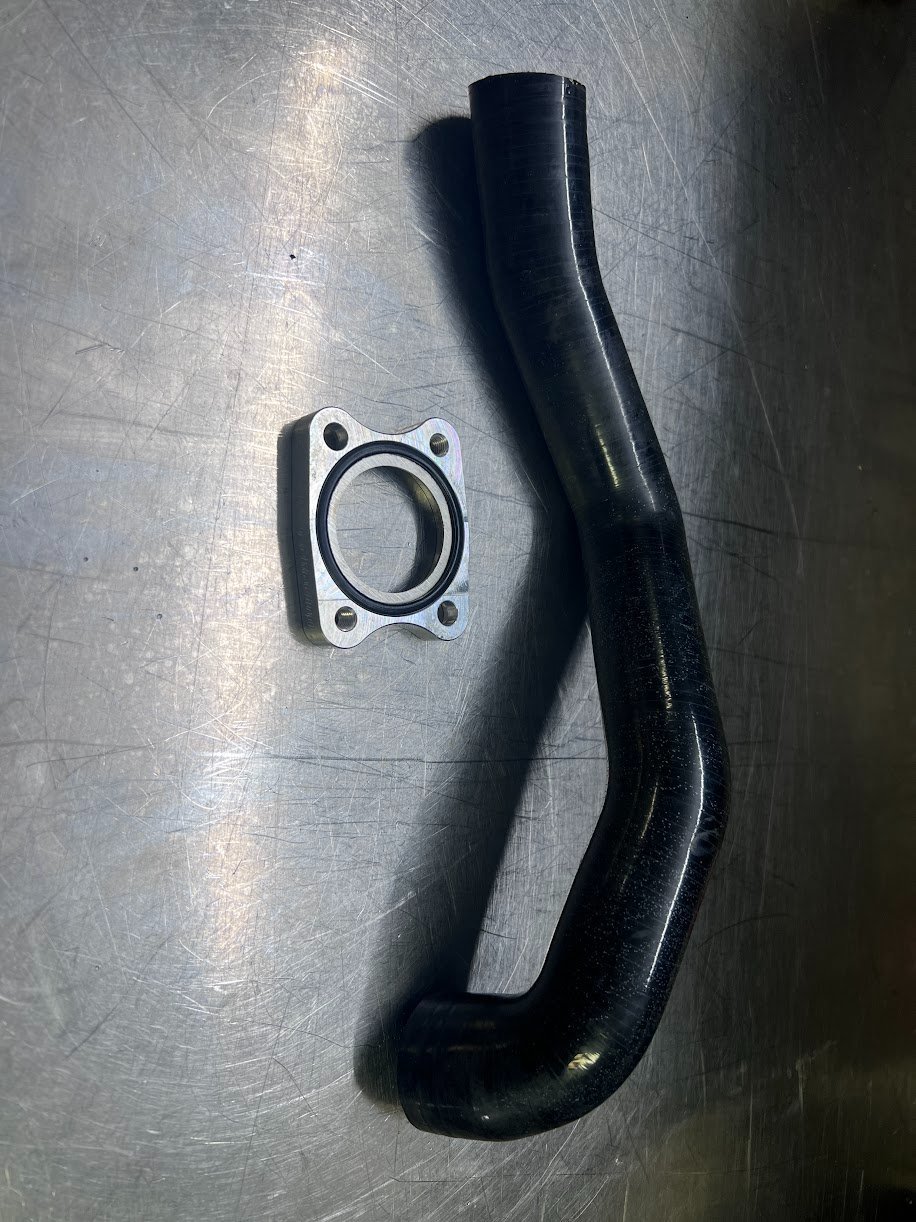
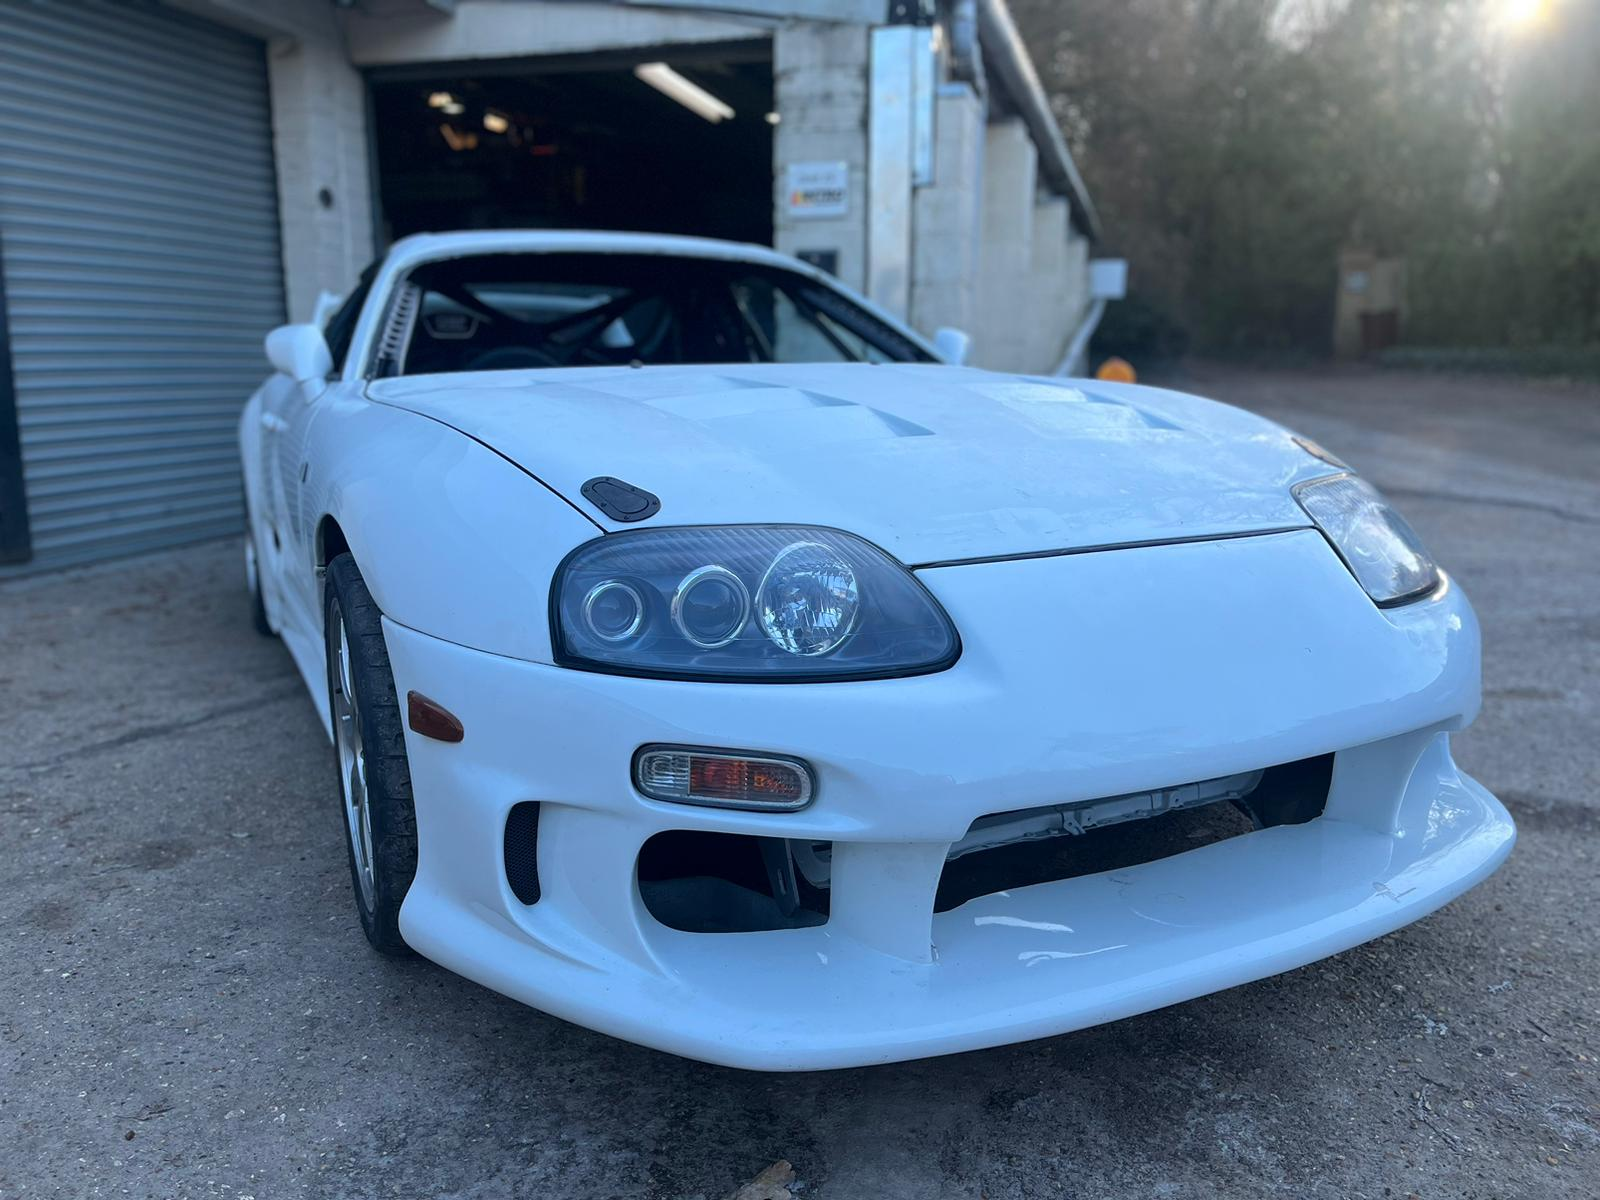
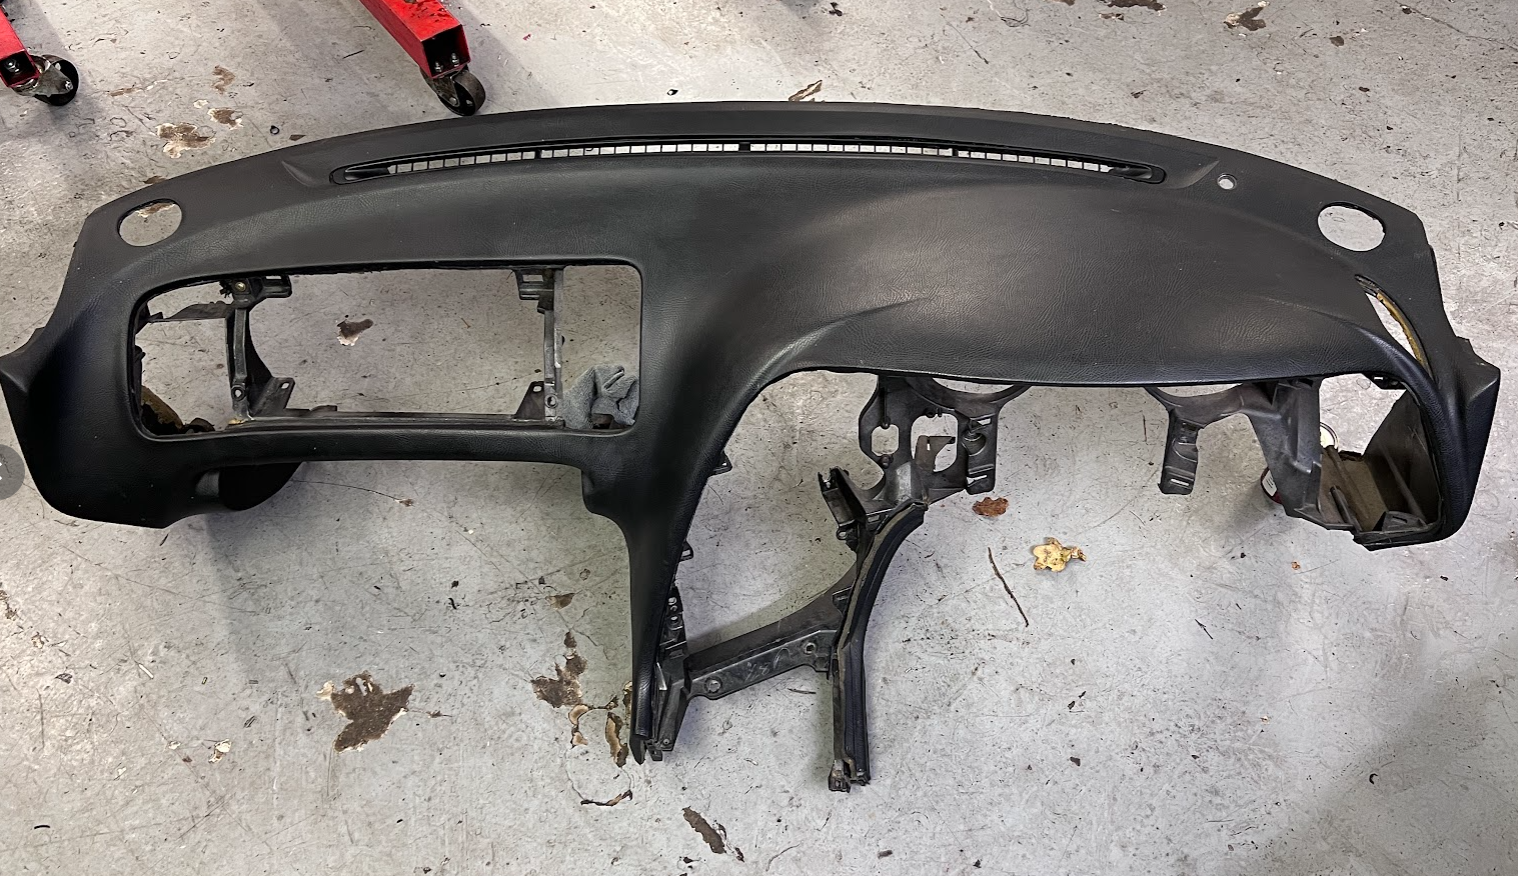
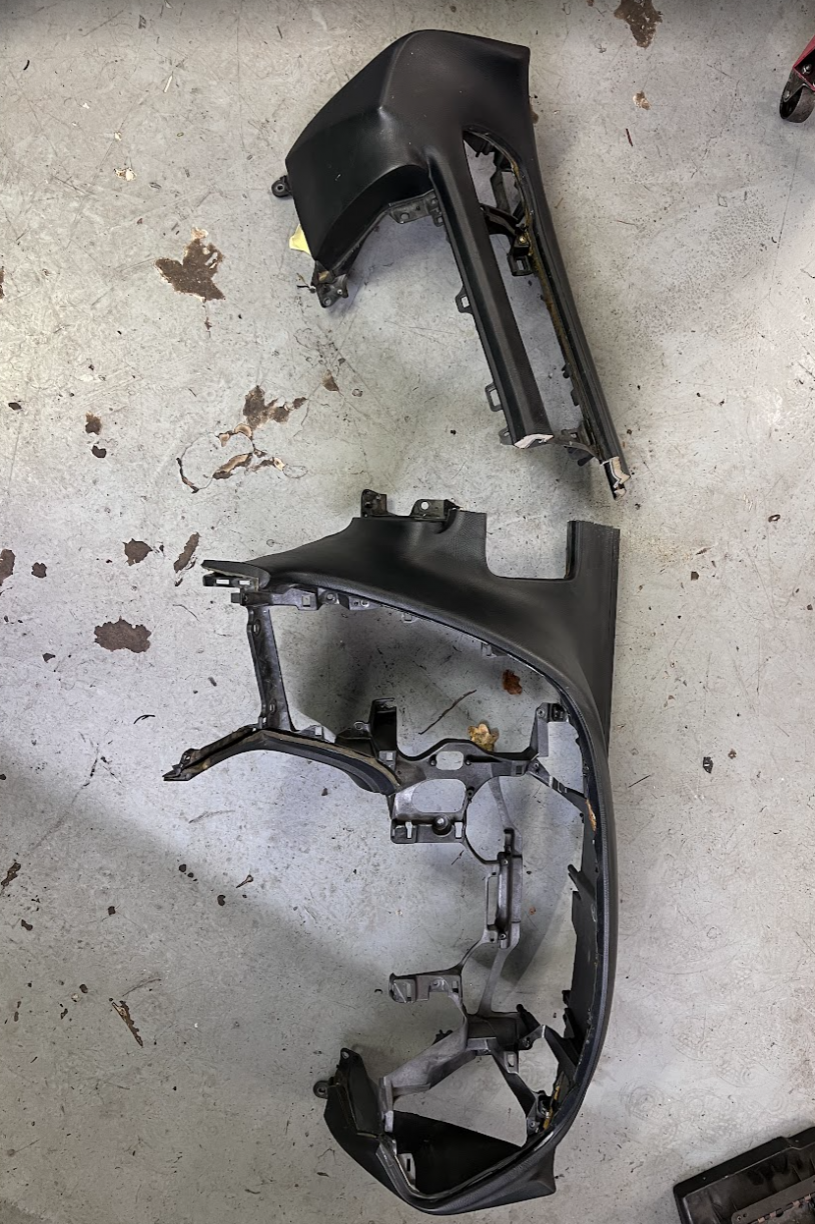
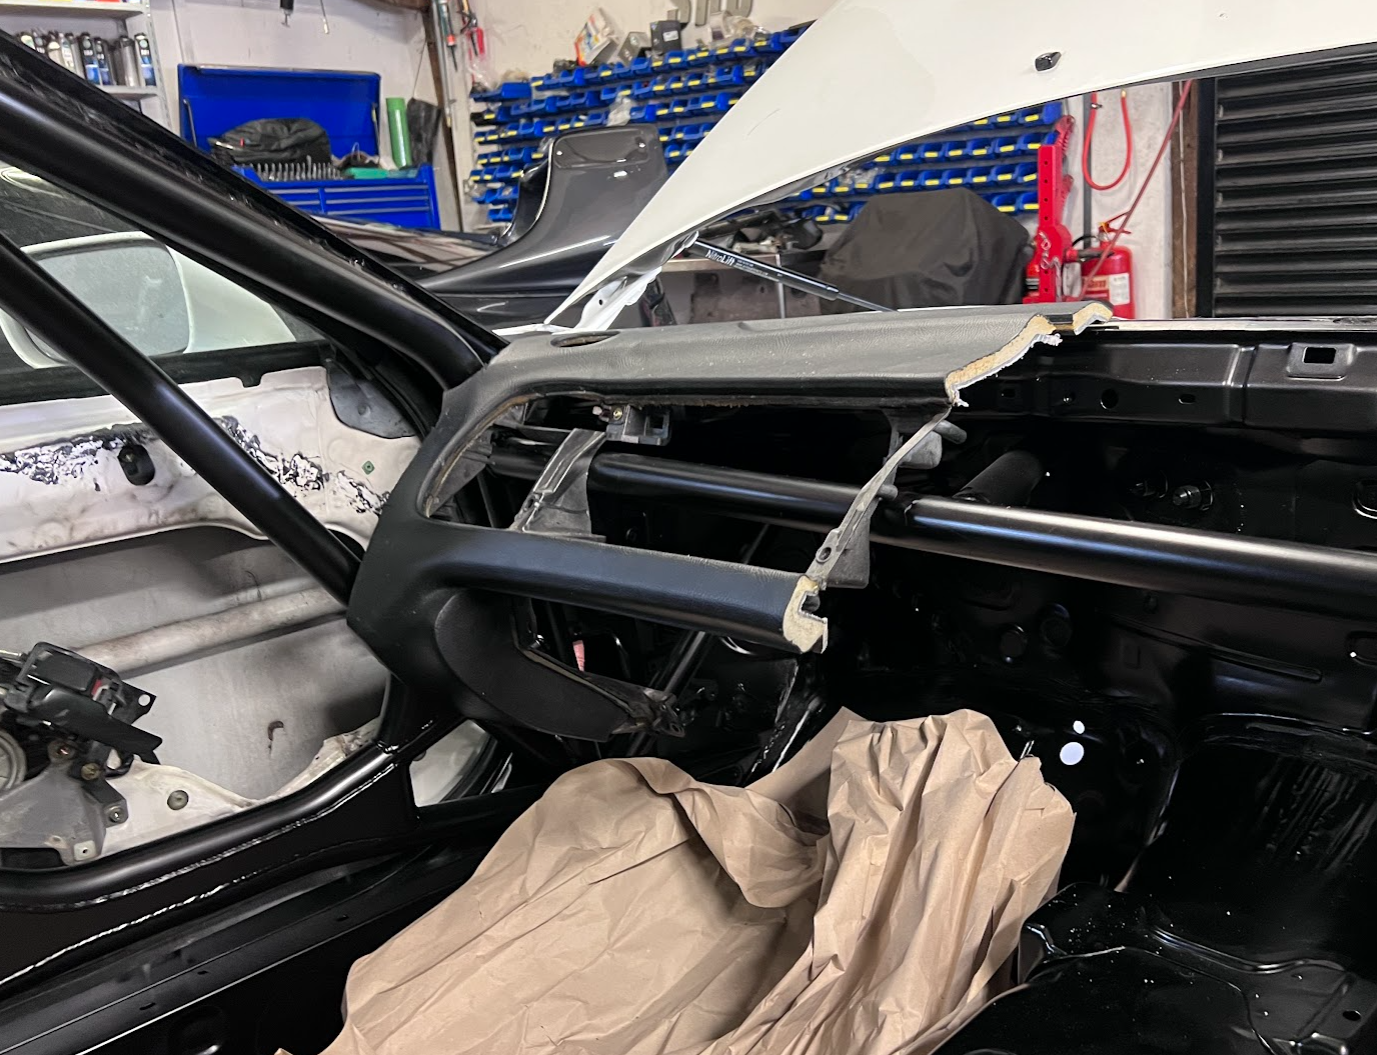
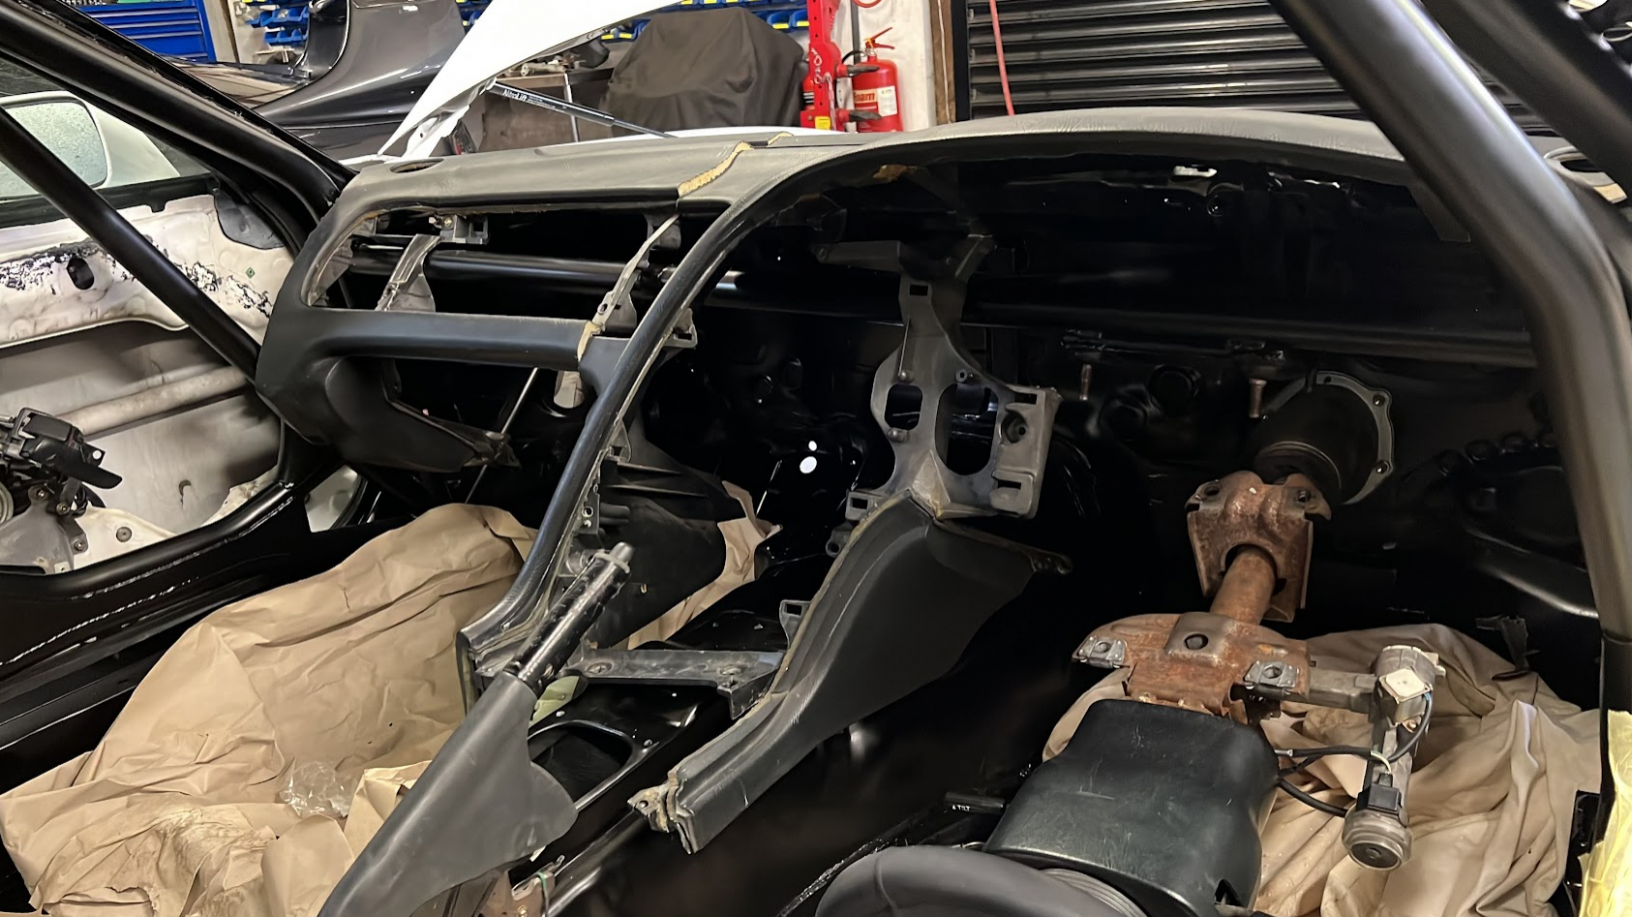
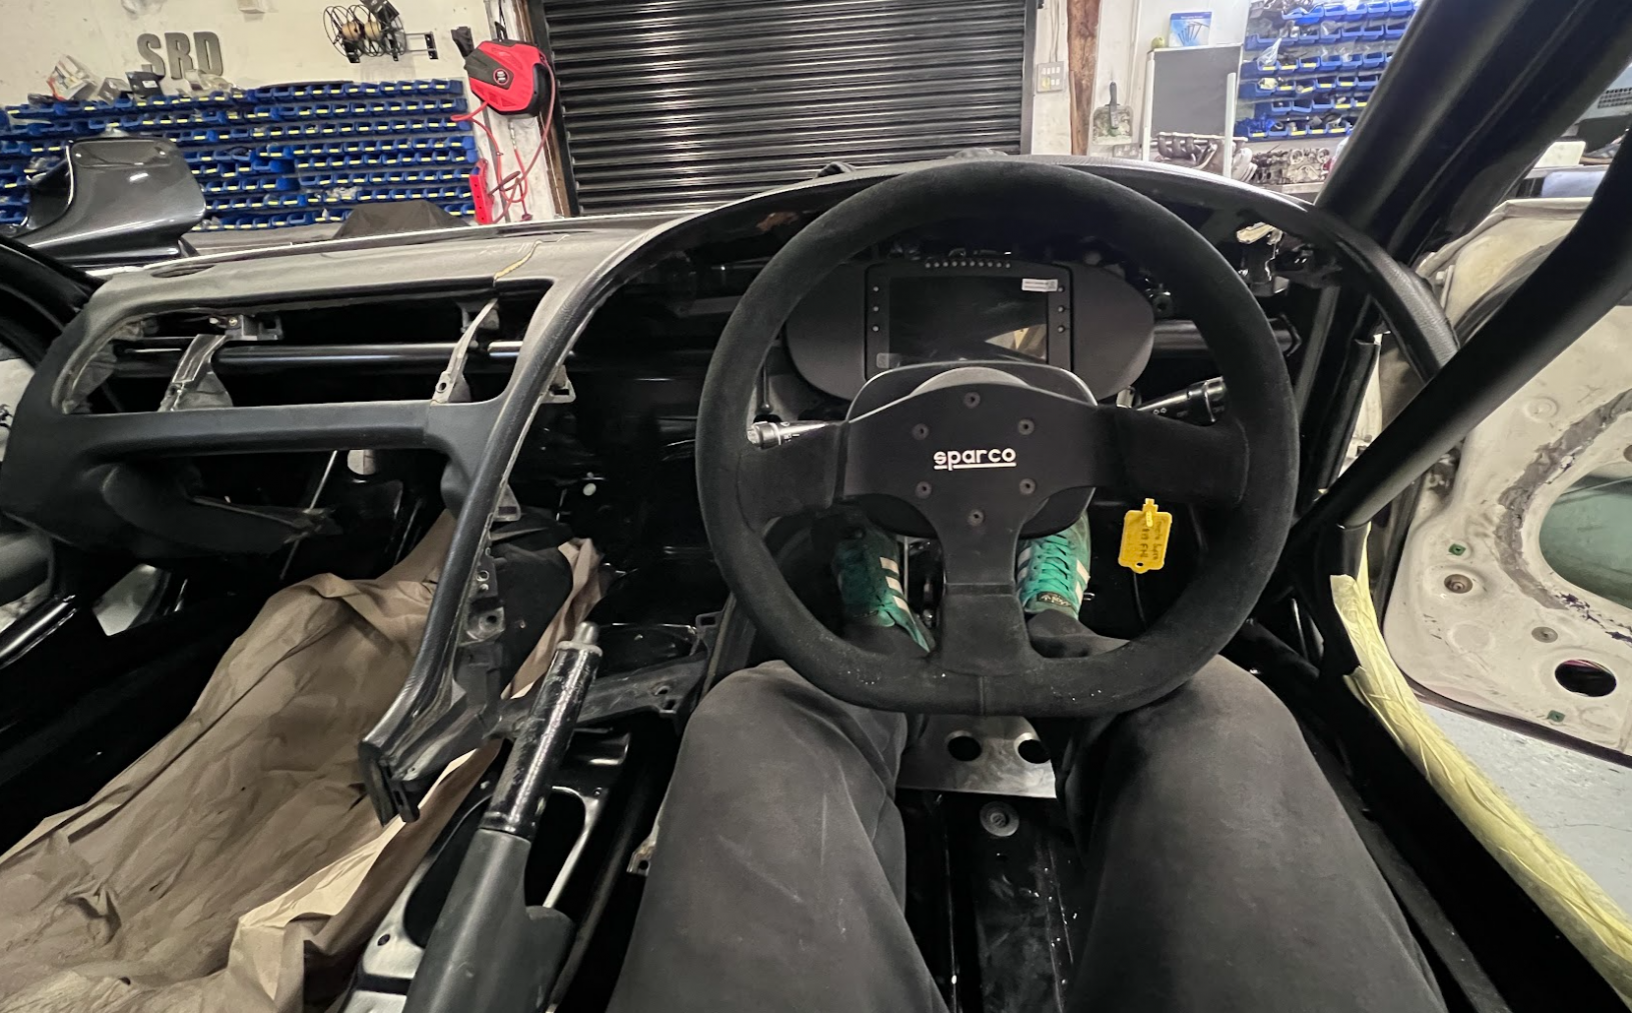
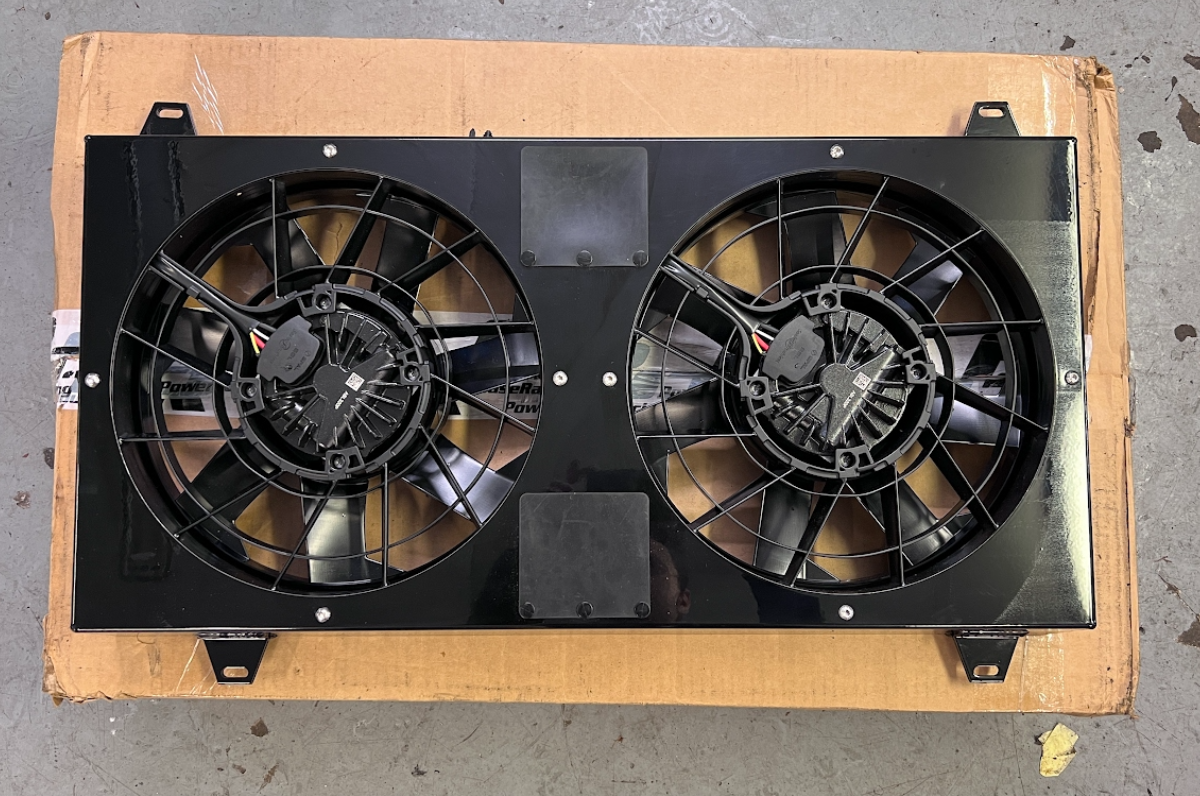
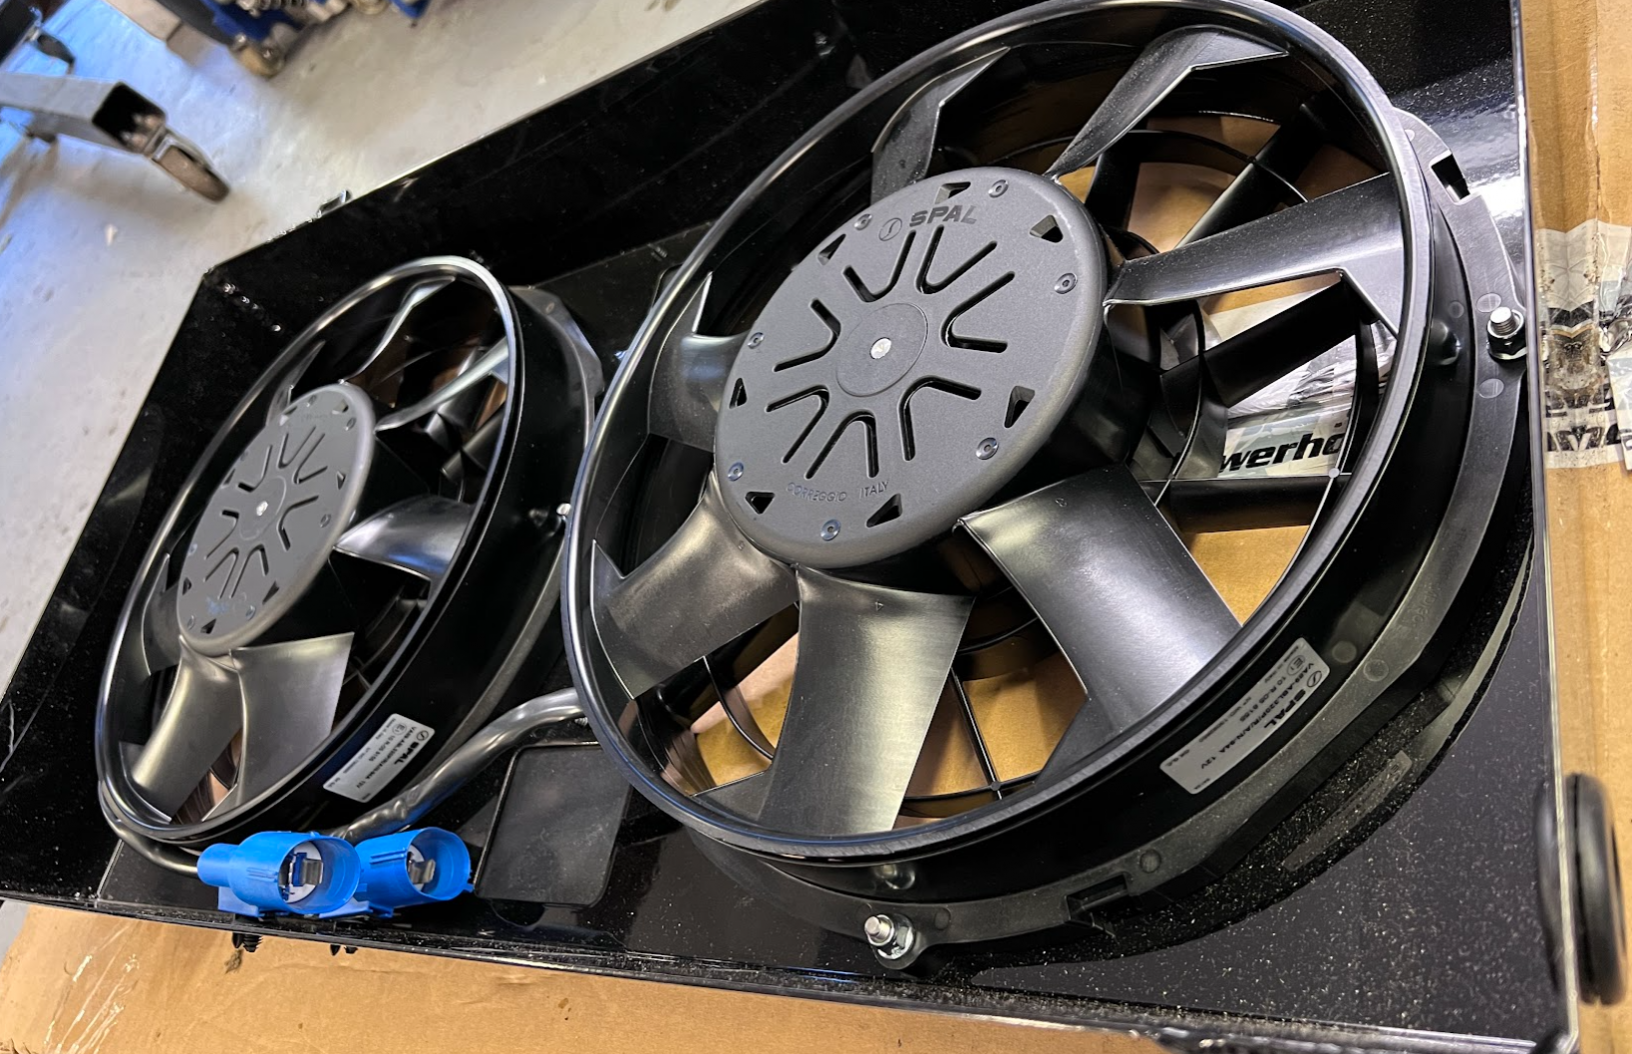
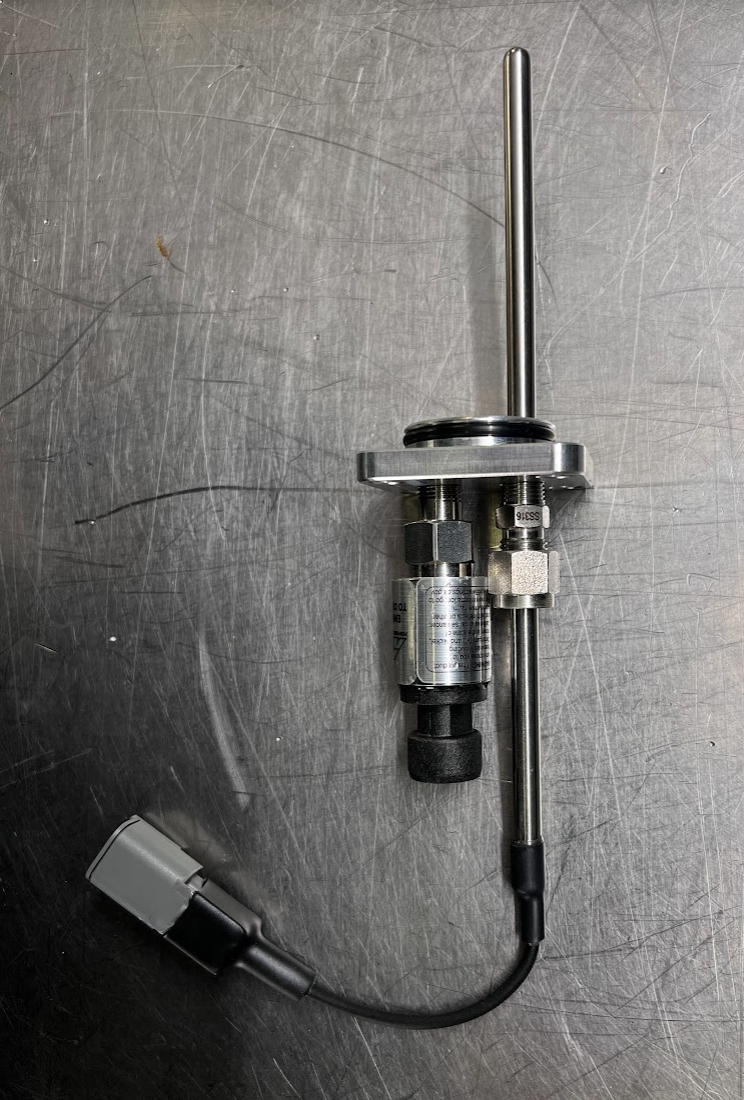
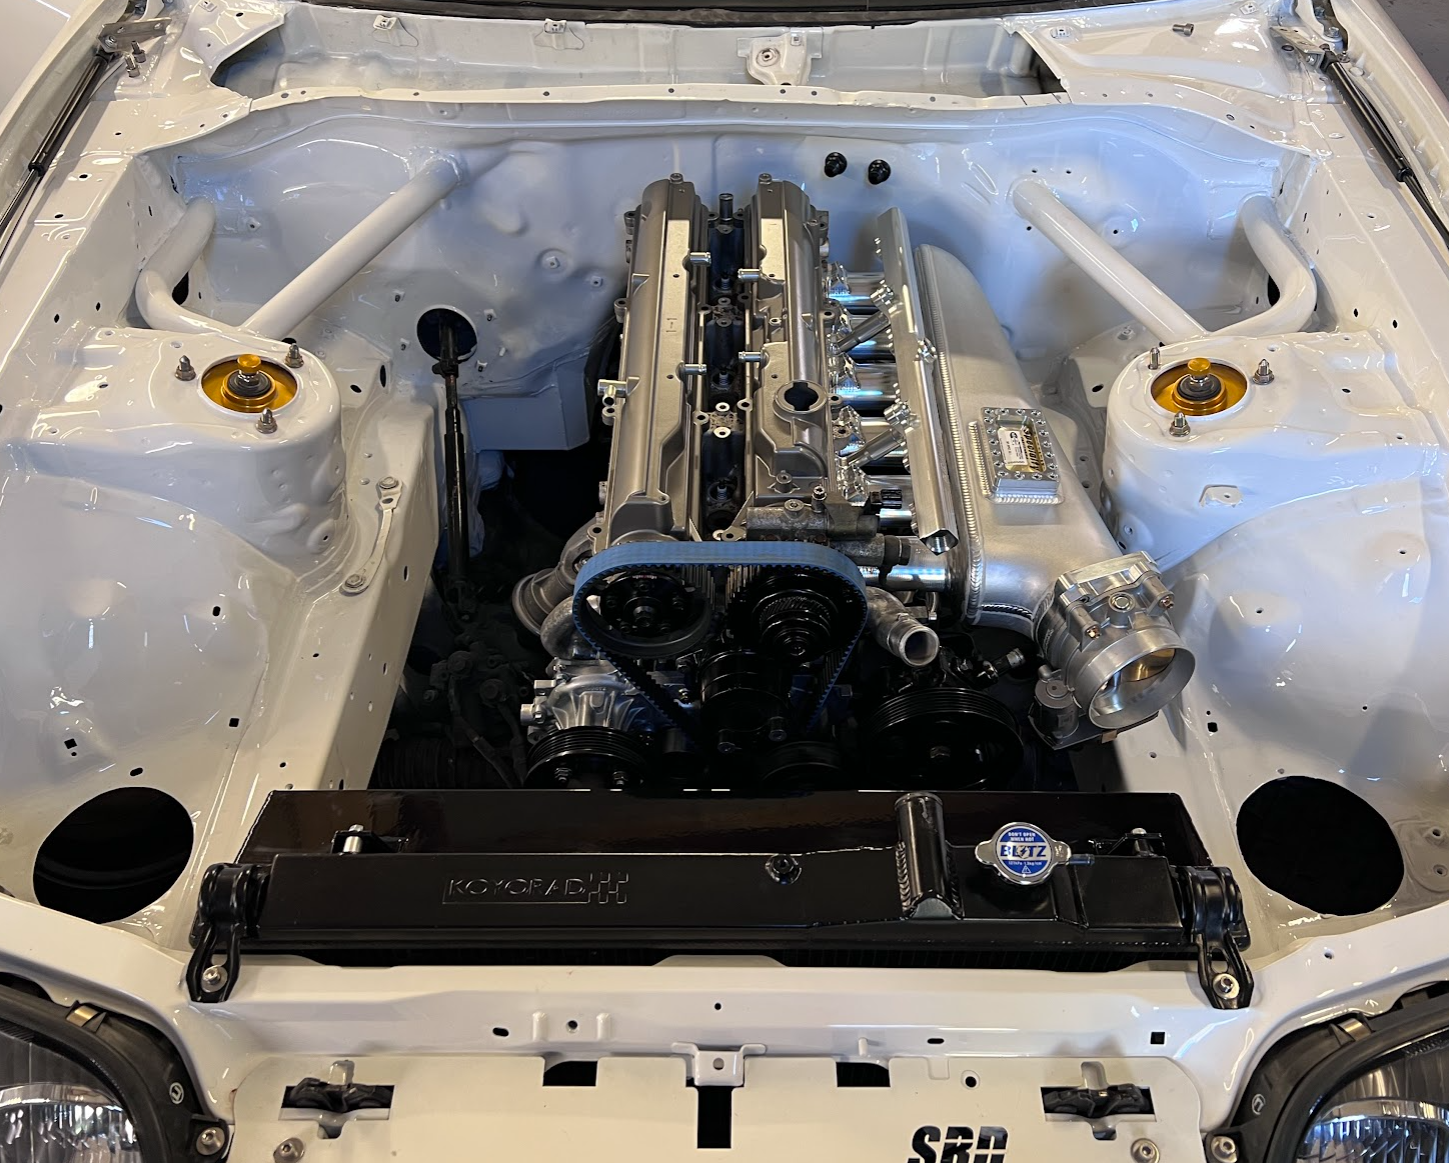
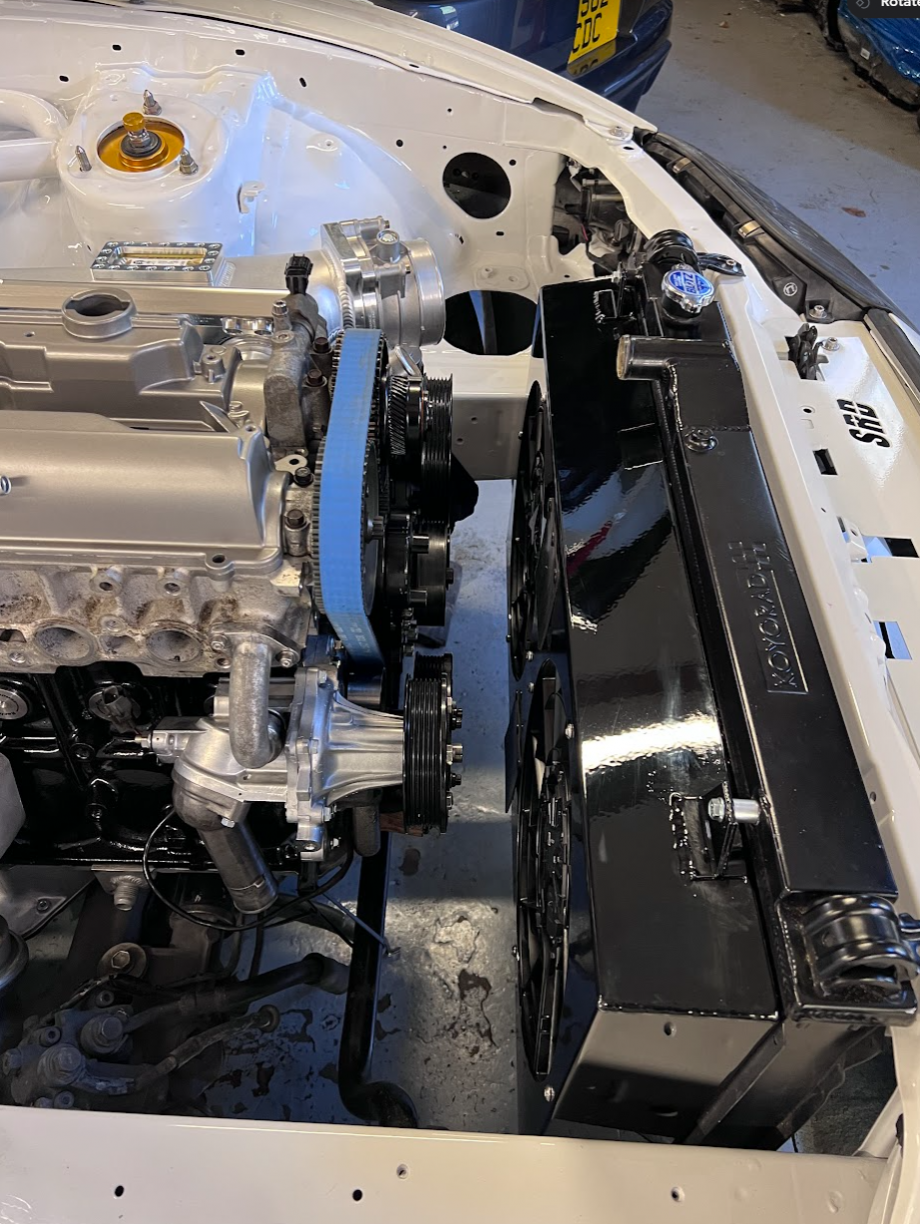
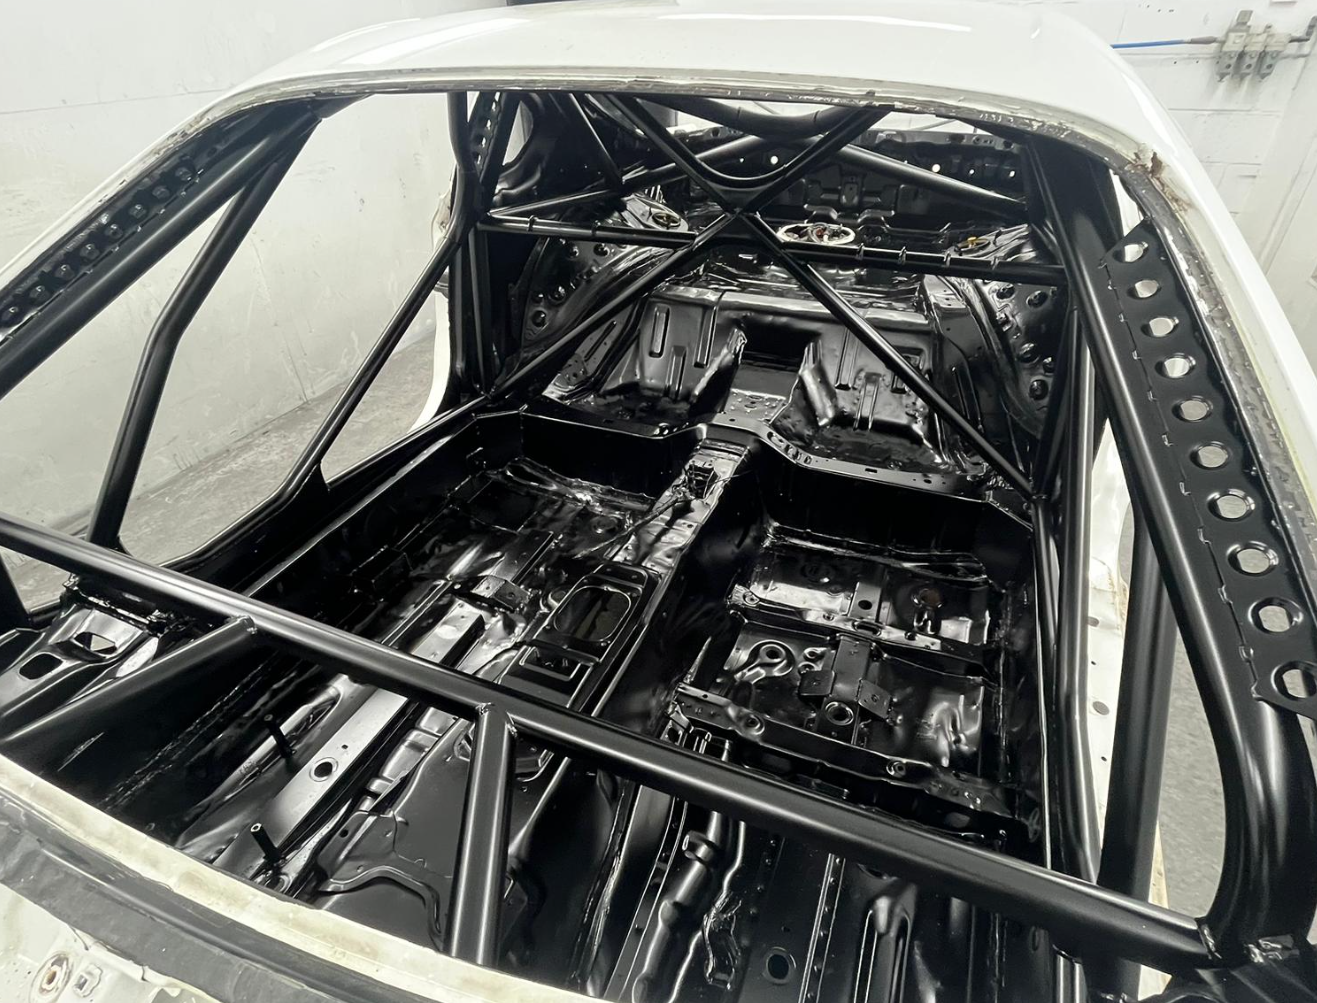
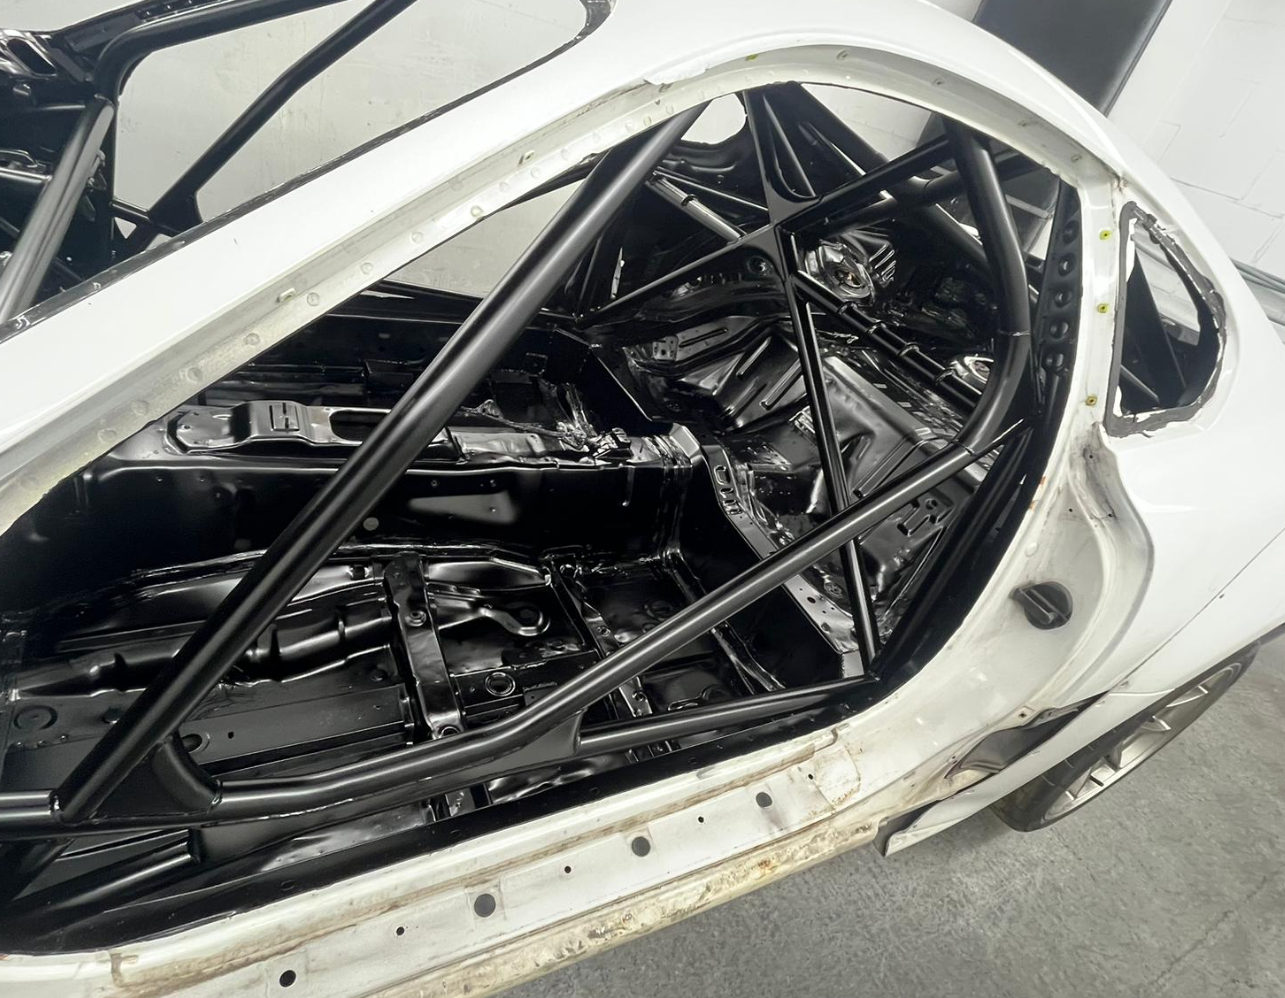
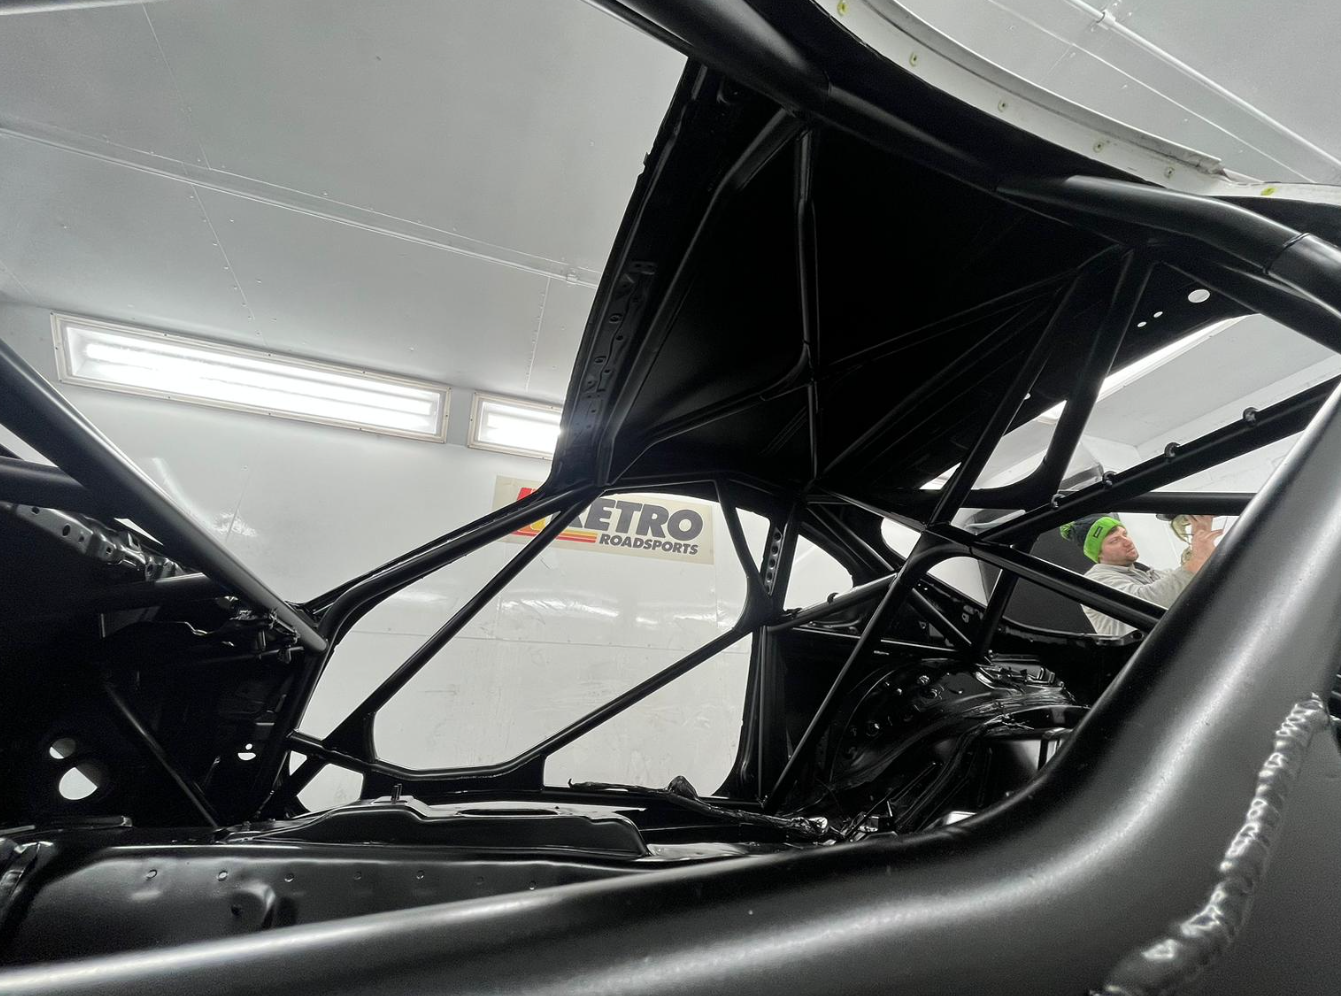
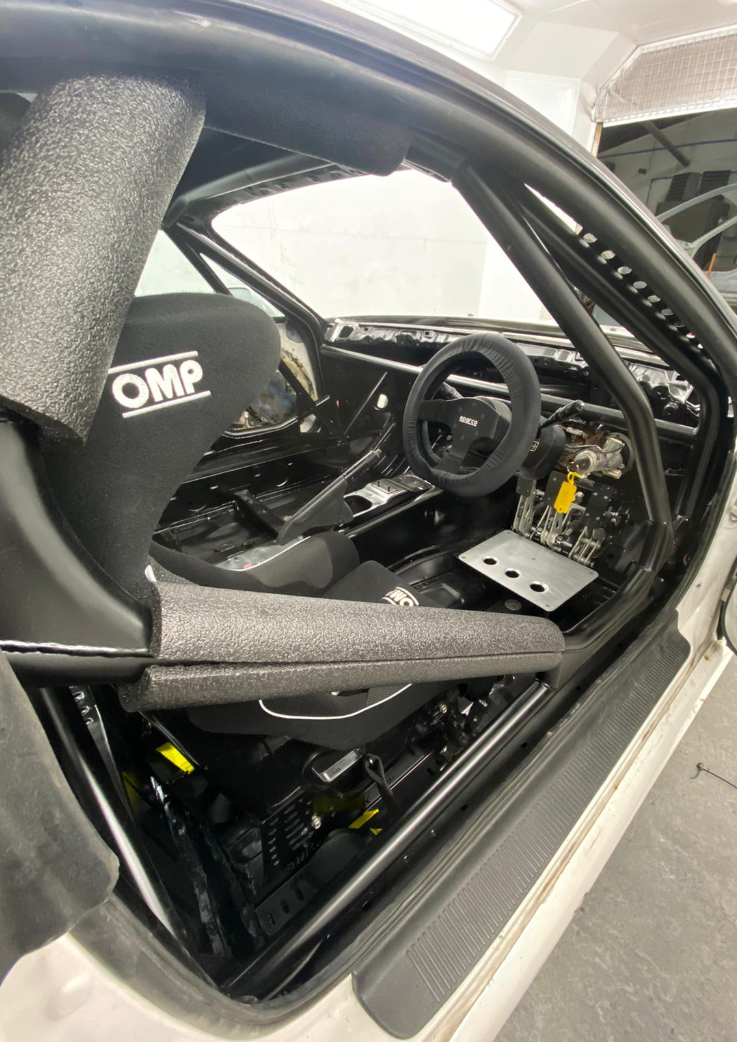
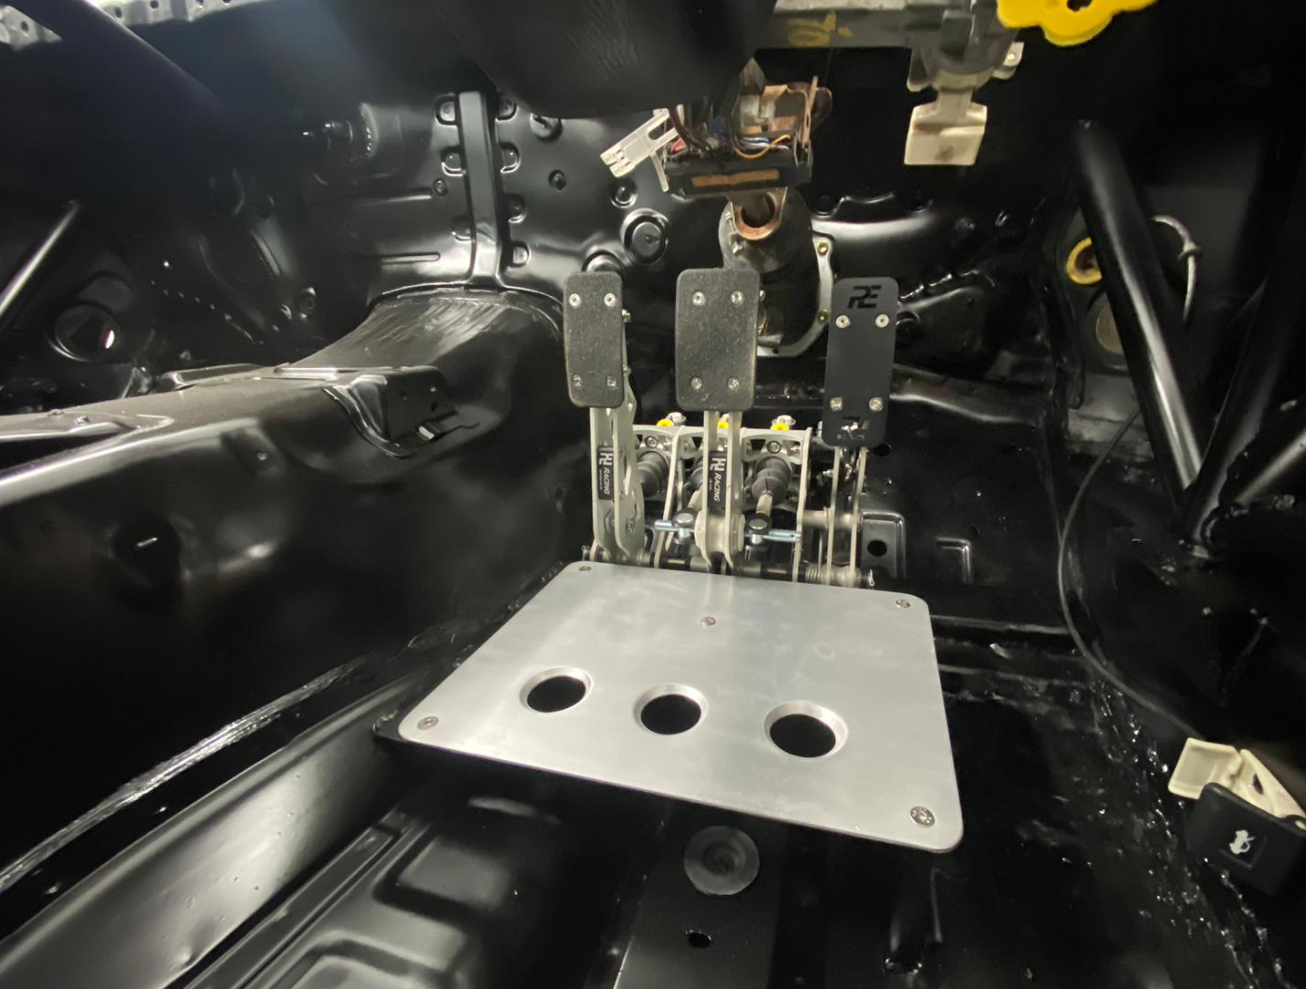
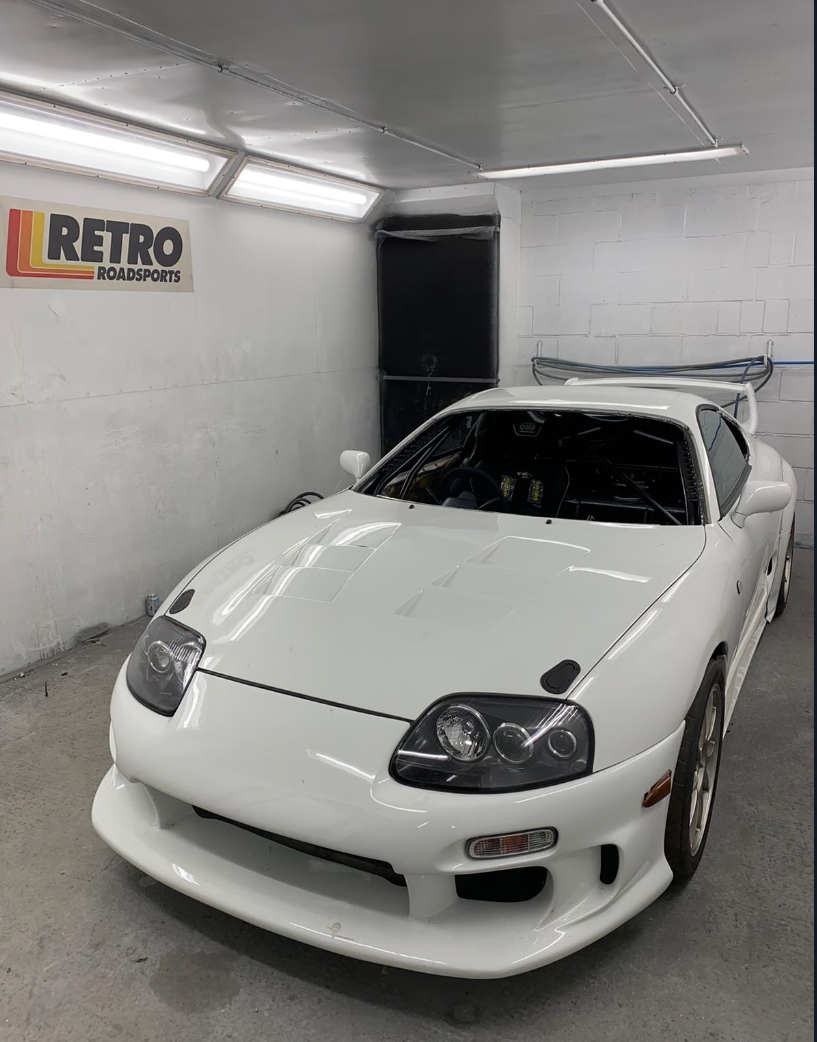
Picked up the car from RRS last weekend and brought back to SRD HQ. Quick glamour shot First job on the list was to see how the dash was going to work the new cage setup. Stripped the dash of everything but the dash itself Took some measurements between my car and a stock supra we had here in the workshop. Very quickly it looked like the dash was not going to fit very well at all, at least in stock form. Definately going to require a lot of cutting to get around the new bars. Spent about 30 minutes debating with myself if I should molest the dash or try and sell it. This dash was in reasonable condition, but it was far from perfect so I think if I tried to sell it I wouldnt get crazy money for it due to some imperfections. In the end I tossed a coin and I landed on heads. Time to cut this baby up. The requirements of the dash going forward are: - Once mounted, it needs to be able to removed from the car as easily/quickly as possible. With everything bolted in, there is very little room inside to remove big bulky items, especially once the windscreen is back in. It's bad enough on a stock car, but now I have even less room due to cage and very time consuming to remove everything that can get in its way on the way out. Dash needs to come out with a few bolts being removed and minimal fuss. - The dash needs to be rigid enough to support the Motec dash and a few panels, but otherwise will serve no other purpose, other than keeping the interior feeling vaguely like a Supra still. As cool as the car is stripped out, I would miss the factory dash sweeping down in front of the driver position. So after a bit of head scratching and a chat with another Supra owner who has a similar cage setup, I decided to cut the dash into two pieces. Not going to lie, I cried a little cutting it like this haha. The passengerside of the interior will house all the electronics, heater core, fluid resevoirs and whatever else I can cram in there. Driverside will just hold a few panels and the motec digital dash, so if I need to mess around with anything it will likely be on the passengerside most of the time so will useful if I can just remove that half of the dash and leave driverside alone where its difficult to remove steering columns, pedalbox, seat etc. After lots of cutting the left side of the dash fits in something like this. Still needs a bit more shaved off in places in future, but it clips into OEM clip mounts at the top. Next up was the driverside. Unfortunately my cage front support bar goes right in place of where all the stock dash frames to mount the panels and combination meter. So after a lot of chopping that now also goes in So with a quick test of everything loosely in place we are left with something like this. Next up for the dash is to make some custom brakcets in various places that will support the dash pieces in the correct place. Once thats done, I might flock the dash or do something along those lines just so the cut line between both sides of the dash is a little less obvious. Then I'll move onto the panels, will either run the factory panels and modify to work with the above, or build some custom panels out of ally to fit into the above. Haven't decided which way to go yet, but will figure it out as I go. I figured the dash was going to take some work, but this has quickly grown into a project of itself. Be interesting to see how this turns out. After all that trauma it was time to move onto something a little more light hearted. Yay shiny new parts First up is the PHR brushless fan kit. Although the viscous has served me well for years, I wanted better accessibility to the front of the engine with enough fan power to keep this car as cool as possible. Had seen some good results on another car with these so figured I'd give them a go. They are PWM controlled brushless fans, so maximum amperage per fan is 25amps which is decent and likely wont need them running anywhere near maximum output most of the time. ECU control will let me ramp these on/off, so no massive jumps to the charging system when they kick on. These are quite chunky fans, and PHR have done a nice job with the shroud with built in flaps to allow excess air at high vehicle speeds to bypass the shroud like on many modern OEM cars. Next from PHR is this cool oil temperature/crank case pressure fitting that goes into the oil level port on the sump. I like the idea of the temperature probe sitting in the oil in the sump rather than somewhere further upstream on the oil system that could be prone to heat soak depending on where its mounted. Between this sensor and another temperature sensor mounted on the outlet of the oil cooler I should have decent visibility on the overall engines oil temperature and cooling performance. Quickly slapped some sumps on the engine and threw the engine into the car for the first time. For a quick test fit I'm happy so far. Obviously missing the turbo side currently, but overall looks nice and simple. Other than having to get creative with mounted a powersteering pump somewhere, the bay should look very similar to this when all is said and done. Lots of room for activities! Test fitting some new OEM VVTI GTE cam covers and they look alright, but by the time I modify them to fit what I need I think it will be better to go with a billet valve cover. Unless Plazmaman get some VVTI covers going soon, then I'll probably end up going with some hypertune valve covers. Not sure on a colour scheme either yet. I normally just make everything black on the engine, which will probably look ok but feel like trying something new this time round. If anyone has any good suggestions then I'm all ears!
-
Wanted 2JZ VVTI Intake Camshaft NA or GTE (damaged or undamaged)
Mike2JZ replied to Andy Ven's topic in Parts Wanted
Pretty sure I've got a GE VVTi set you can have -
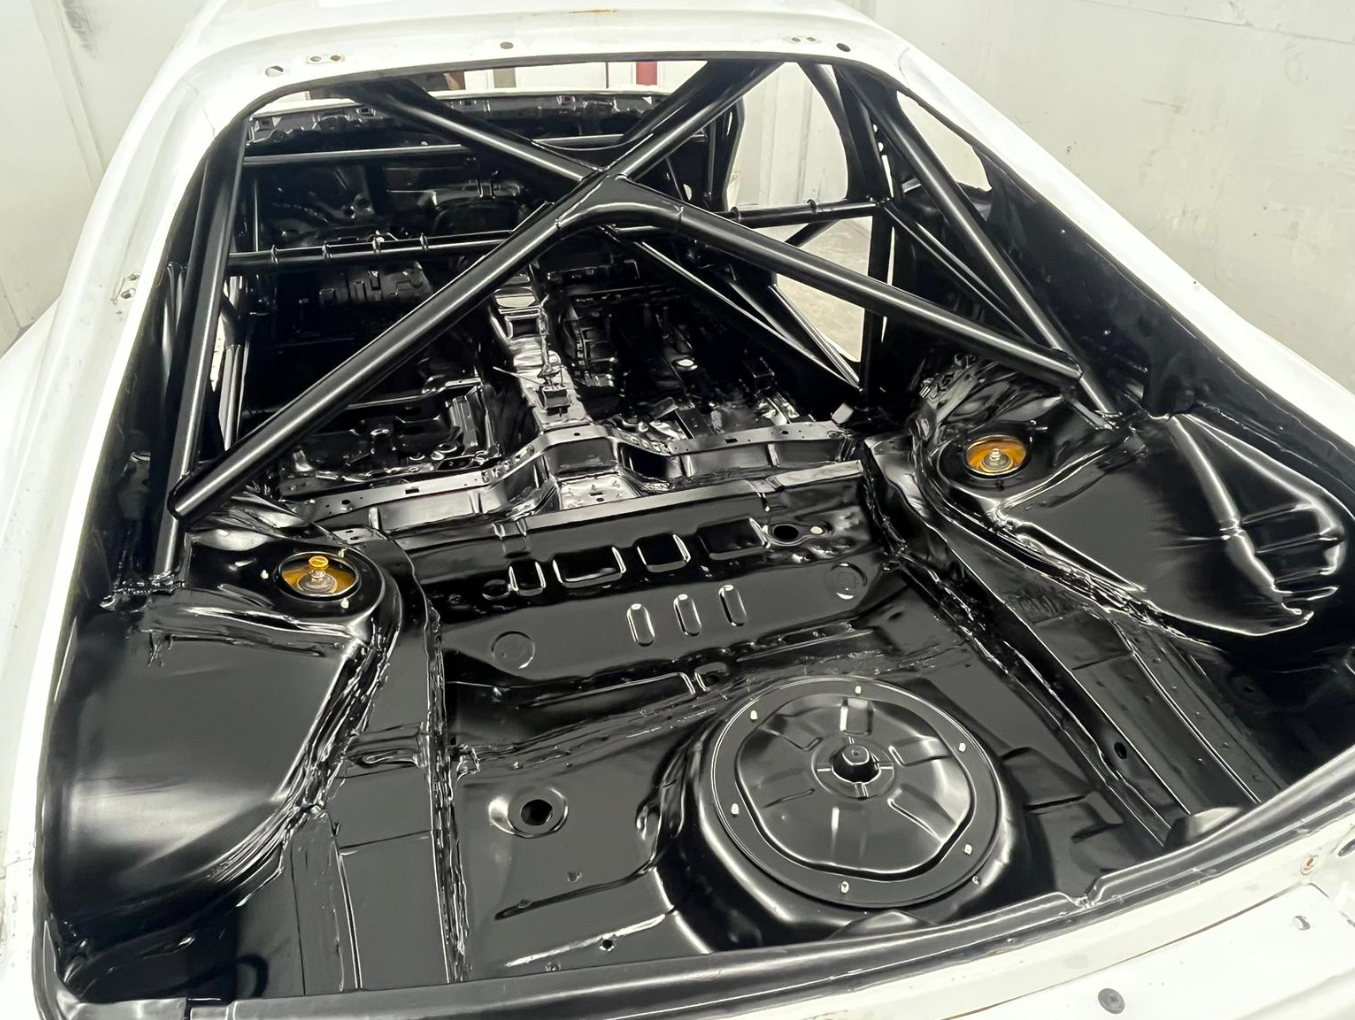
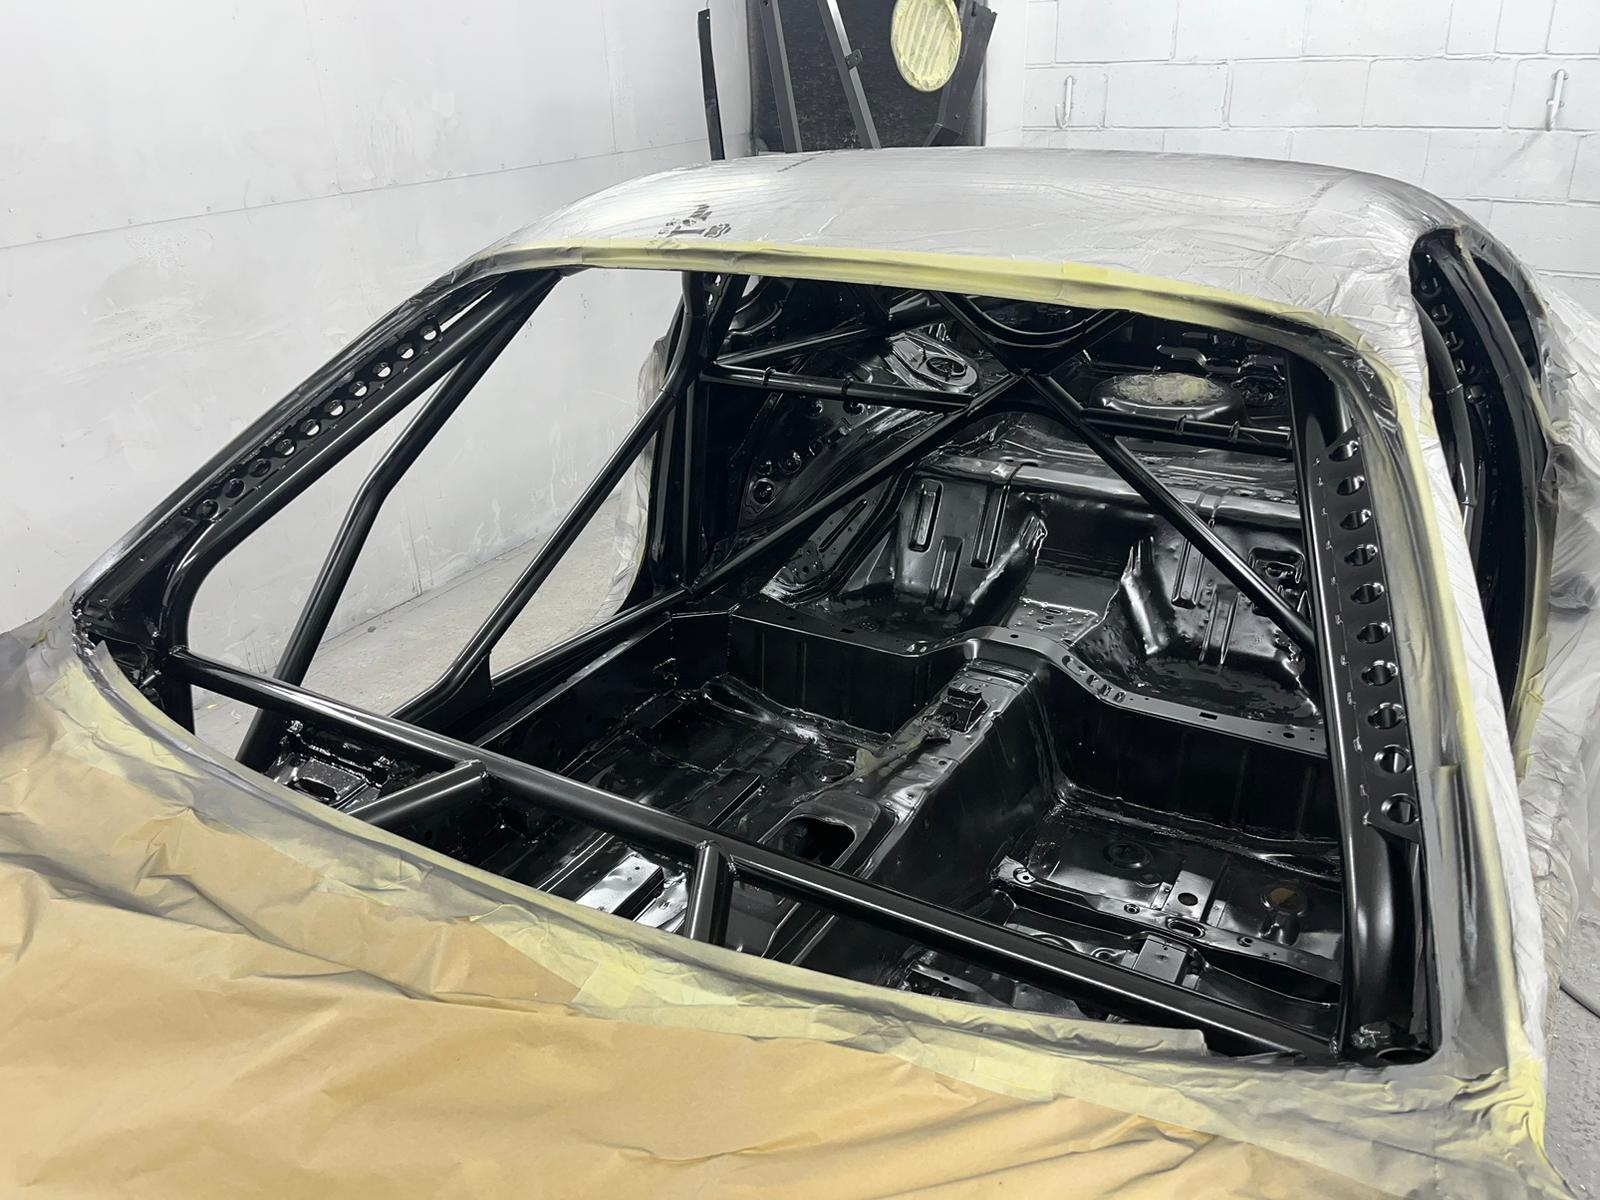
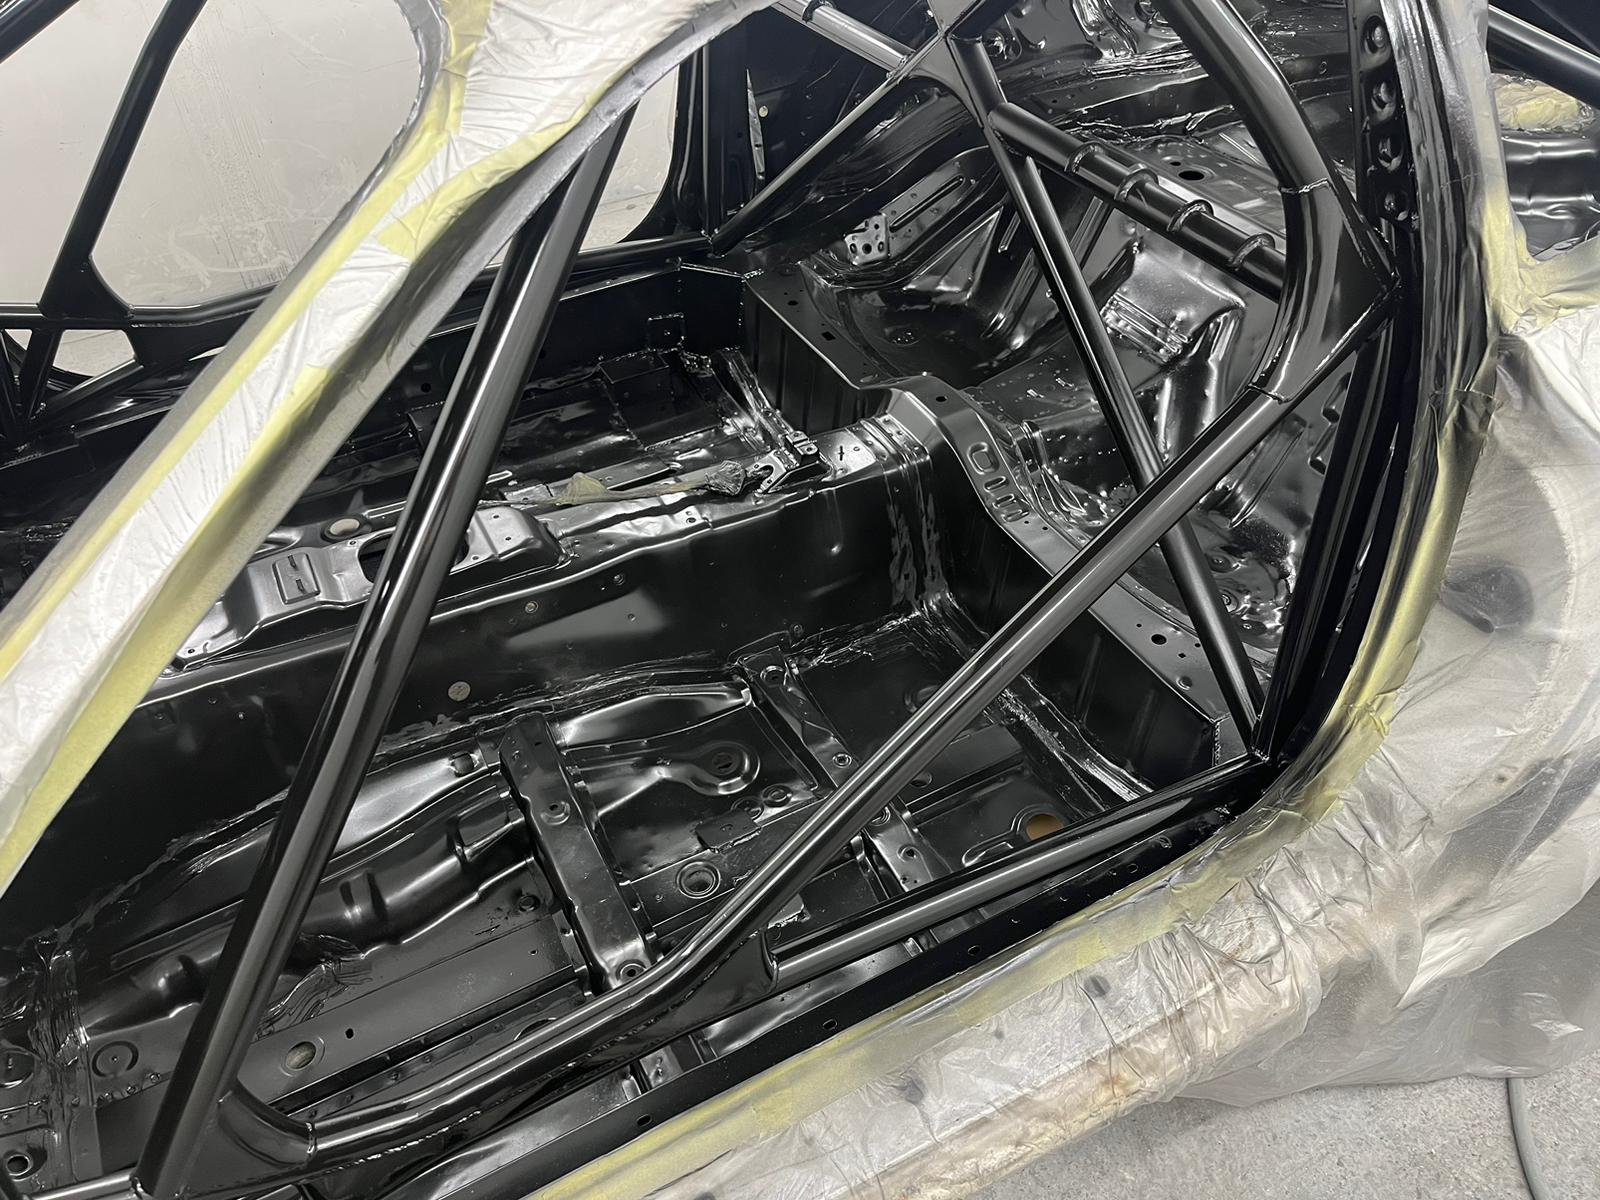
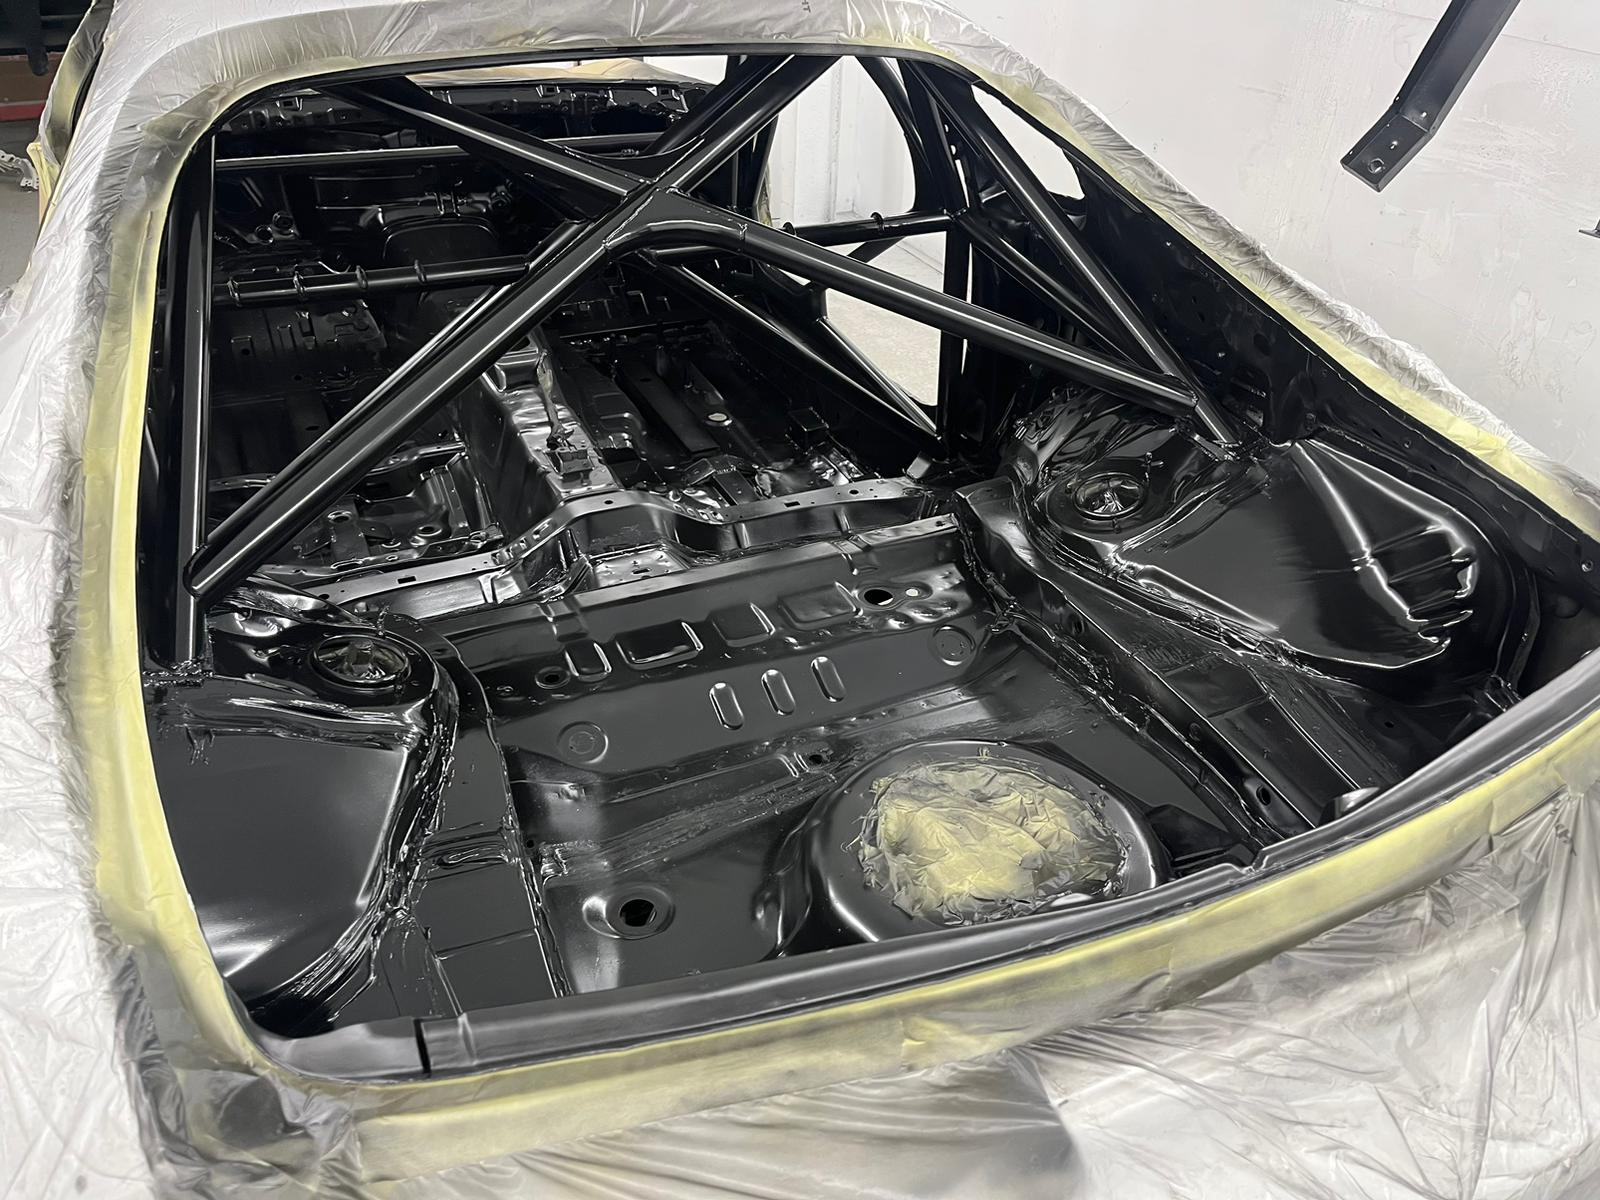
The work at RRS is finished, James & Kane smashed it out. A coat of satin black went on the other day After a day to let the paint settle the re-assembly begun Hopefully pickup the car this weekend then the next journey begins. Will see if I can sandwich my dash back in and go from there.

-
No not really, I just went Motec to learn a new platform. Most modern ECU's have strategies in place to control a nitrous solenoid progressively as it its core its just a high frequency PWM function versus whatever variable you deem fit. The nozzle isnt a solenoid. Its literally just a jet with an orifice thats been drilled to deliver 'X' amount of horsepower based on the size of the orifice. There are no moving parts to it. The nitrous solenoid output is connected to the nozzle. The solenoid is the part that does the hard work. In the past these solenoids were just used as an on/off switch to pass the nitrous through it, but as technology as gotten better these solenoids can now be pulsed via PWM using external h bridges which will allow control on how much nitrous is delivered through it. I'm not sure on efficiency or range of operations as I'm sure it will be dependant on the hardware setup, but so long as I can have a ramping style of nitrous delivery rather than one big hit then it will serve its purpose.
-
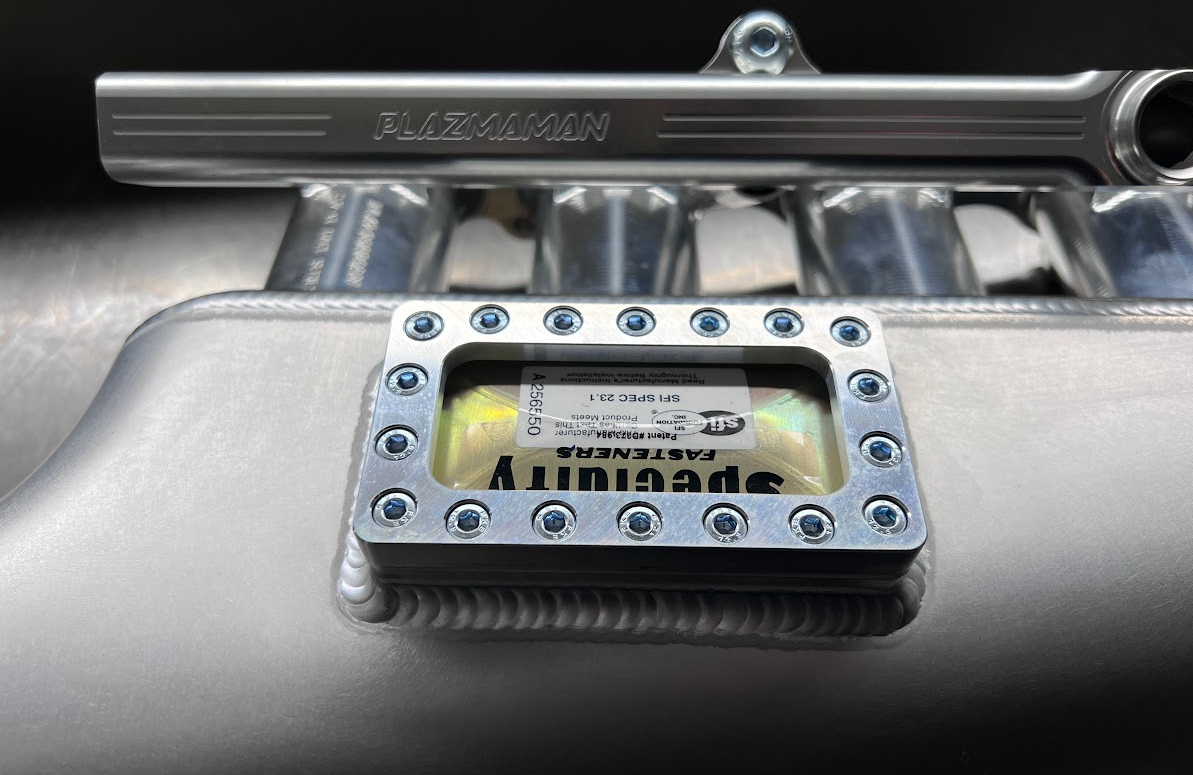
Yeah, in the event of a nitrous backfire through the intake manifold, the pressure spike will blow the burst plate first, allowing for the offending air charge to escape through there. Without something like this in place then its possible to do a lot of damage. Personally I've seen a backfire blow an intercooler and intake pipework to shreds, which I'd rather avoid in the event of a backfire. The only problem with the burst plate is that if it does blow open and the engine is still running then the engine will draw air through the blown plate, bypassing the throttle body and could lead the engine wanting to accelerate or hit to RPM limiter very quickly. Haven't though of a failsafe that I can implement around this currently but I'm sure I can come up with something. Might run the engine without the burst plate and see how bad the air leak is then figure out something from there. The plan is to run a progressive nitrous system directed through the Motec using a solid state relay that controls the solenoid. So I could run say a 100hp nitrous jet, then use PWM control to pulse the solenoid to give me a range of 0-100hp depending on the frequency of operation, so the nitrous can flow in steadily rather than having an instant hit of whatever the jet can supply. Yeah head isn't ported currently, but after baseline is established then head will come off for porting and valves, so will get it matched to the intake then.
-
Getting close now Stage 1 of interior paint done, basically an epoxy layer for the next coat of paint to sit on Going with a satin black paint layer on top of this. Although the car is white and I like the idea of white interior but every track car I've been in with white always gets super dirty and I cant be bothered with the upkeep on that. So black it goes, will make it easier for everthing to blend in inside.
-
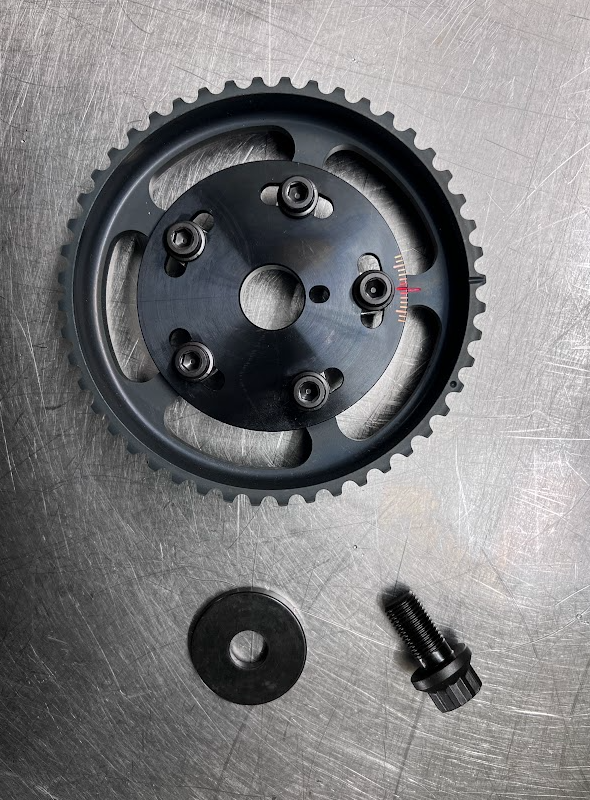
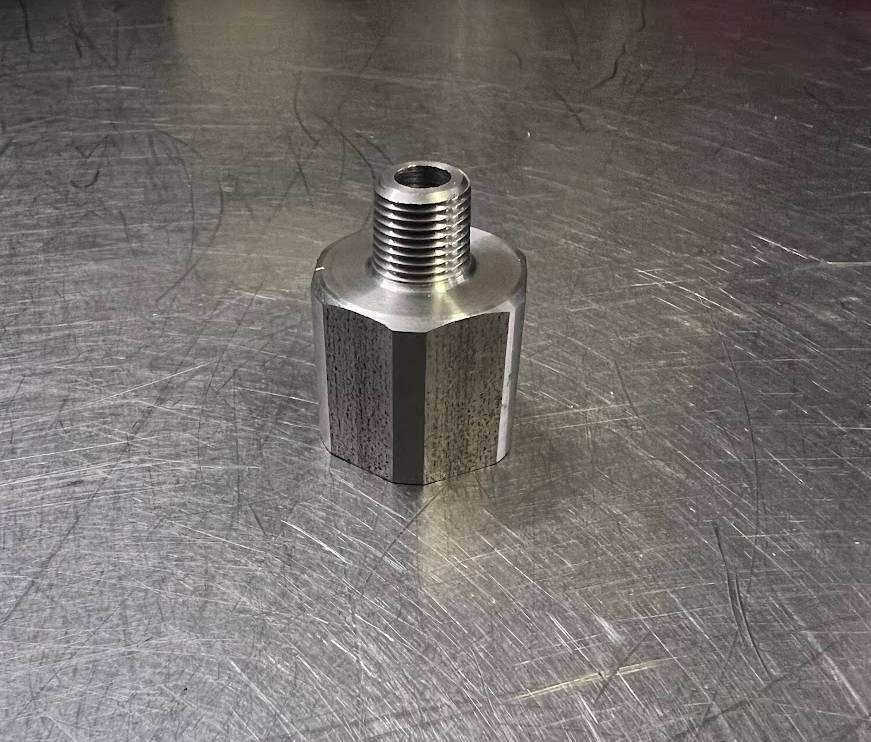
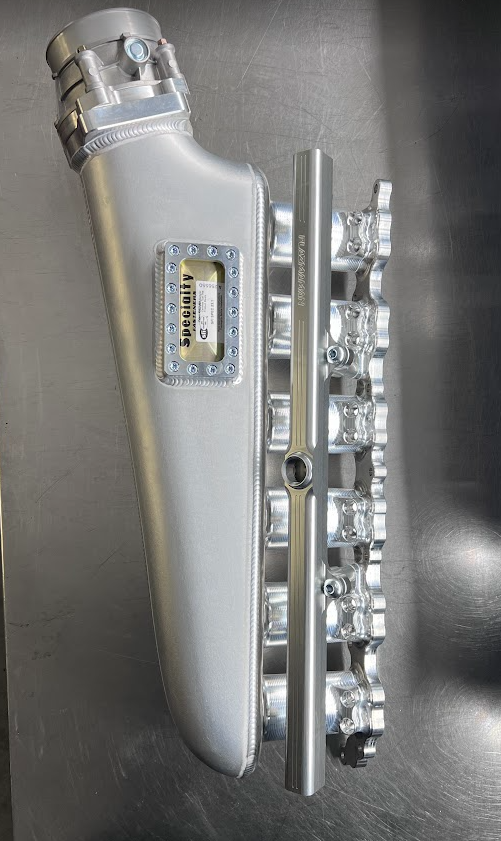
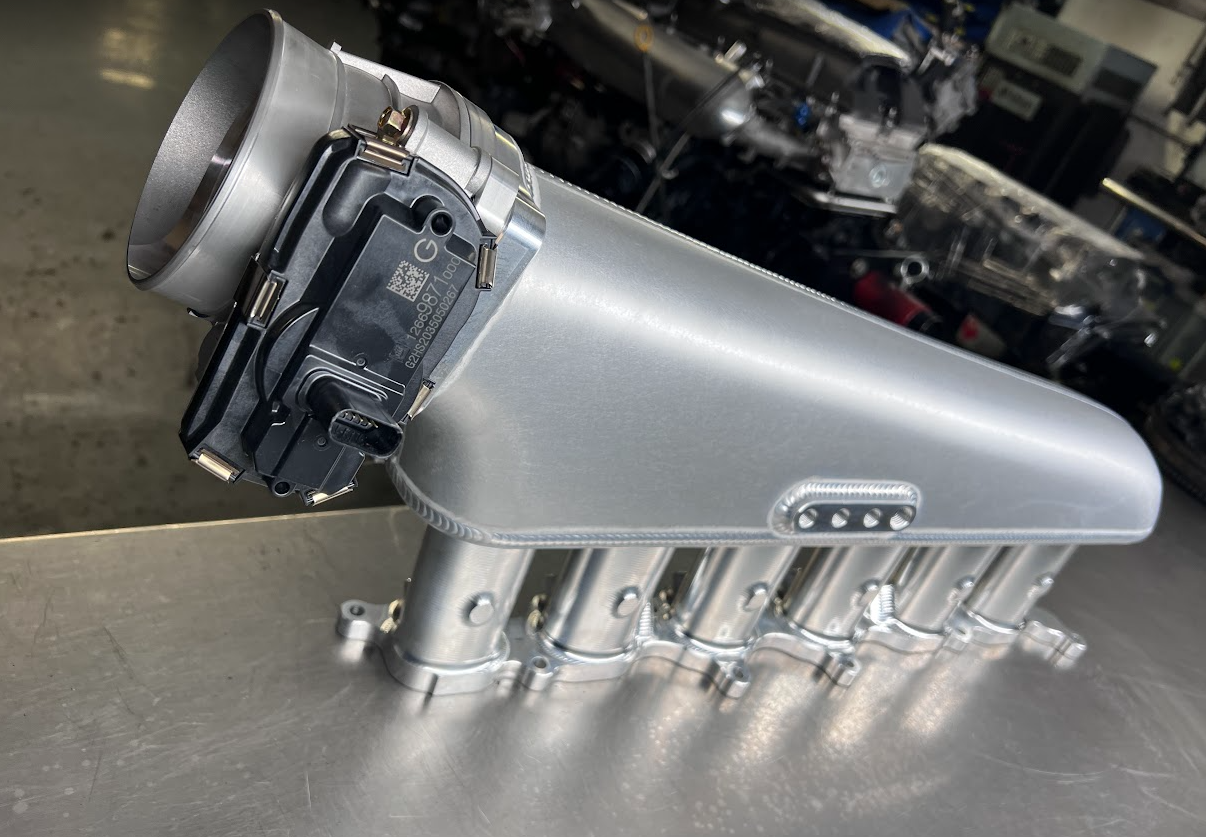
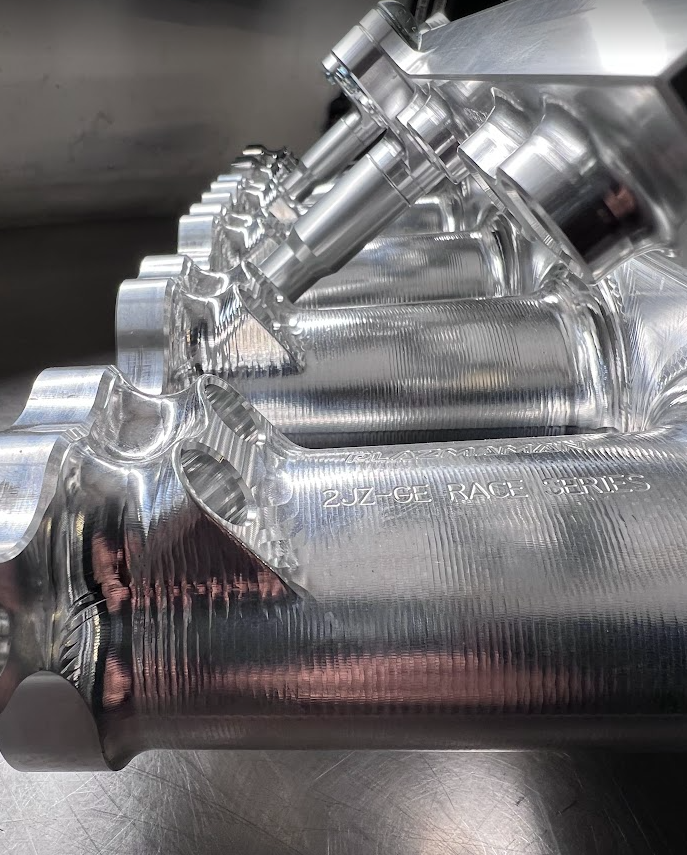
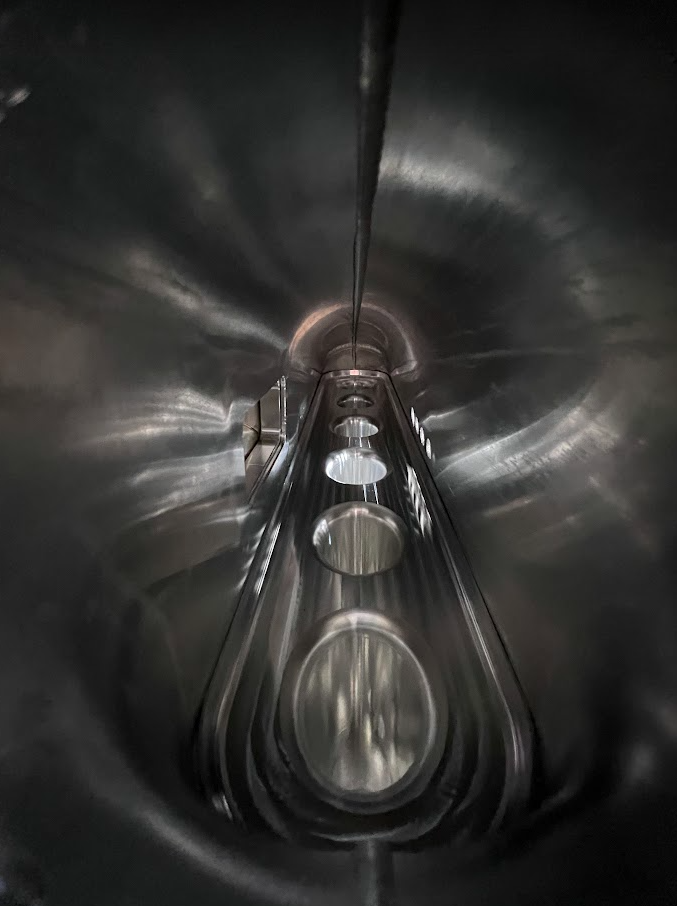
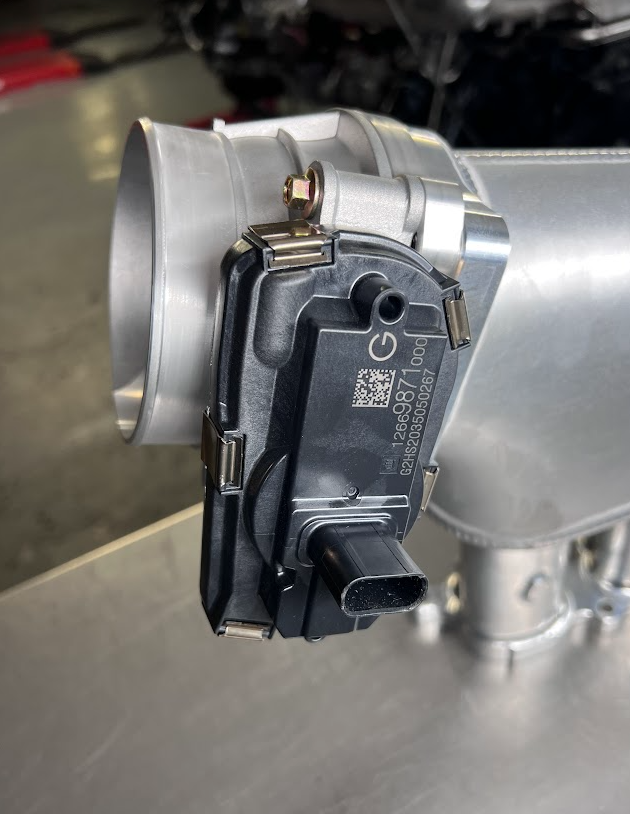
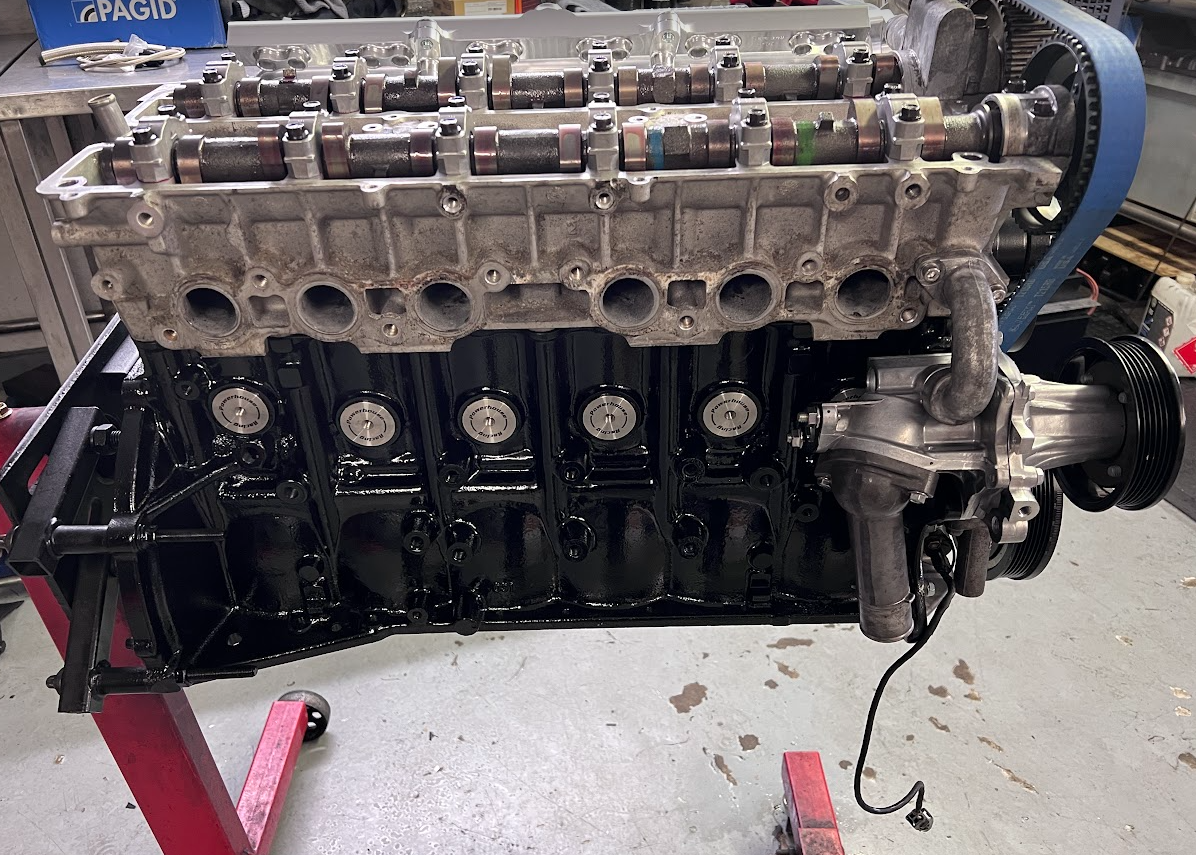
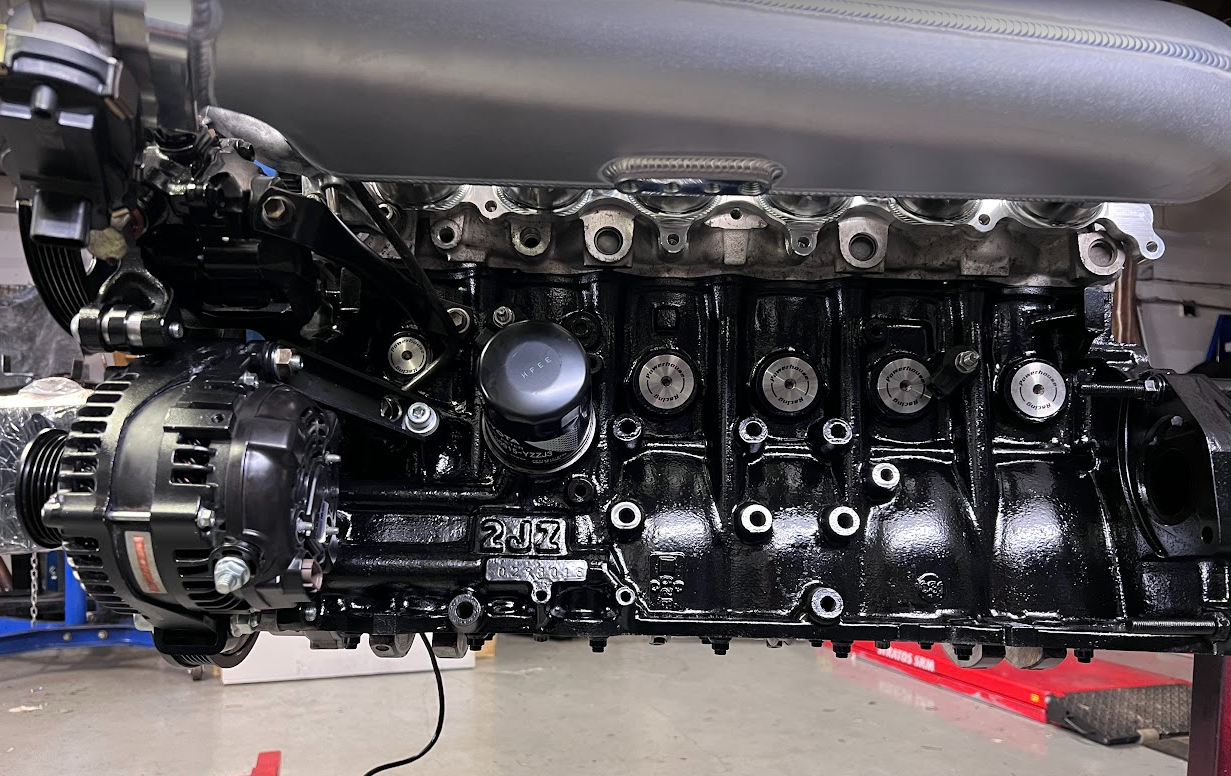
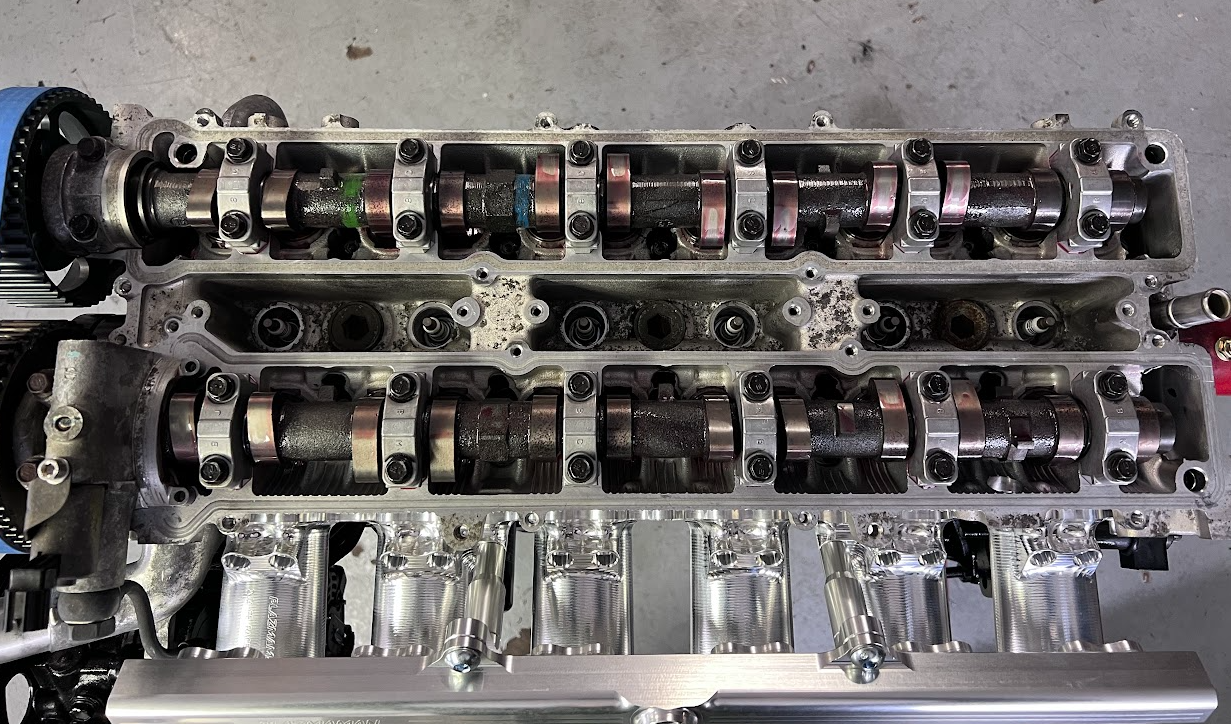
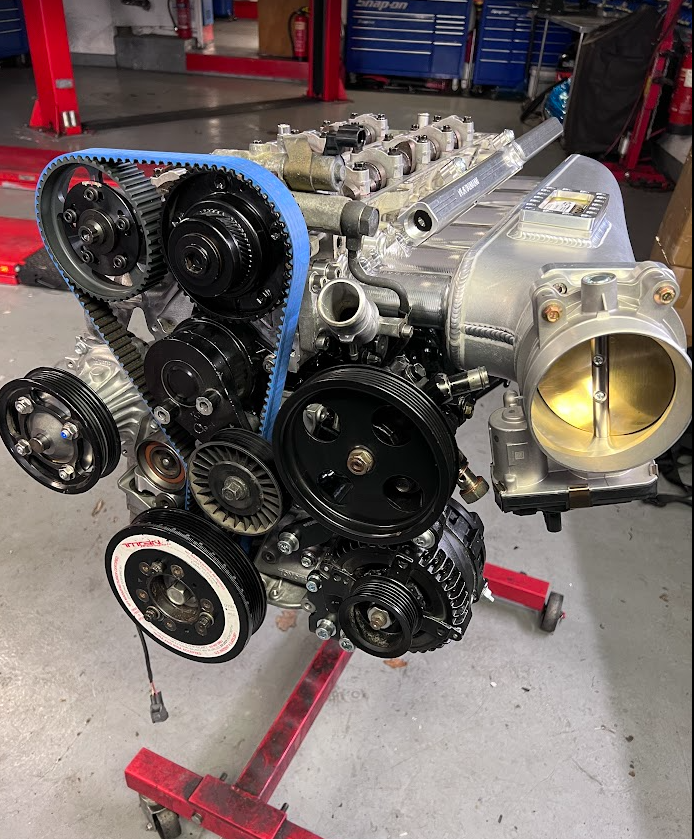
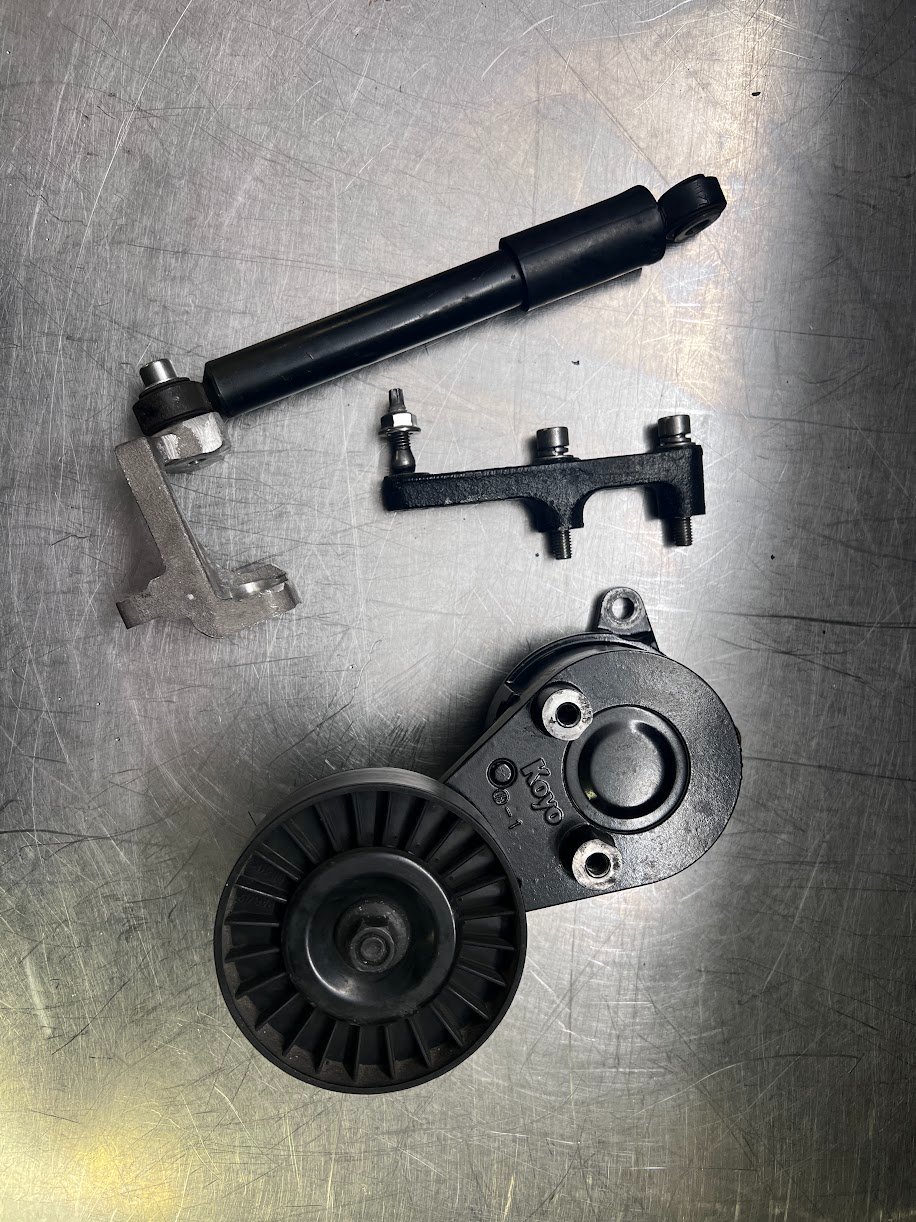
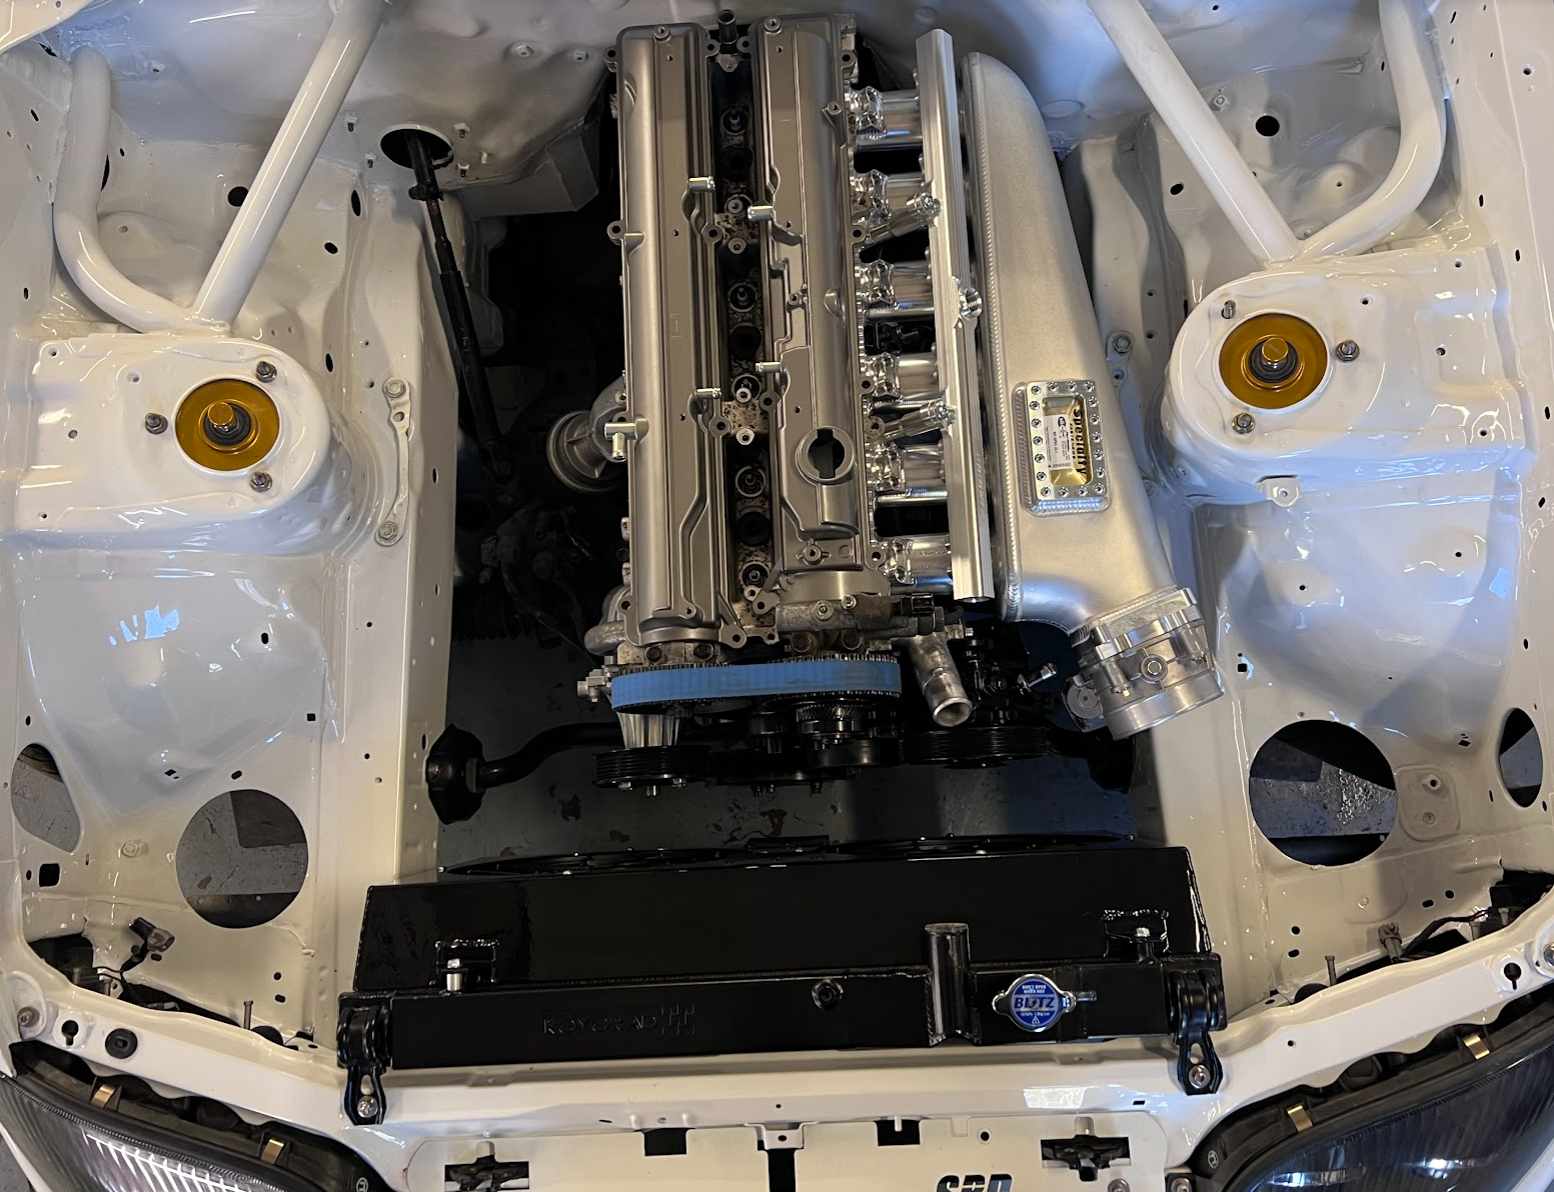
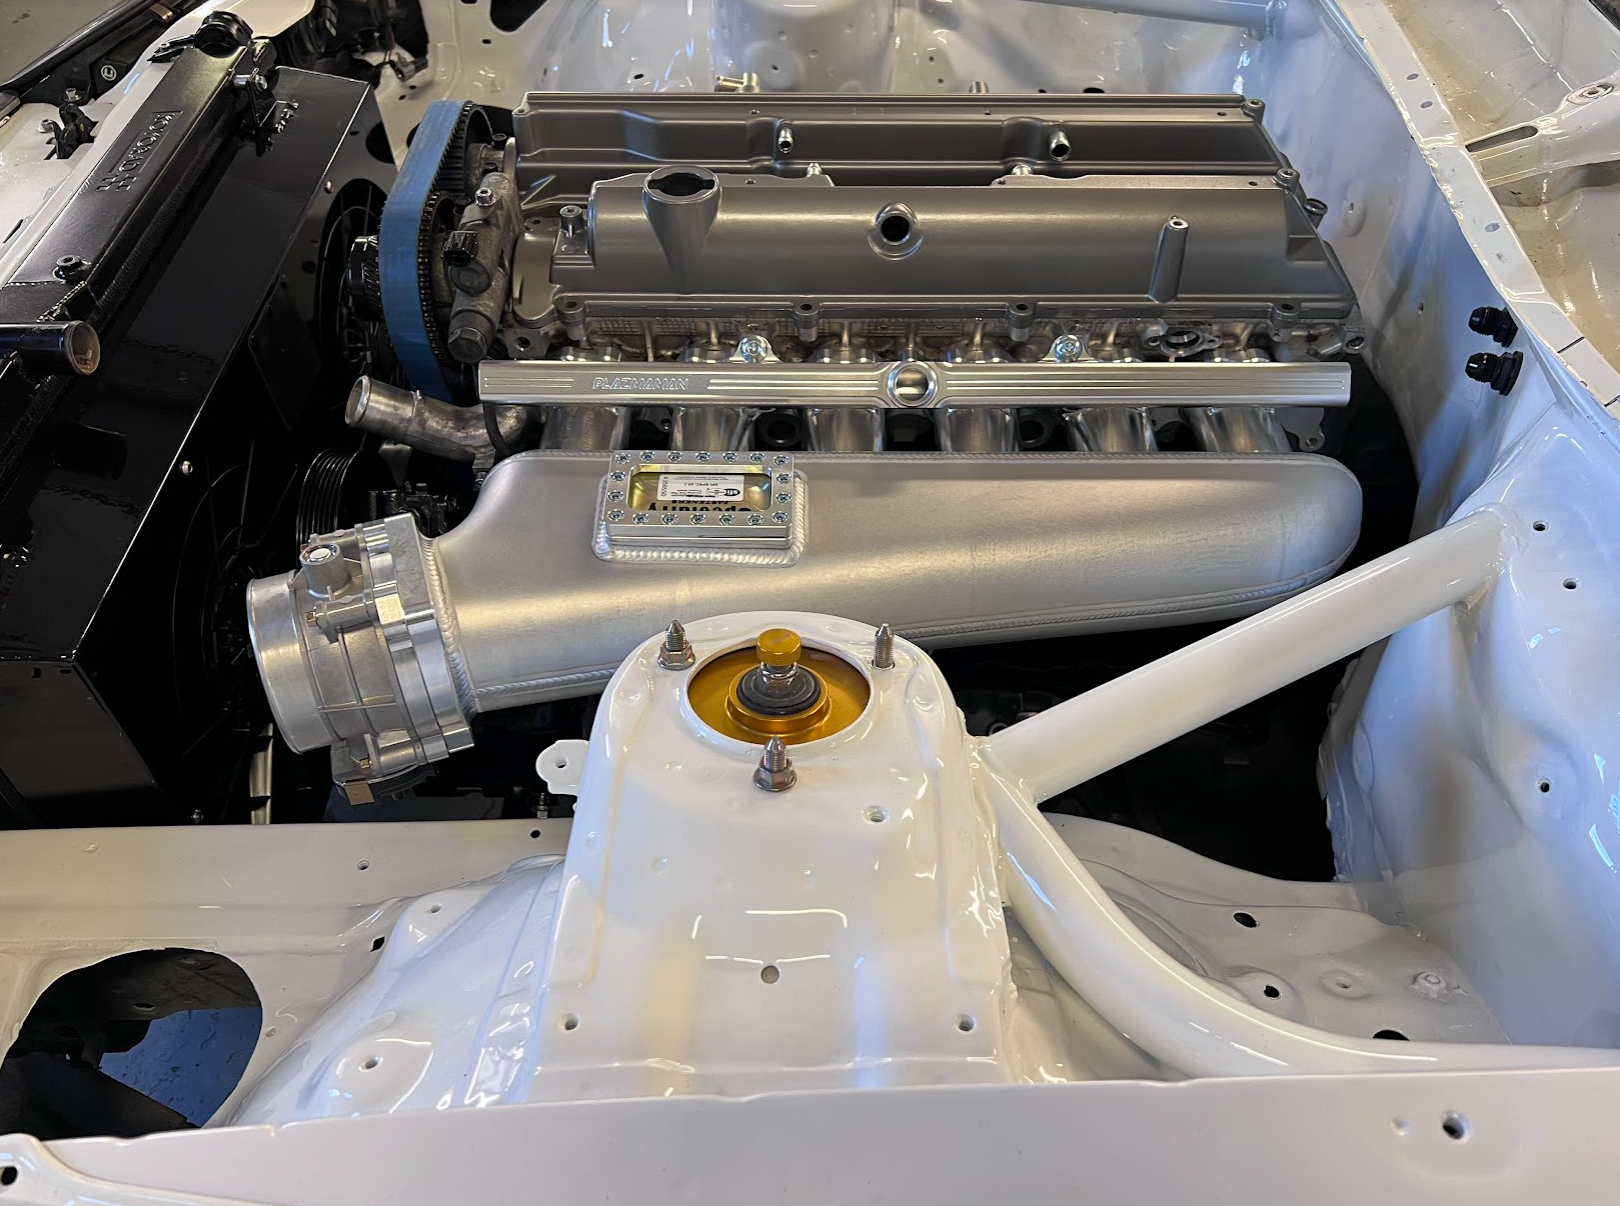
Thanks for the kind words fellas. Had a fairly productive weekend, but forgot my phone at home on saturday so missing lots of photos of the assembly of the longblock unfortunantely. Picked up from where I left off the other day and installed the pistons & rods back into the motor. Then installed my head and called it for the day. Starting today I got to install some new fancy parts which I've been looking forward to. First on the list was a new JUN cam pulley with ARP bolt There are argueably more modern and more secure cam pulleys on the market these days, but I can't get over how cool this pulley looks to me, so opted to get a fresh one in from Japan for the build. As I'm reusing my shortblock that originally came from an NA supra, the block is early style forging that was not provisioned for VVTi, so had to use one of these PHR adapters to allow me to install the factory vvti oil feed line. Had to bend the oil feed line slightly in places to reach this adapter and avoid the powersteering brace but fairly easy install otherwise. And la piece de resistance is this Plazmaman intake manifold This is specced for a 2JZGE, 12 Injectors on a single rail, nitrous burst plate & DBW throttle. Seemed a bit rude not to include the burst plate as I'll be dabbling a bit with nitrous on this setup. I only plan to run a dry shot pre throttle for spool aid/midrange torque, so the chance of a nitrous backfire is less than a full wet system, but for $100 it seemed like a good insurance just in case. Quite a cool piece I think. The quality of the machining and welding are certainly up there. The Plazmaman seems to be designed primarily for high power drag applications, so there are a few details in the way its been constructed which seem heavy duty. For example the runners are a single piece billet, the fuel rail has the beefiest mounts I've seen for a 2J. The rail itself has 3 AN12 Orifices that can be configured in multiple ways to supply/return fuel. The runner port size are larger than the factory head ports, and there are provisions under the runners for direct port nitrous should that be required. Probably a bit OTT for what I need, but I appreciate having something over-engineered. The idea of this was to have an intake that I realistically never have to change in future, and the setup can grow into what the inlet can support should it go that direction in future. The plenum can support multiple different style of throttles. I opted for a LS flange for a few reasons, compared to going with a bosch DBW which argueably are some of the best DBW's on the market. The LS flange can support both LS Cable & LS DBW throttles, so multipurpose in that respect. I don't see myself ever going back to a throttle cable, but nice to have it as a backup without having to weld on a different flange. In terms of DBW support with the LS flange there are a handful of OEM & aftermarket LS DBW throttles that have been used over the generations of LS motors, so plenty to pick from. However most of these are 10 years old + in terms of design. As mentioned, the Bosch DBW's are really prominent in the aftermarket for their reliability and ease of use, but I wanted to try something different that could hopefully match the standard of Bosch. So I started digging into what the modern day equivalent OEM's like GM are using for DBW. This lead me to the LT5 engine used in modern corvettes. Compared to the earlier LS DBW's that used a voltage divider on a wiper contact which can wear out over time. The LT5 DBW uses contactless inductive sensors to operate the throttle. Compared to the old throttles this is "state of the art" and is rated "for life" operation. So on paper the LT5 unit should be better in every way. Interestingly, the LT5 throttle does not use analog inputs for the TPS1a/TPS1b tracking. Instead it uses a digital signal communicating over the SENT protocol to send data regarding throttle position. Luckily the Motec ECU supports this so should be able to make this throttle work. Another thing that interested me was the size of the throttle housing being 4'' and the butterfly being 95mm. Again, although its a bit OTT for my setup having a 4'' throttle housing, it means I could run a 4'' pipe from my intercooler outlet straight to the throttle without any need for reducers in the pipework. The idea again being that once this setup is in, I won't have to redo the intake side of the pipework in future if I go for more power. By contrast the bosch DBW units "only" go to 83mm throttle size, which is still sufficient for more power than I'll ever need but in case there is any doubts on restriction, a 95mm throttle will allow for further headroom. Having played with 102mm cable throttles on high powered 2J's before, it can be hard to get them to drive off idle as smooth as the OEM setup as cracking open such a large throttle even at small opening angles proportionally lets in a large amount of chargeair to the engine, so it can feel a bit like an on/off switch. I think the engineers at GM were thinking along a similar line as the LT5 throttle has been produced with a small ridge that reduces the amount of airflow through the throttle at small opening angles, so you can have a decent balance between low throttle driveability whilst having the airflow required at WOT on a large supercharged V8. Between this ridge and the pedal to throttle mapping control on the ECU, I'm hoping I can have my cake and eat it in terms of airflow versus drivability at low engine speeds. Can't wait to see how this all plays out when I get round to calibrating it. So back to business at hand. With the longblock assembled, I started test fitting various components to the engine. This isnt the final fit, as once the car is back from RRS I want an engine to drop into the bay so I can start making decisions on a few things mechanically and cosmetically thinking about what colour scheme to go for. Then I can pull the engine back out, do some cleaning/painting and install whatever else needs to go on before going back in for real. So mainly test fitting what components I have spare from the last setup for now. Starting with the front of the engine This time round I've decided not to run any front covers on the engine. With the cam covers I plan on running I wont be able to seal the top half of the engine with a cover like OEM, so theres little point running the lower covers as if there is anything that goes near the cambelt at least now it will have somewhere to go rather than getting stuck inside a timing cover and causing havoc. I can also keep an eye on and service various components a little easier this way round. The other big change on the front end is the alternator relocation, using a Tomei alternator relocation kit. I haven't run an A/C in years, so always had a free spot under the powersteering pump. The relocation kit serves a few purposes for me. Firstly, it keeps the alternator away from the heat of the turbo & manifold, whilst also streamlining the wiring more towards the inlet side of the engine. Secondly, with no alternator on the exhaust side I now I have more room to play with for turbos and intercooler pipework as it can sometimes be a bit of a squeeze with the alternator in the way. I actually prefer the GE's coolant inlet/outlet locations to a GTE, as there is no longer a waterneck & pipework that has to cross the front of the engine. The in/out to the radiator is more of a straight shot and gives better accessibility to the front of the engine. Previously I had run the manual aux tensioner dampener, but with the tomei relocation kit I think I will have to go without this and go back to an auto tensioner, unless I can get a fancy billet mount made up. Maybe a side project for the future, not the end of the world currently though. Between the GE waterneck, rotated thermostat housing and the alternator being removed, it allows for the most compact setup I can manage whilst keeping the factory water pump. Haven't decided yet on what style water pump hardline I'm going to run. I need to make some provisions for coolant feed/returns for the turbo and electronic wastegate. I will probably wait till the manifold and turbo are in place then figure out what sort of design is needed. The only thing for sure currently is that the coolant & oil lines on the exhaust side of the engine will be made from steel hardlines. Although there will be a few flexible sections I want hardlines to cover most of the areas where the heat is going to be most prominant to increase reliability. Nothing too sexy happening on the intake side just yet, other than mounting the PS & Alternator relocation. Between the mechman alternator having a slightly larger housing than the OEM alternator and the VVTi adapter sitting further out than OEM, I had to modify the mounting brackets of the tomei kit slightly as it was fouling in places. Still have a bit more work to do on the rear alternator brace to the block, but it all fits as it should now. Previously I had run a mocal oil thermostatic housing for my oil cooler, but the route of the oil lines went where the alternator now lives. So for the moment have just mounted an oil filter straight to the block. I will still retain a oil filter sandwich plate with a thermostat, but I think I'll move to a different product for this. The head is a 2JZGE VVTi, running stock ports, stock valves and stock buckets with shims. Camshafts are Kelford T202-D (272/278) with ~10mm lift, with Kelford Beehive valve springs. The valve lift is probably cutting it a bit close with a stock bucket/shim setup, but for a baseline this setup will fit the bill. Also switched to some L19 head studs for that extra bit of clamping goodness. The head is a bit grotty on the outside still, but for the moment is not a priority for me. Once the baseline of this setup has been established on the dyno, I'll remove the head and have valve seats, valve guides, valves and portwork done, so will save the cleaning/blasting of the head until then when the whole head has to come to pieces. A few months ago I had ordered some plazmaman billet valve covers, and they were super nice. Compared to other billet covers I have seen, they designed a really good baffle system. Only problem was the covers I ordered were for a GTE non vvti, which obviously wouldnt work with a VVTi head. Annoyingly, Plazmaman haven't got VVTi valve covers ready yet. I've been told they will be available at the start of 2023, but if they dont come through in time then might have to go with hypertune or OEM VVTi covers. So for the moment I dont have any sexy covers. In the next few days I'll get the sumps and some other components back onto the engine, ready for when the car is done being painted.