Loomie
-
Posts
140 -
Joined
Content Type
Profiles
Forums
Store
Blogs
Events
Downloads
Supra Articles
Gallery
Everything posted by Loomie
-
Hi everyone, I've been spending the last few days updating all the yellowing bulbs on the Supra and i'm a little stuck with the fog lights in the front headlights (the outermost bulbs). I've bough some LED h3 bulbs but they're not bright at all and don't really do anything. These are the LED H3's i bought - http://www.ebay.co.uk/itm/252133510570?_trksid=p2057872.m2749.l2649&ssPageName=STRK%3AMEBIDX%3AIT I was wondering if anyone had tried using HID's in these bulbs and if they have, what was the output like? Was there much glare/did they shine down wards like normal fogs or were they blinding. I get really irritated by people who stick HID into normal xenon headlights and take no steps to ensure the beam pattern is shining where it should so i definitely dont want to do the same myself. Here's an example of the type of HID kit i was interested in - http://www.ebay.co.uk/itm/35W-55W-H7-H1-H3-XENON-HID-CONVERSION-REPLACEMENT-Headlight-Bulbs-Slim-Ballast-/221859588241?var=&hash=item33a7dca891:m:mnTkmx5e6FuLEBSCE3X1sfQ Thoughts?
-
Bump!
-
Right now it's all in Japanese so I have no idea whether it can be changed or not. The manual is in Japanese too so that's not much help bud - maybe if you knew someone who spoke it they might be able to figure it out?
-
Hi, So with all the audio upgrades in my car i have, which seems to be a pretty decent japanese Kenwood headunit sitting there gathering dust. I'd love to hear what everyone else did with theirs? Throw it in the bin or did you manage to sell it? Its available if anyone wants it - it seems to be a HDD with navi built in with a TV Tuner too - all Jap spec and i still have the manual (in Japanese obv). Model number is Kenwood HDV-790. Here's a pic but let me know if anyone is interested and wants more or other info... [ATTACH=CONFIG]206656[/ATTACH] Open to offers. Loomie
-
Yeh, the Rohana's are a beauty - honestly, i have no idea about offsets etc so rather than rack my brain trying to figure it out i thought i'd just postpone it till next year. I think the smallest the rohana's come in is a 19 though so might not fit without rolling arches. If you do end up getting them let me know how you get on with fitment etc
-
Anyone? I was hoping this had been done a few times considering the number of Jap imports here.
-
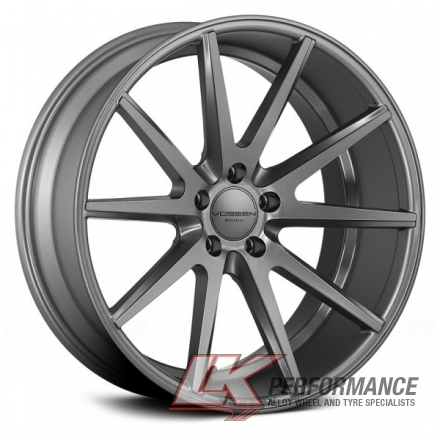
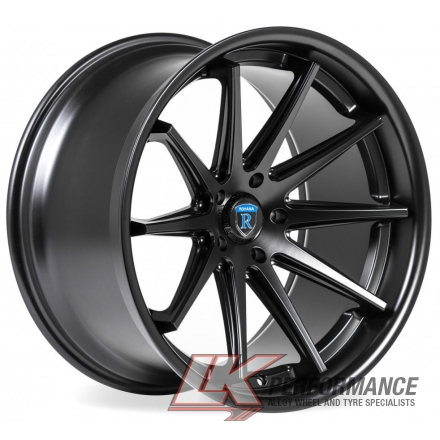
I actually went through exactly the same thing as you - i looked for some cheaper options but didnt find anything i was completely happy with so thought i'd park the circles till later... The two i found which i came closest to getting were these... http://www.lkperformance.co.uk/wheels/vossen/4237-vfs1-matt-graphite?vehicle=1343&rim_size=19 and http://www.lkperformance.co.uk/wheels/rohana/3807-rc10?vehicle=1343 http://www.tsw.com/alloy_wheels_jerez.php I loved the rohanna's particularly.

-
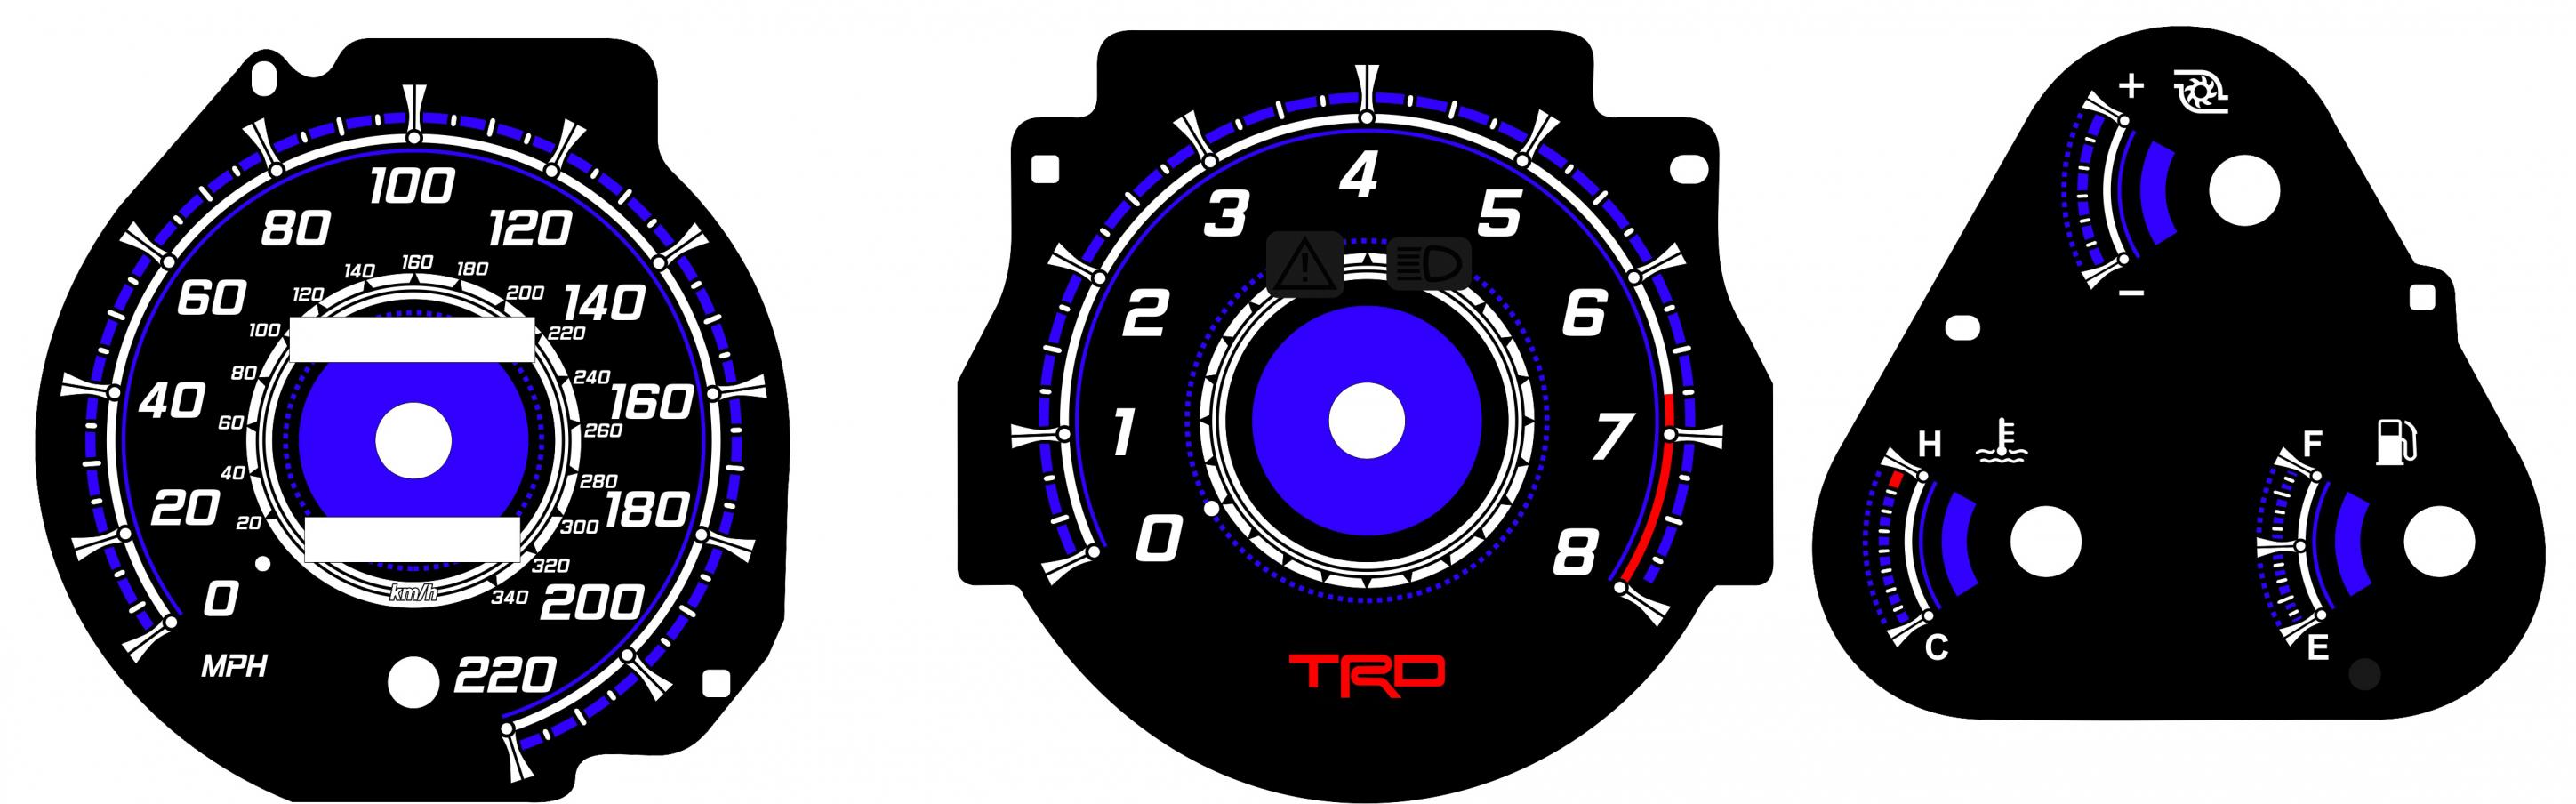
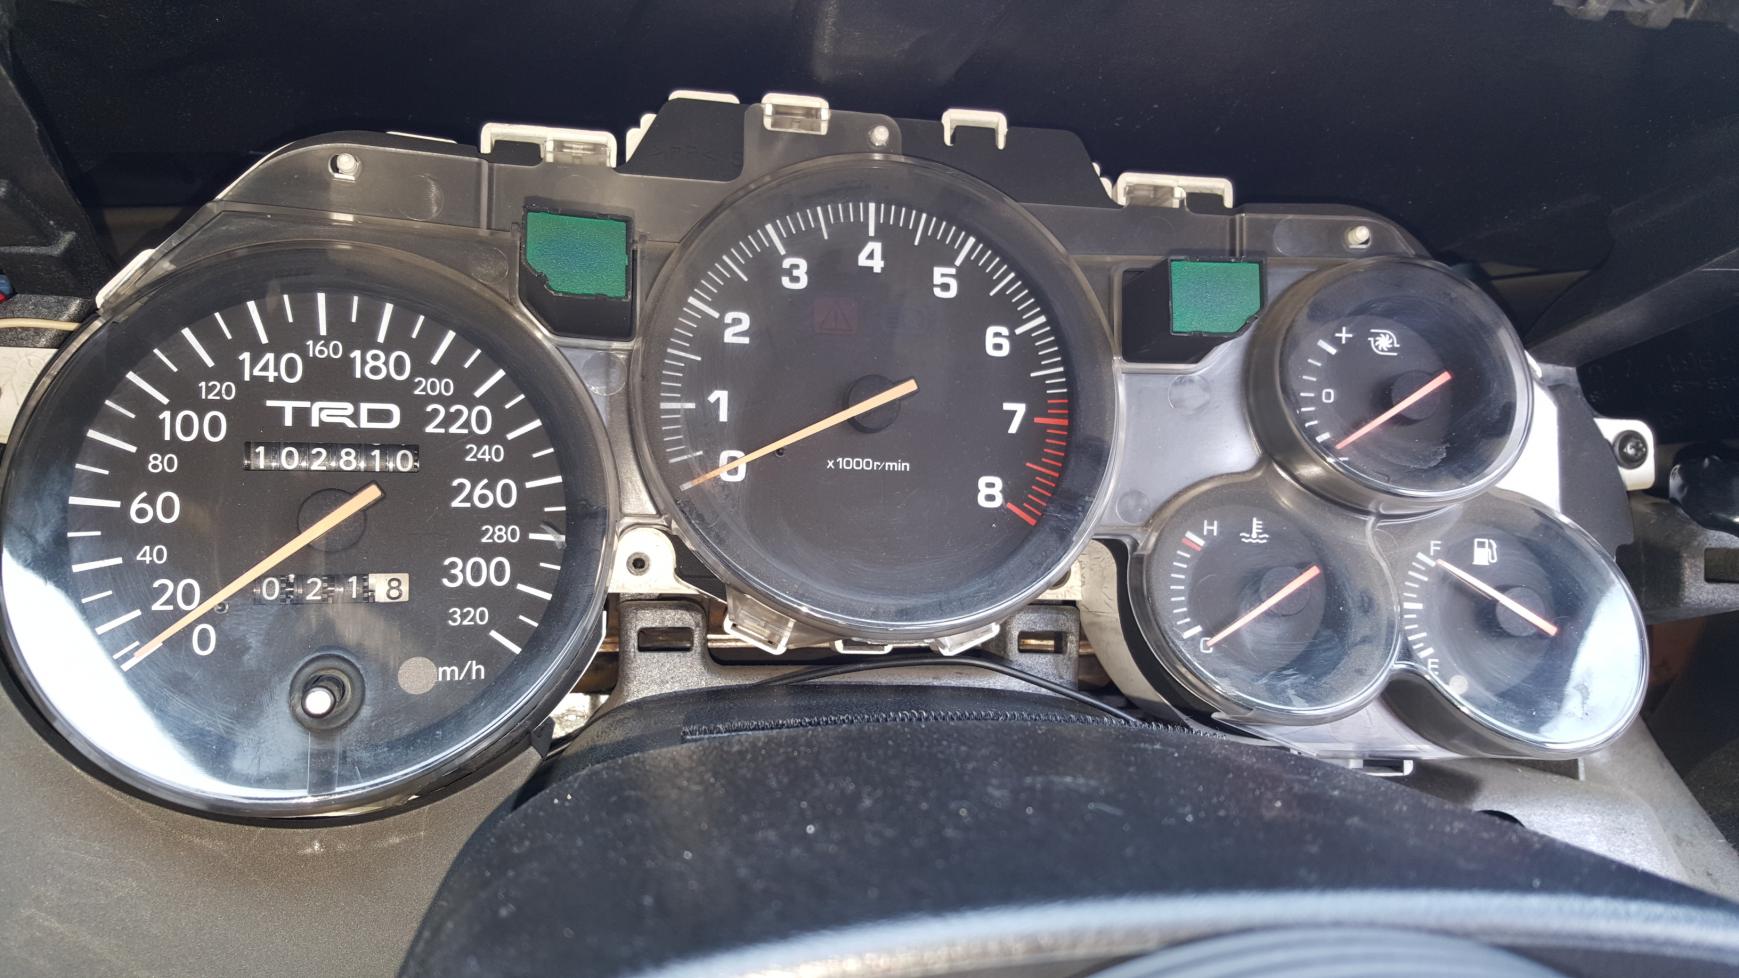
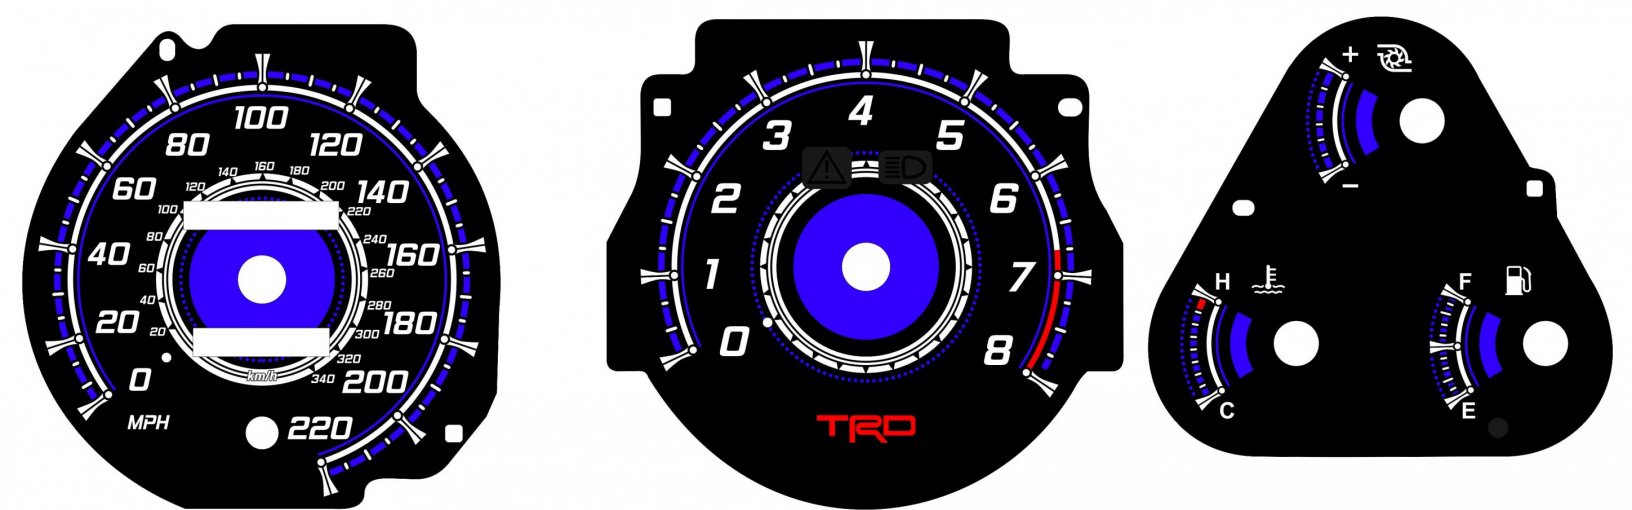
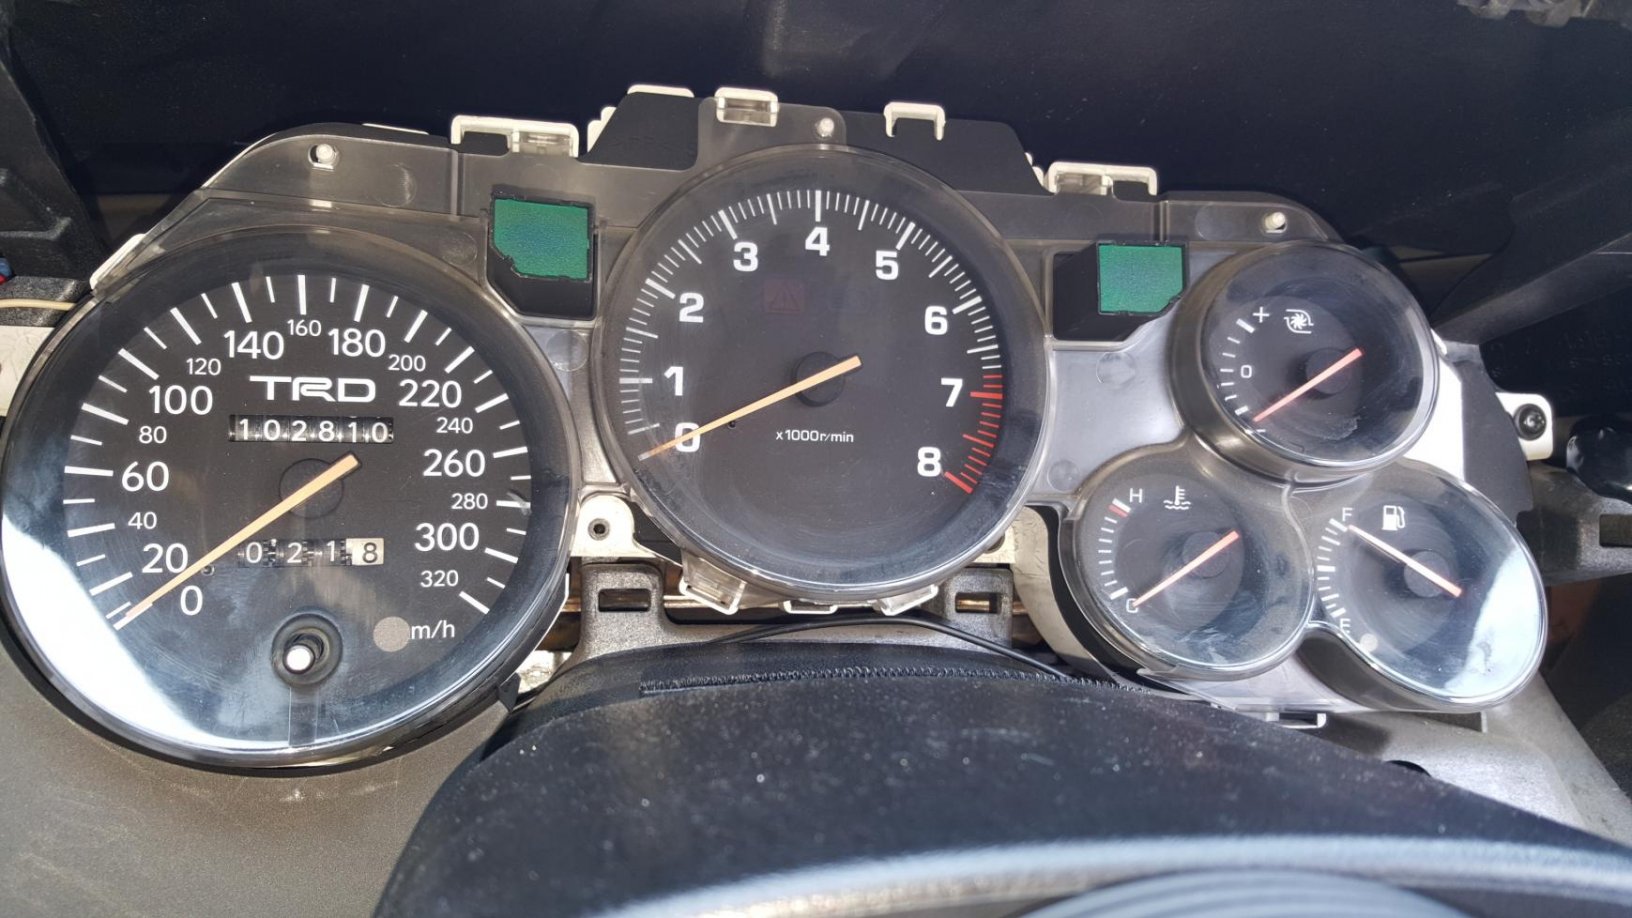
I've recently ordered a set of dials from moman which i cant wait to fit however i had a few questions regarding the speedo/odo on the car. When i bought the car from JM they fitted a KMPH to MPH speed converter chip thingie to it. Now the chip converts the KMPH speedo to read in MPH and so only the first half of the speedo would ever be used (the dials currently go to 320kmph, so even at 160MPH i'd only be at half way around the dial) , it converts the odo to counting in miles also. When i get my dials from moman i'm assuming all i need to do is remove the converter chip and the speedo will go back to normal so it uses the full speedo dial, however i'd prefer to still have the Odo counting in Miles. Does anyone know how i can accomplish this? Is there another chip i can get that will only affect the odo? Any help with this would be great! Some pics of my dials and the ones i'm getting from moman below.
-
This
-
Still on the look out for a passengers side switch please!!
-
I think black with blue stitching would look amazing! Less is defo more! Subtlety is key.
-
Cheers - the car already sounds amazing with only half sound proofed. The upper glove box and the Nardi steering wheels were there when i got the car so the previous owner must have enjoyed the additional space and i dont have the stock wheel unfortunately! I didnt actually realize the facelift had an airbag instead of the upper box actually. :-s
-
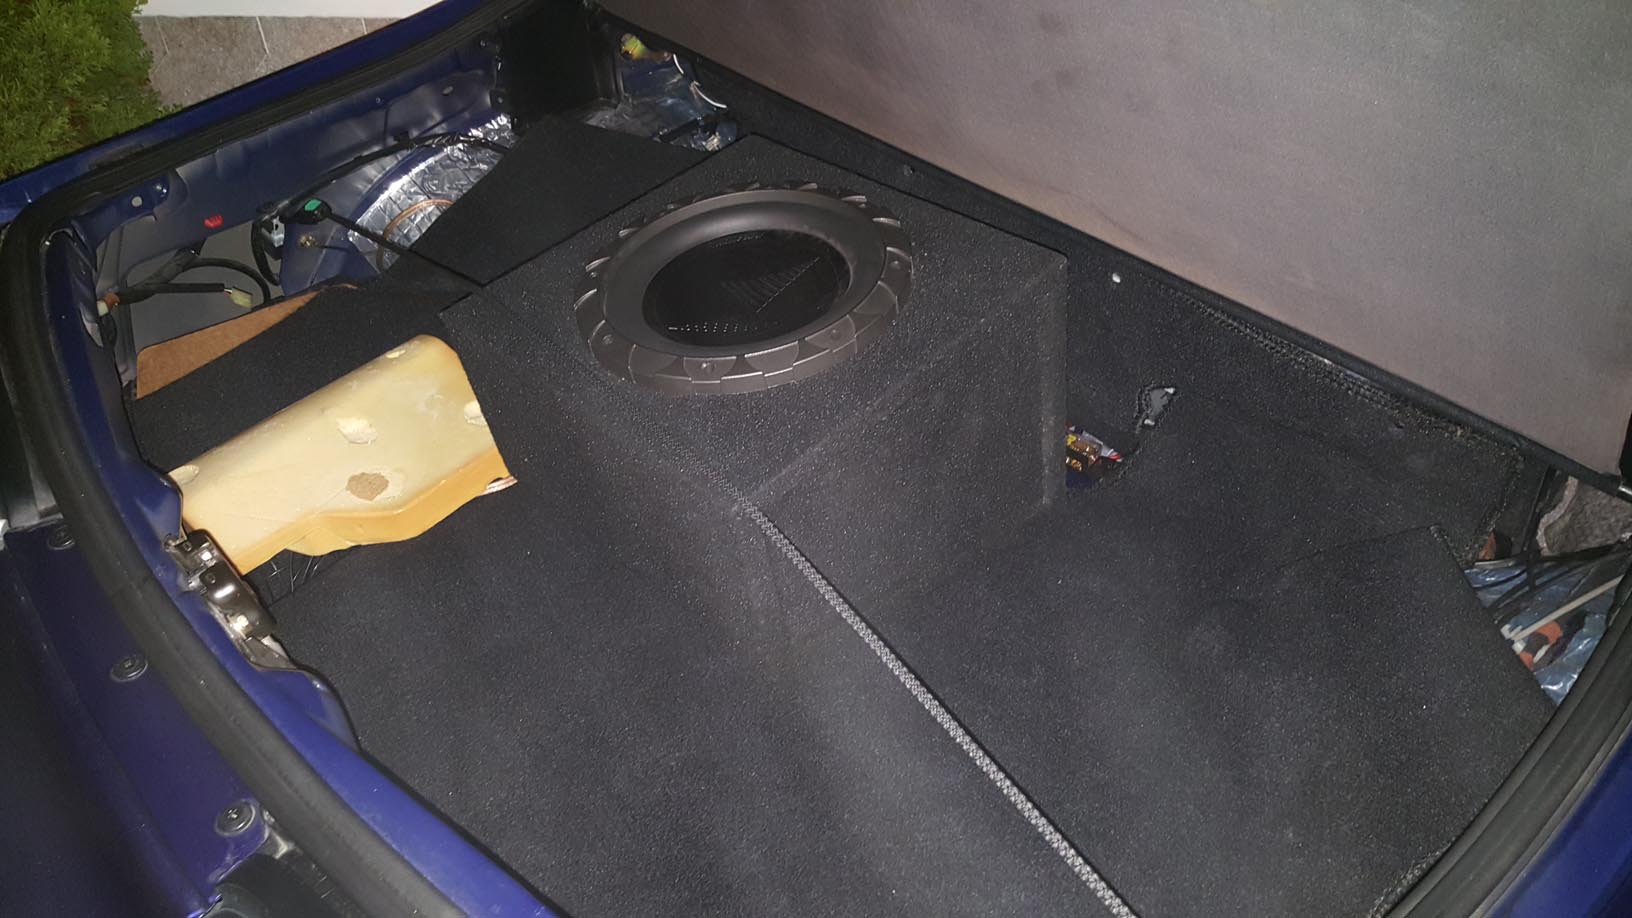
Finally finished the sound proofing in the boot last night... Now just gota put the trim back in and start on the sub box.
-
I put some recaros from a megane rb26 in mine which I'm absolutely in love with. Maybe take a look and see if you like the look?
-
Doh - looks like loads of the pics didnt come out right - not sure what i did wrong?
-

for sale BREAKING/SALE - 1993 Mk4 Supra 2JZ-GE 3.0 NA (everything available)
Loomie replied to Virus's topic in Parts for Sale
How much for the drivers a pillar trim and also for the passenger window switch? Pm, sent. -
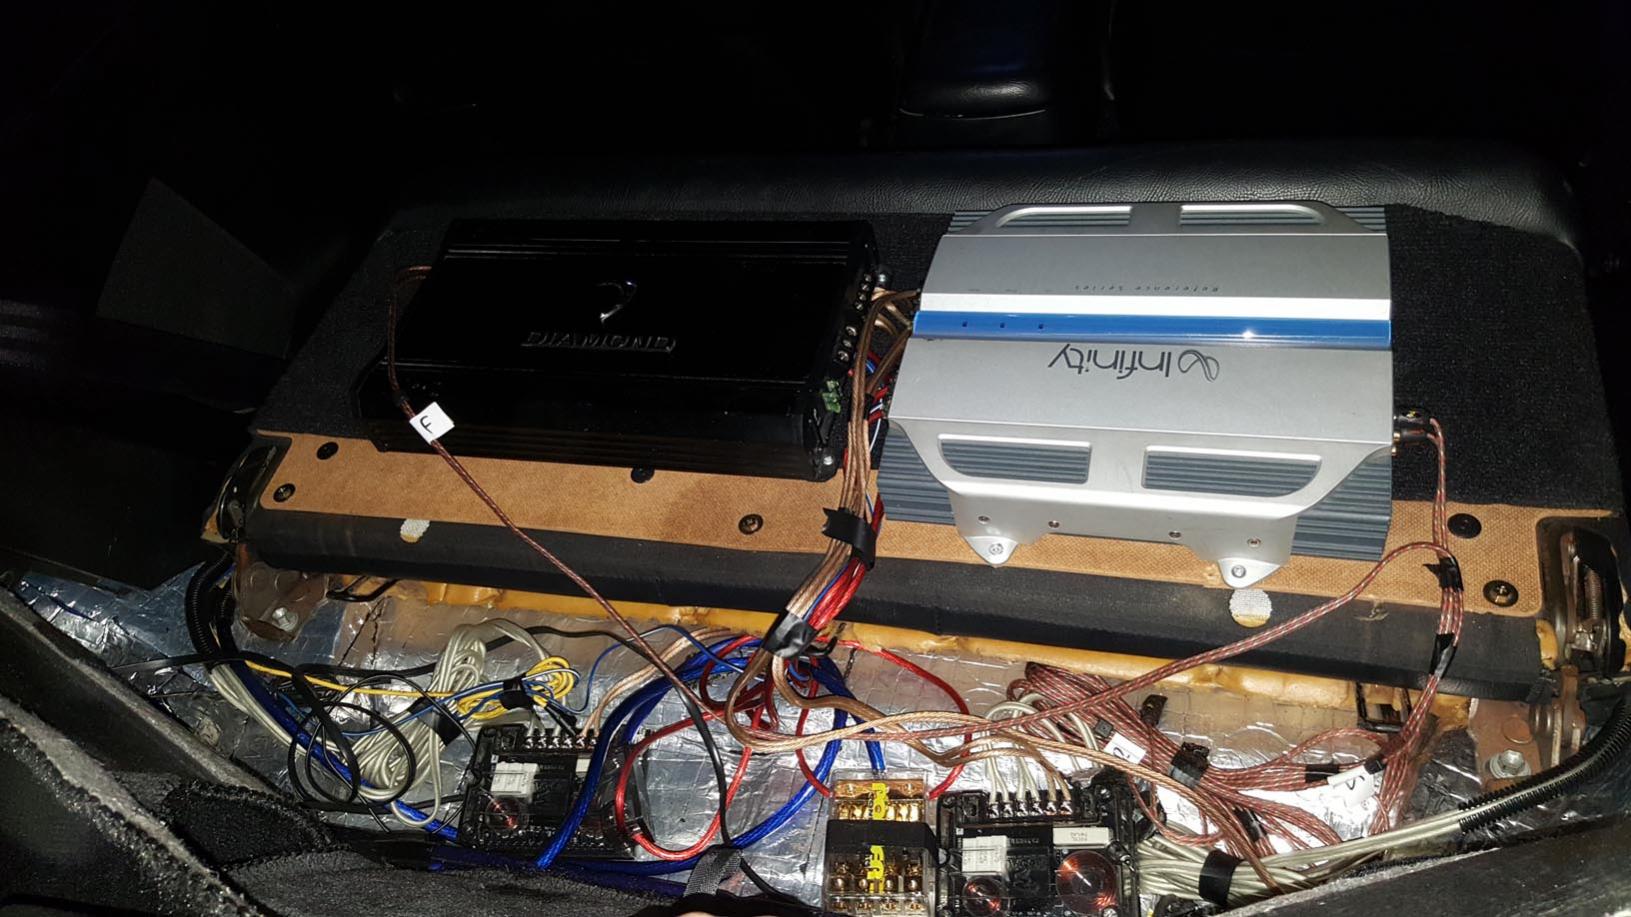
Next on my list of things to do for the system... - Move to an active front end with a 4 channel amp with an individual channel powering each tweeter and each mid with an active crossover. - A fibre glassed stealth subwoofer box in the hole where the original hole was. I want to take as little space as possible, while having a big enough volume and keeping the spare wheel. - Build some grills for the tweeter to clean up the install here. - A full tune on an RTA. Wish me luck!!
-
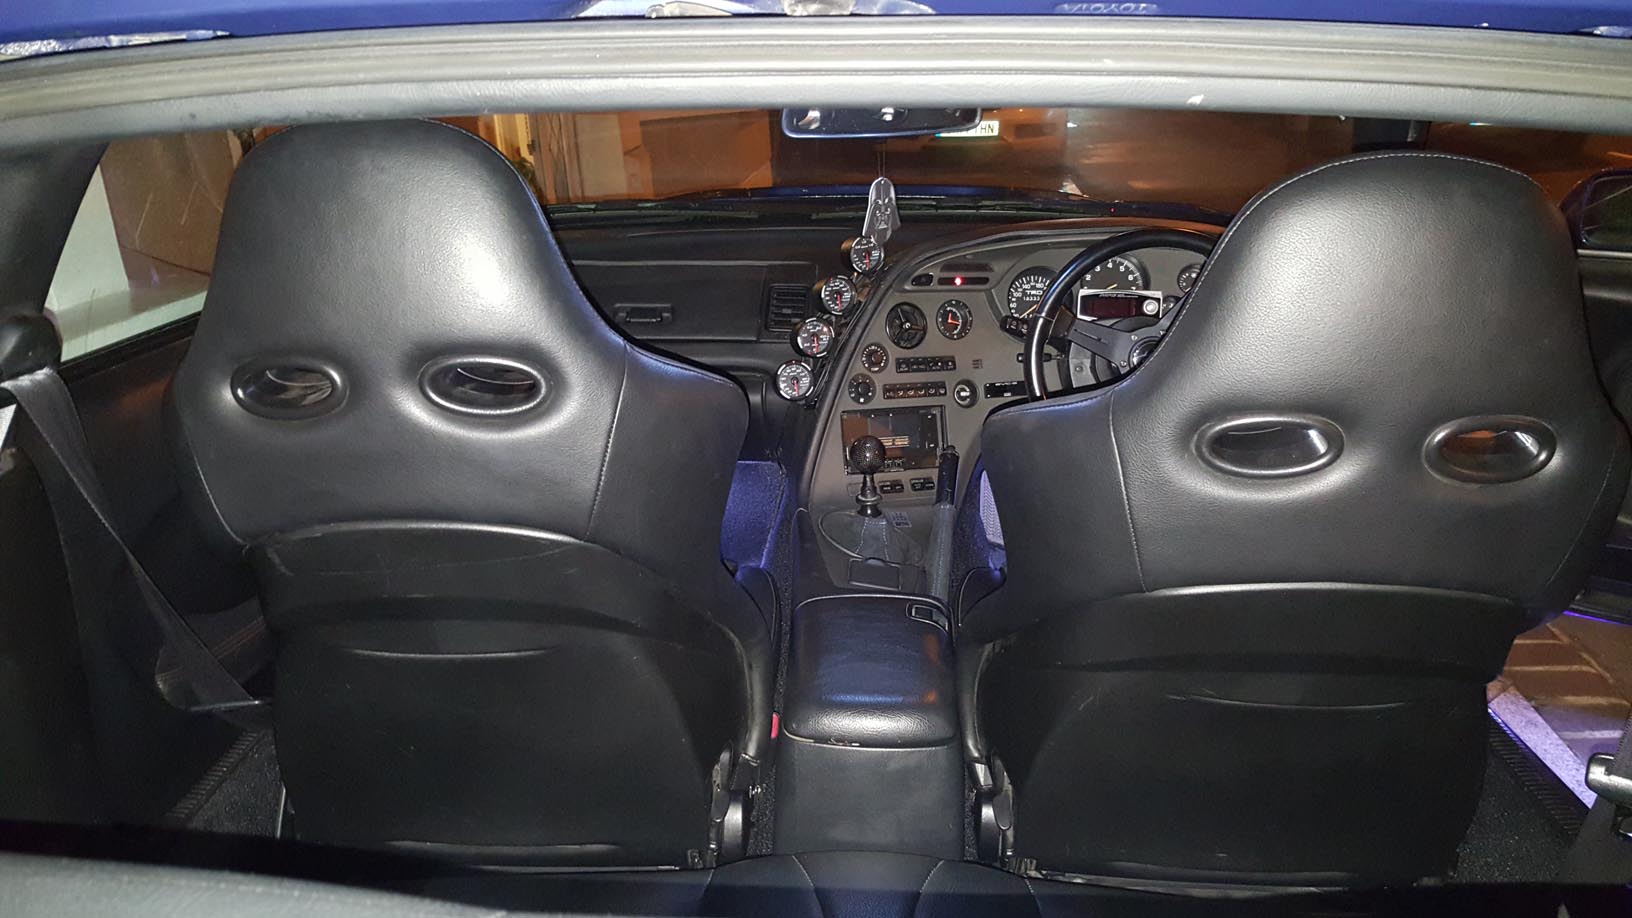
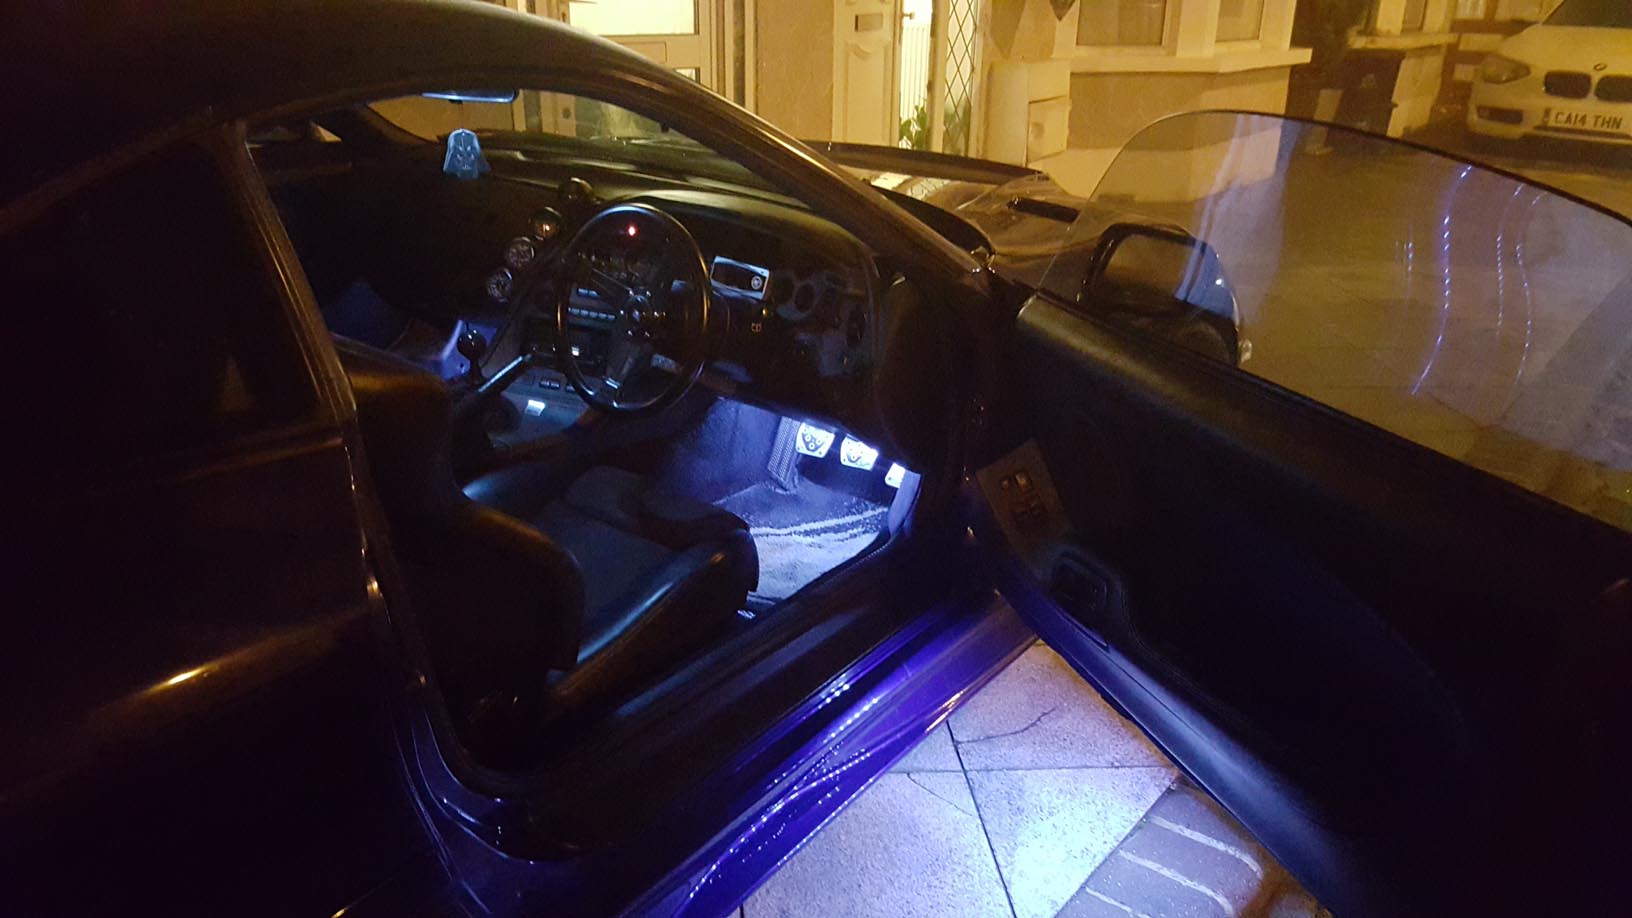
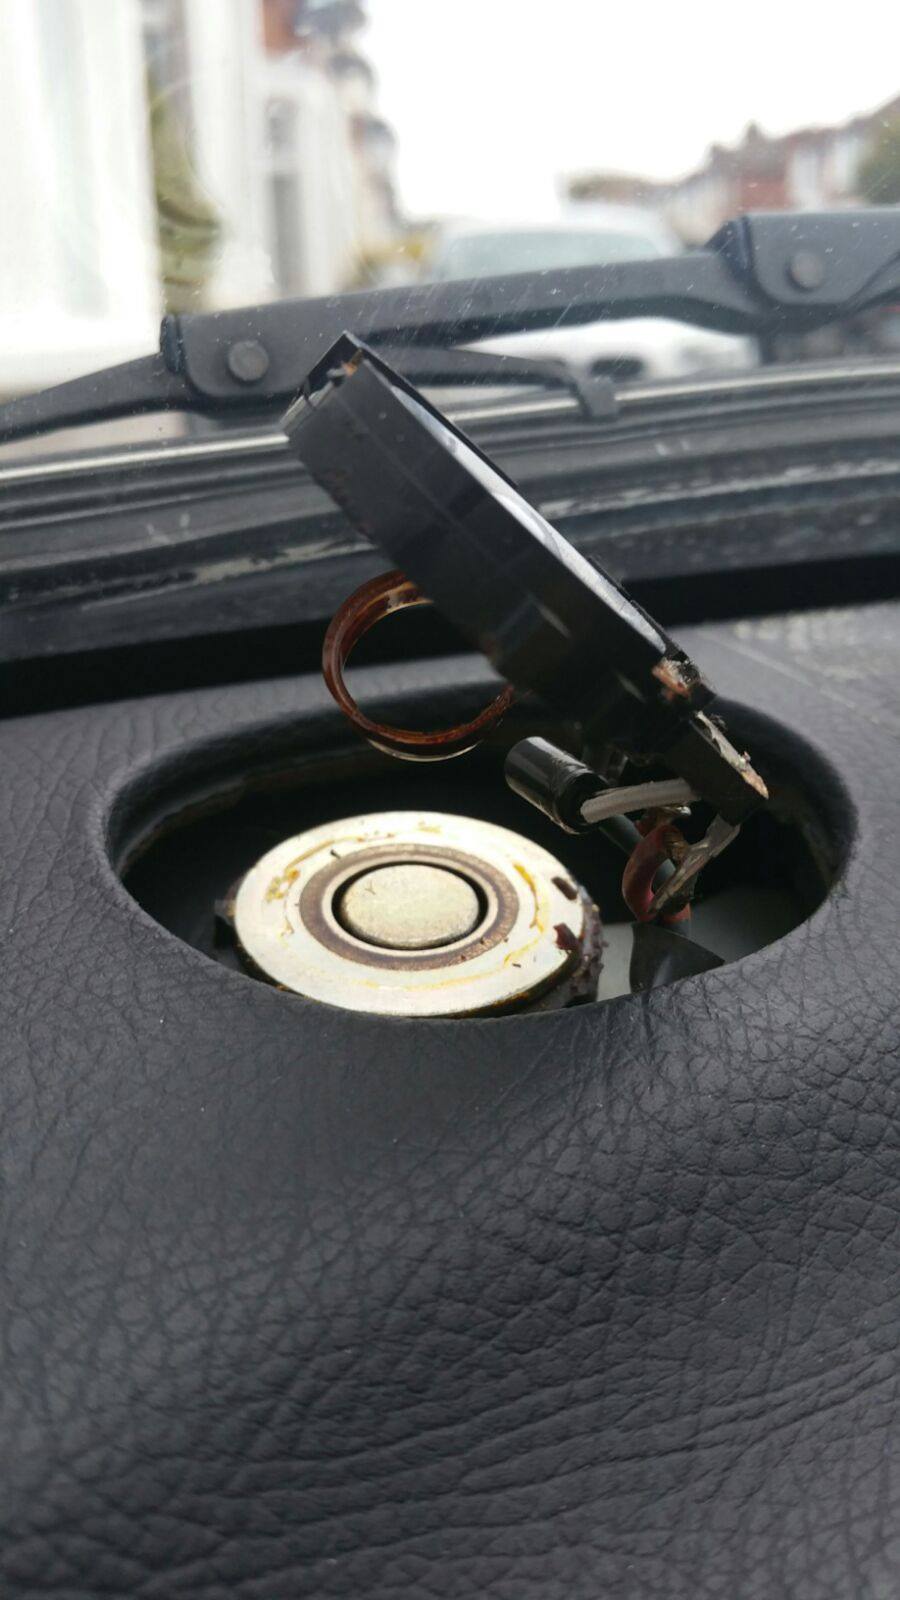
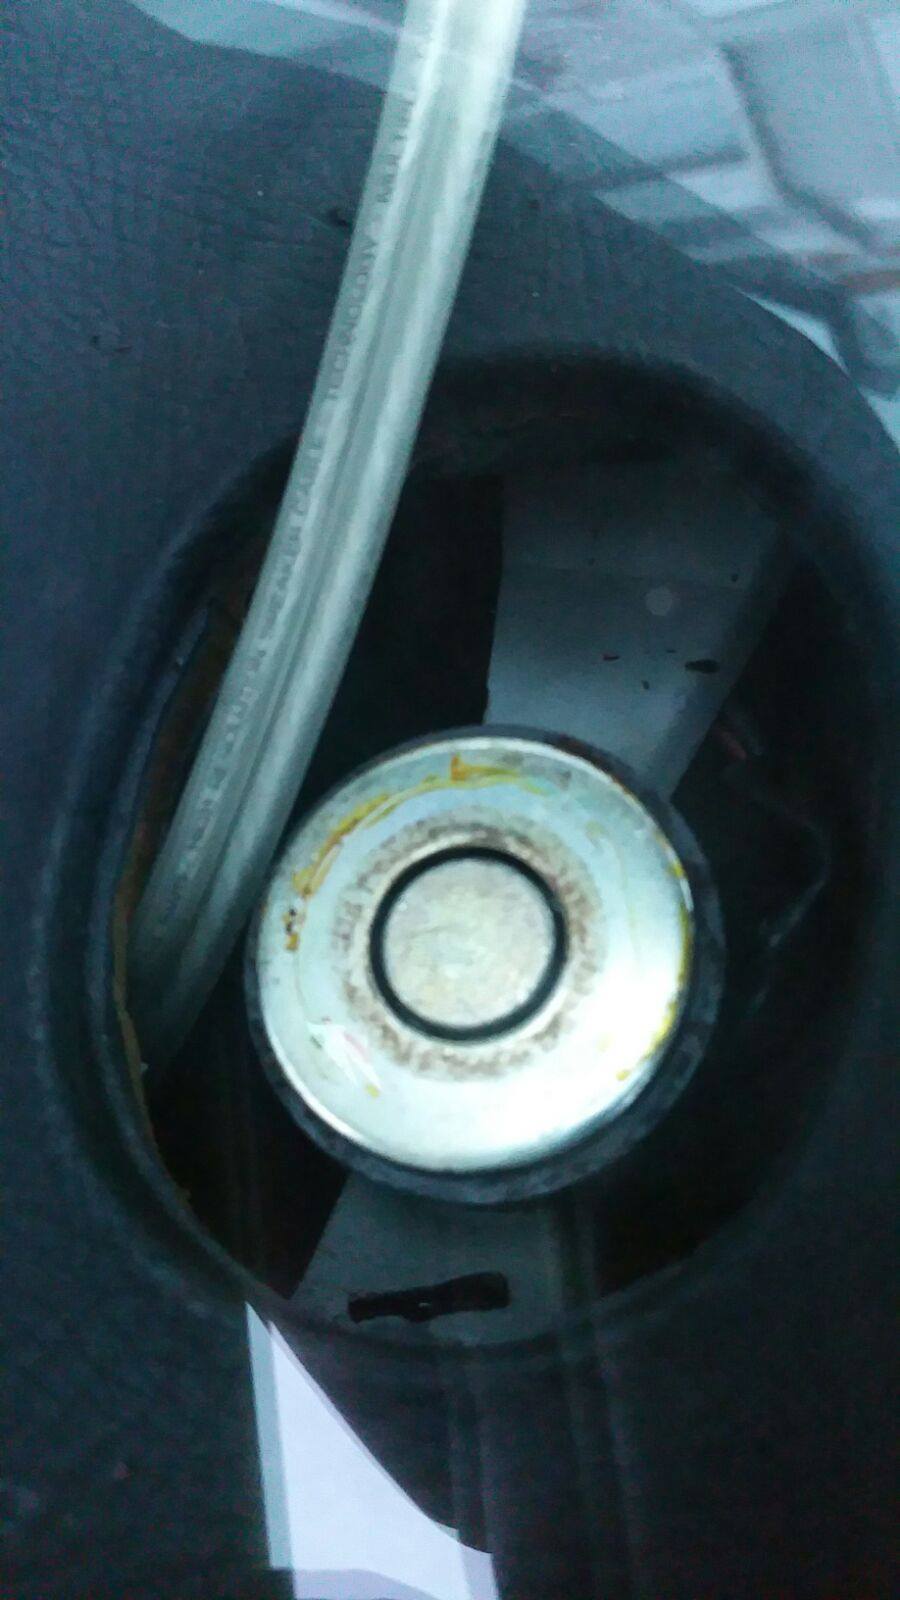
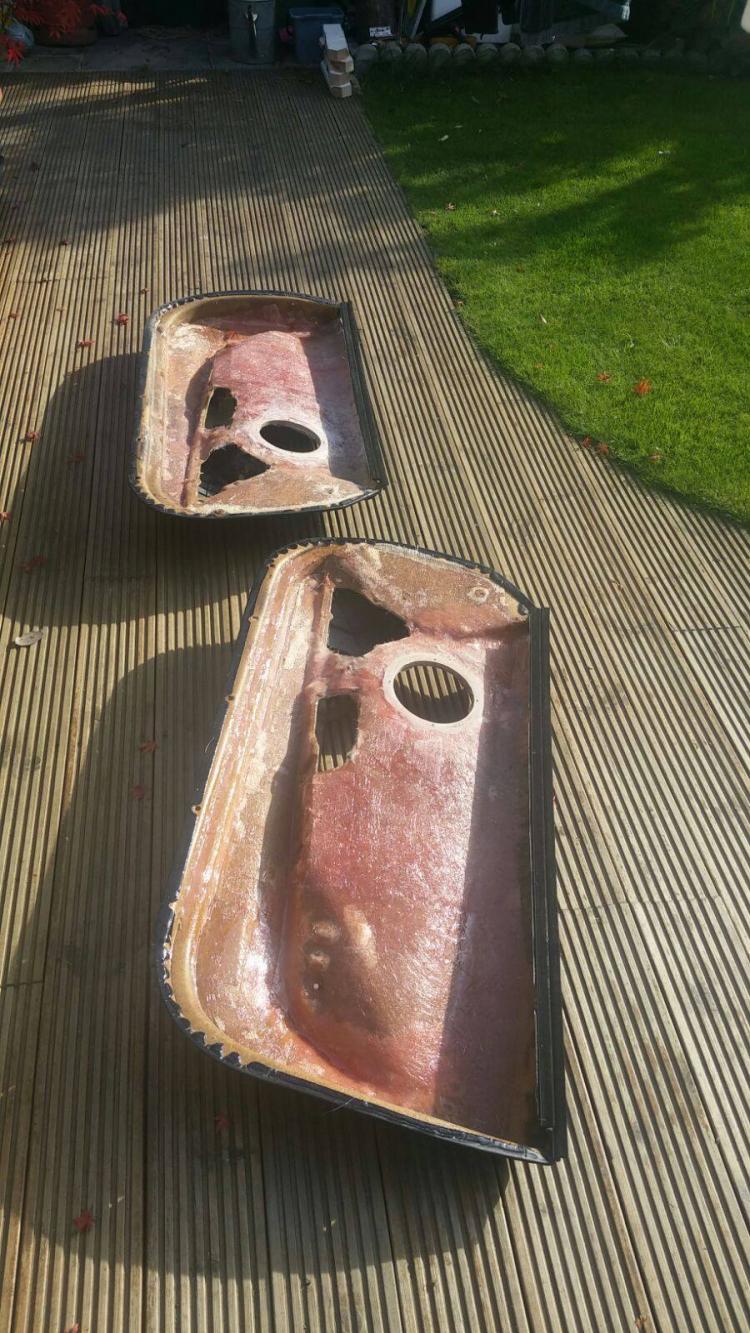
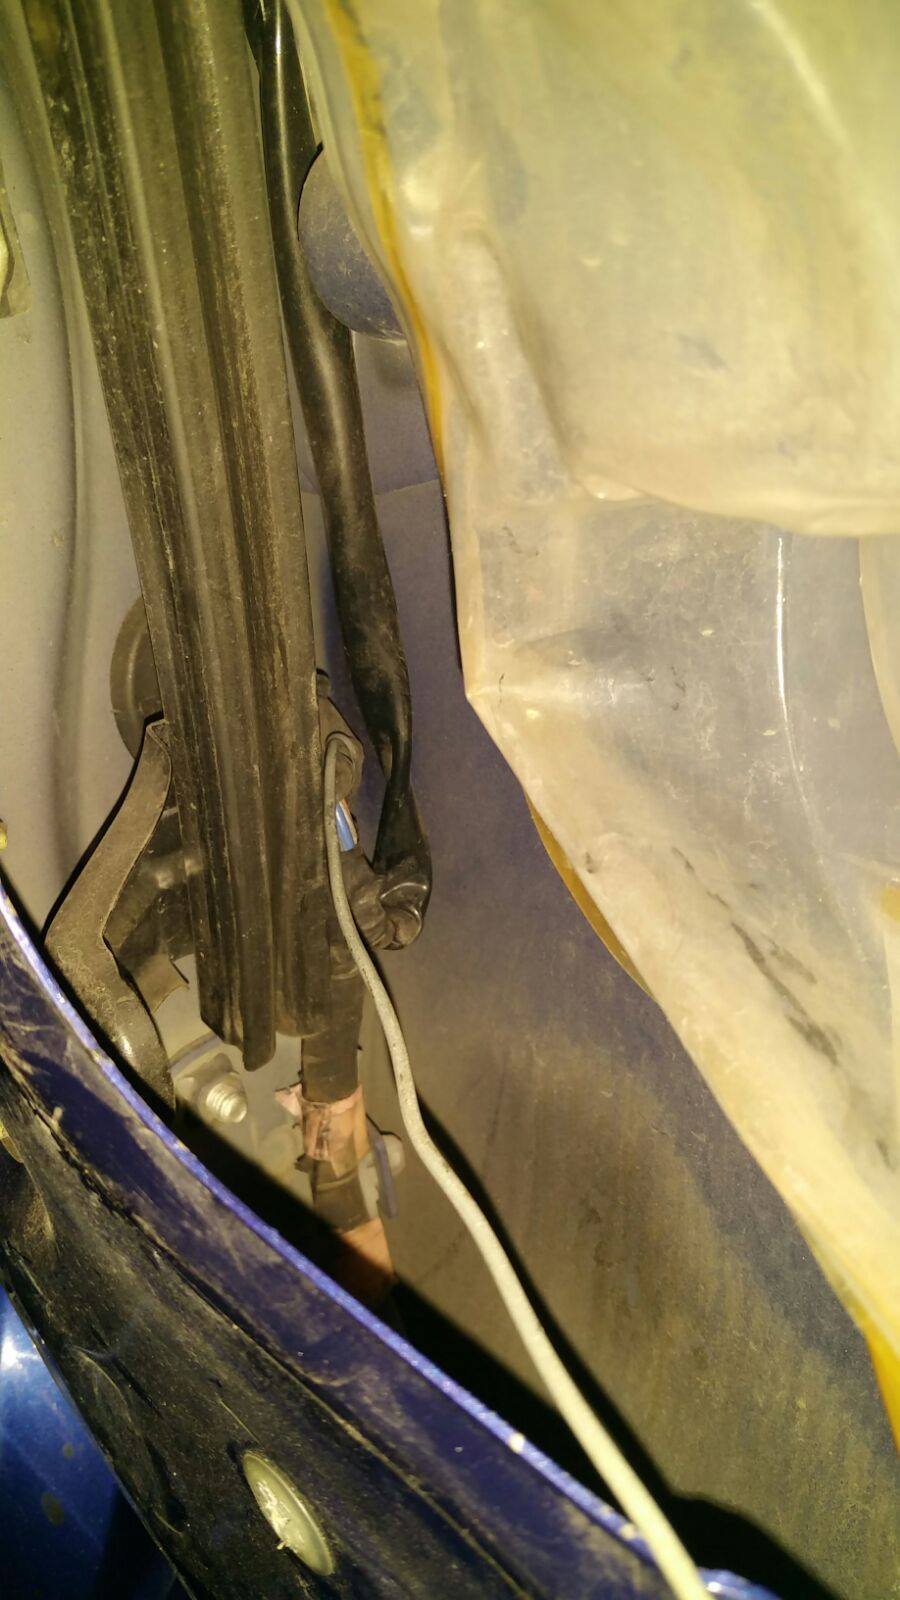
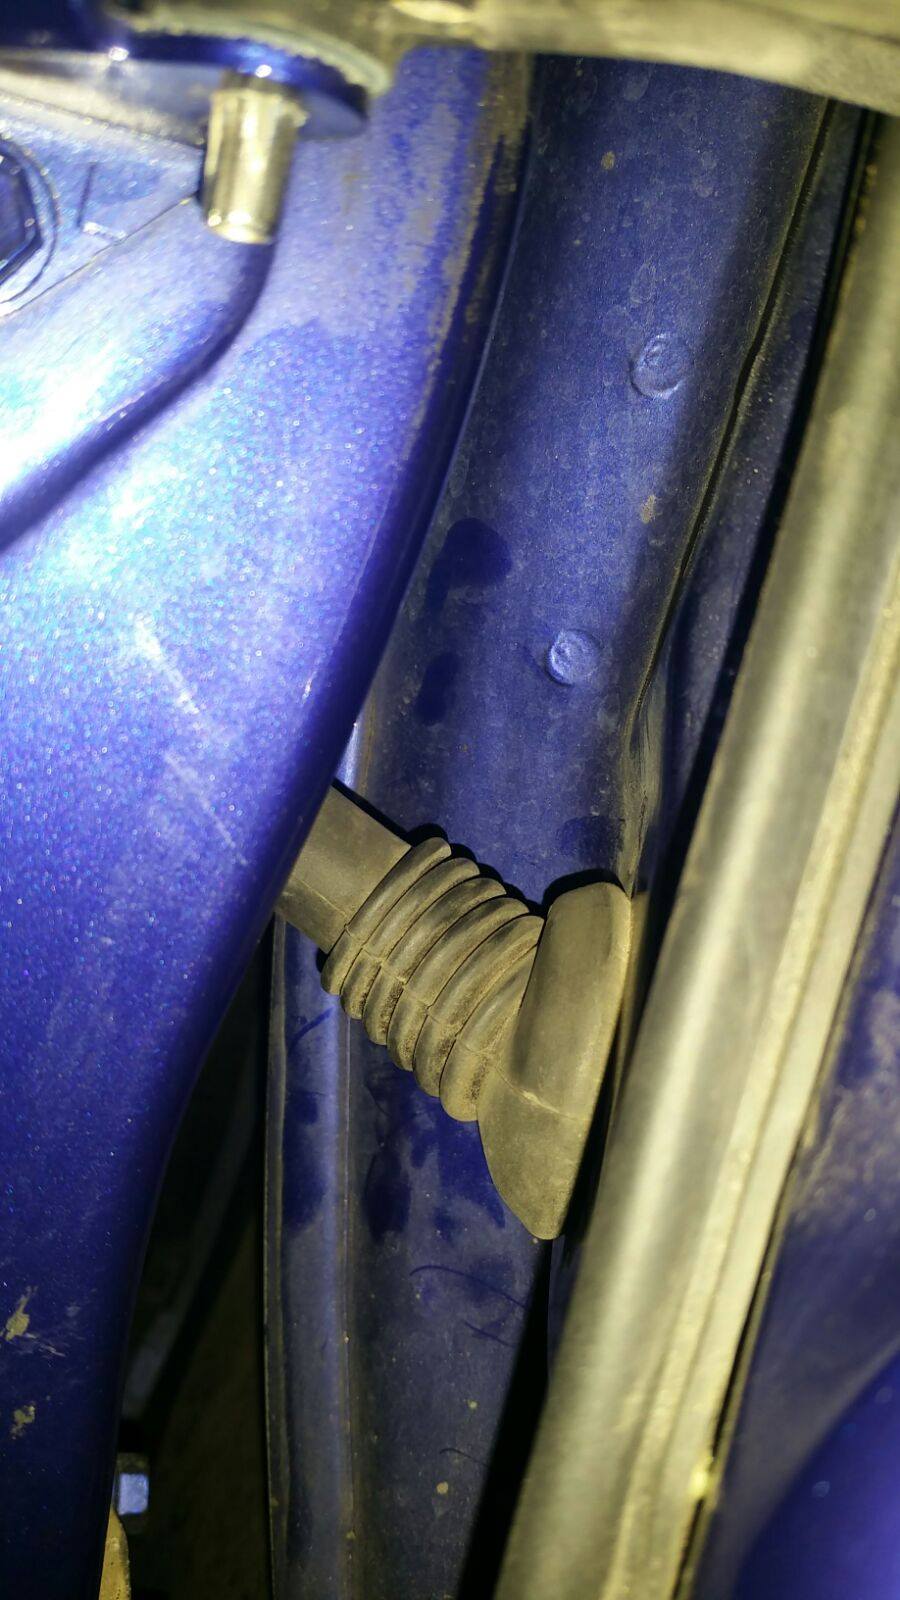
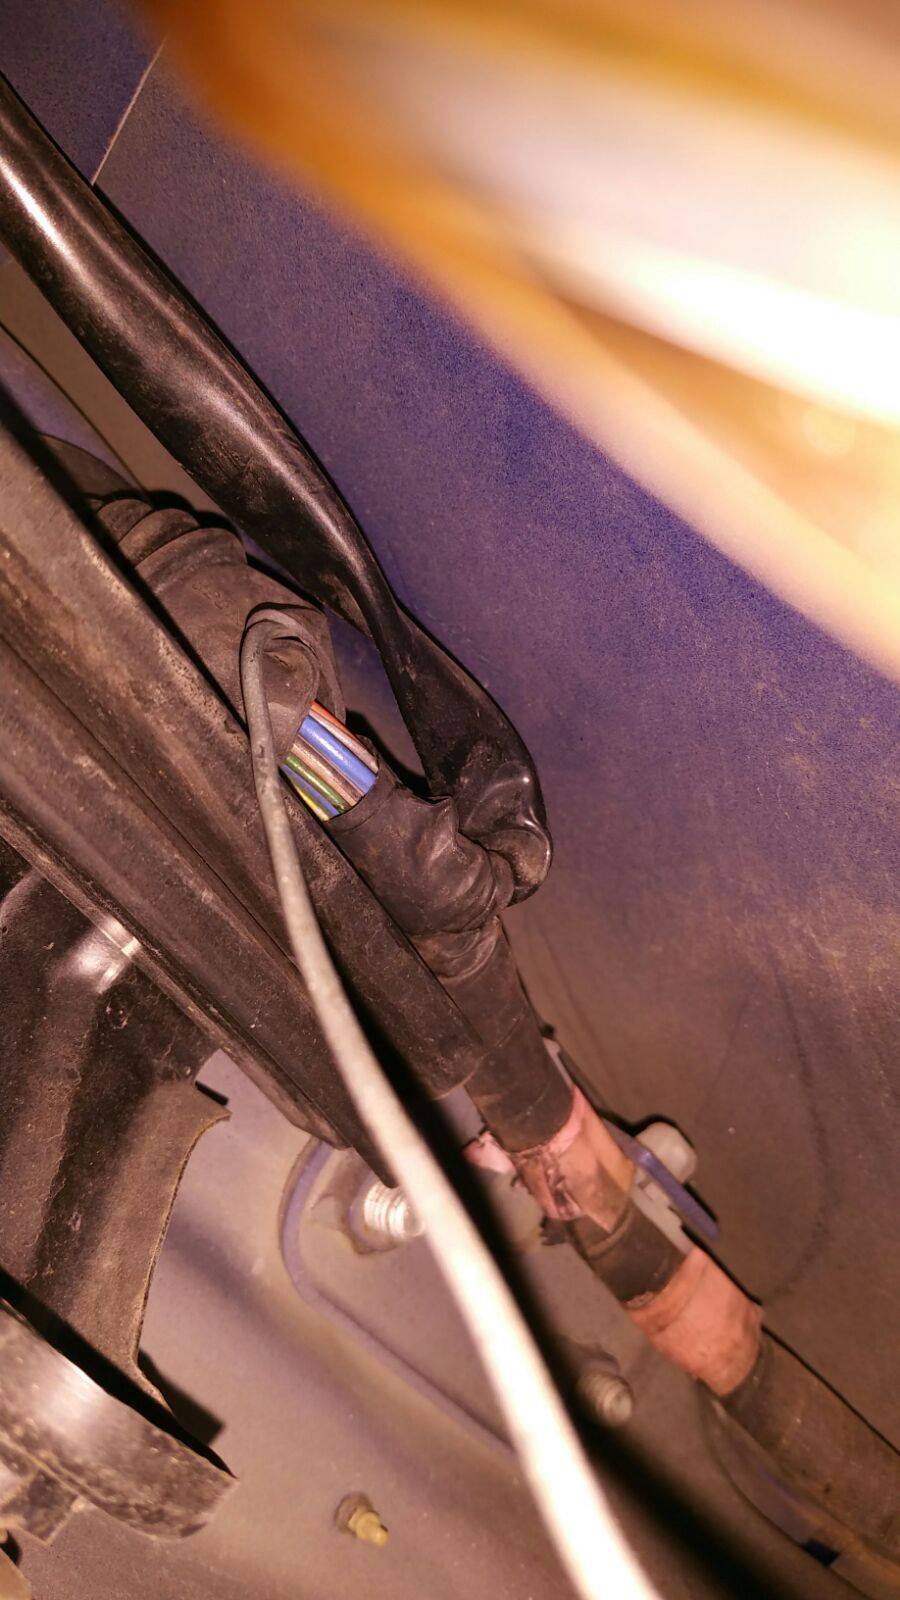
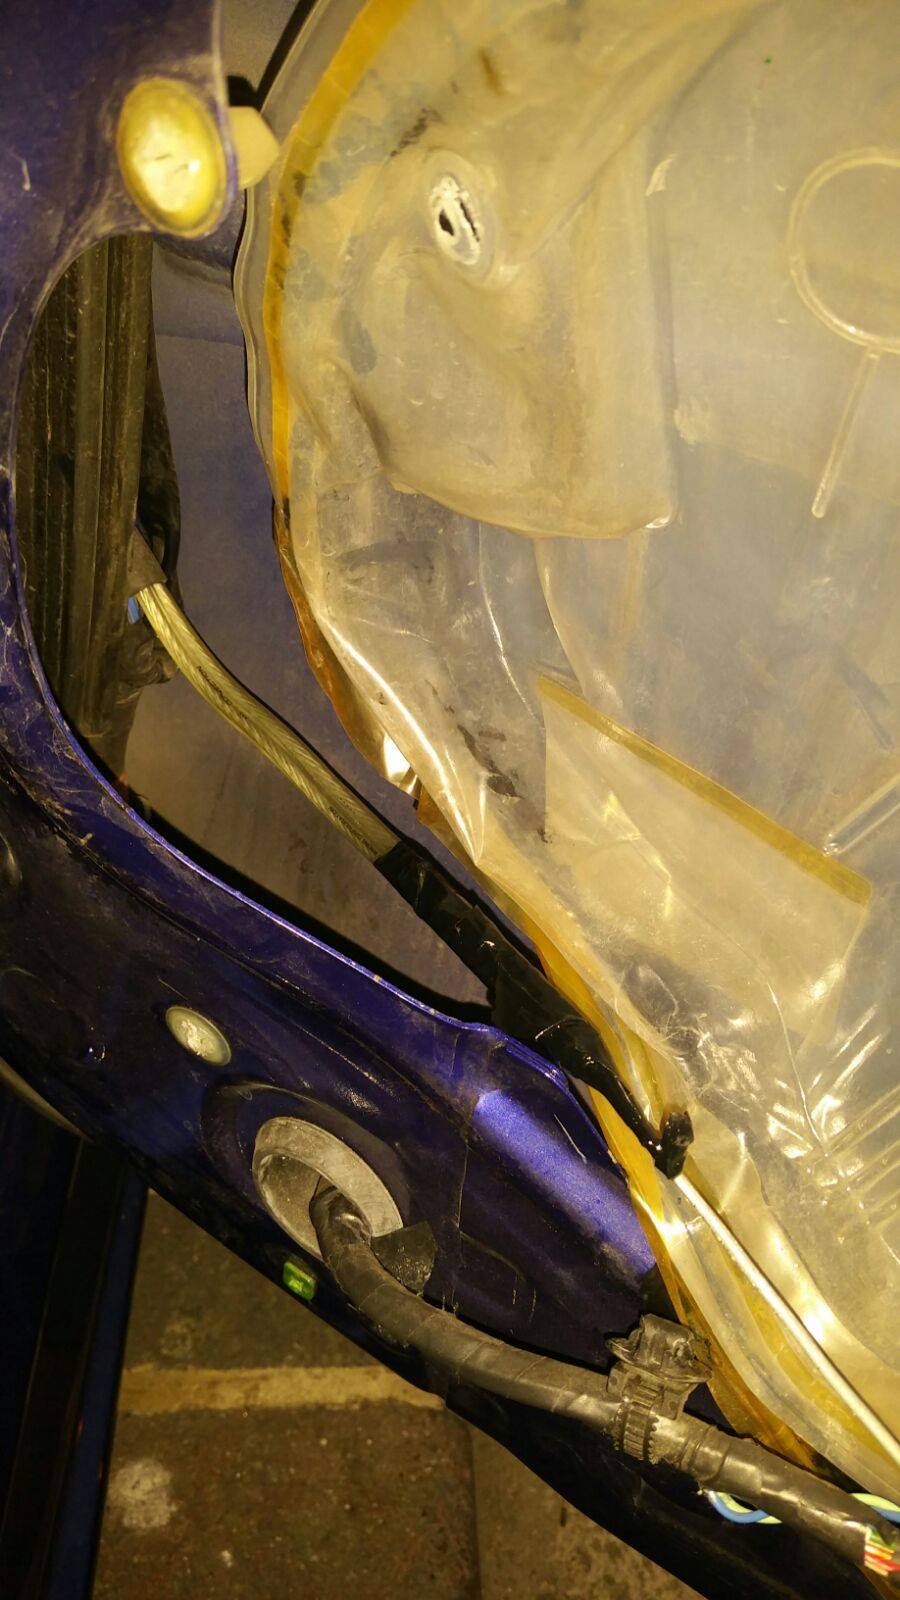
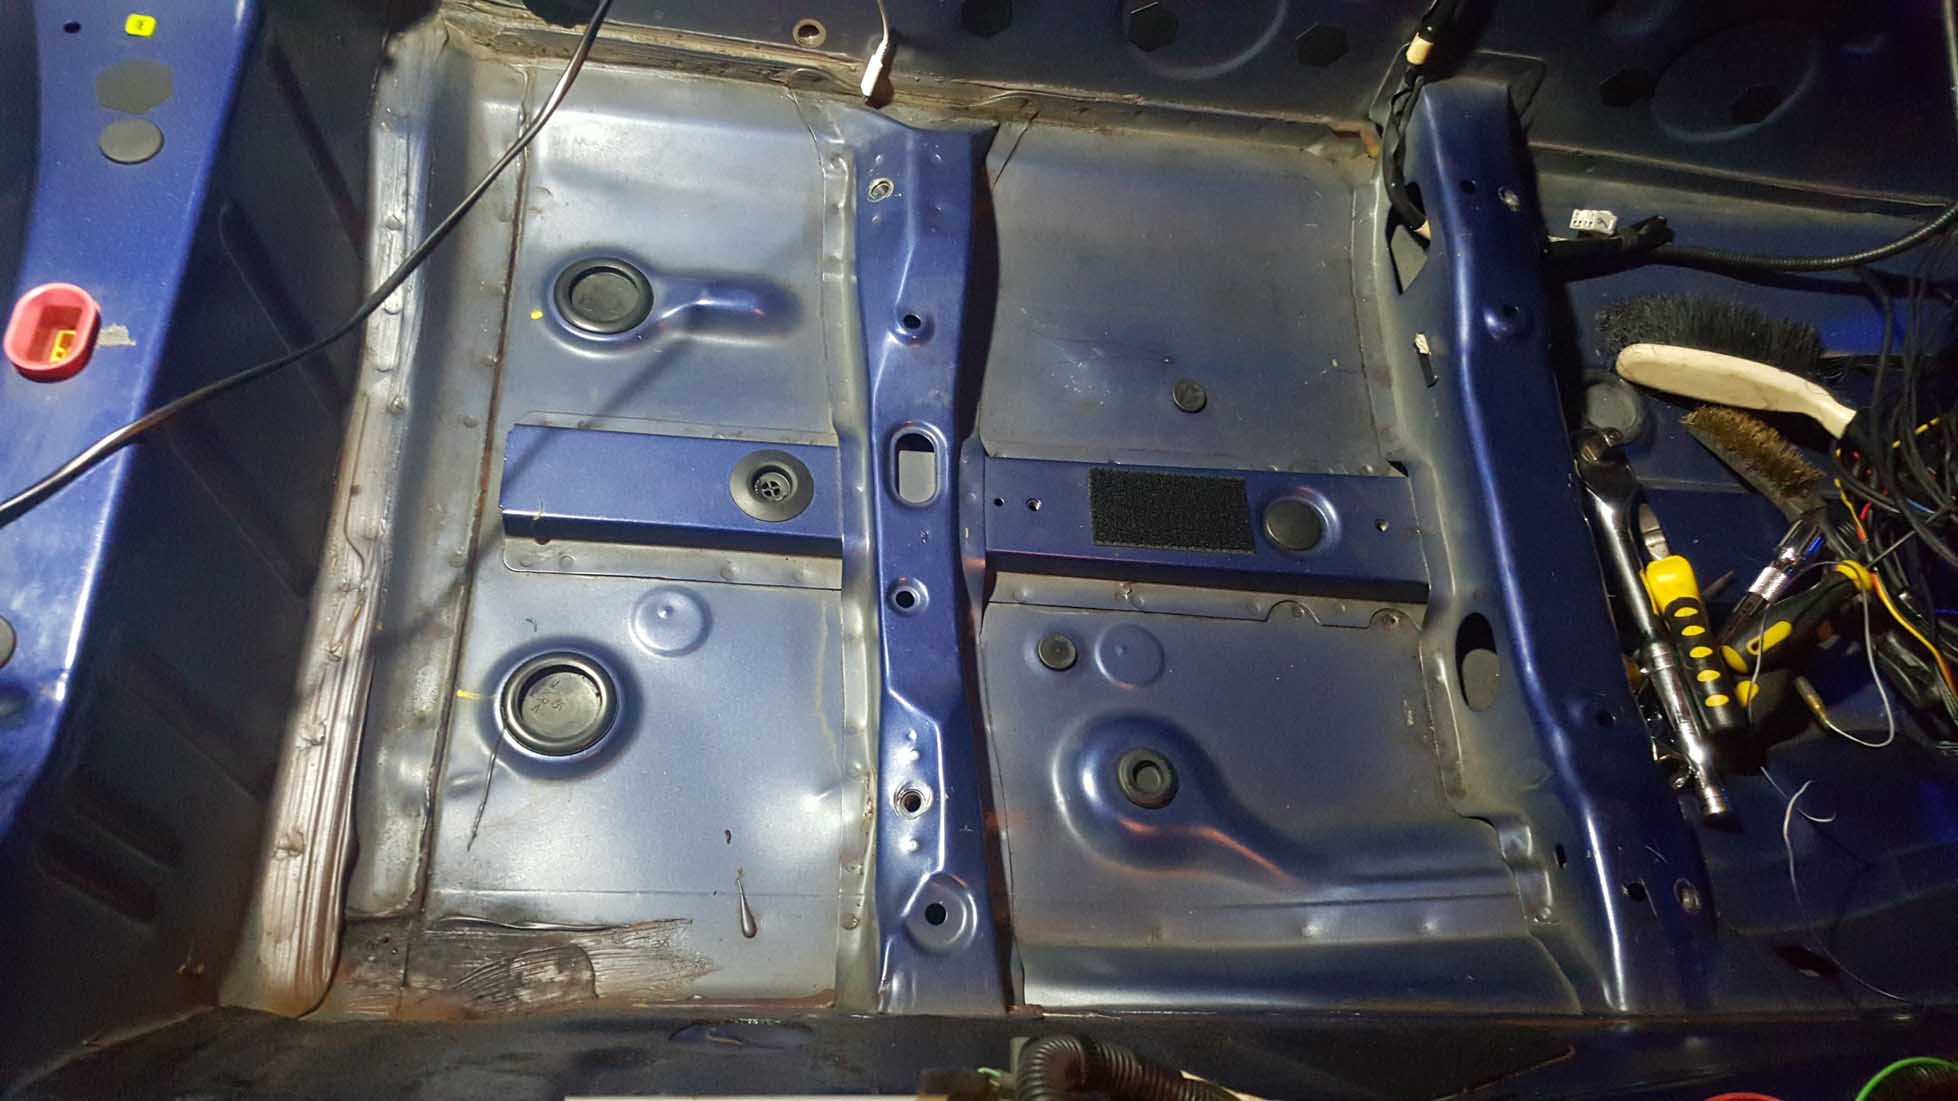
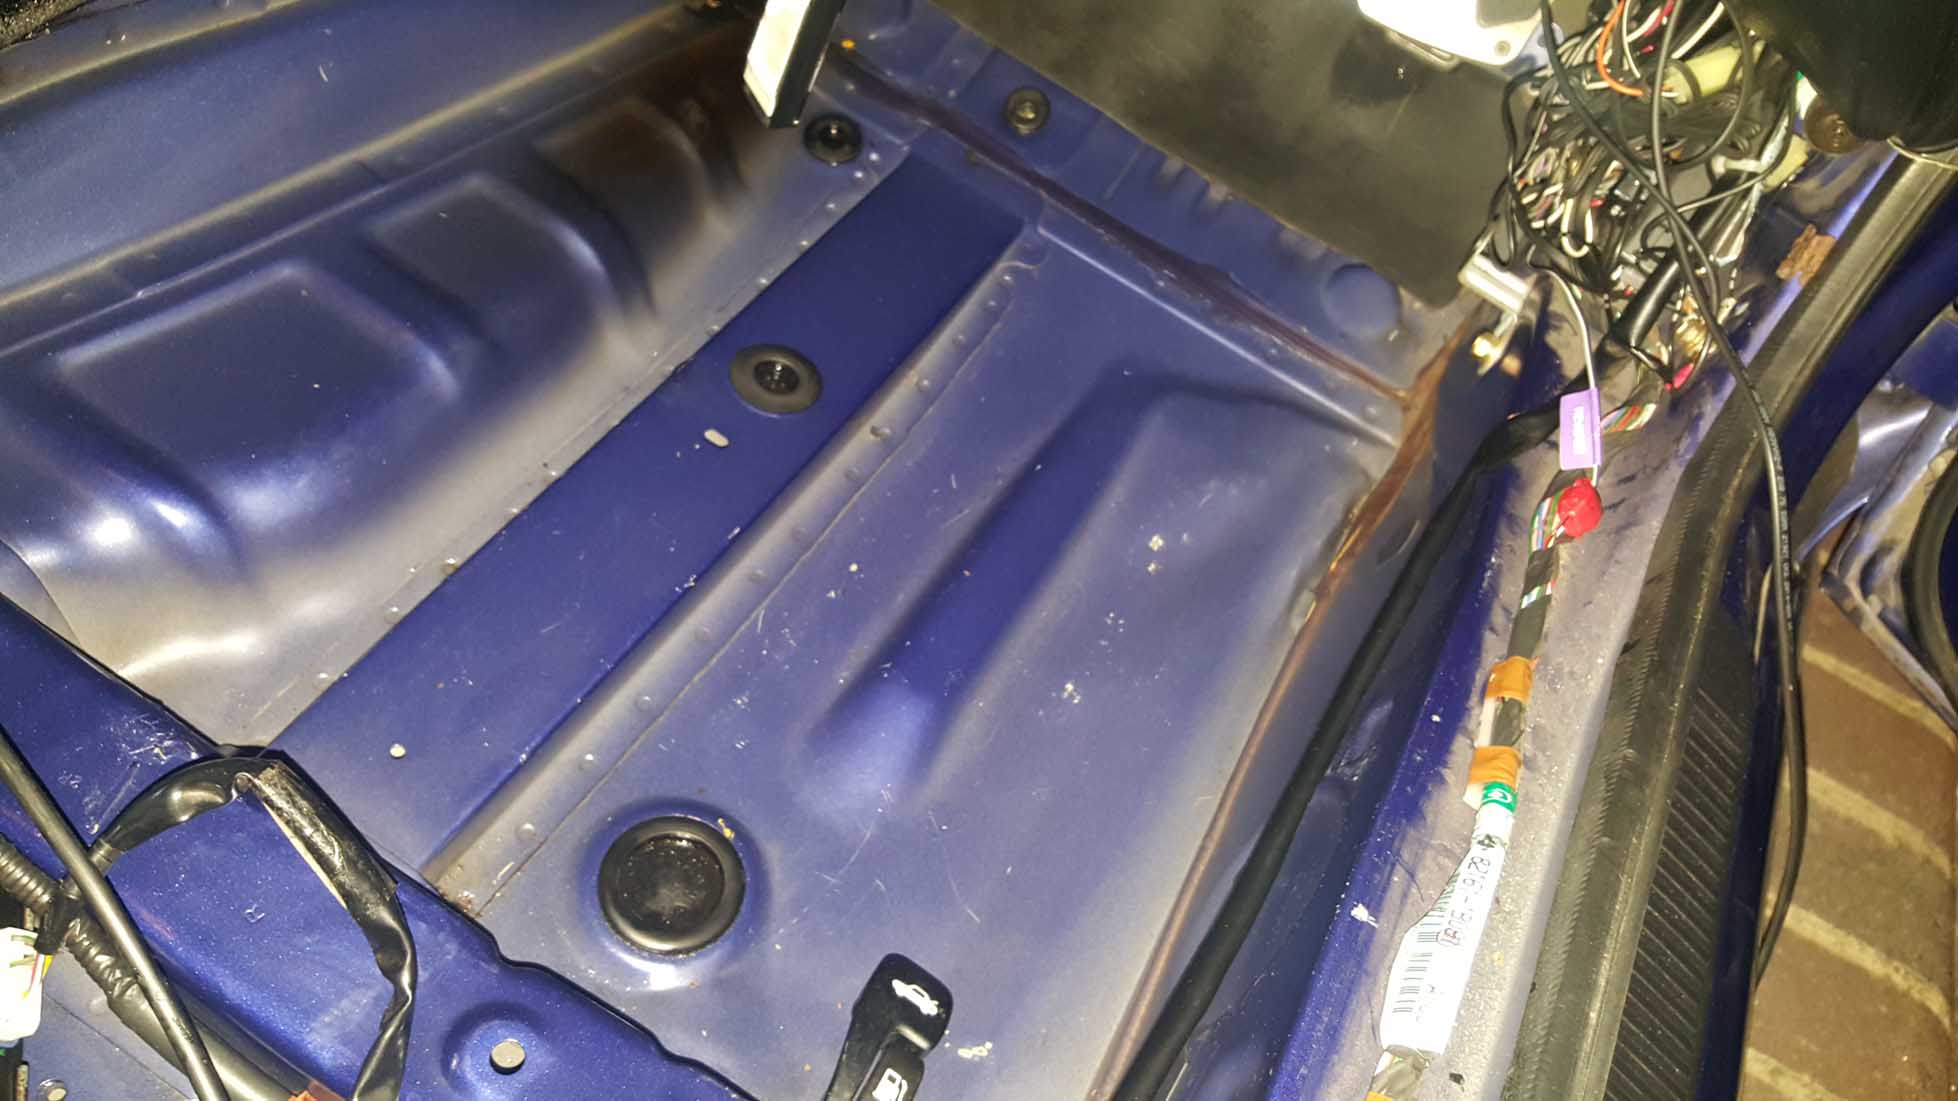
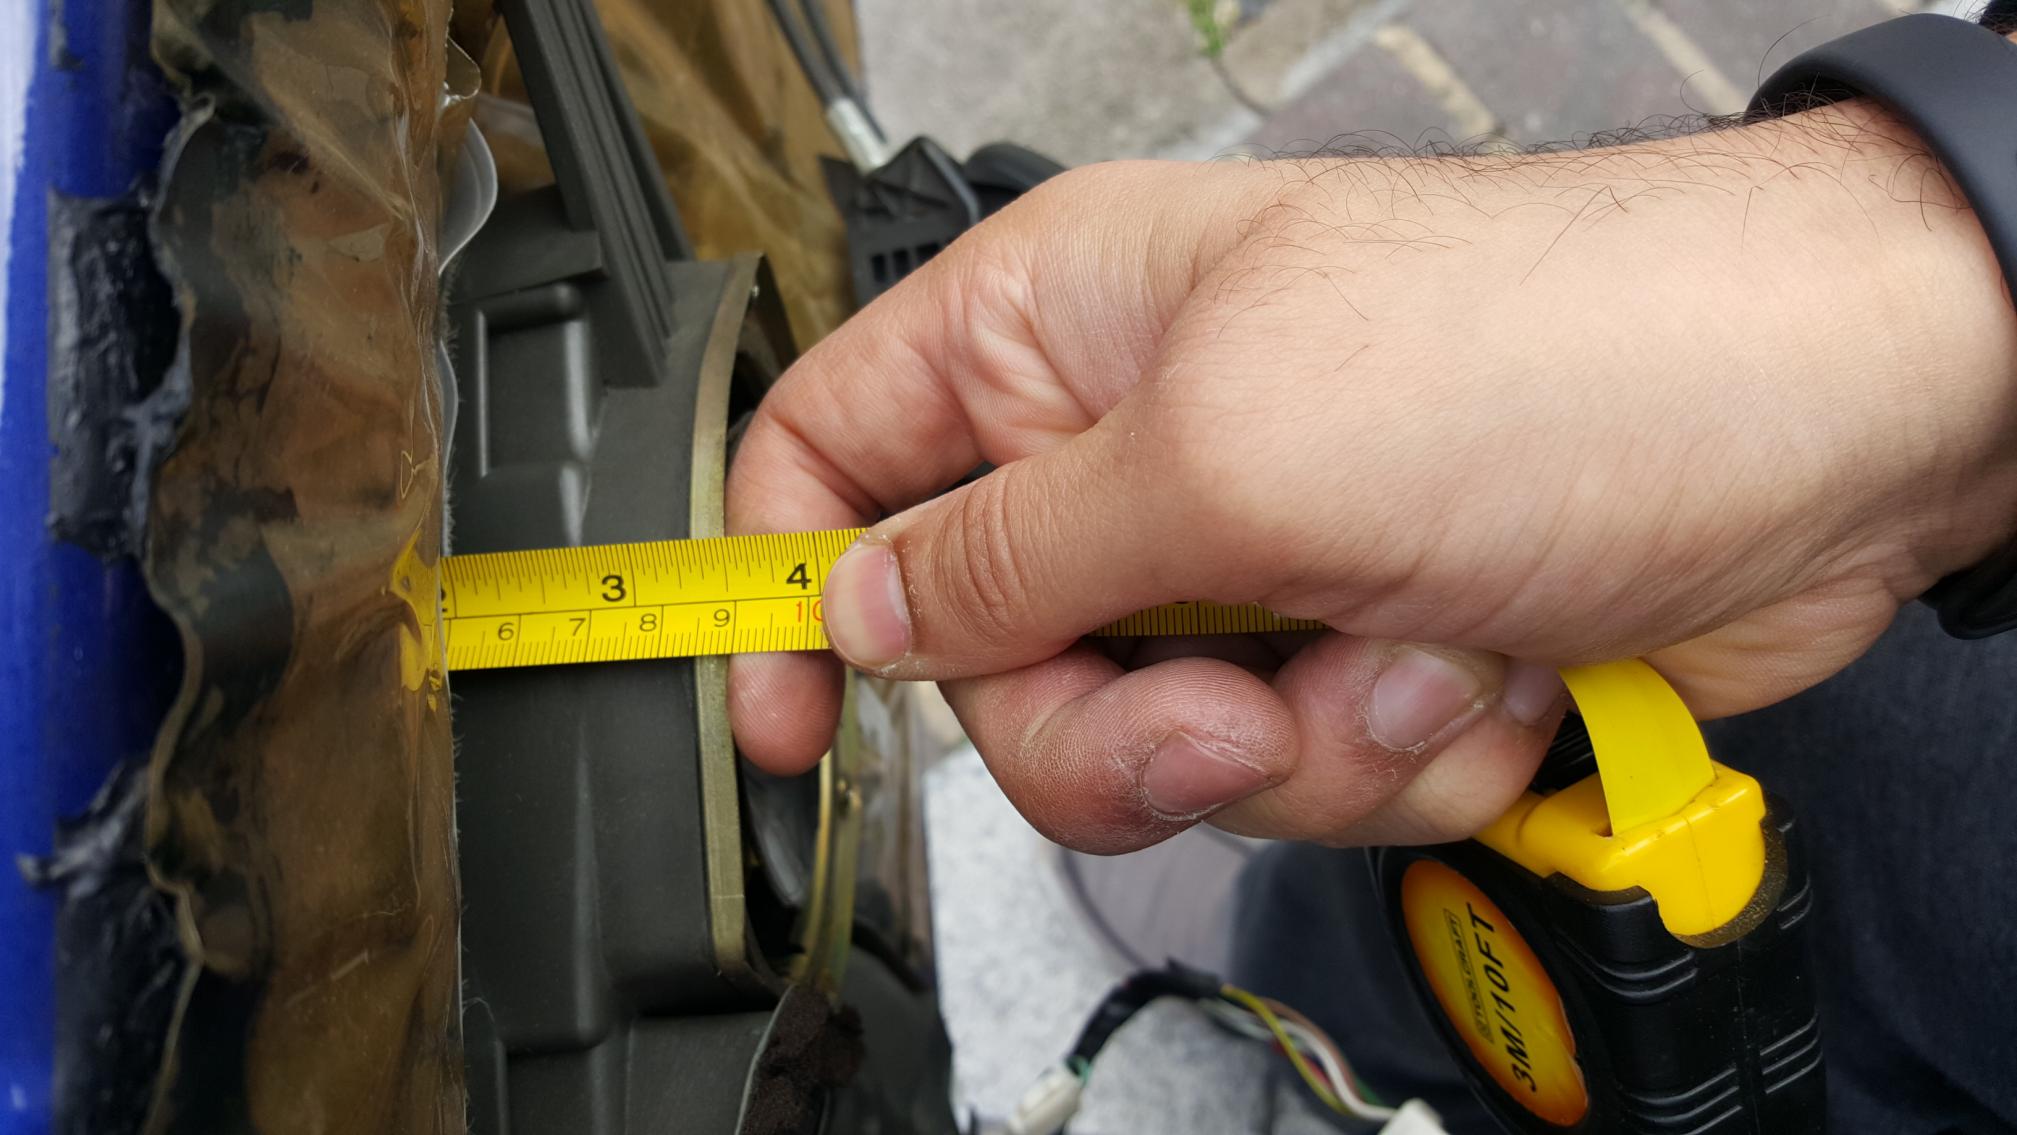
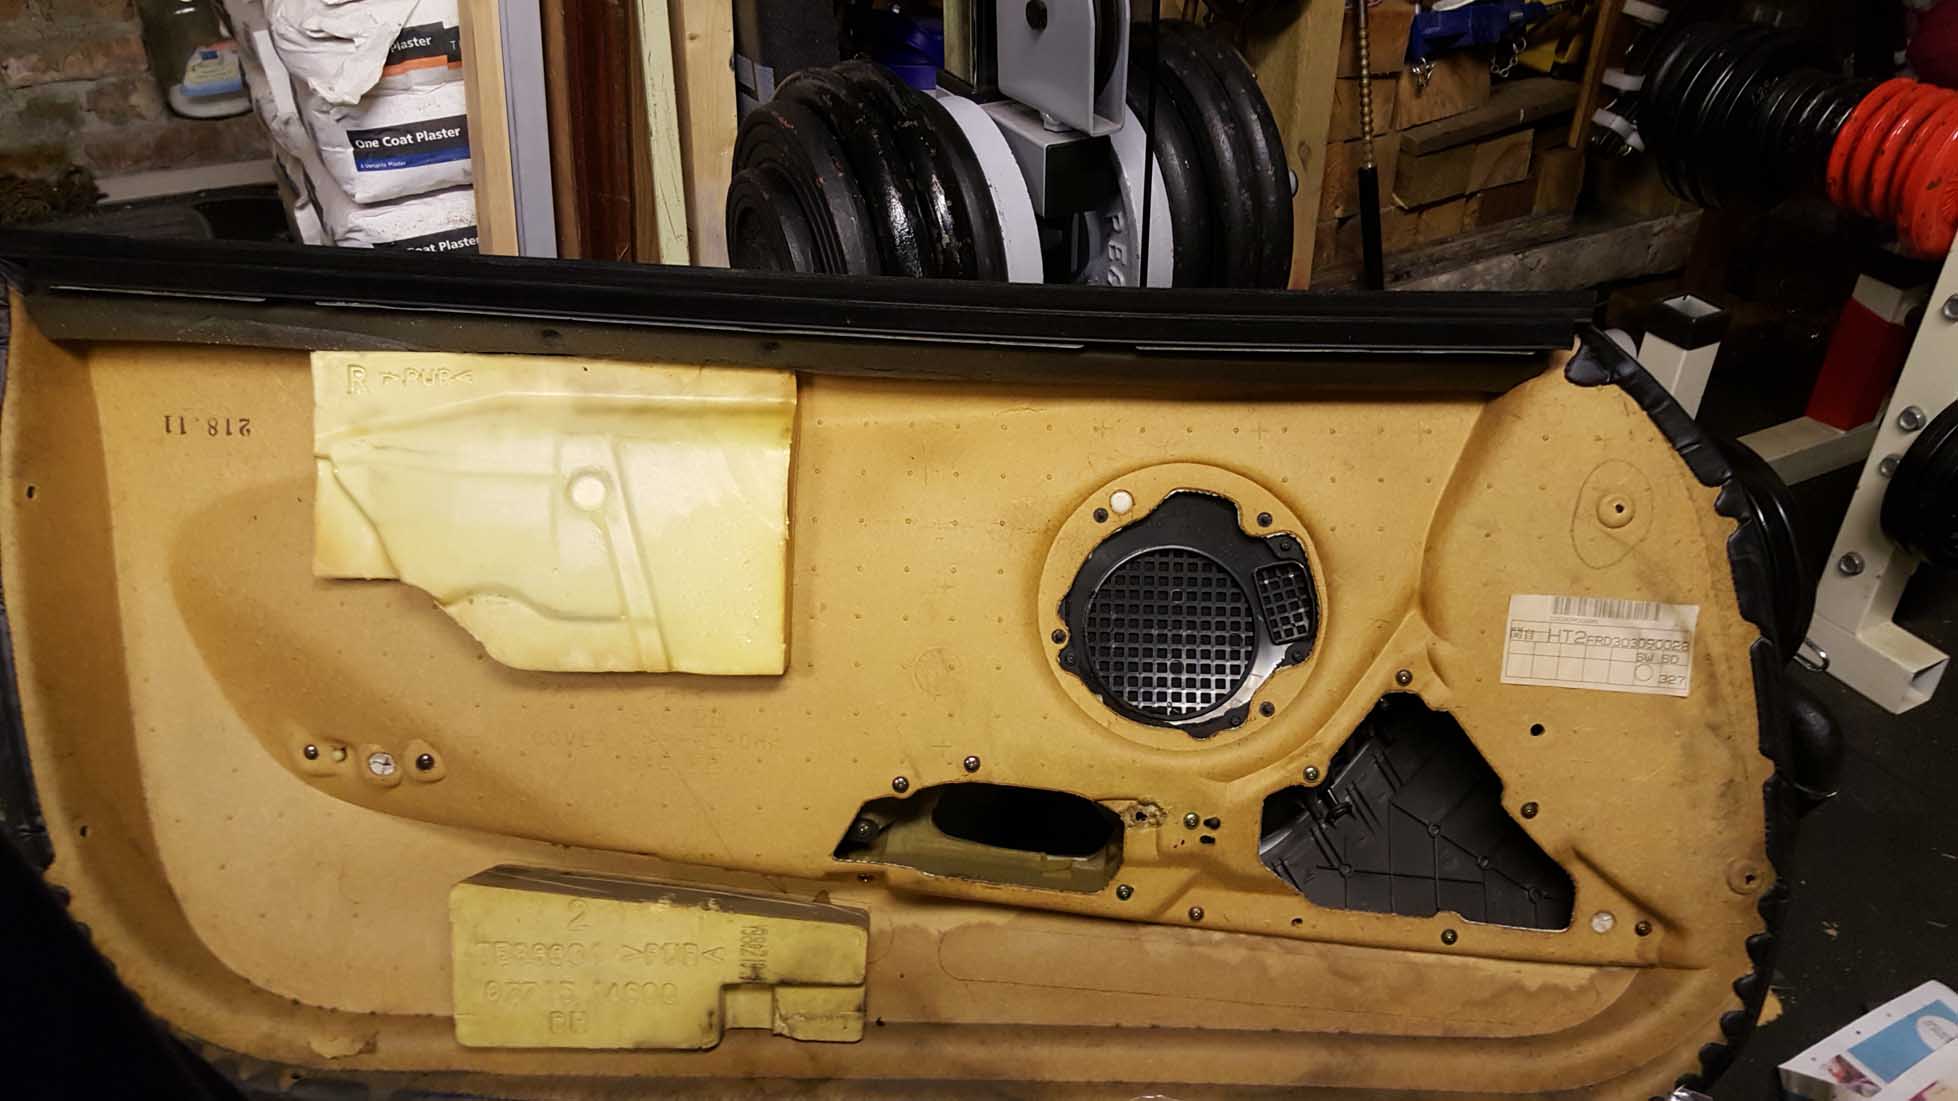
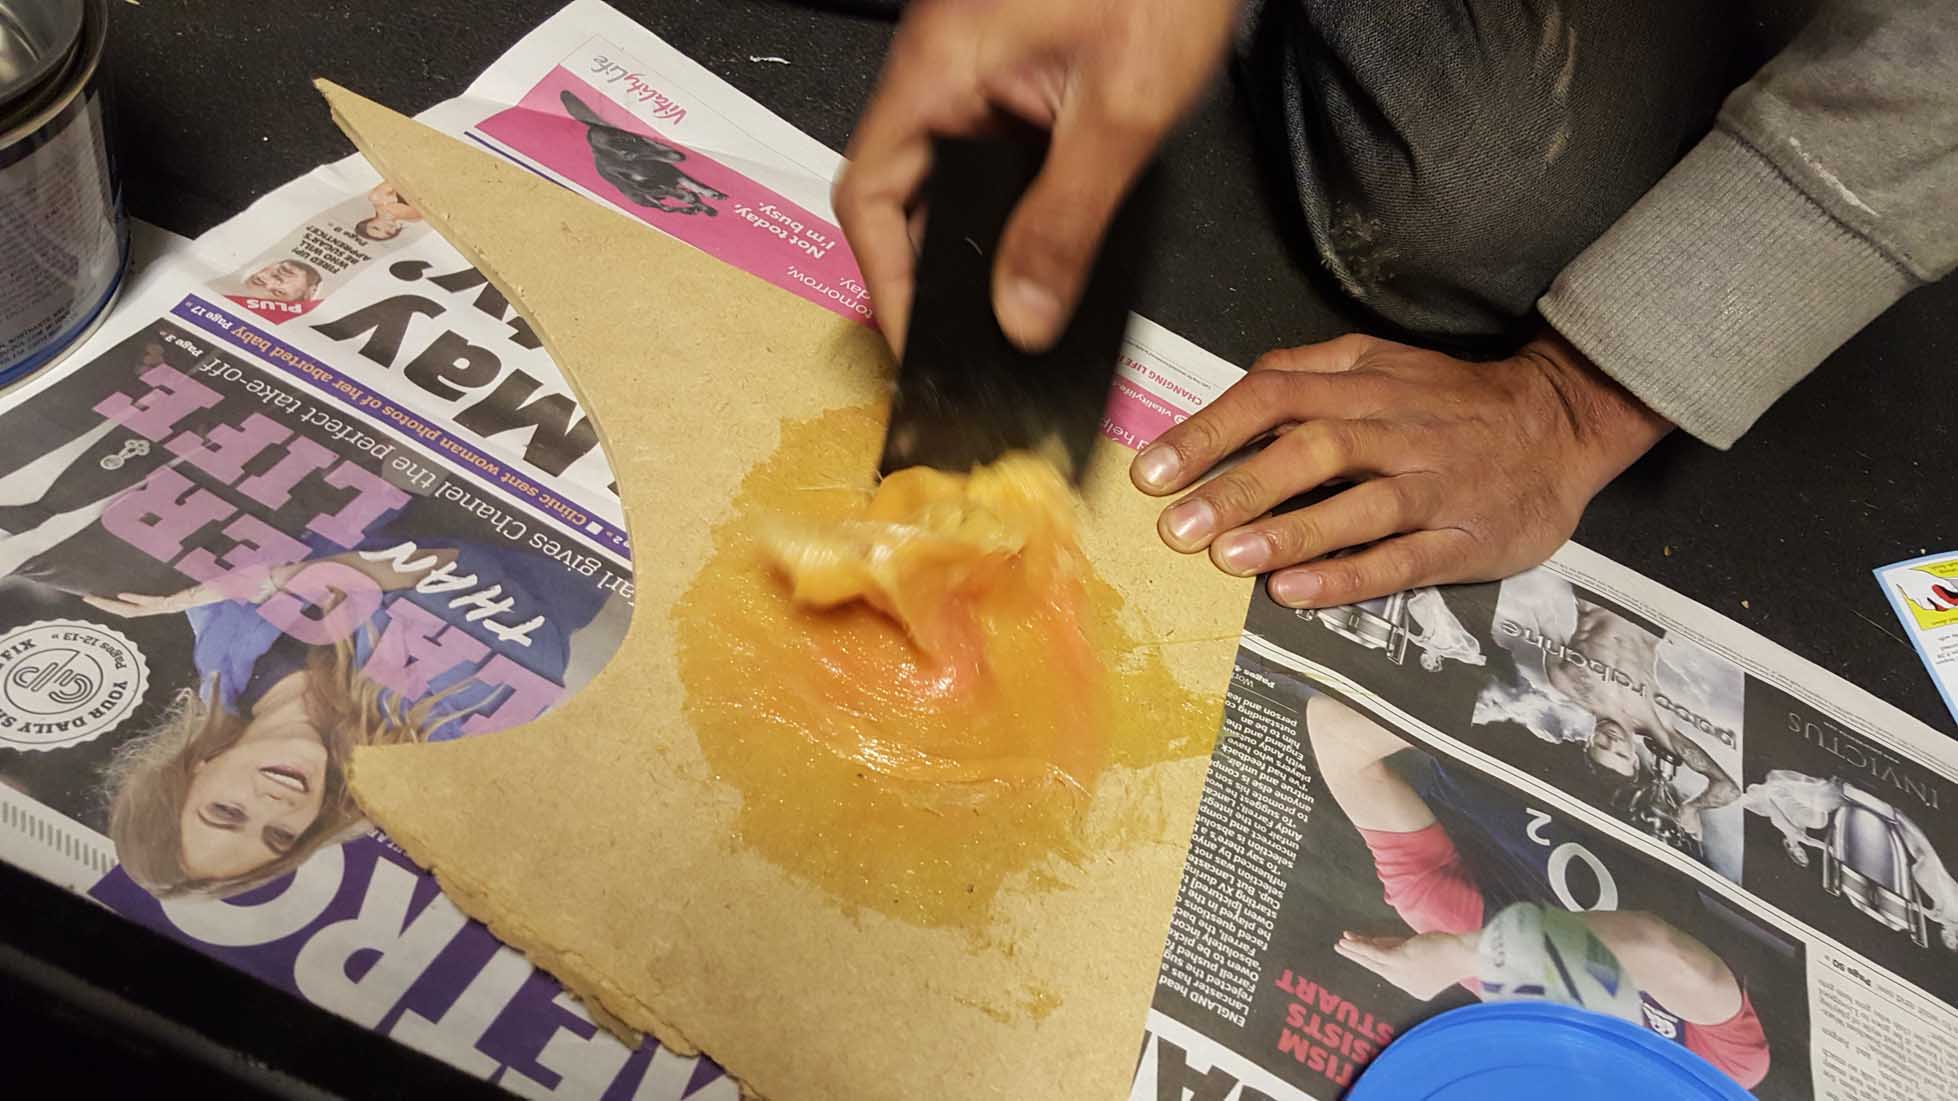
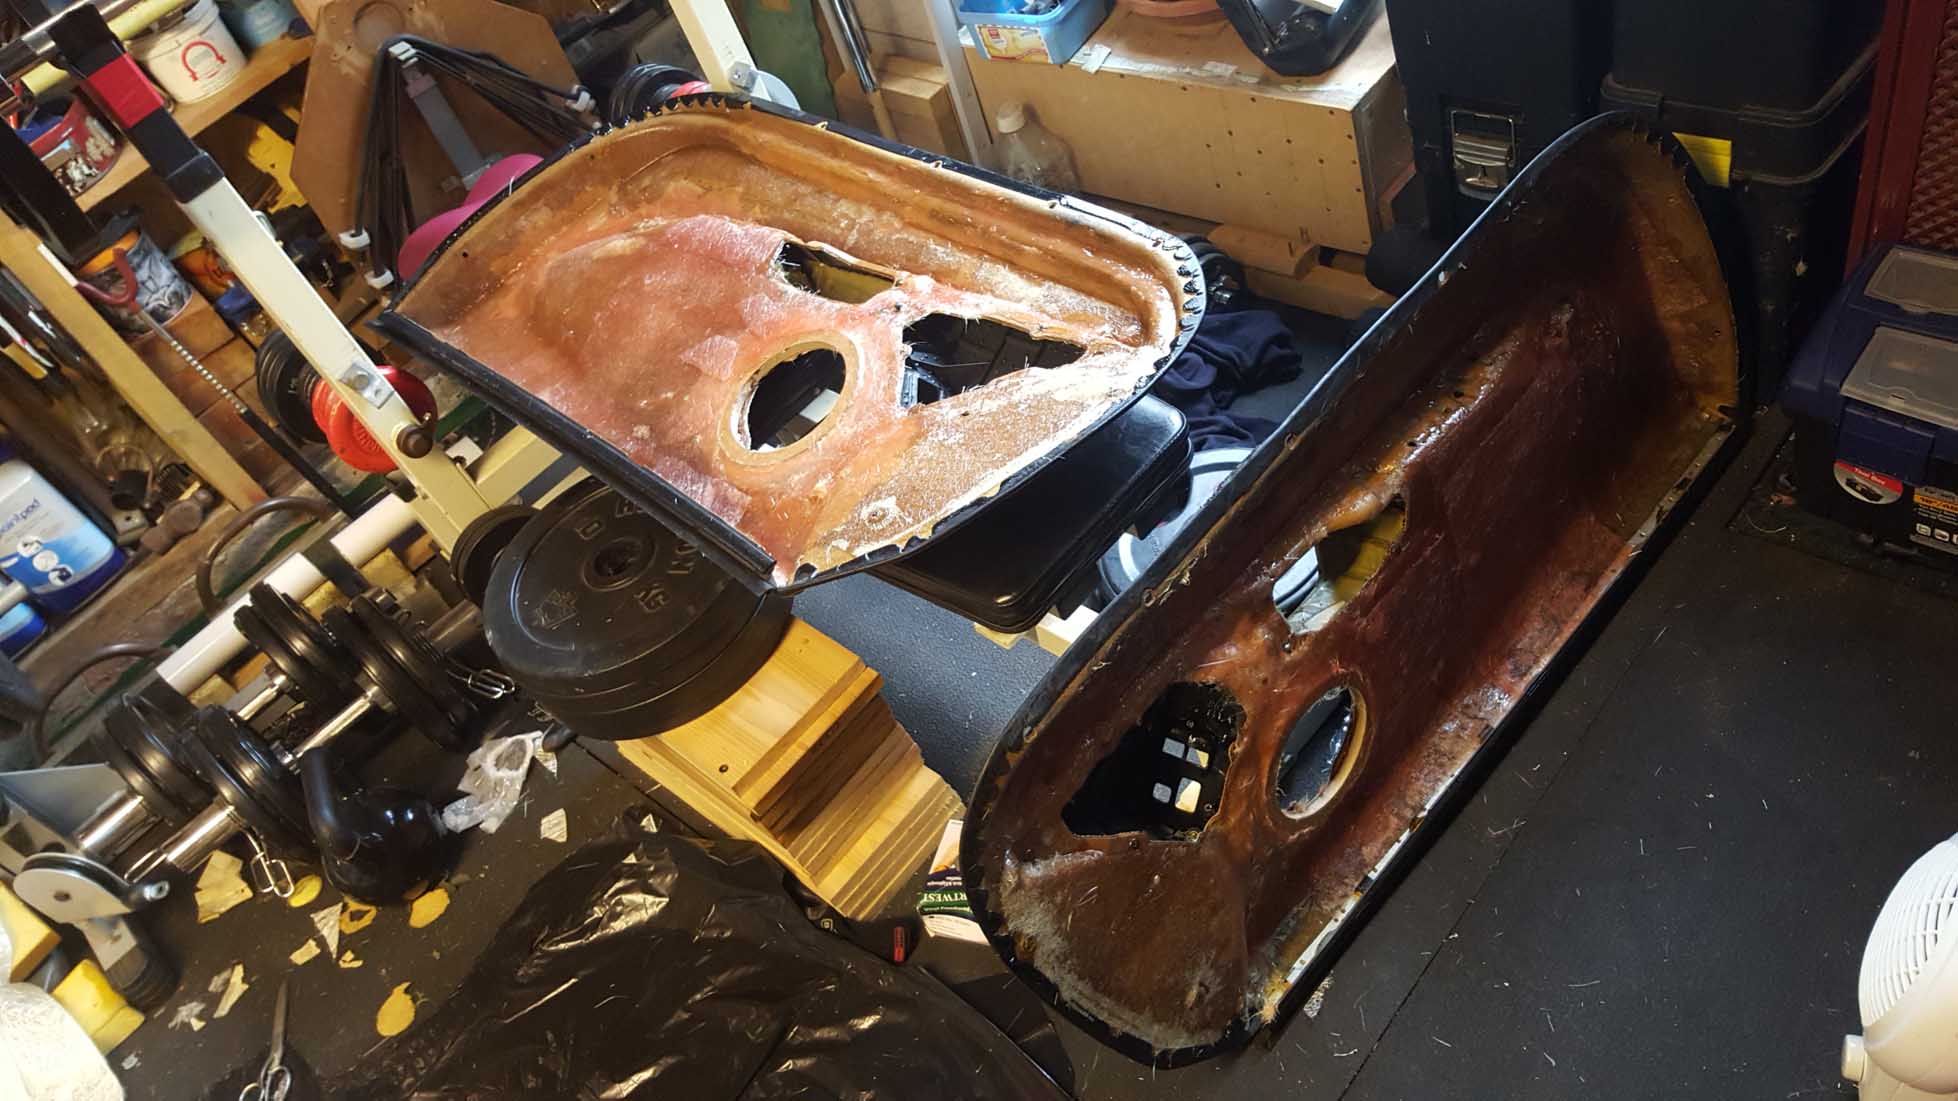
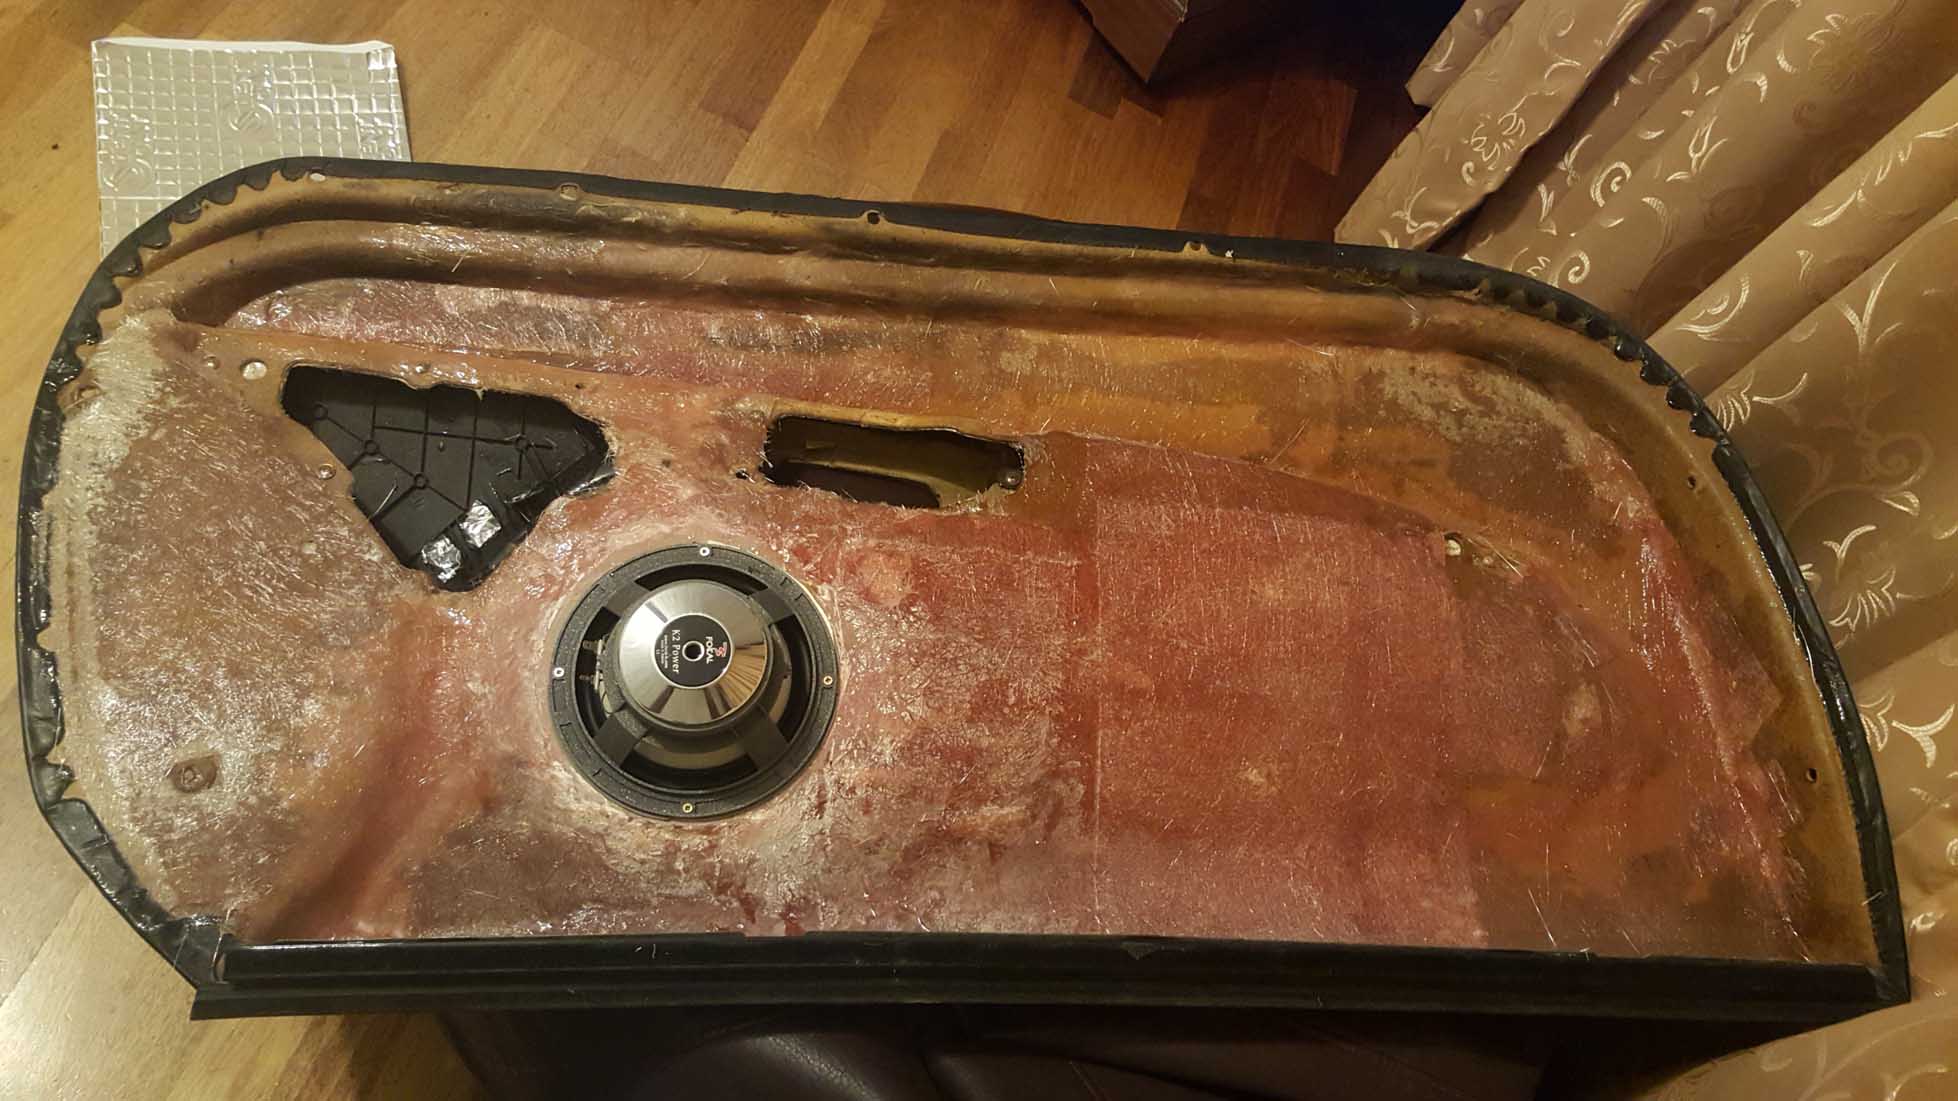
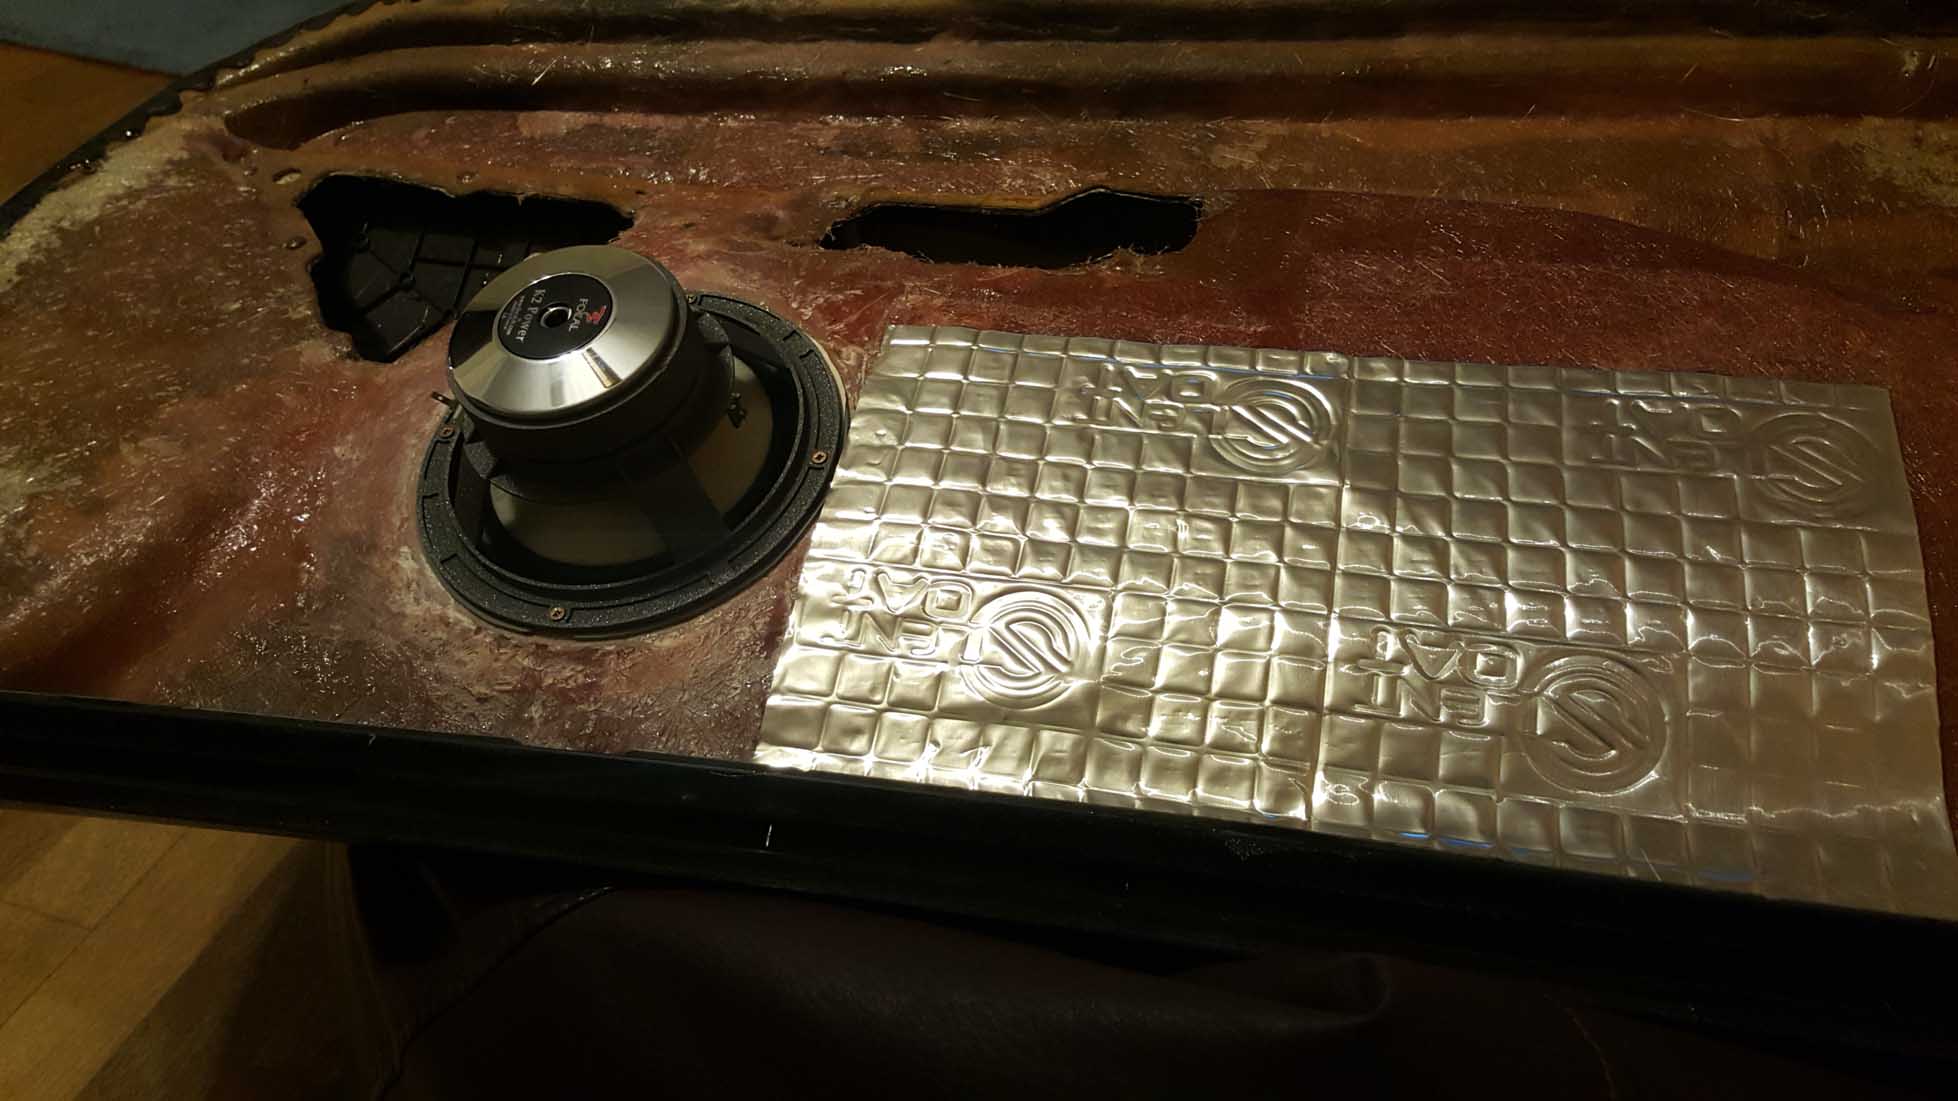
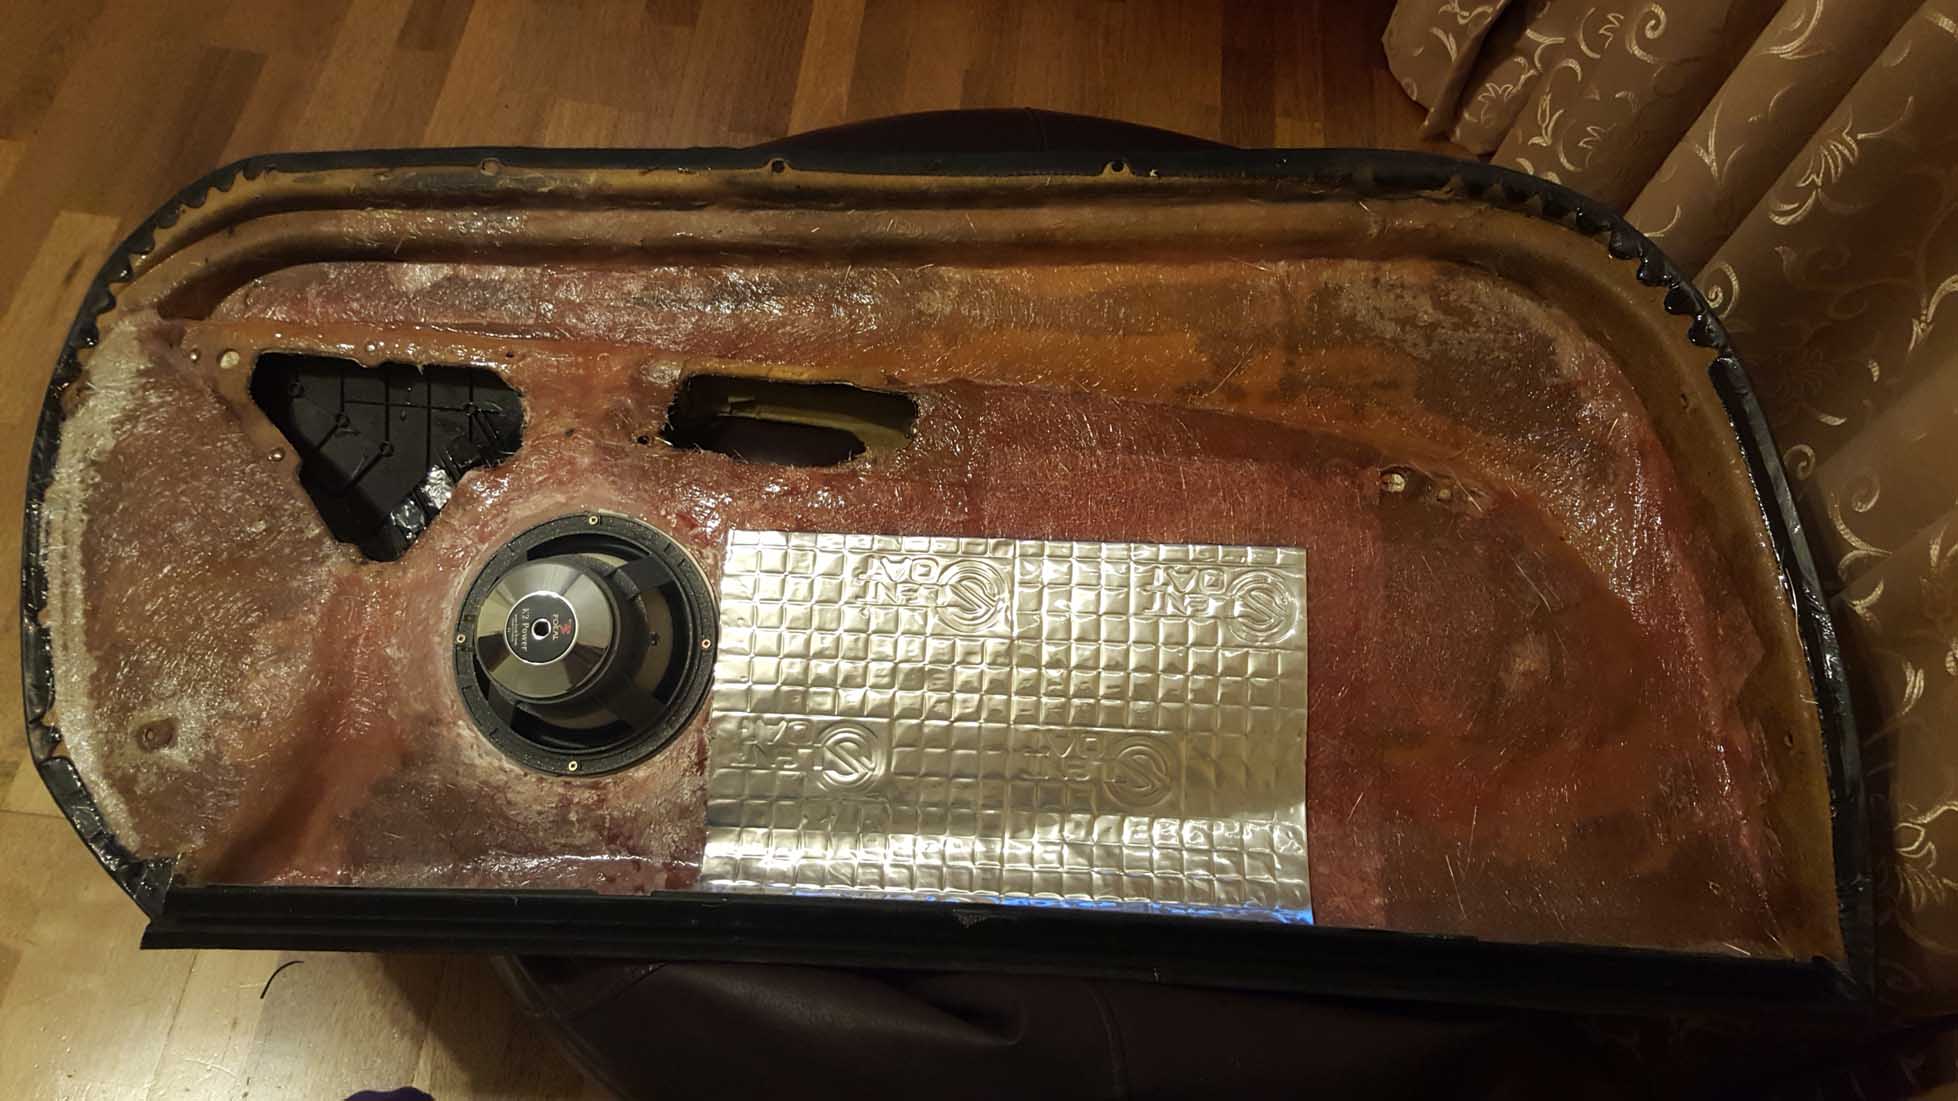
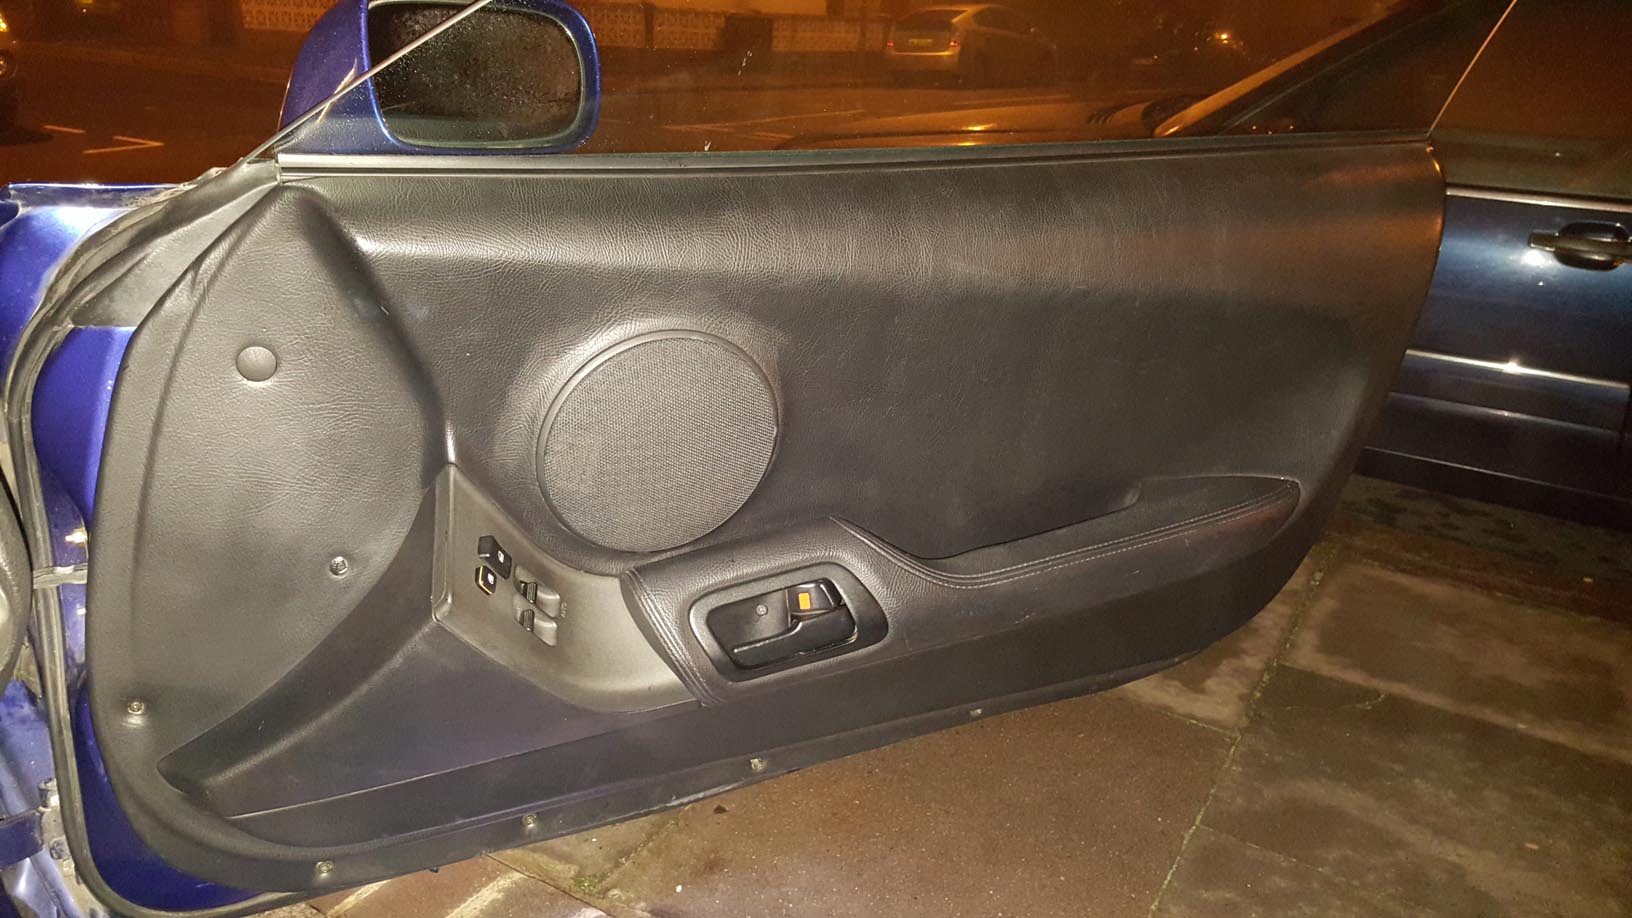
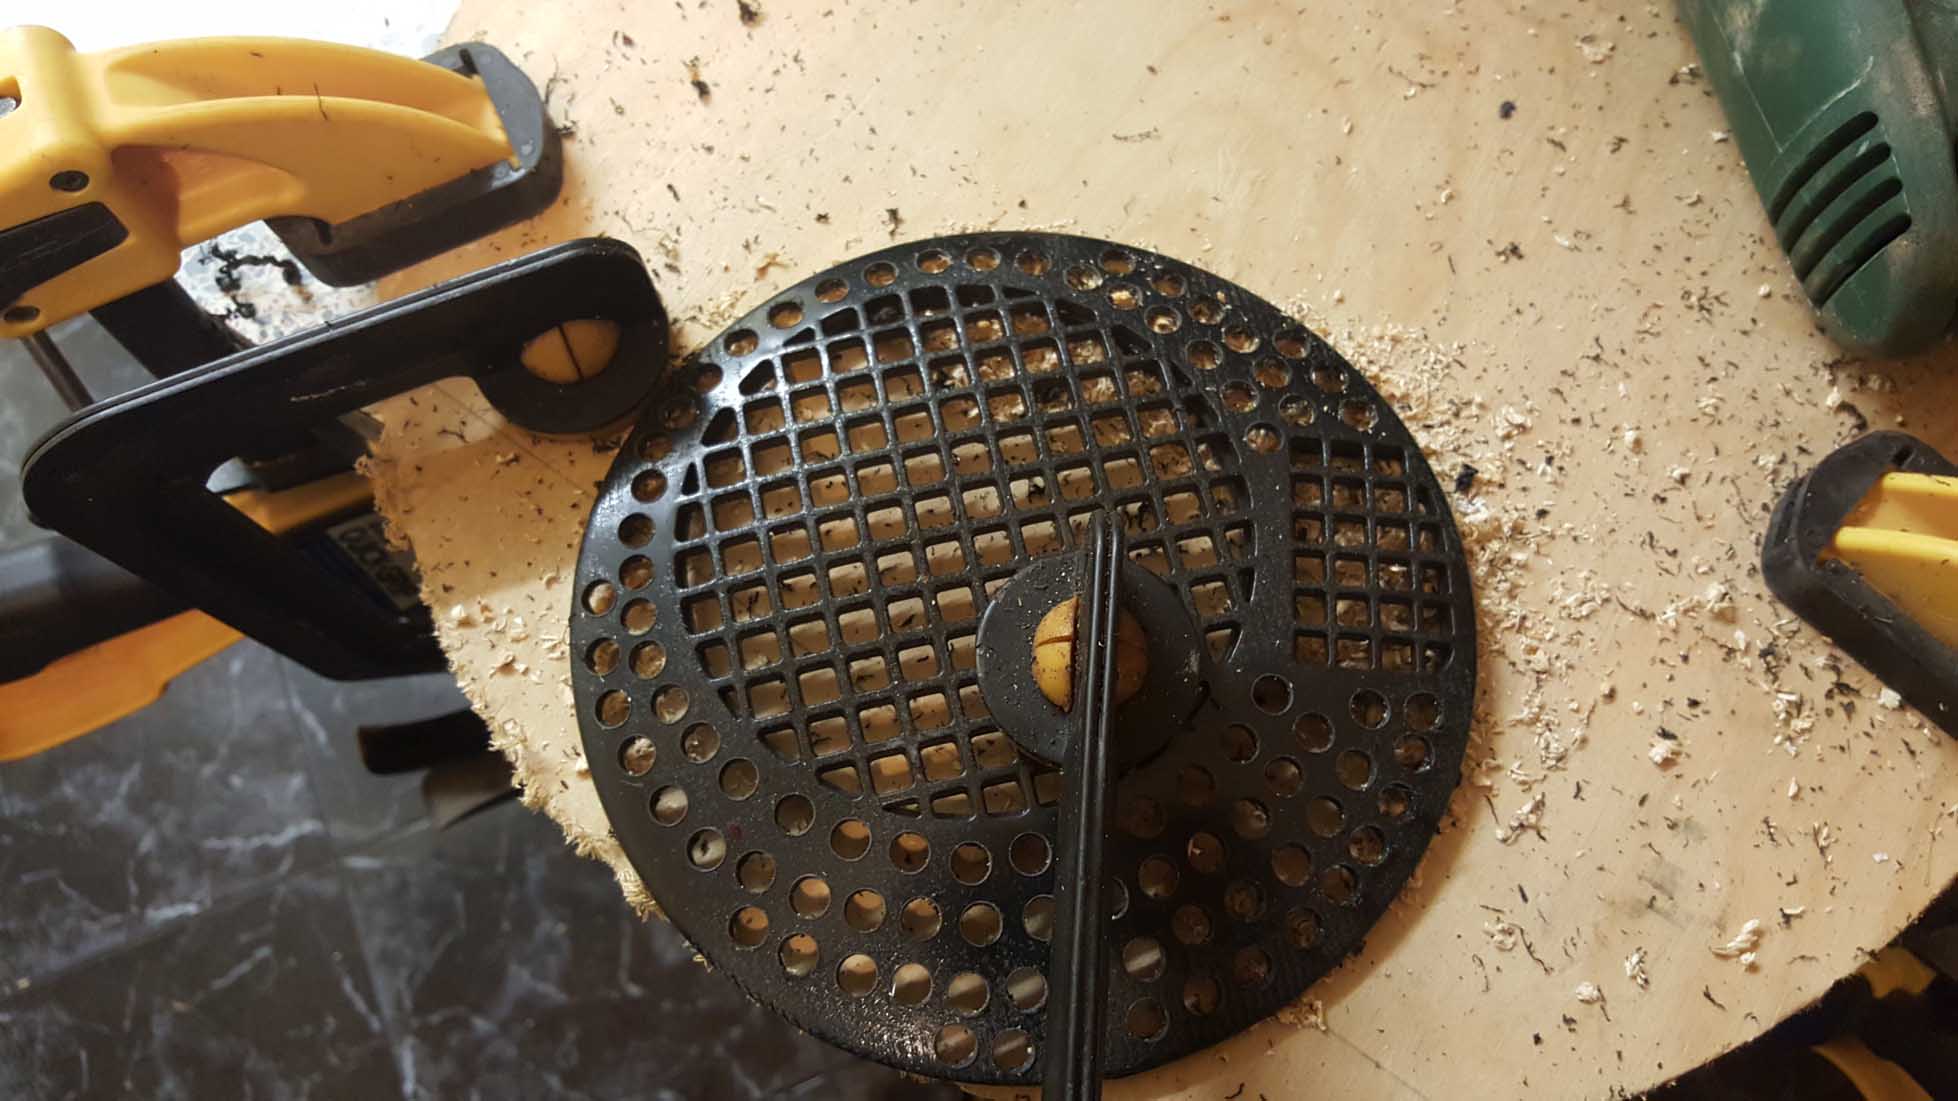
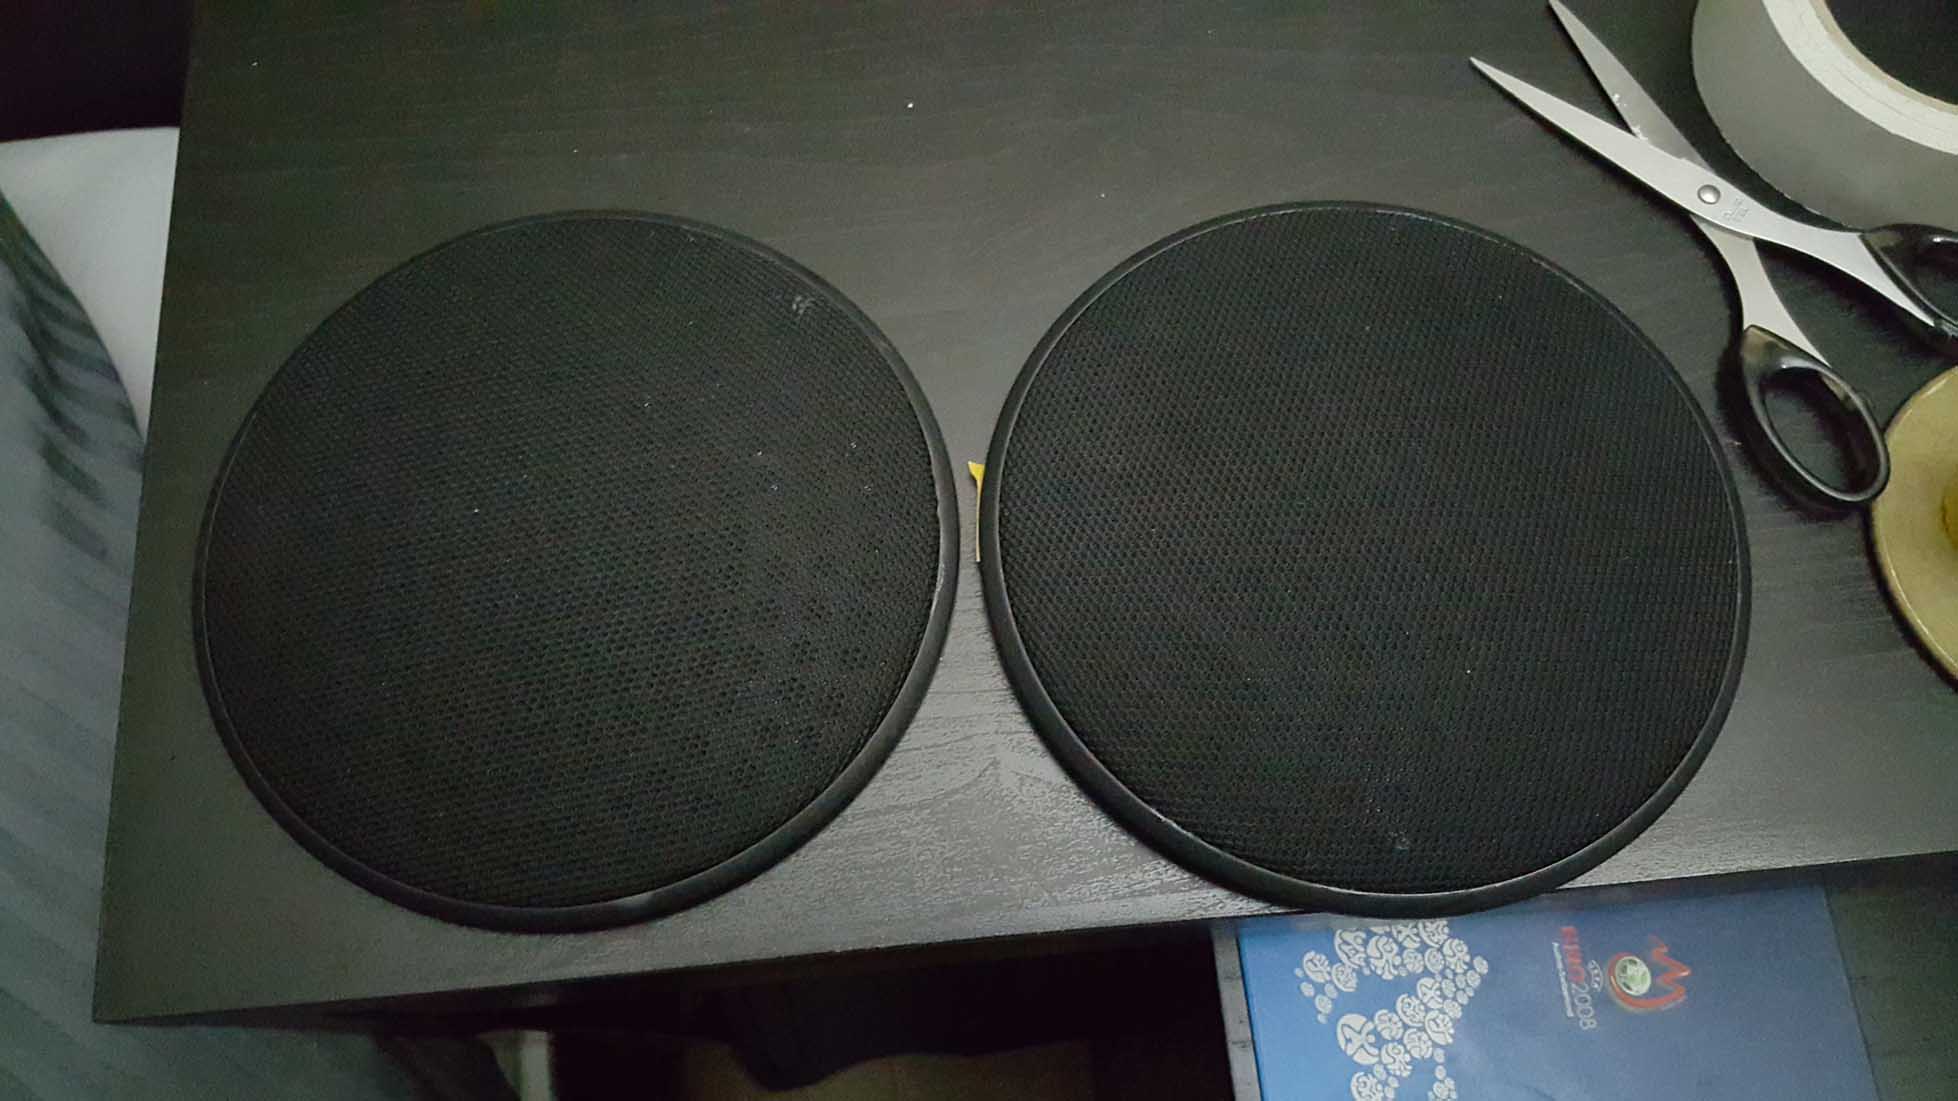
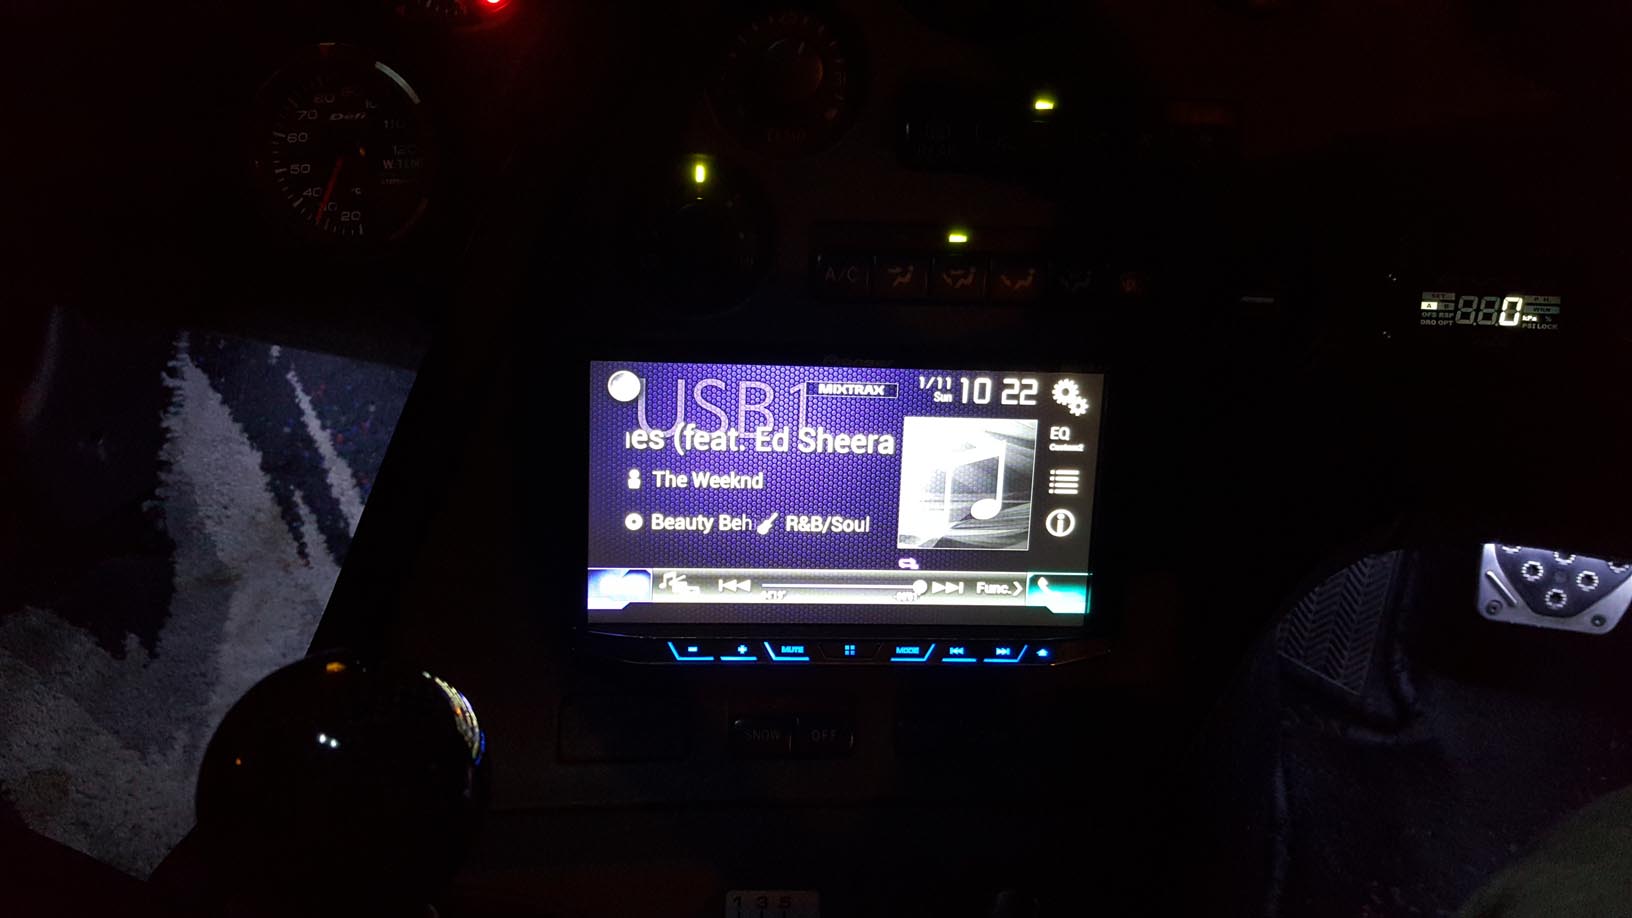
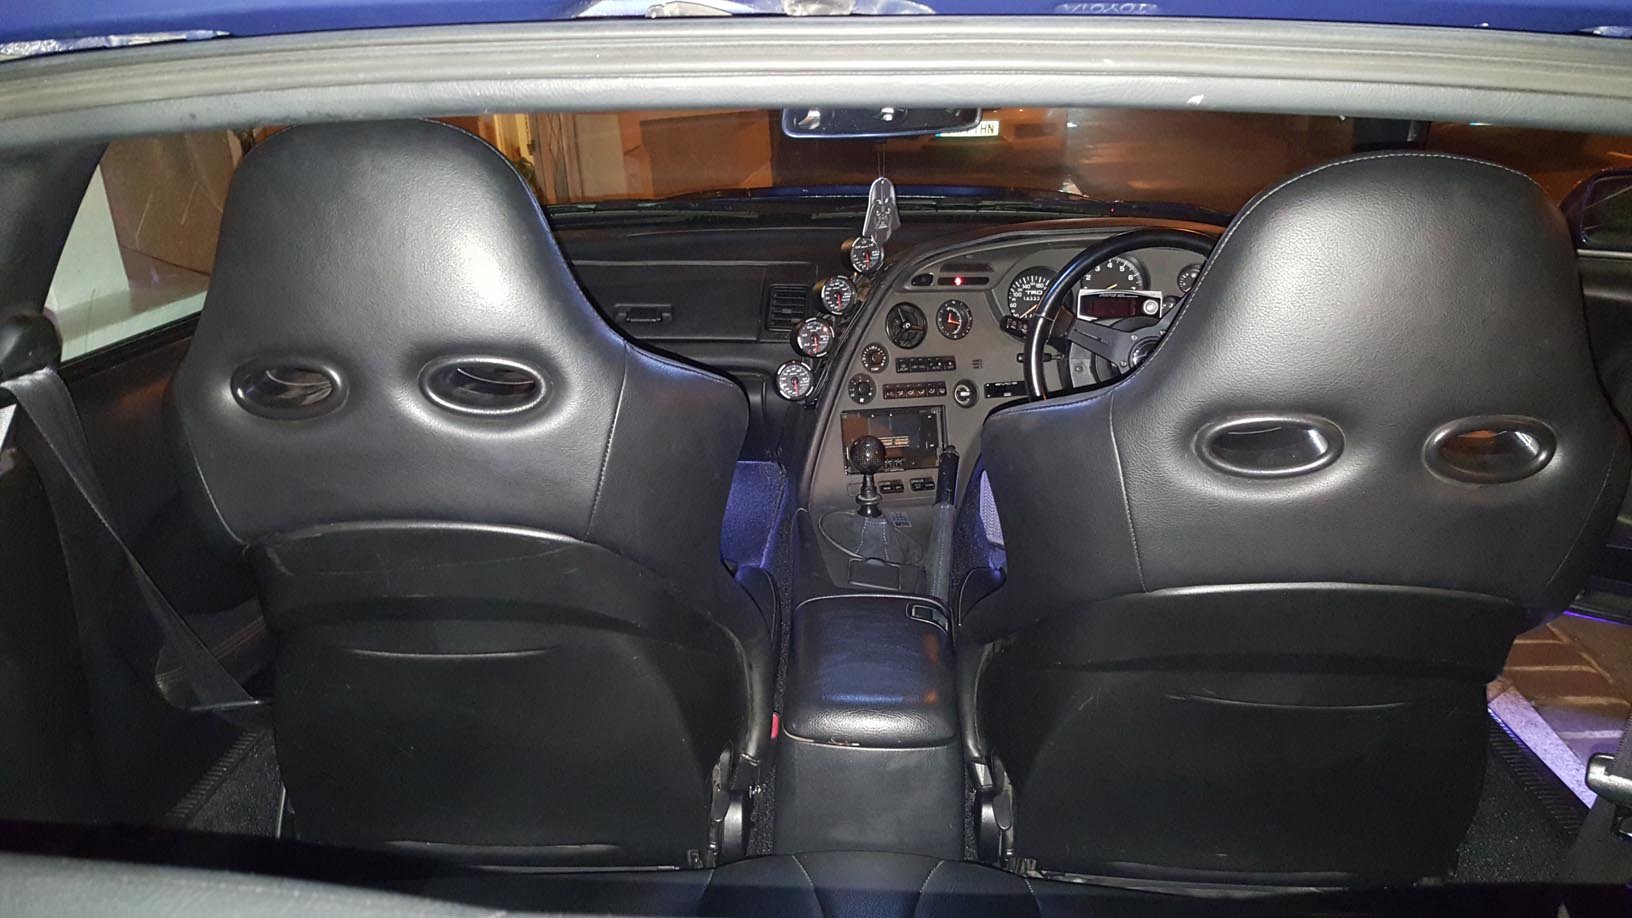
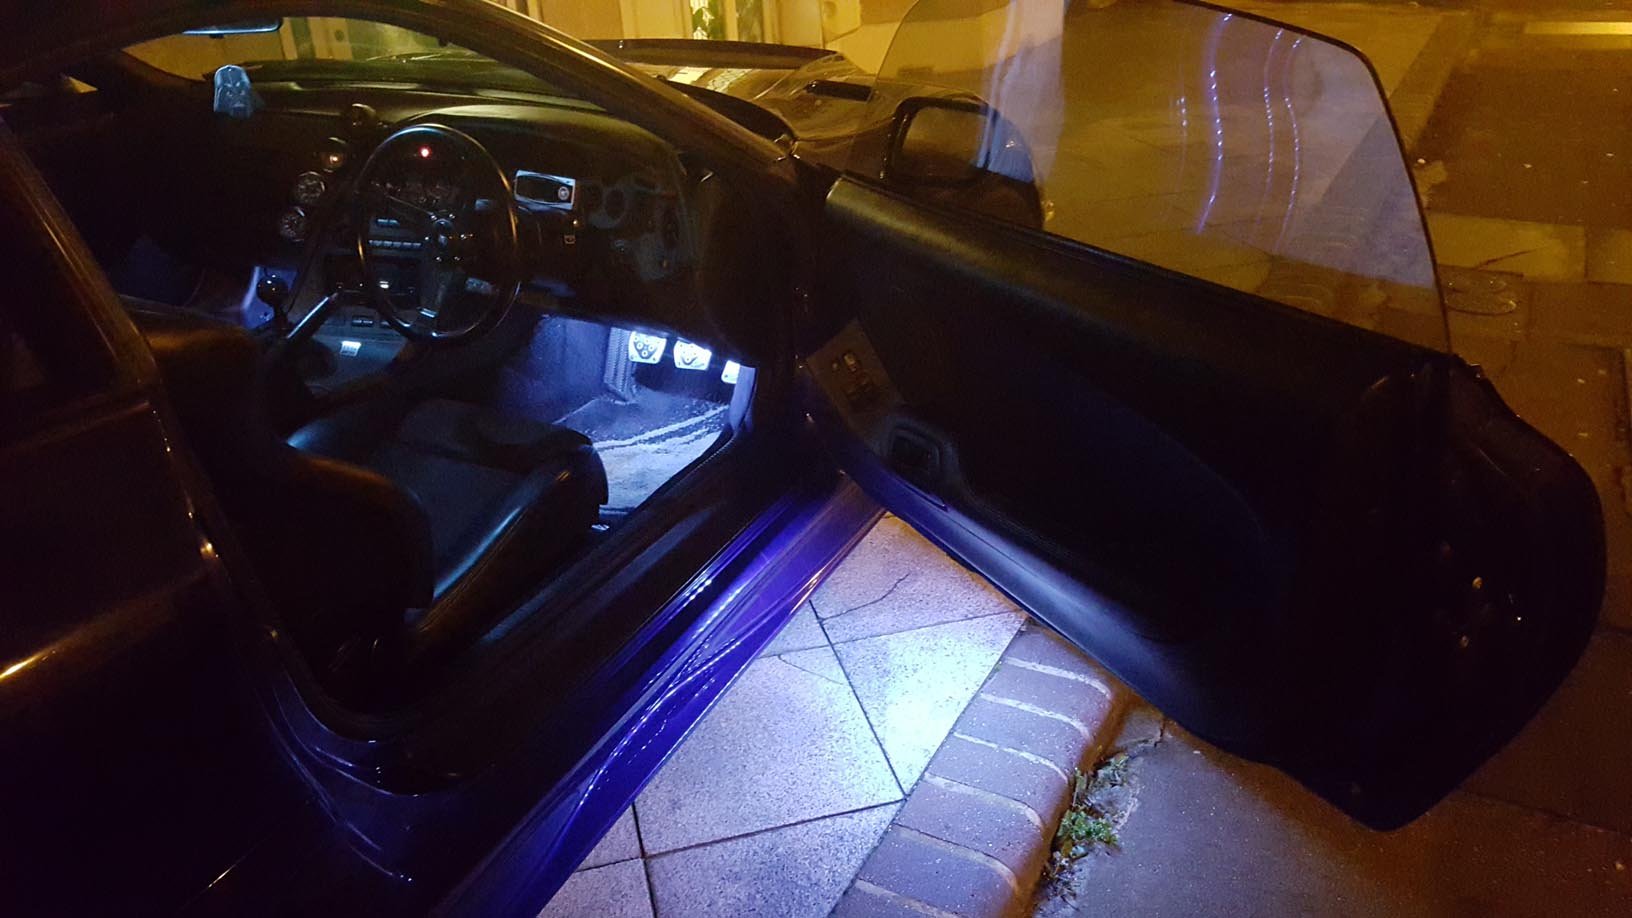
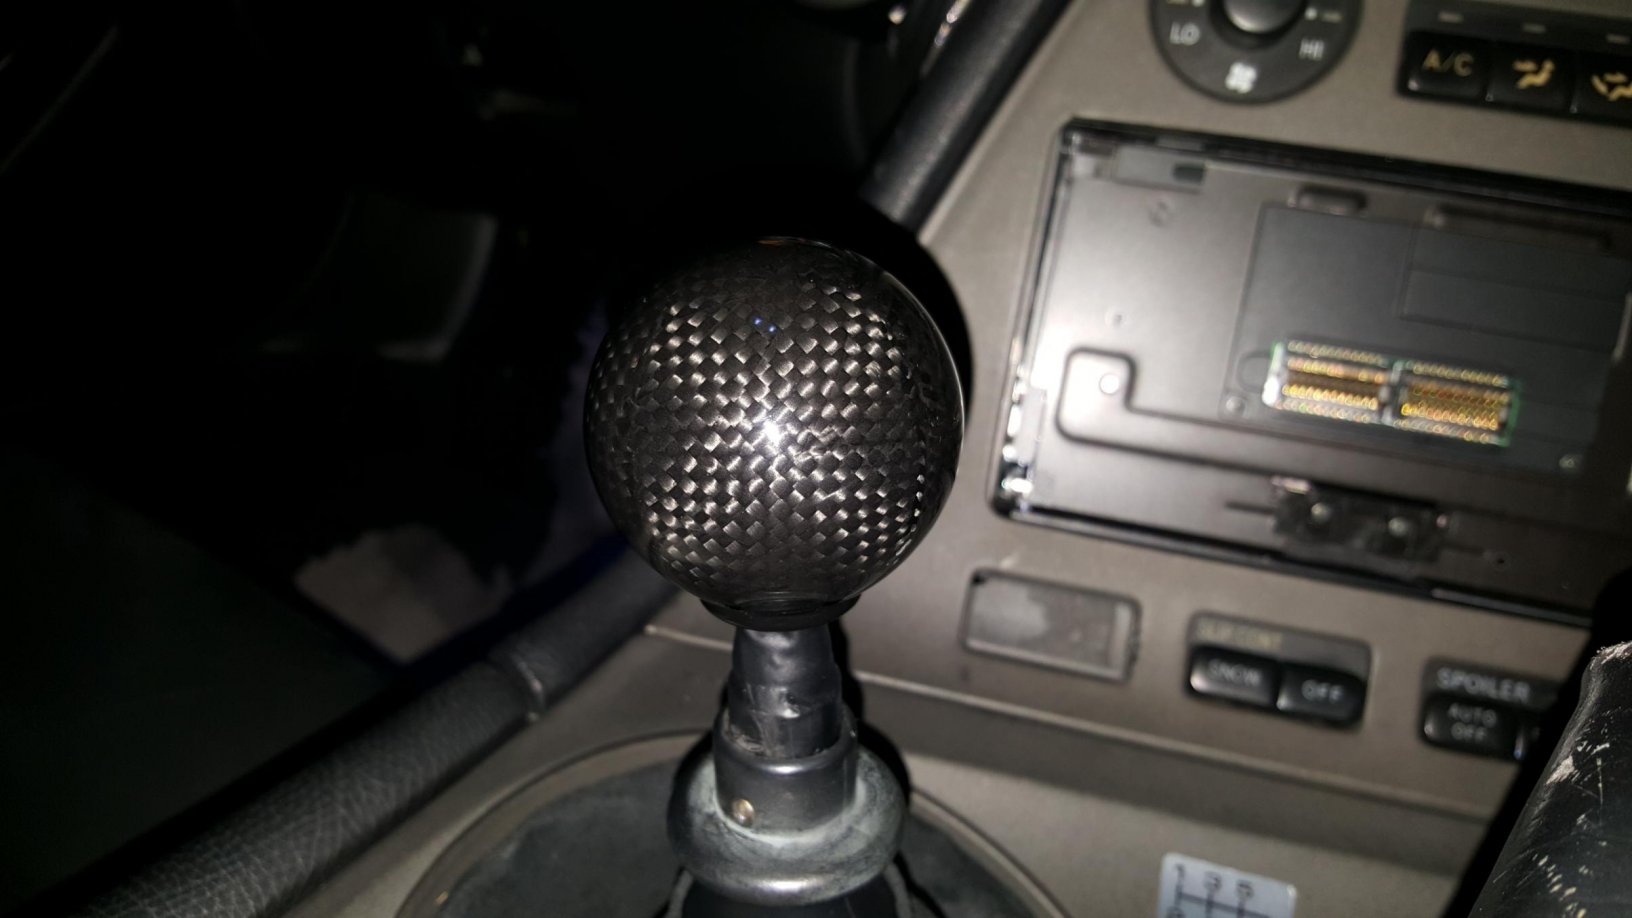
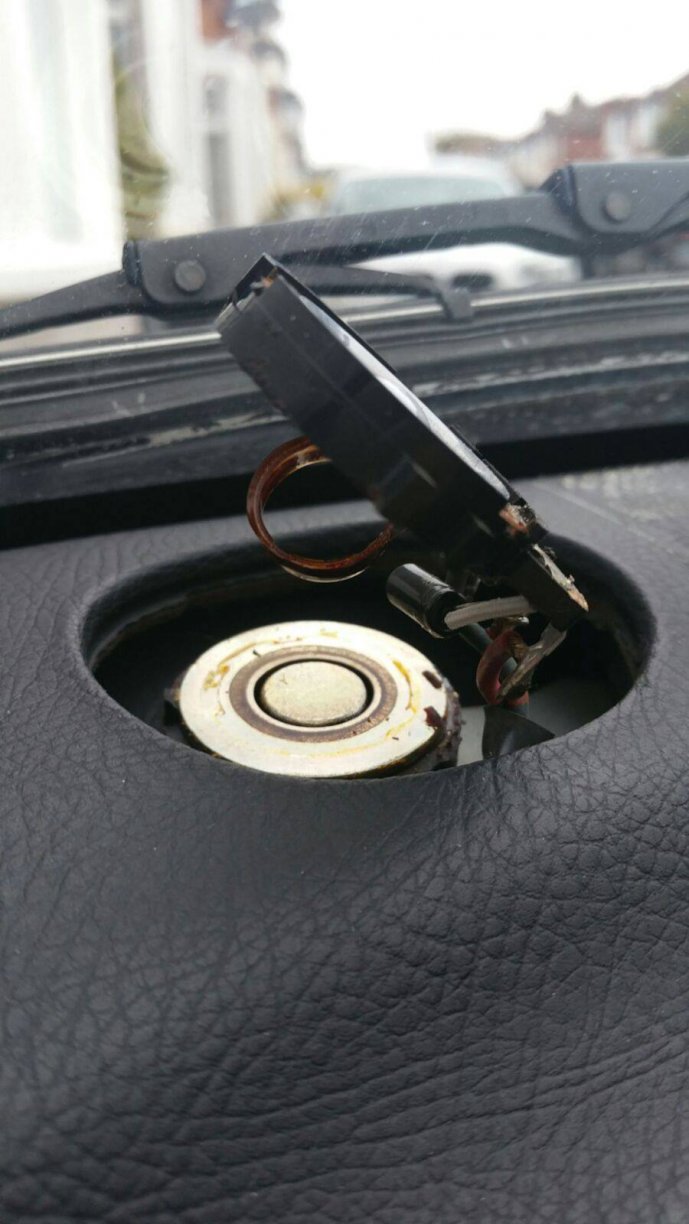
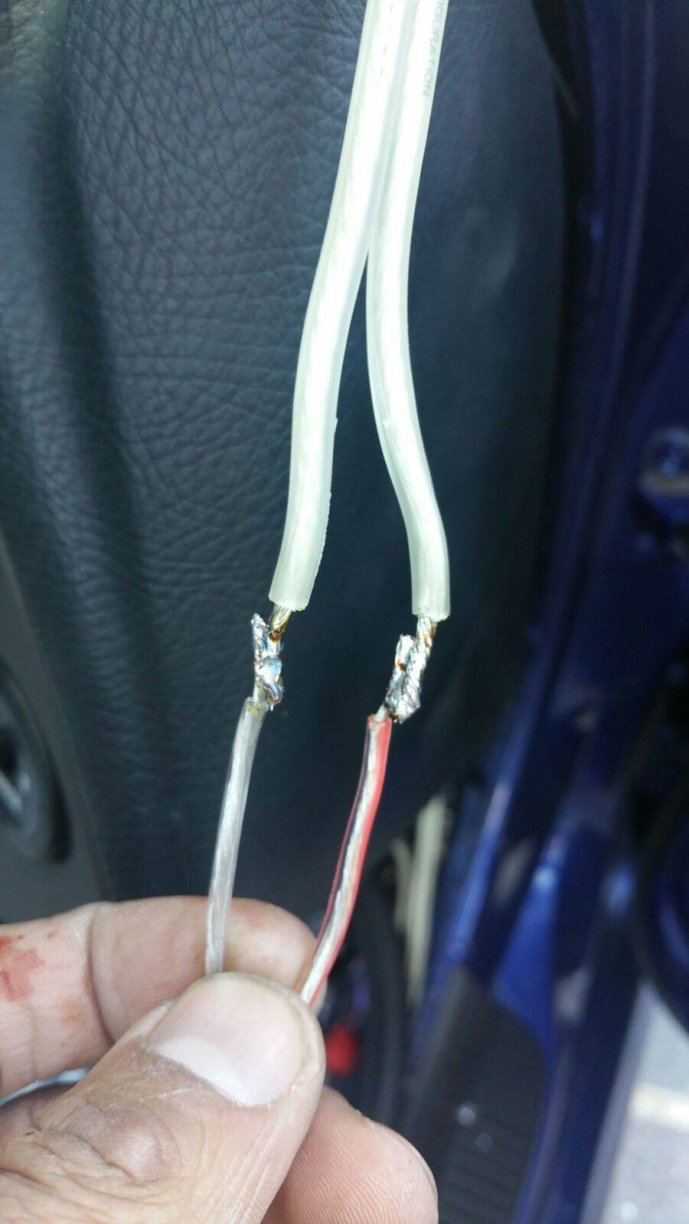
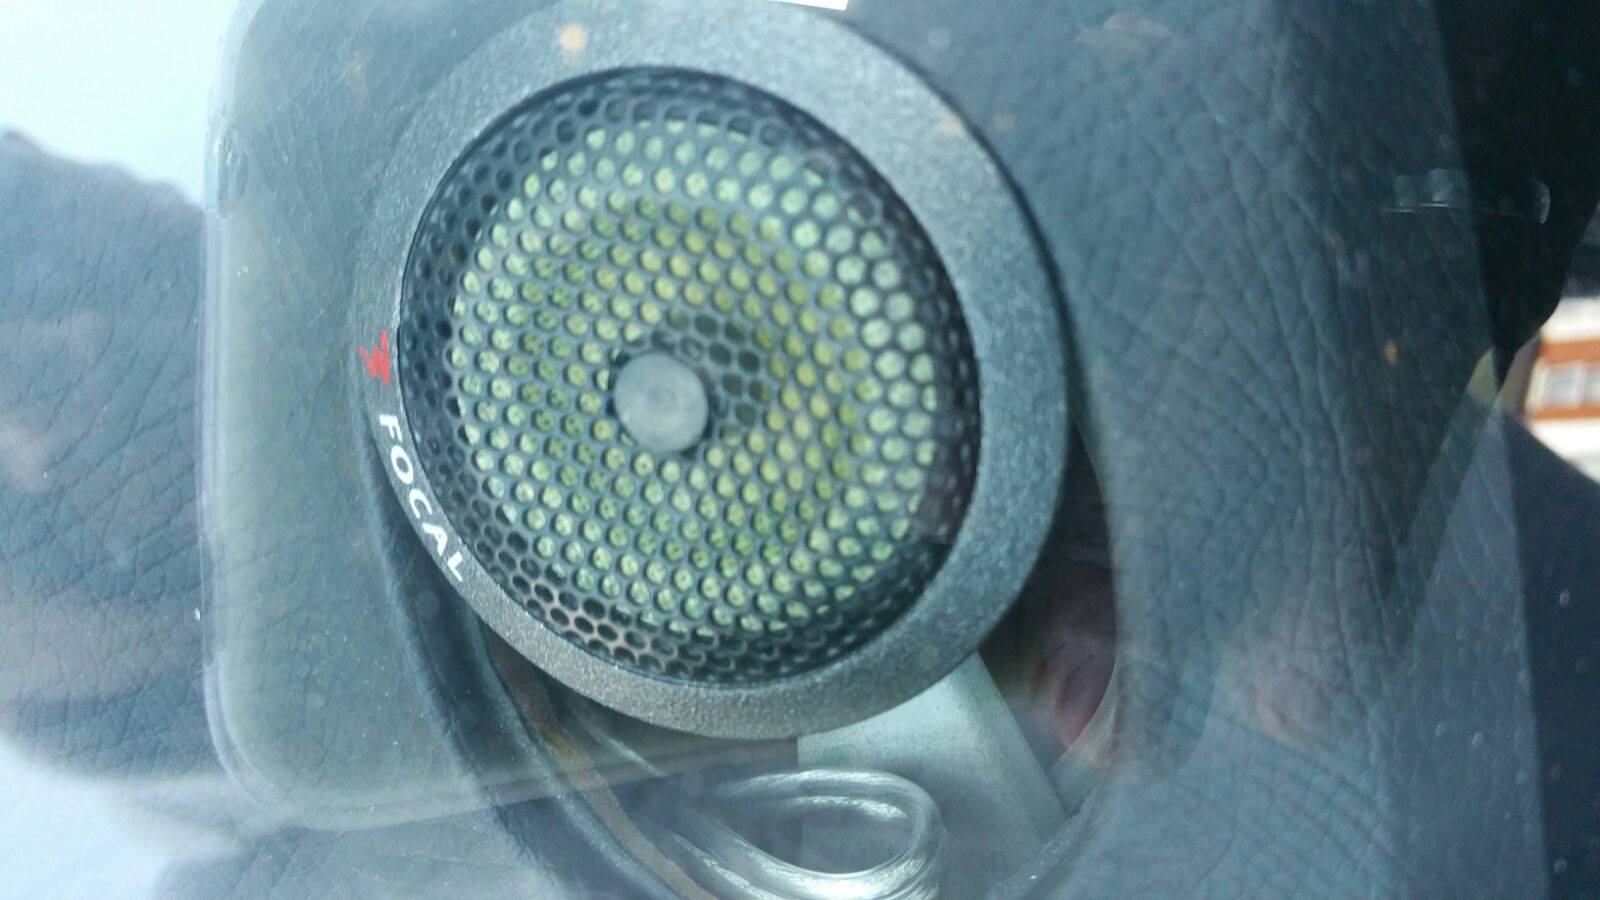
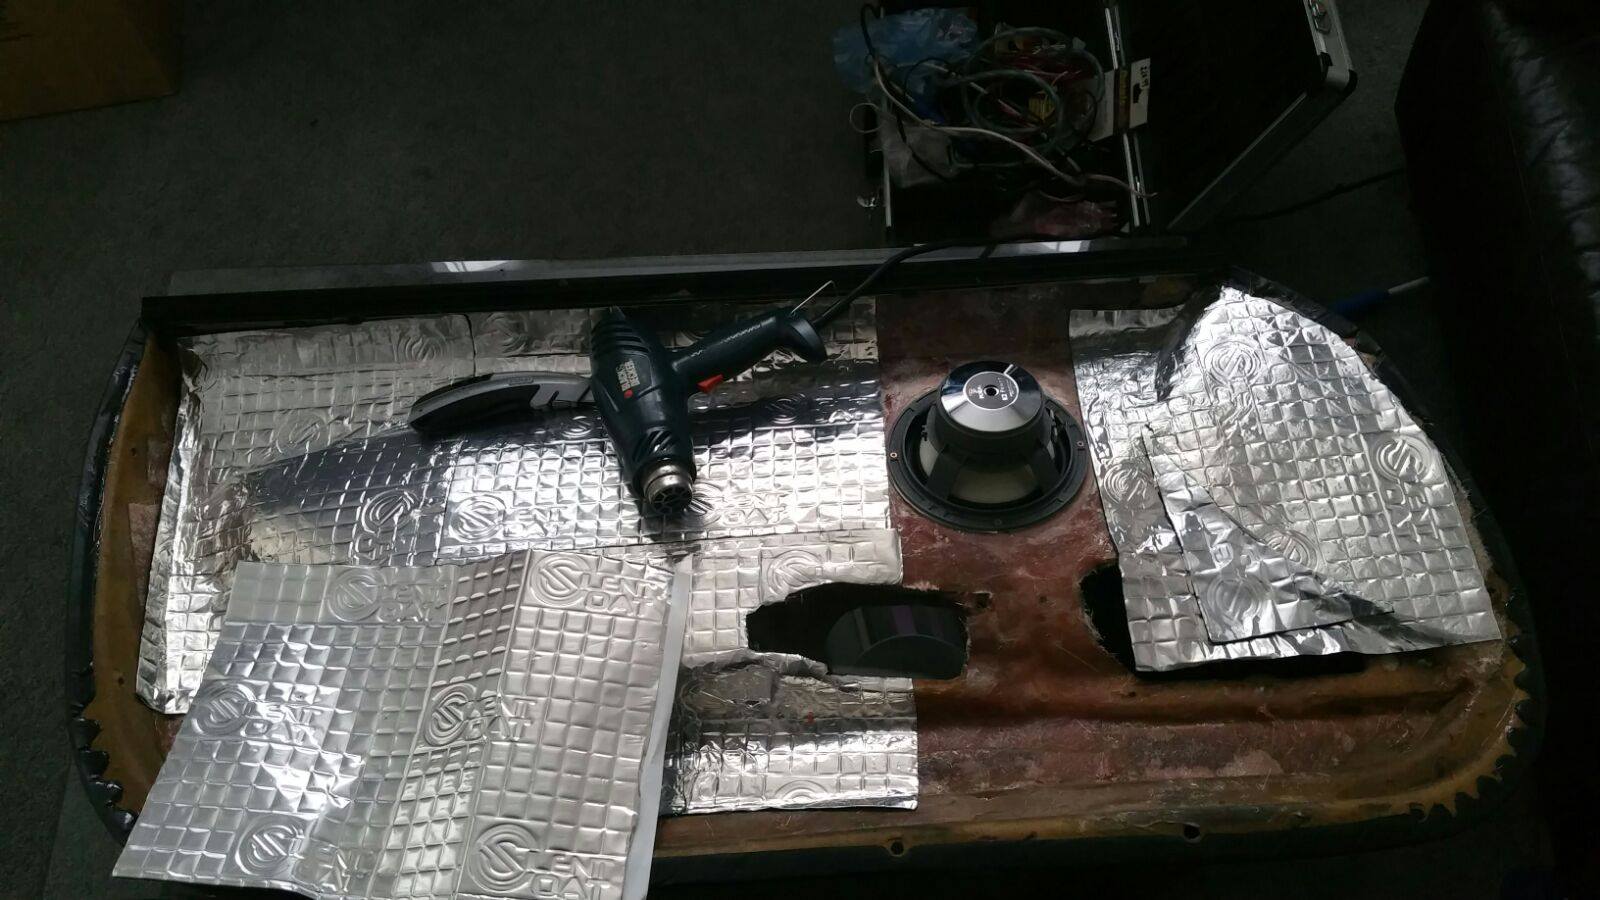
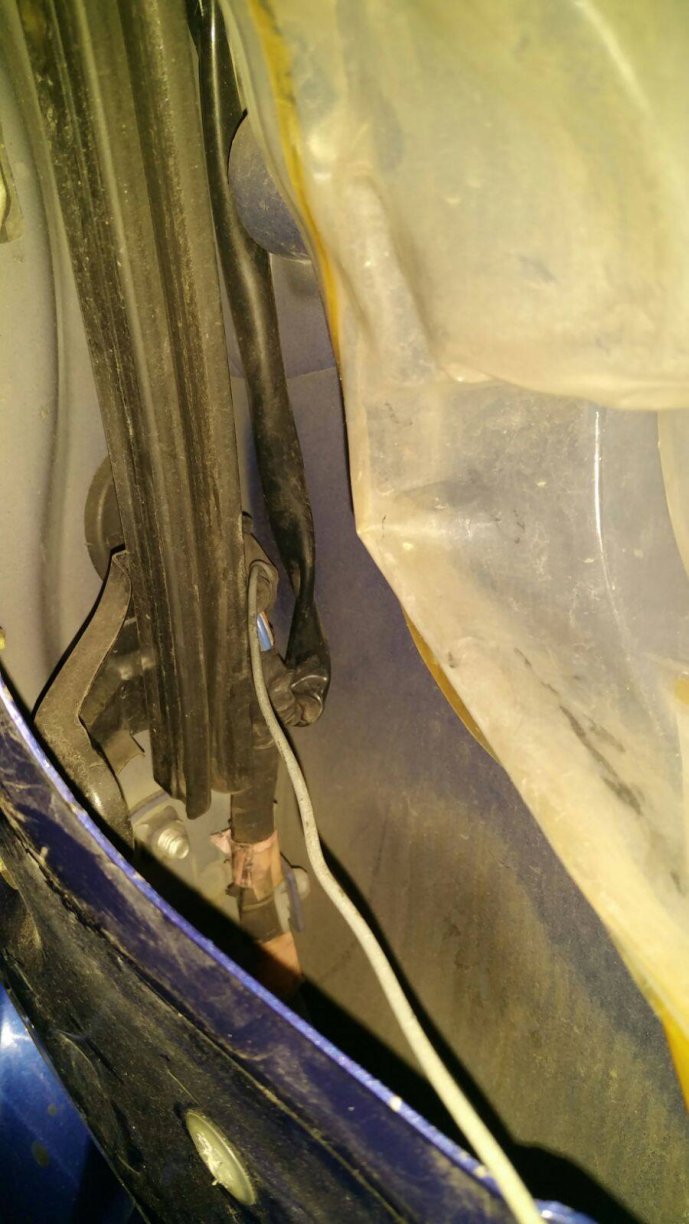
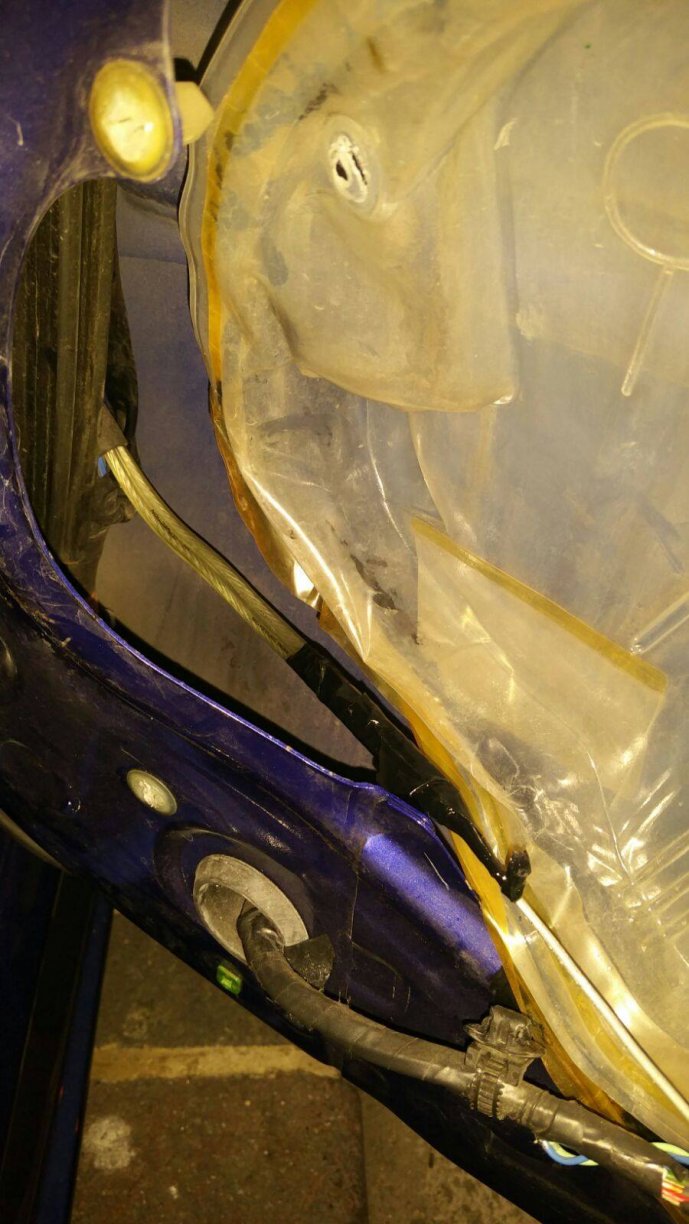
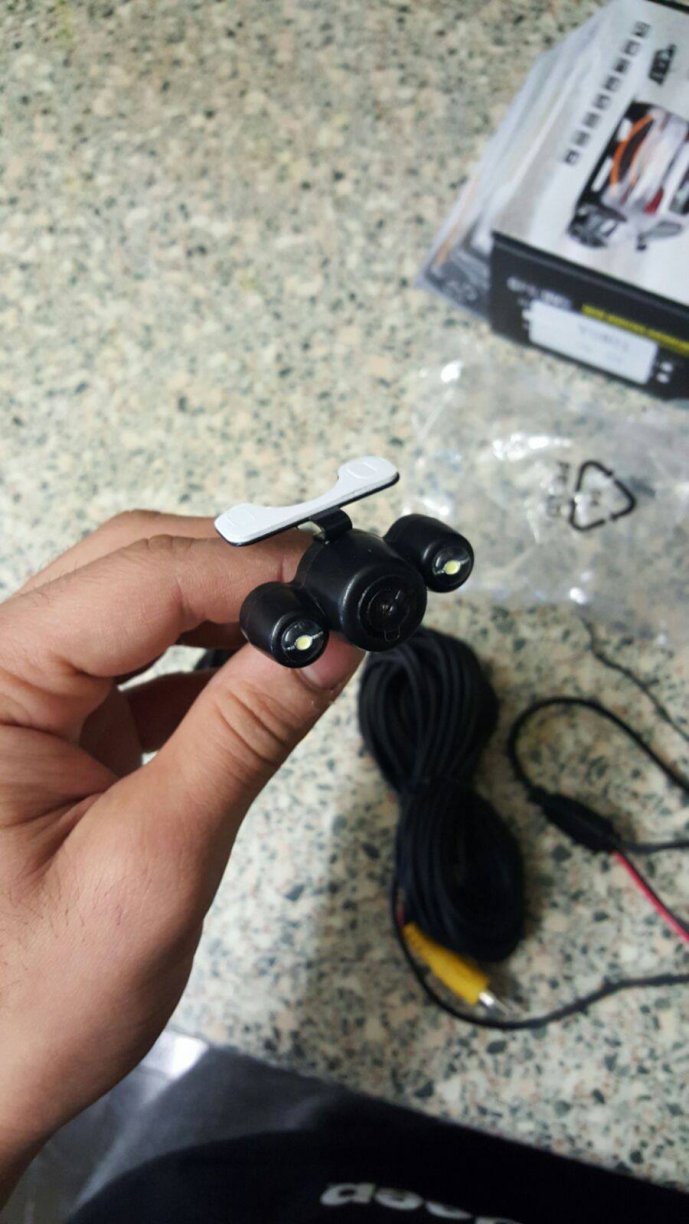
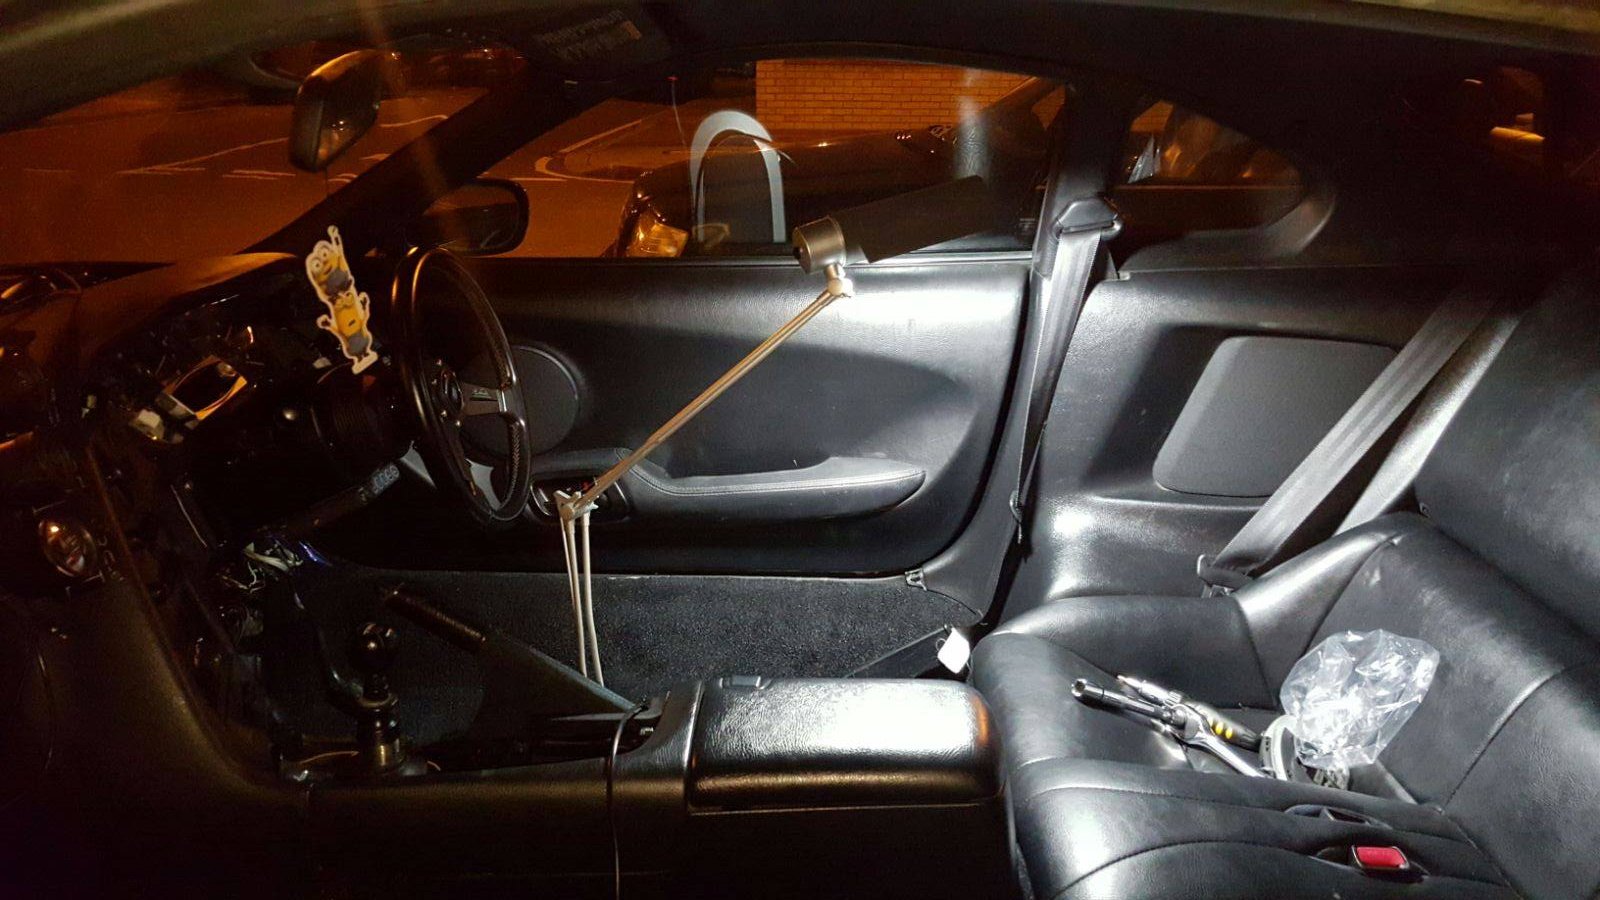
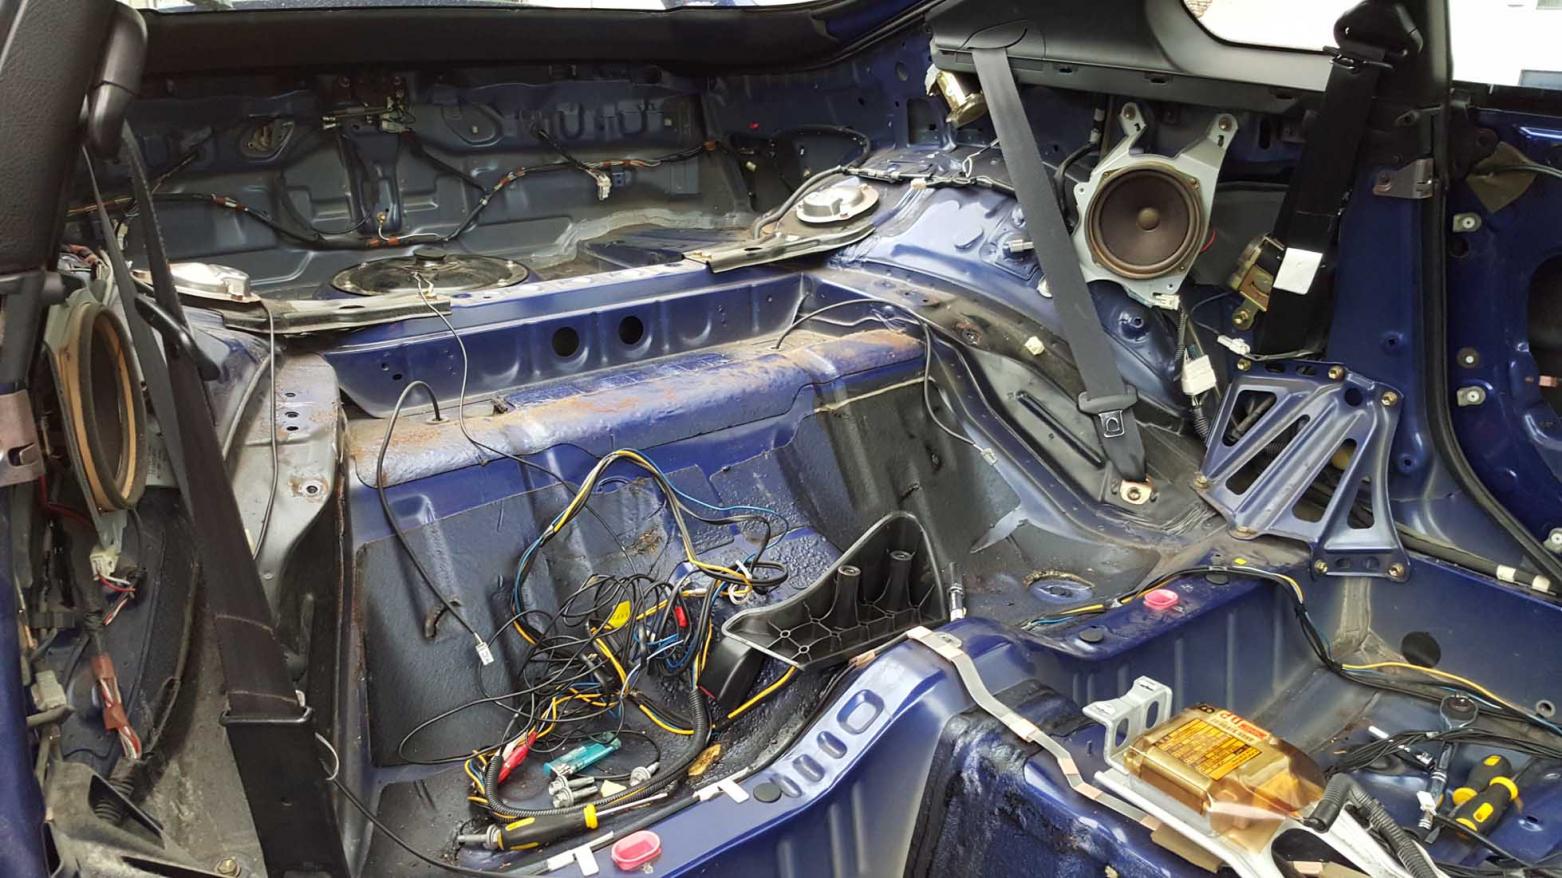
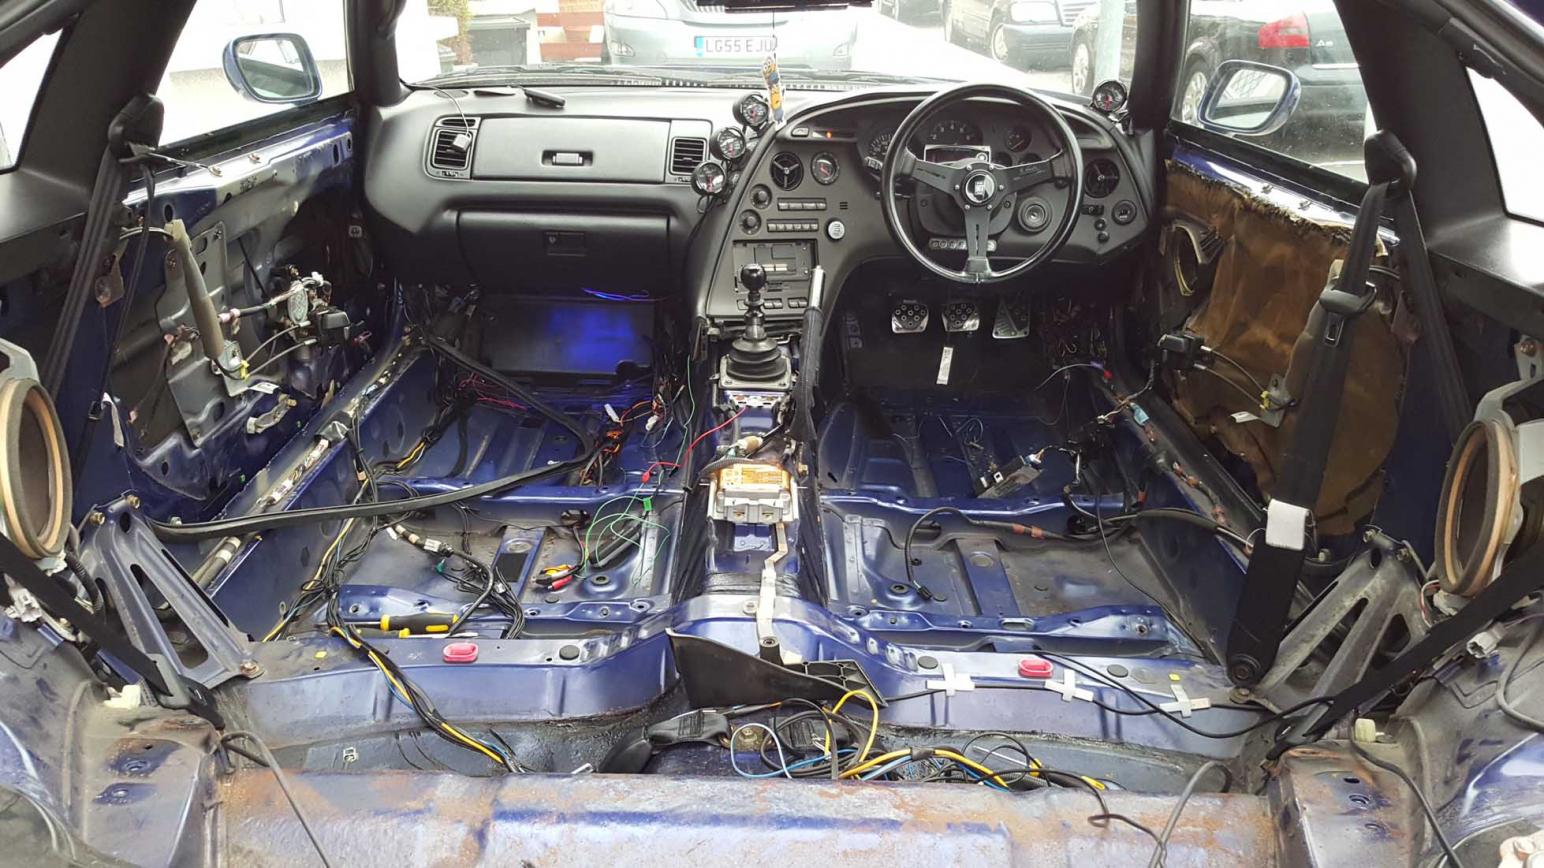
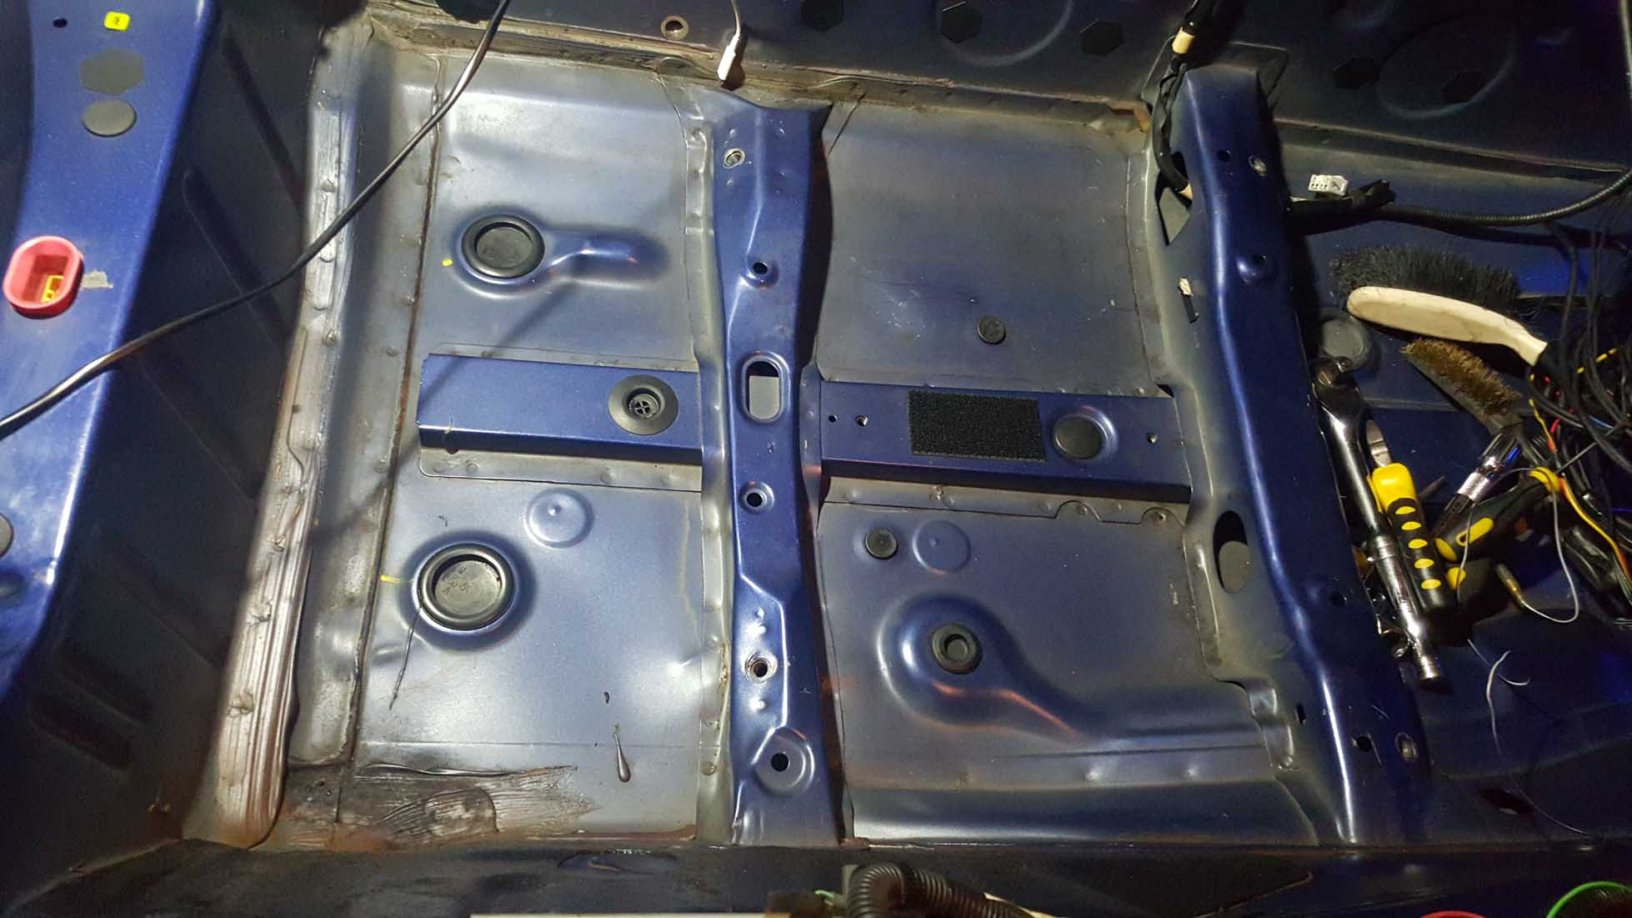
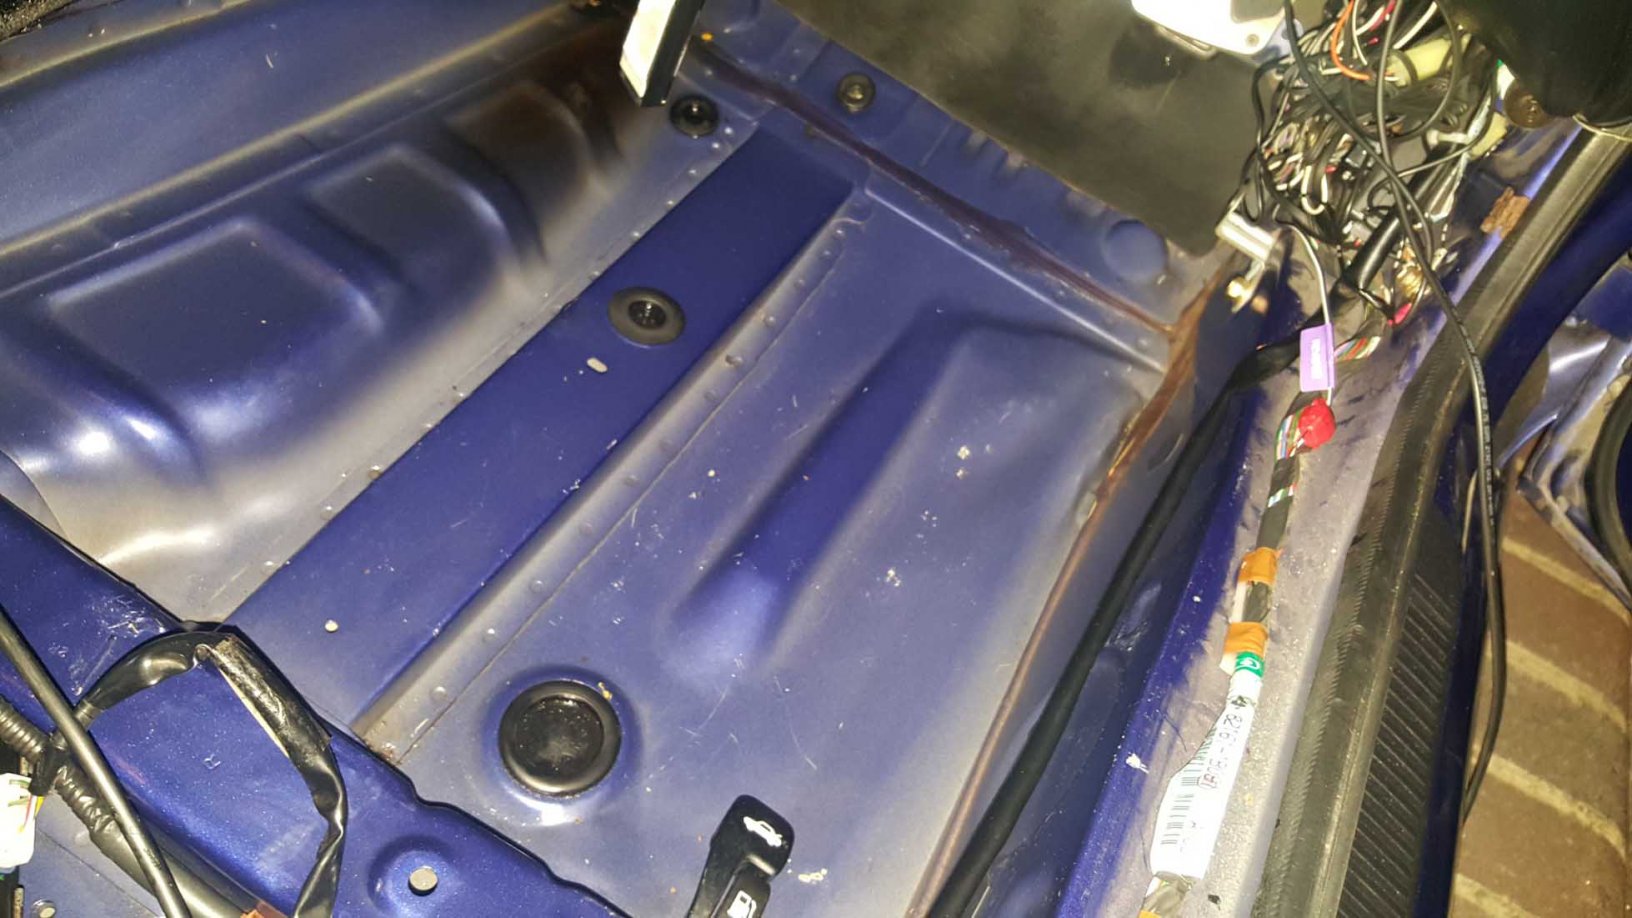
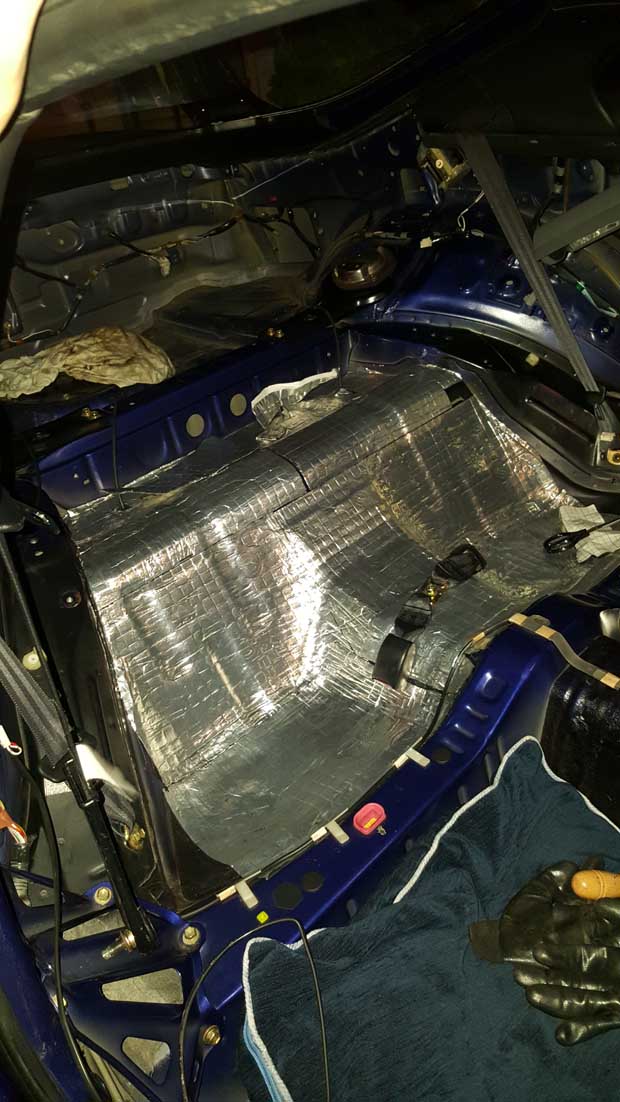
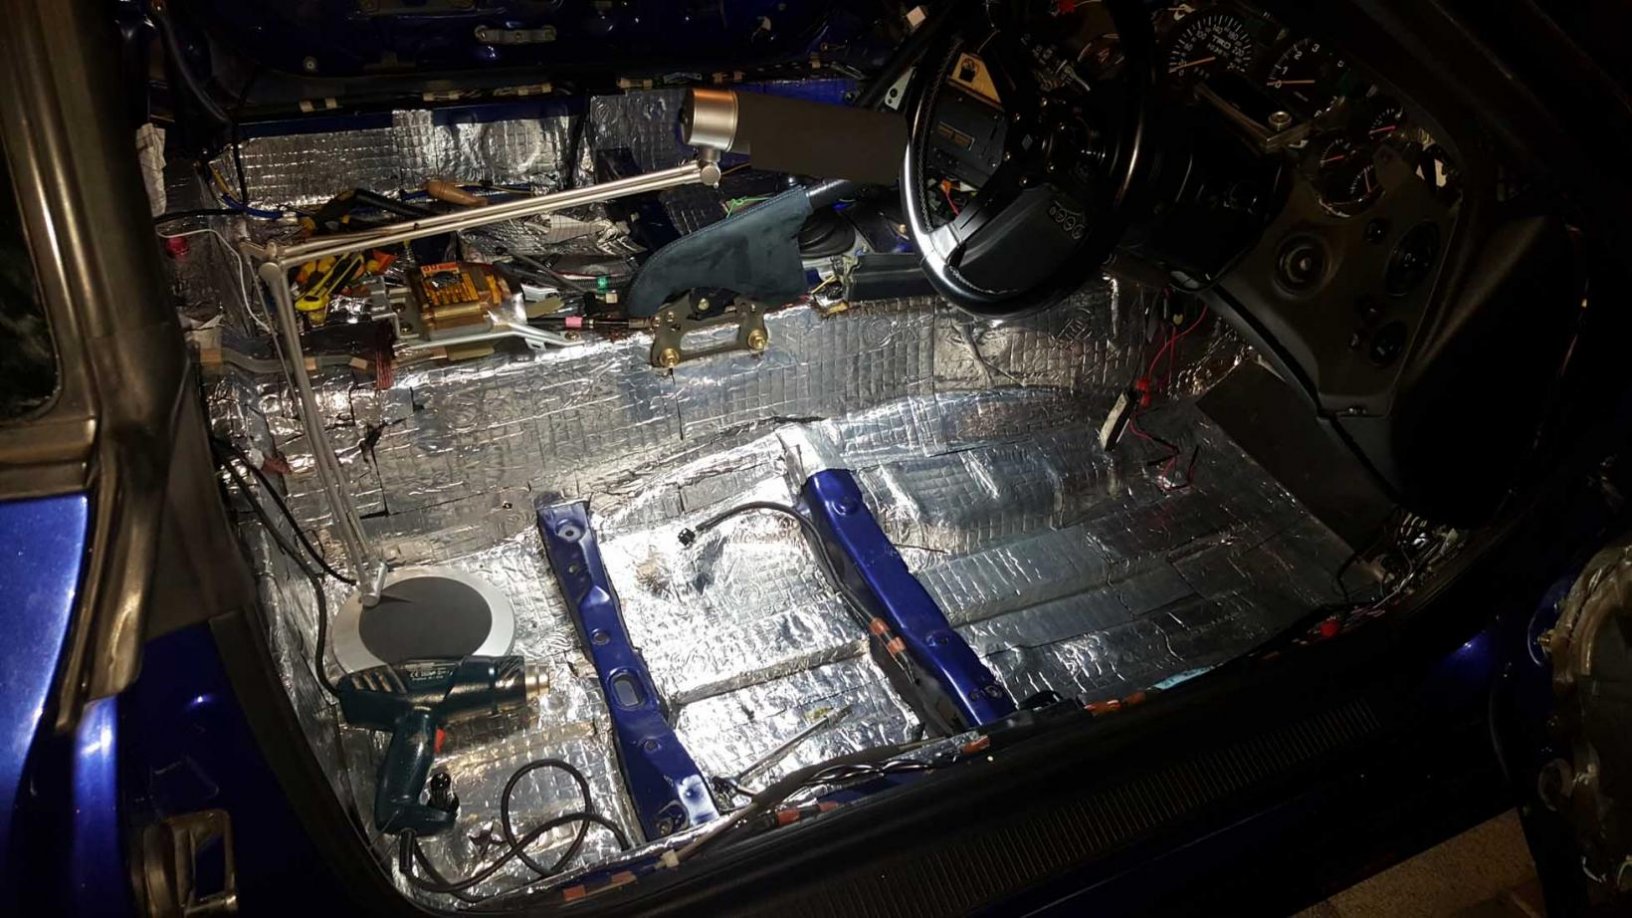
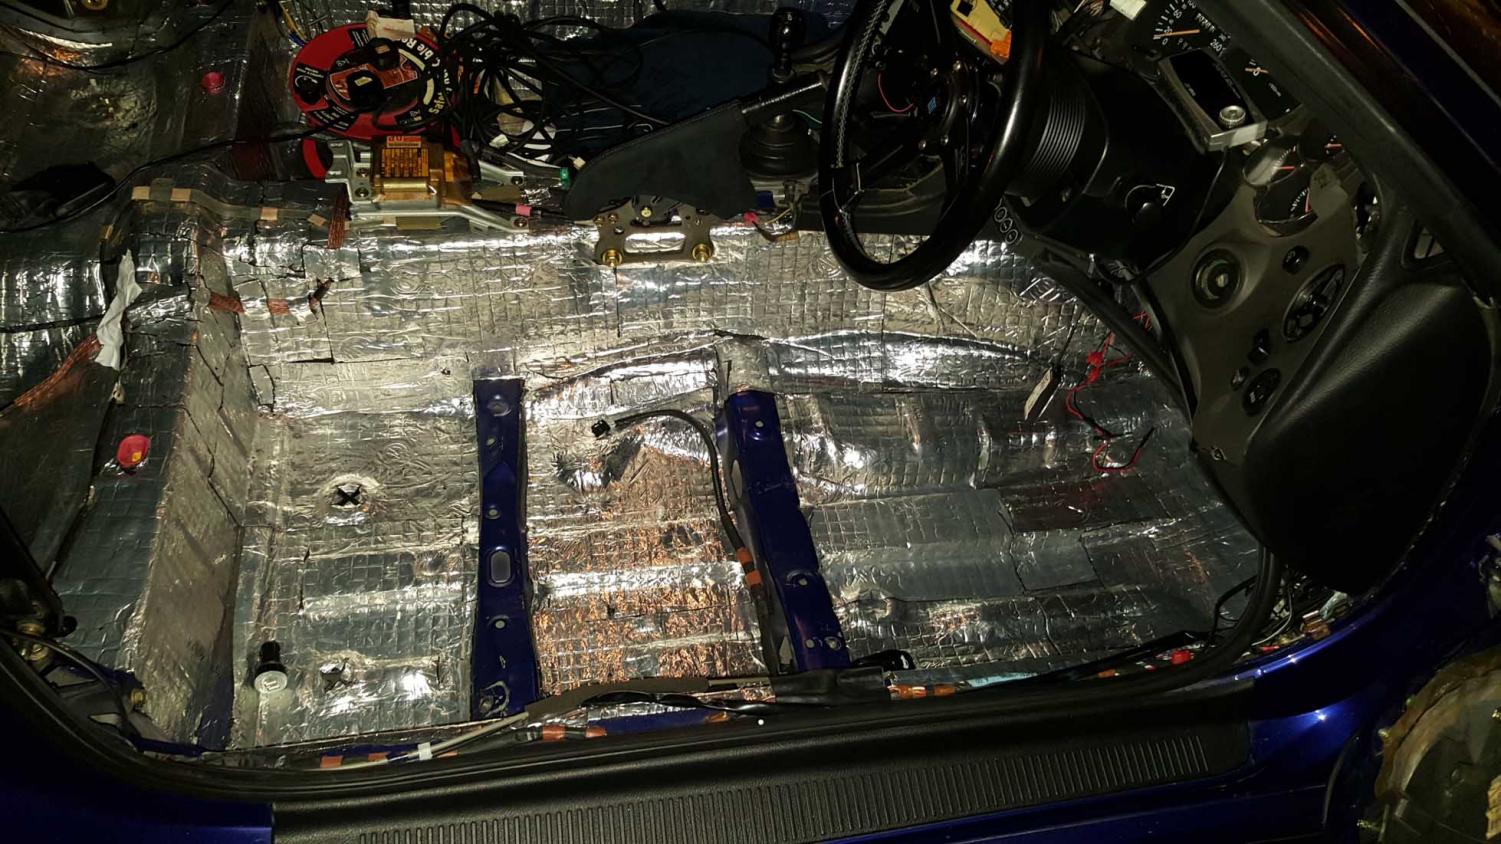
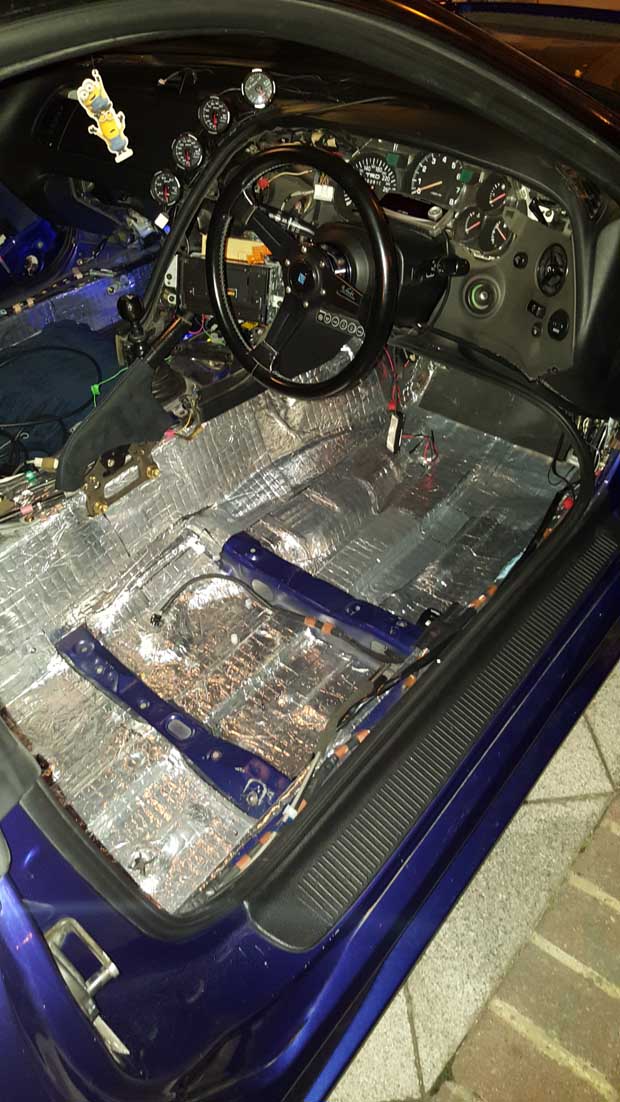
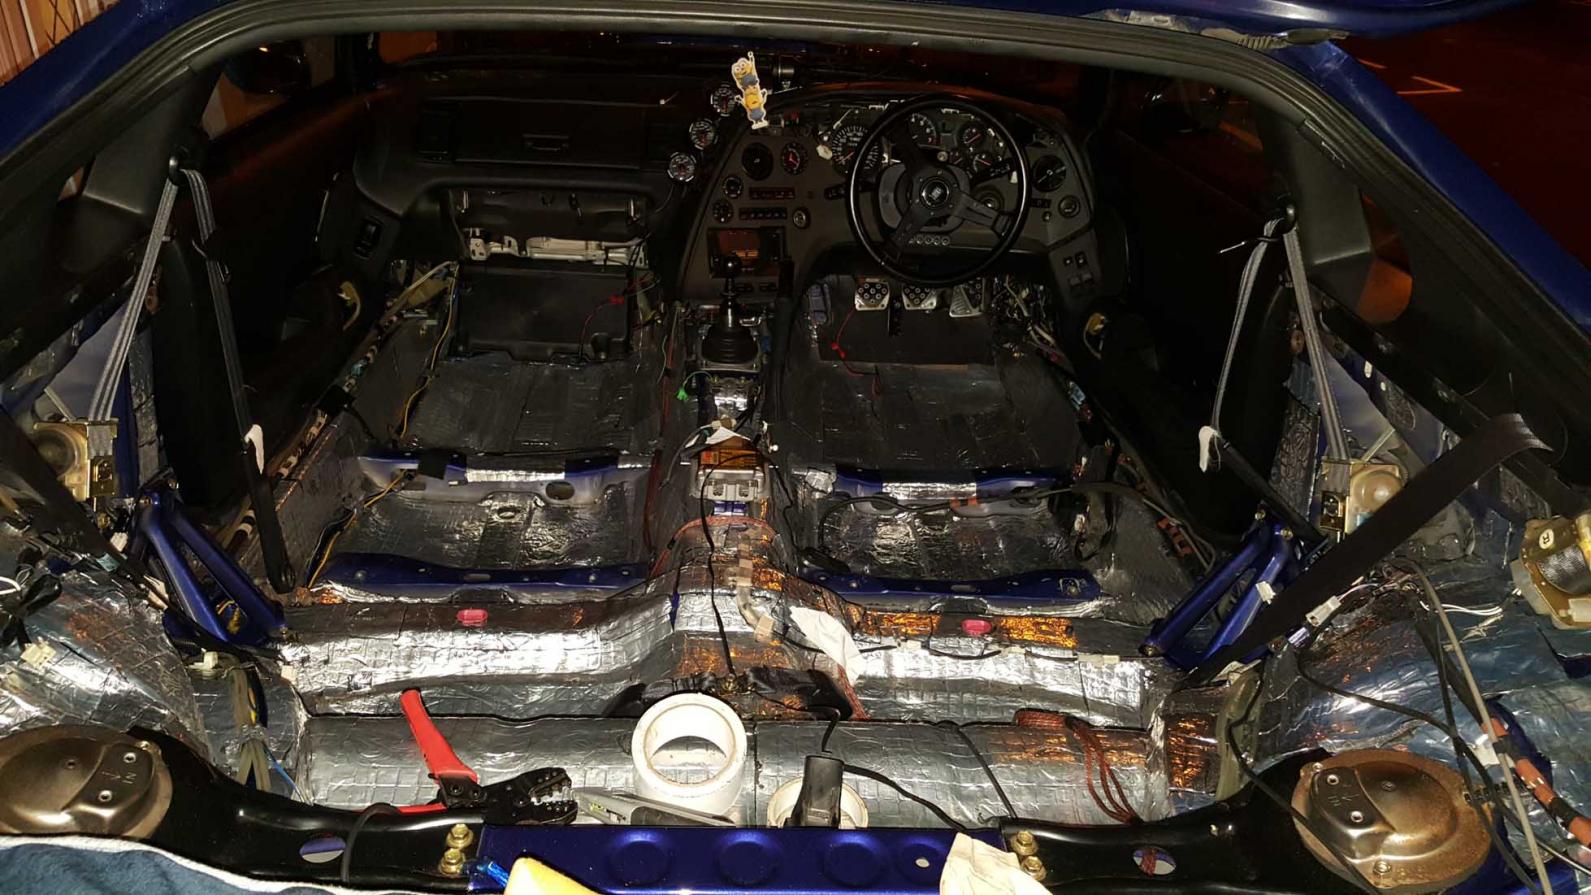
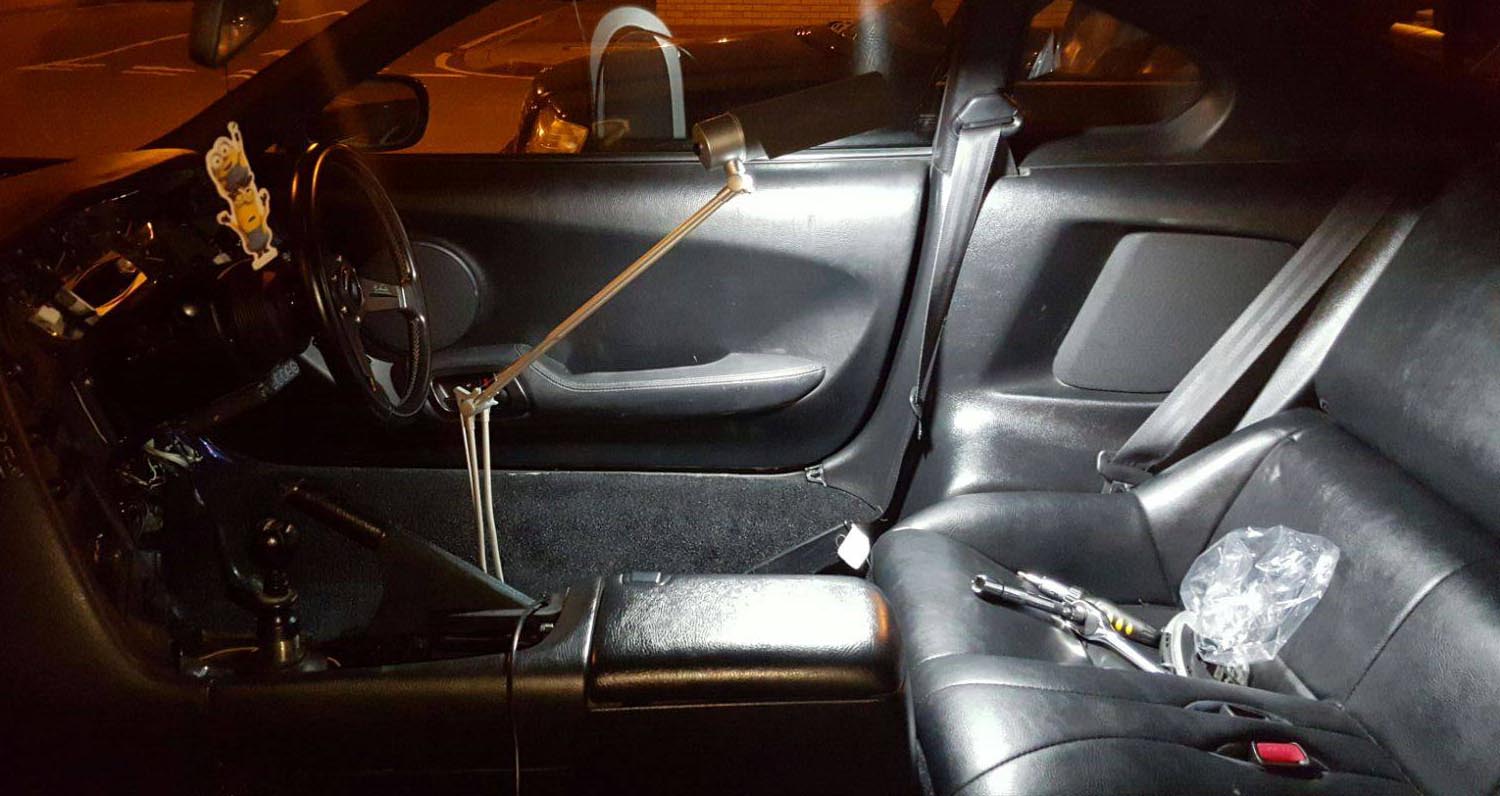
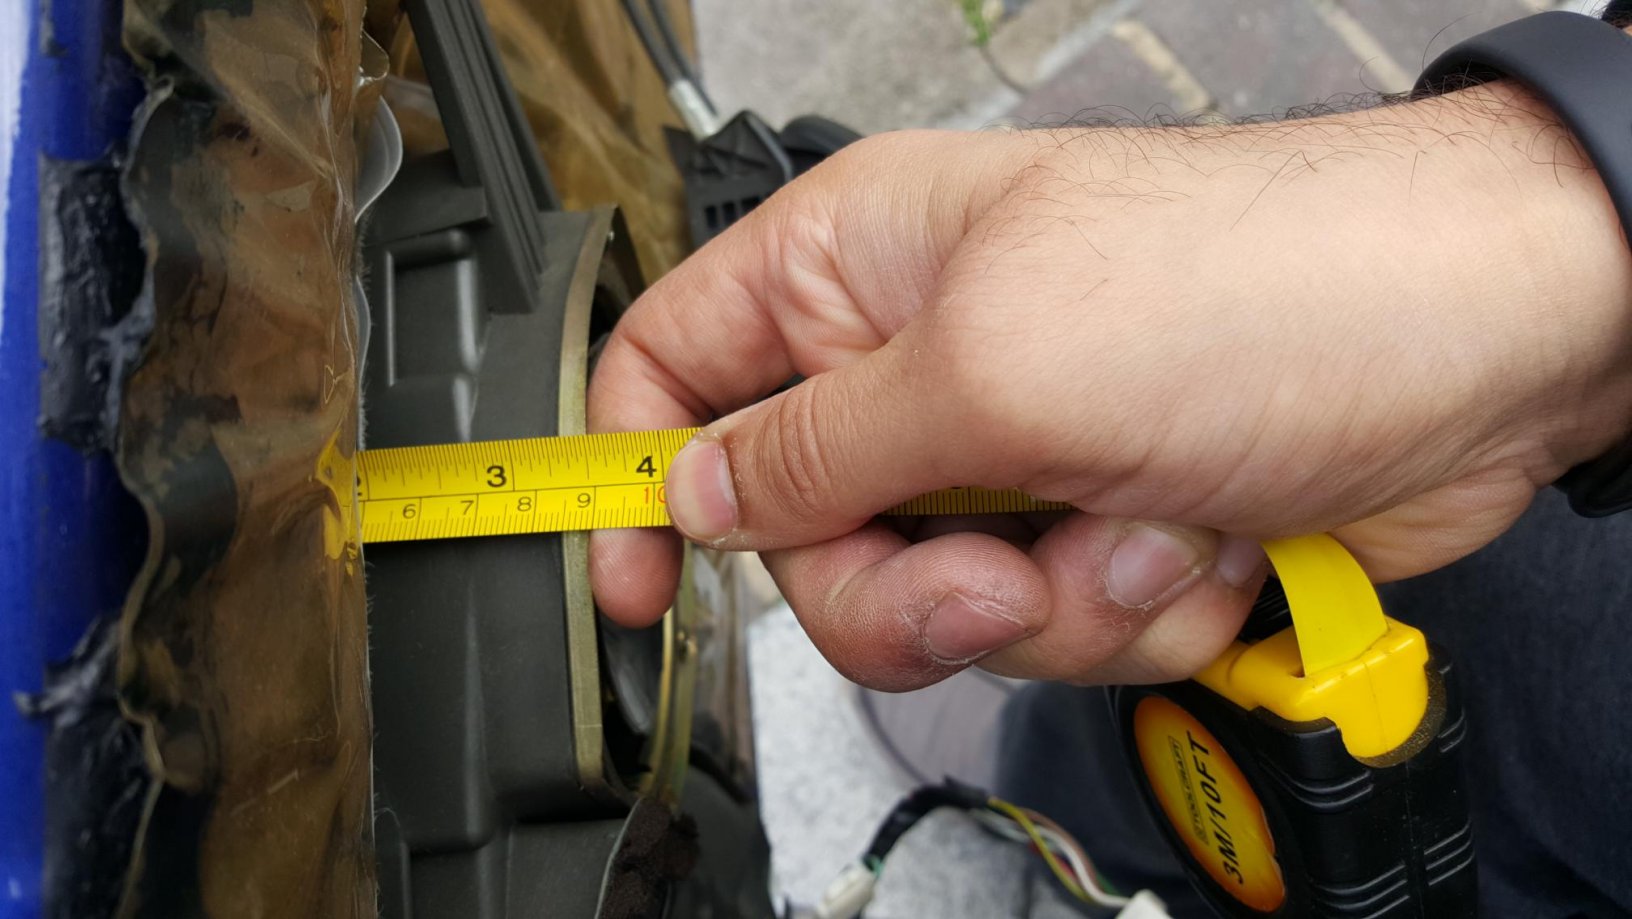
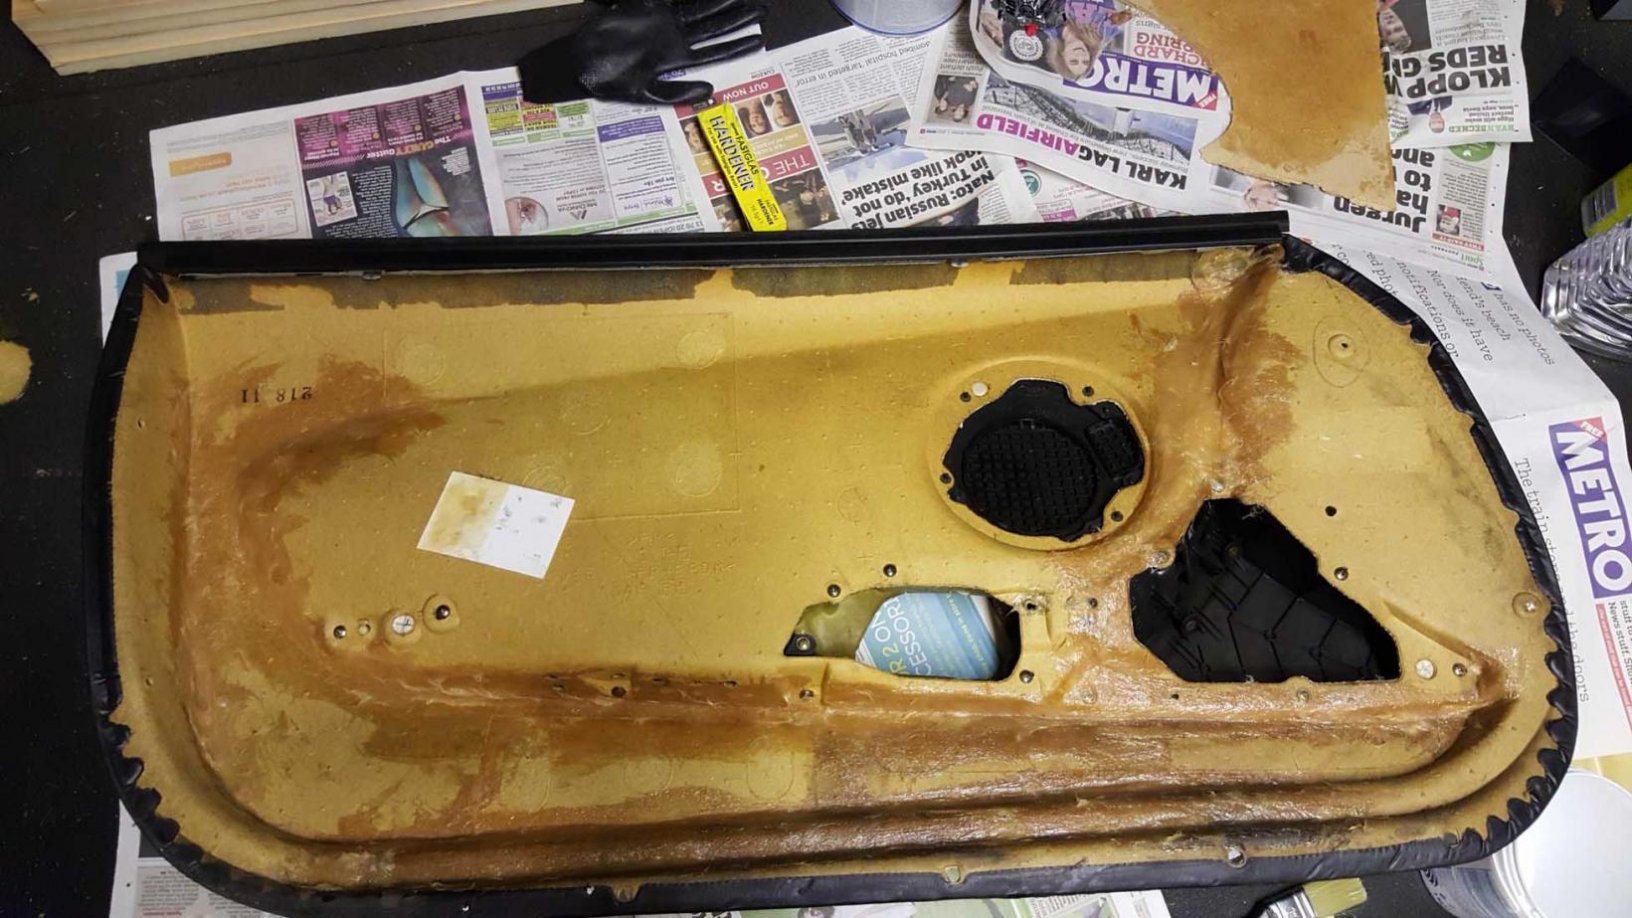
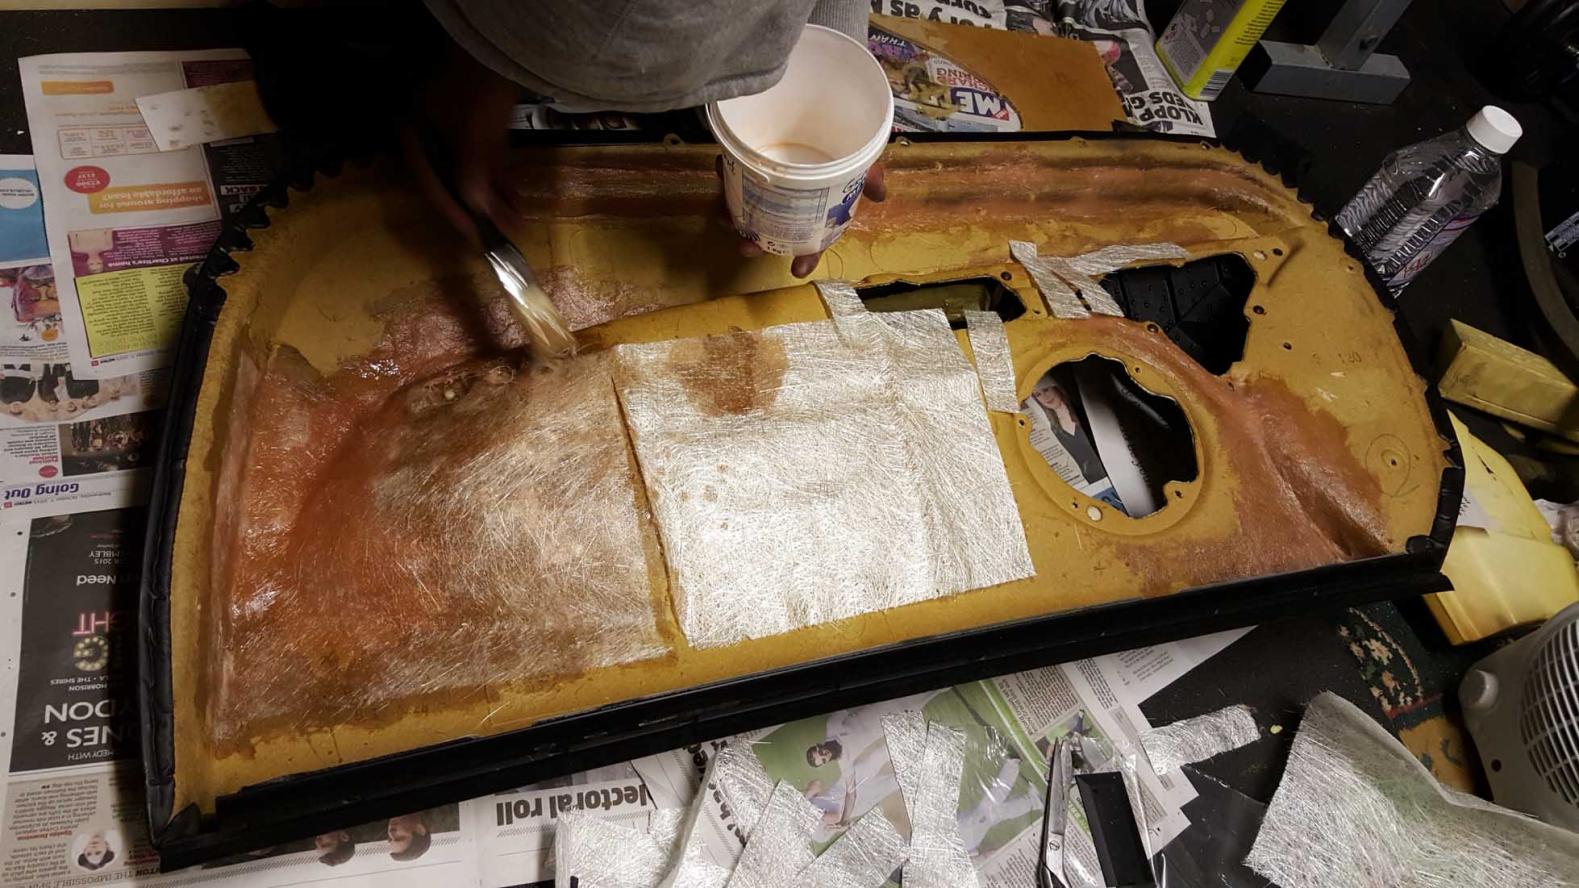
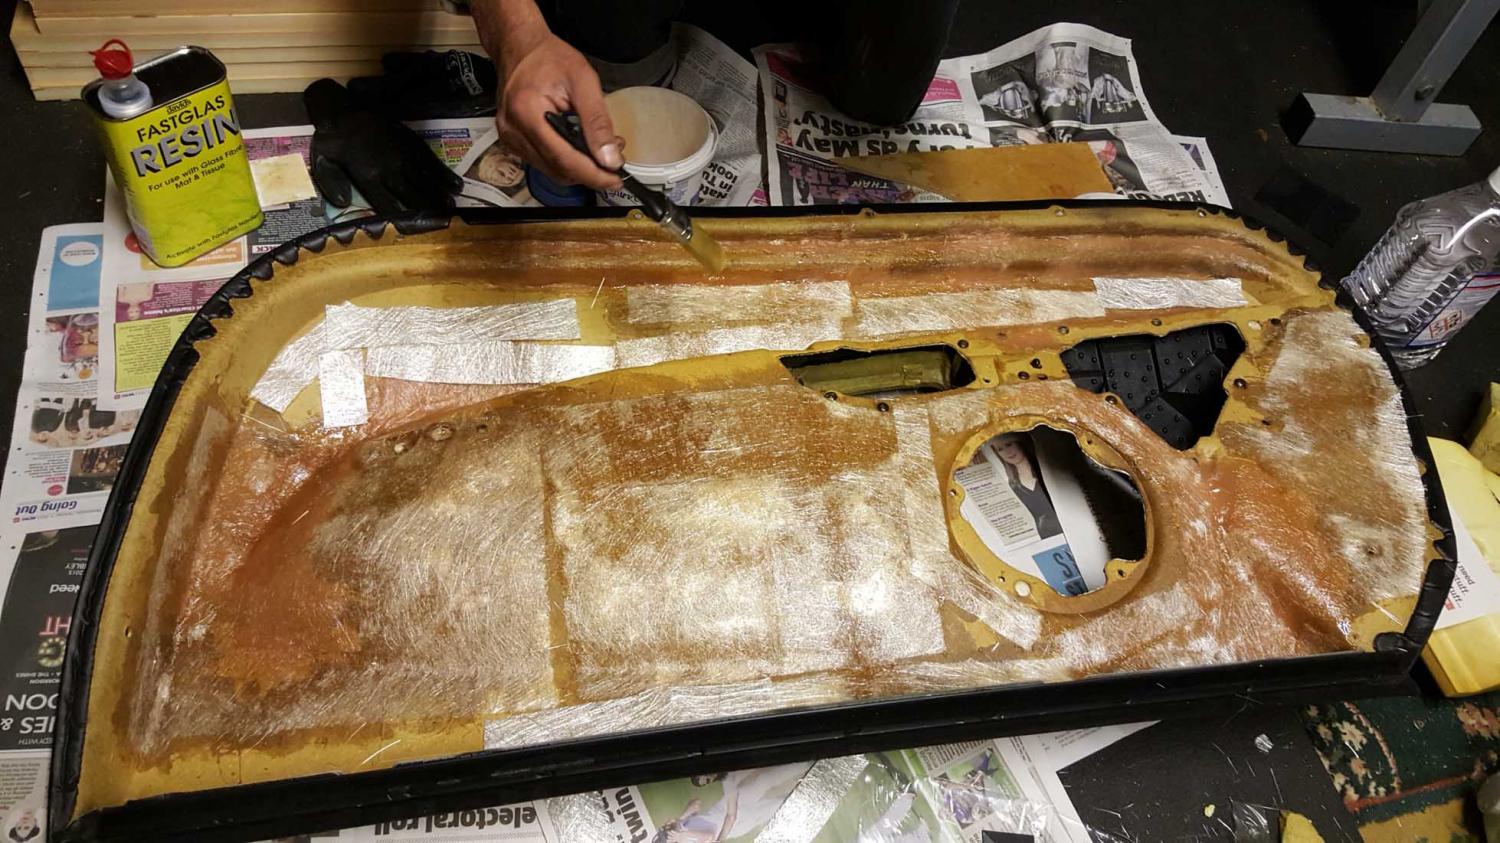
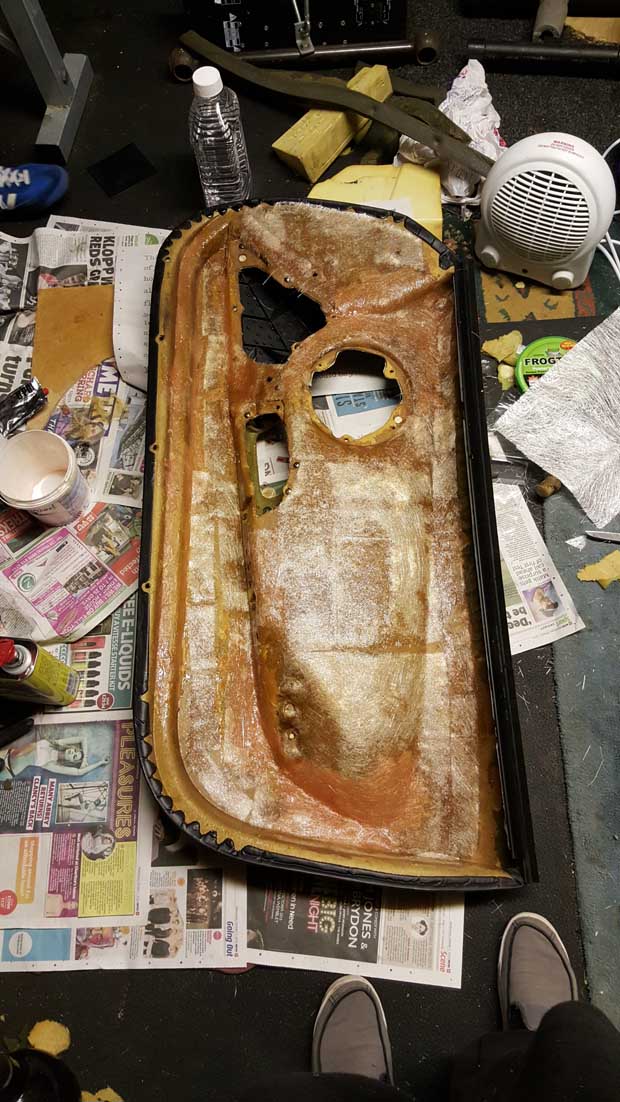
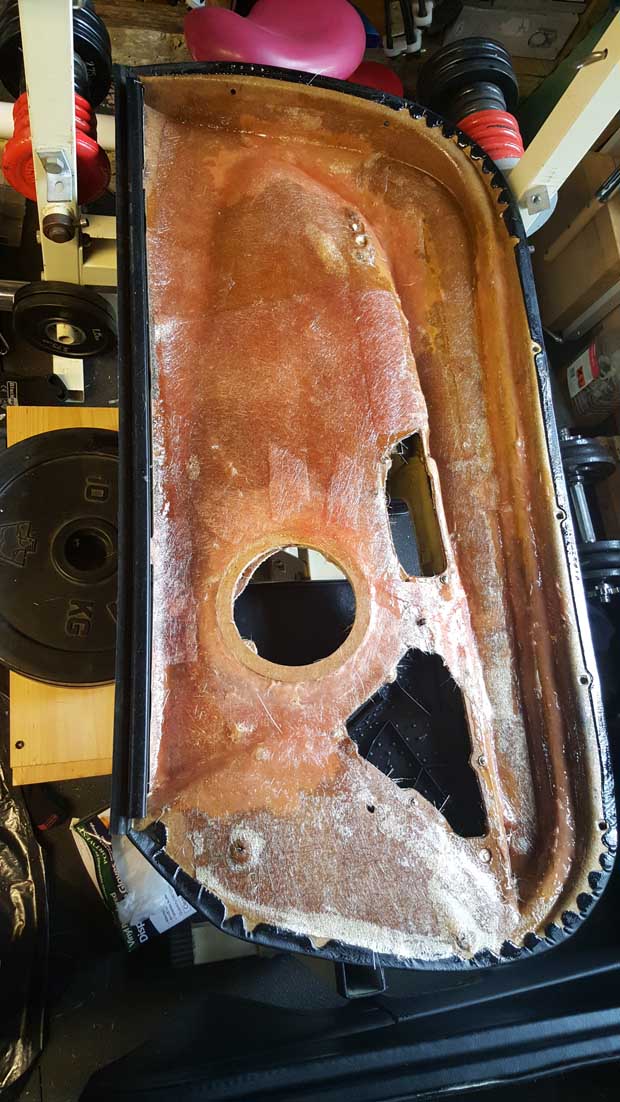
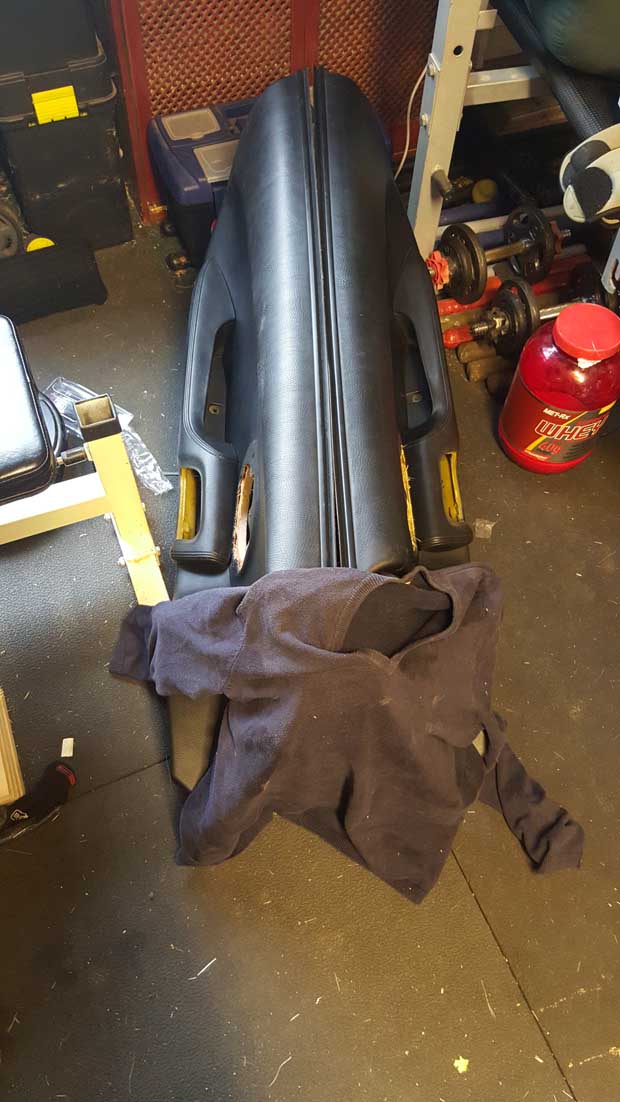
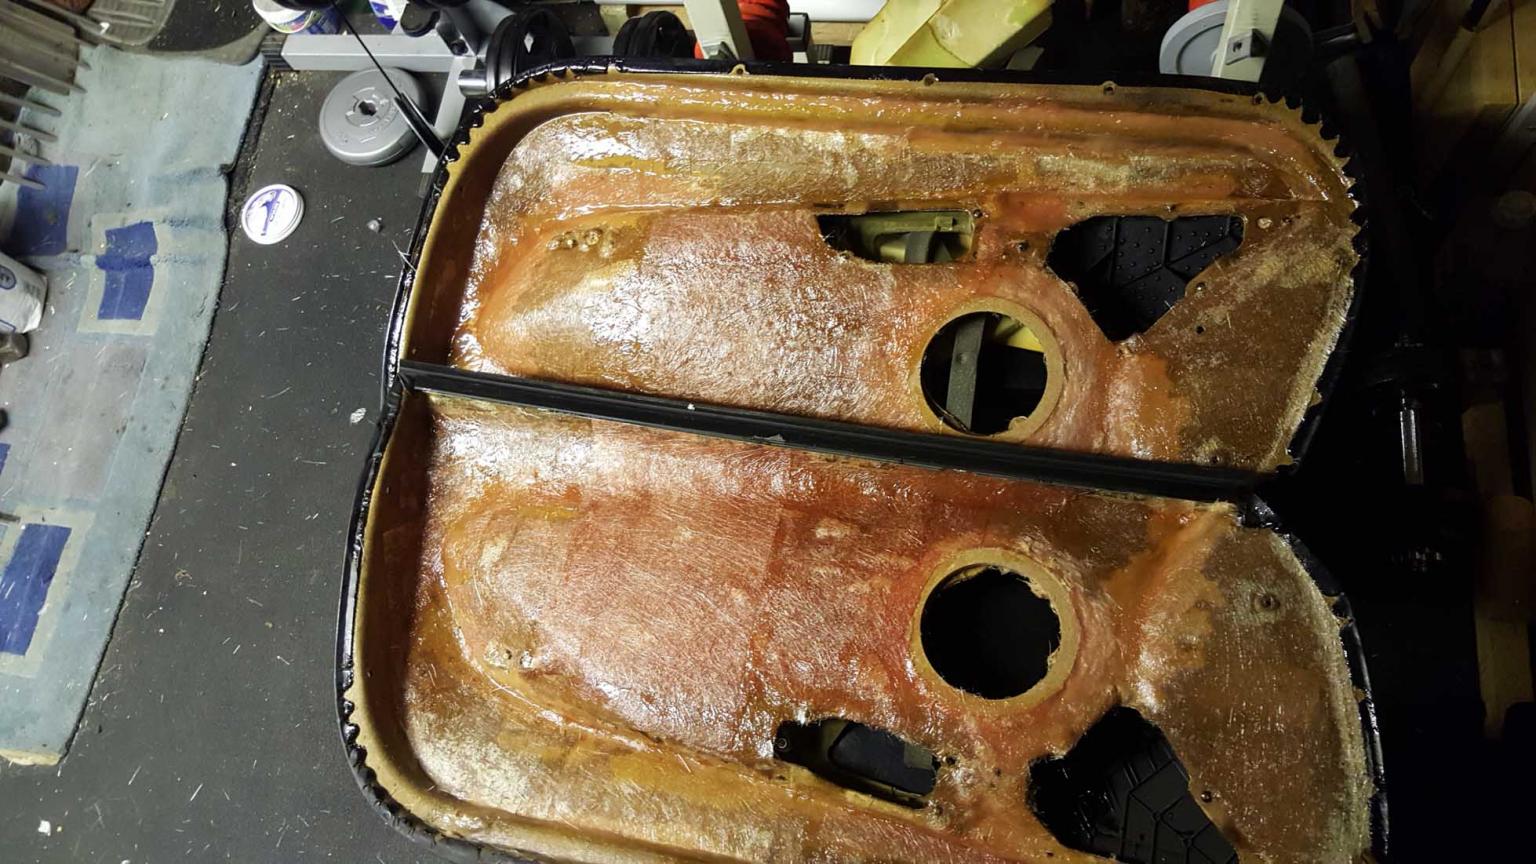
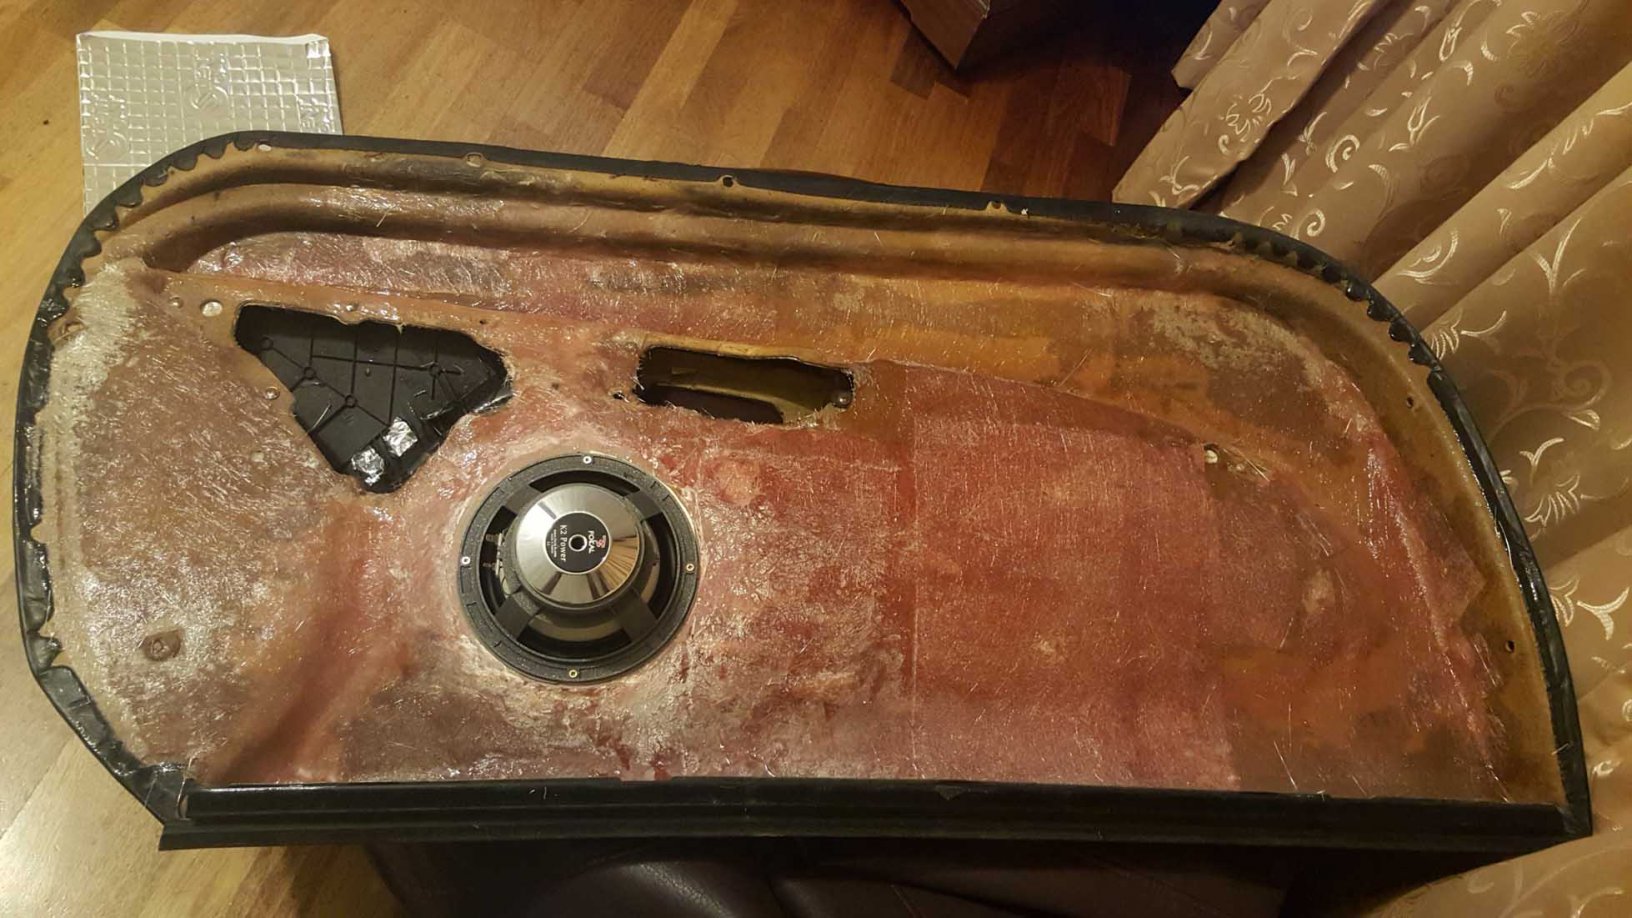
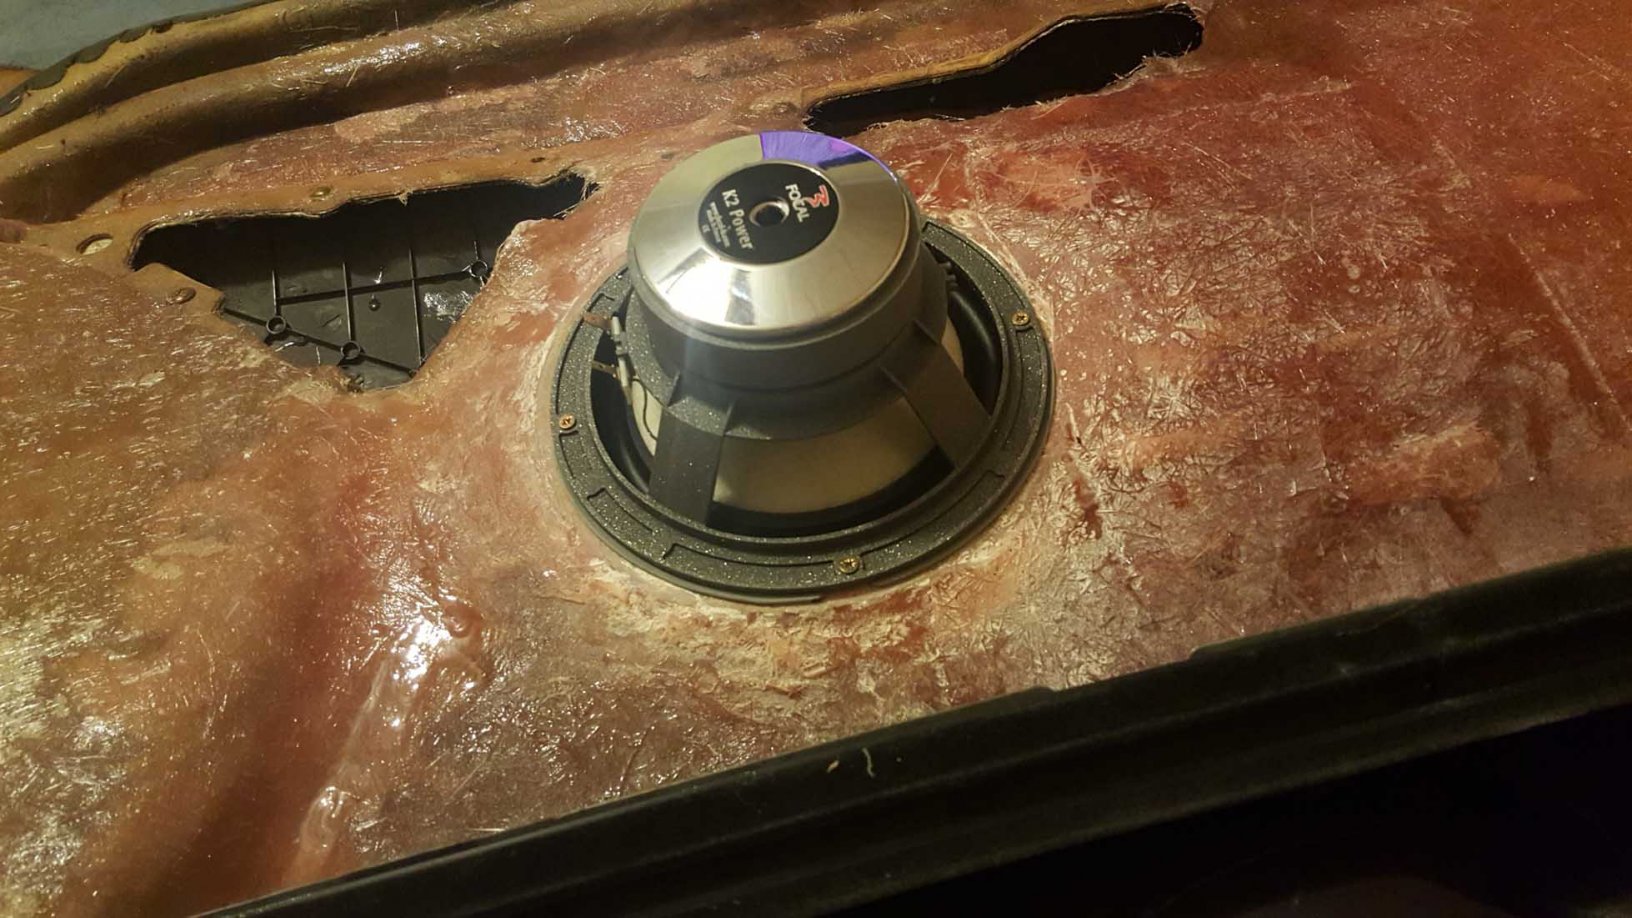
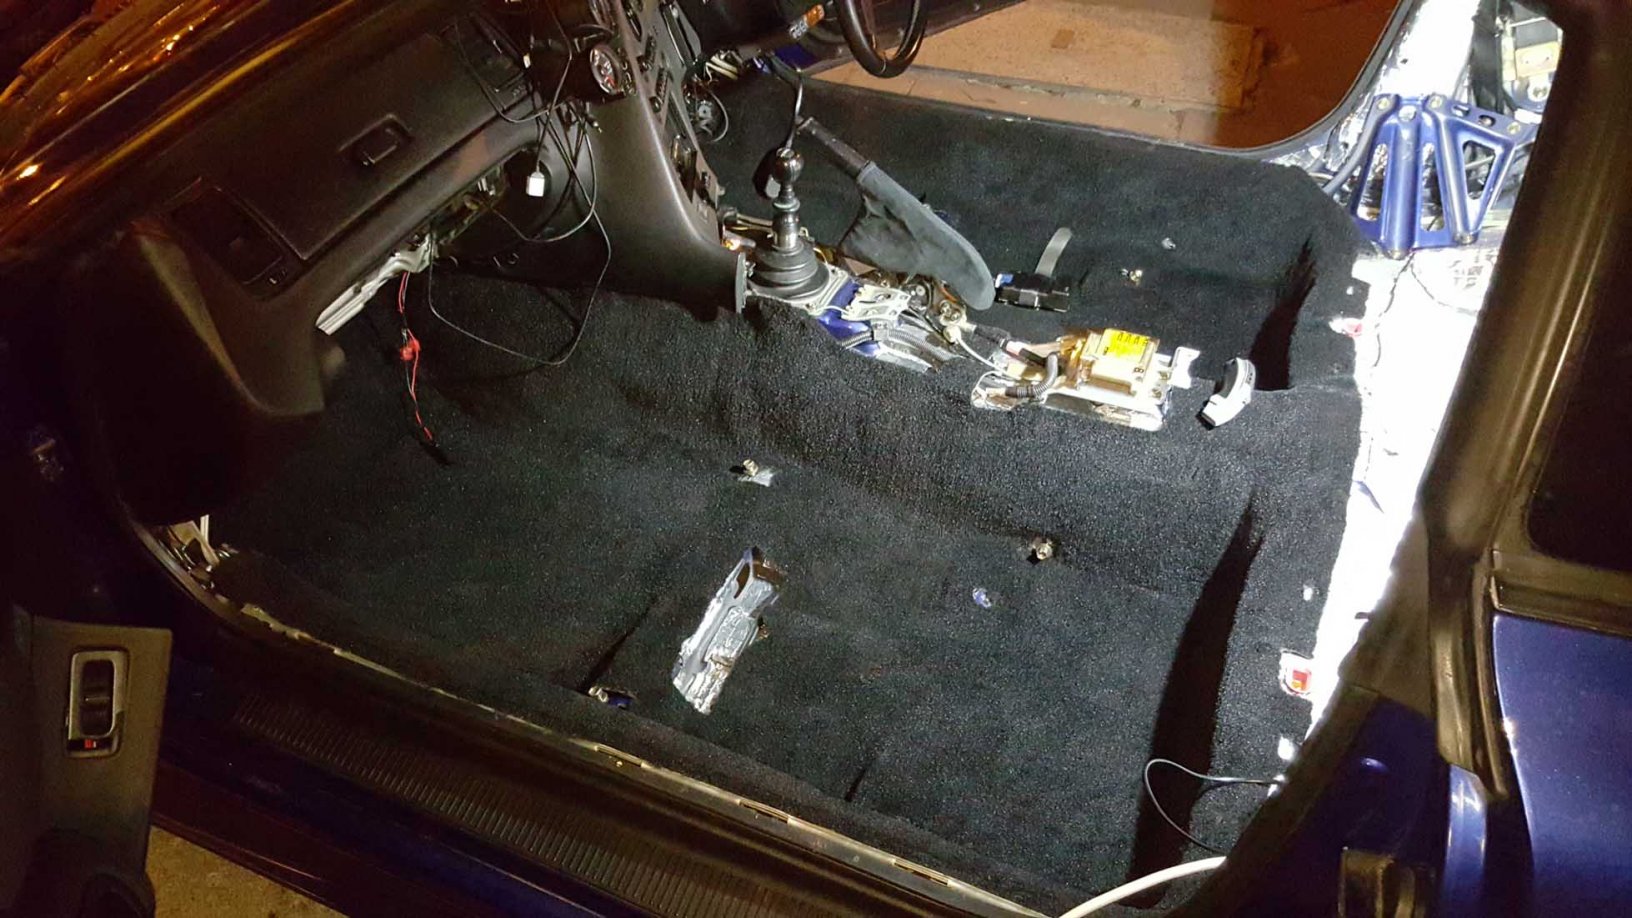
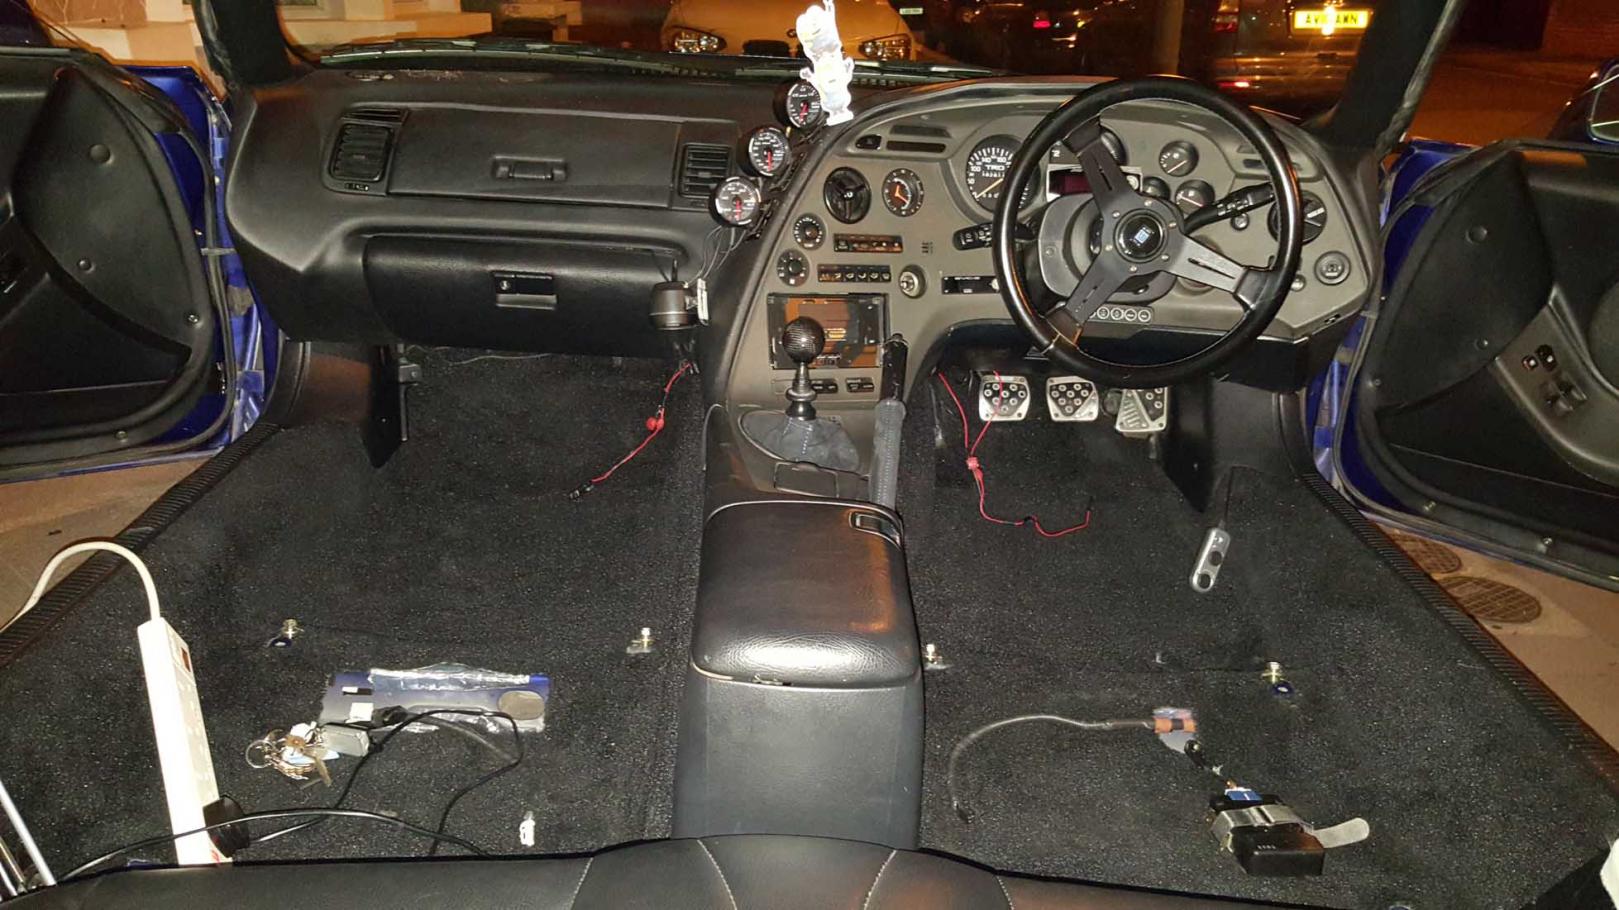
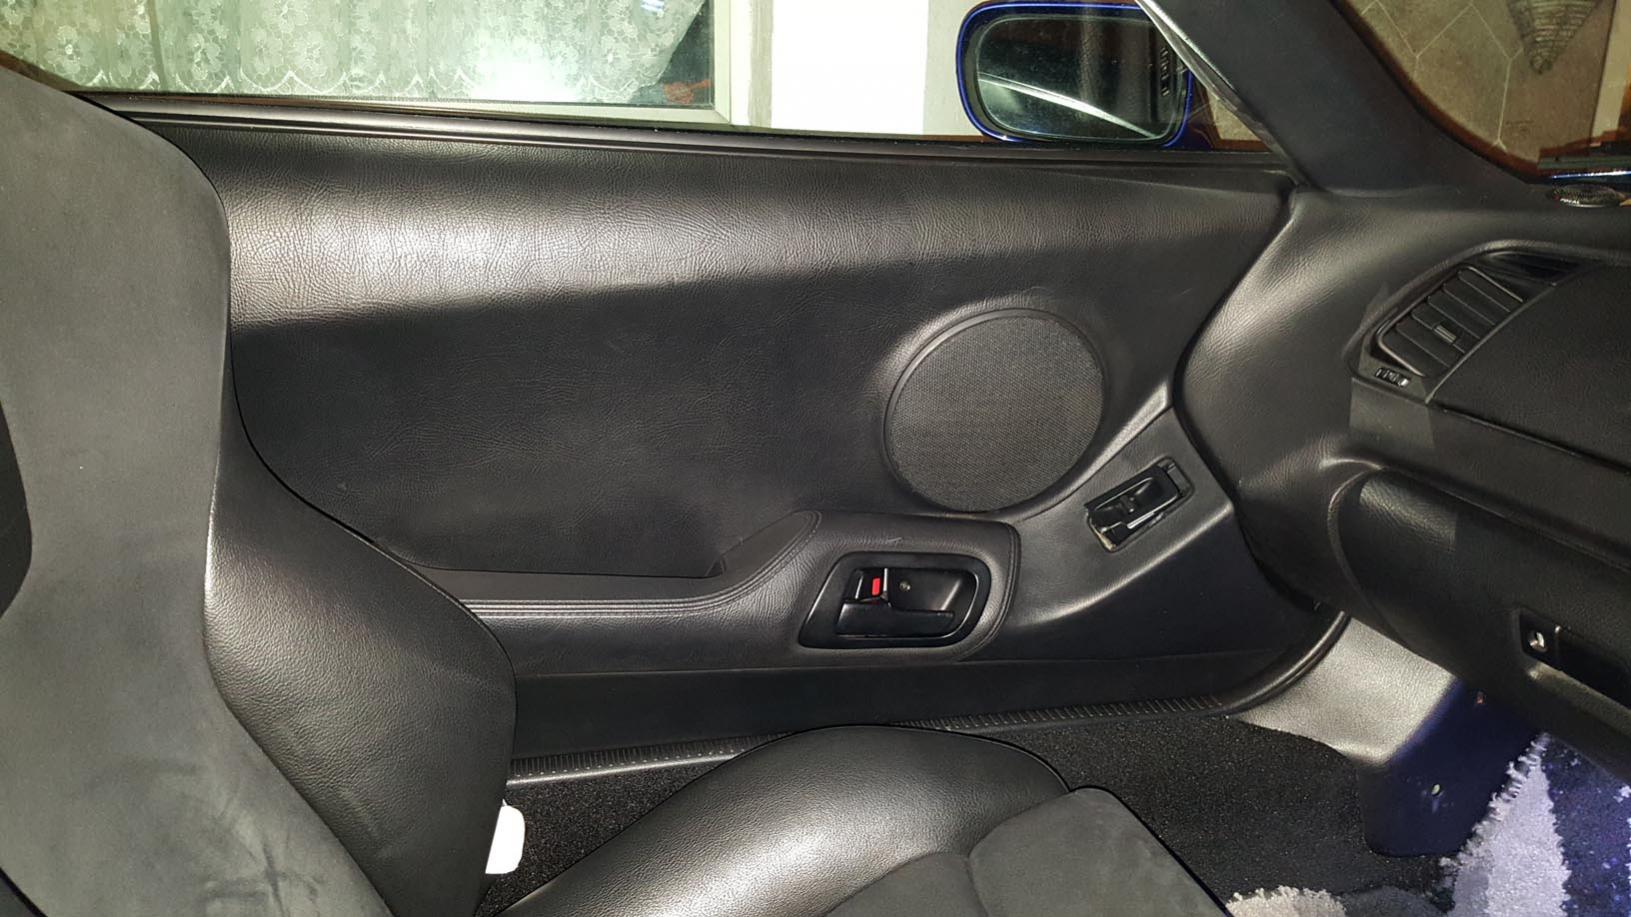
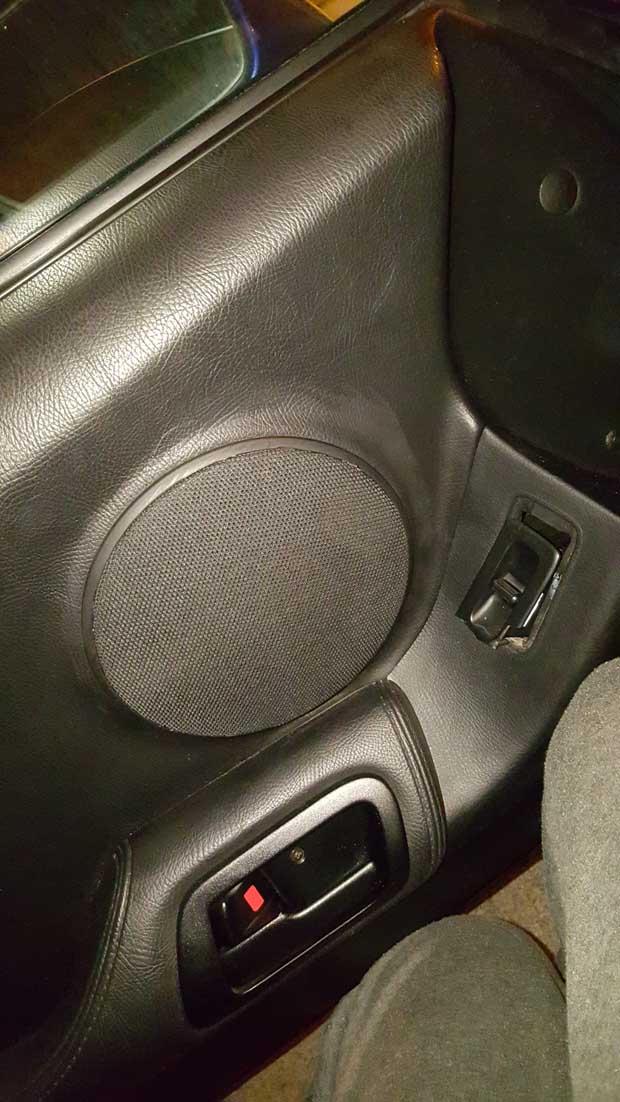
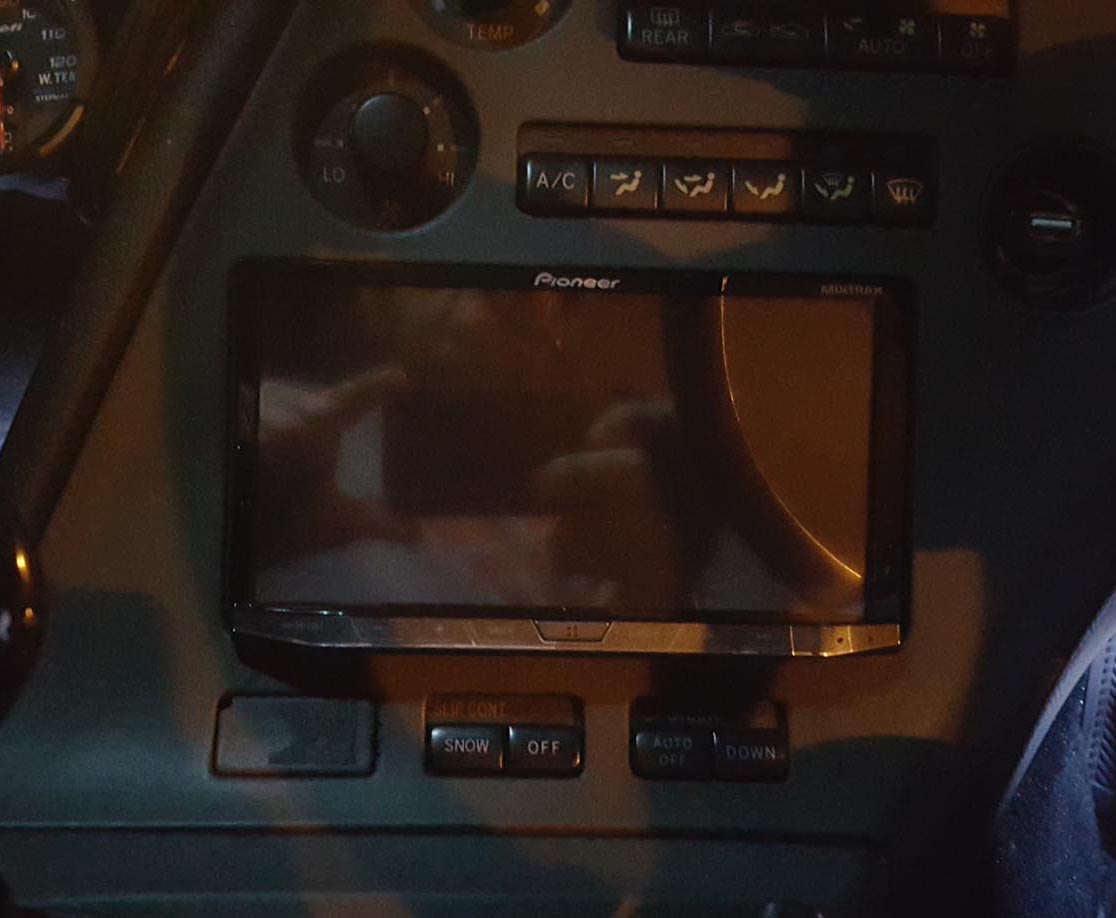
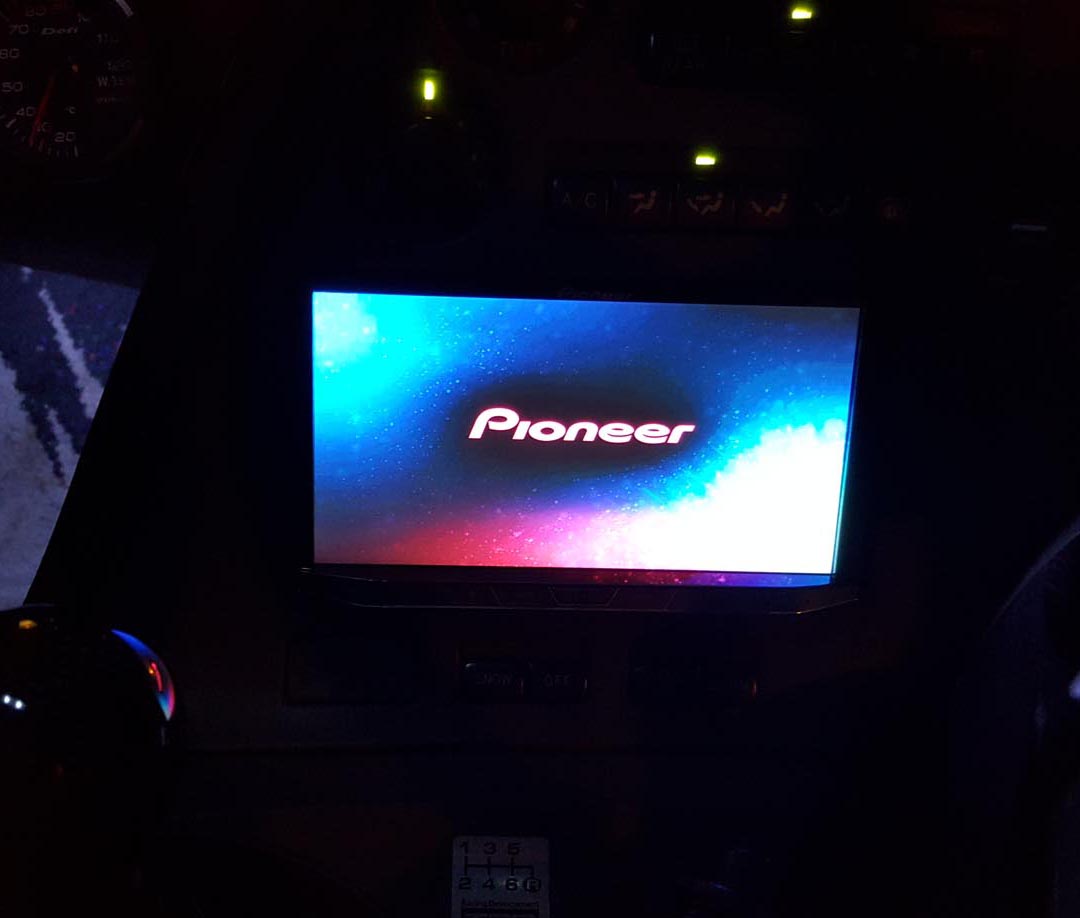
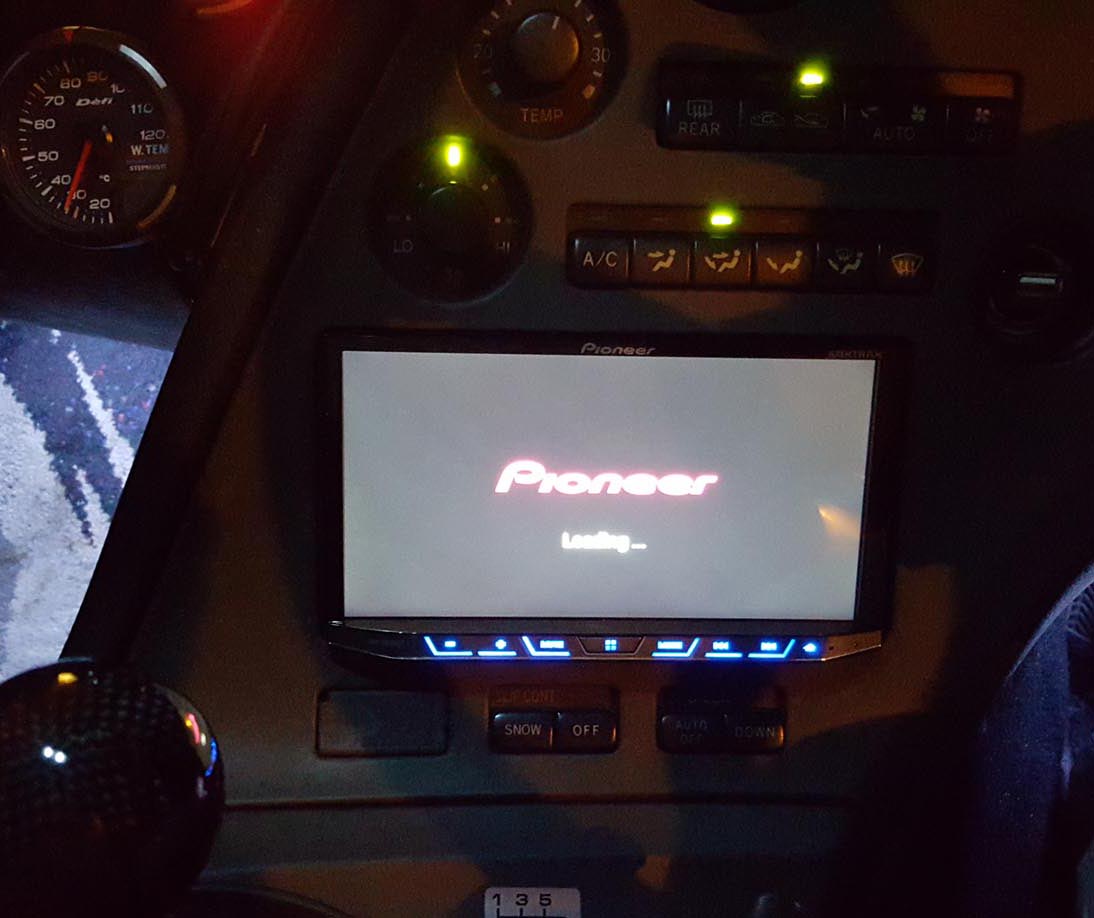
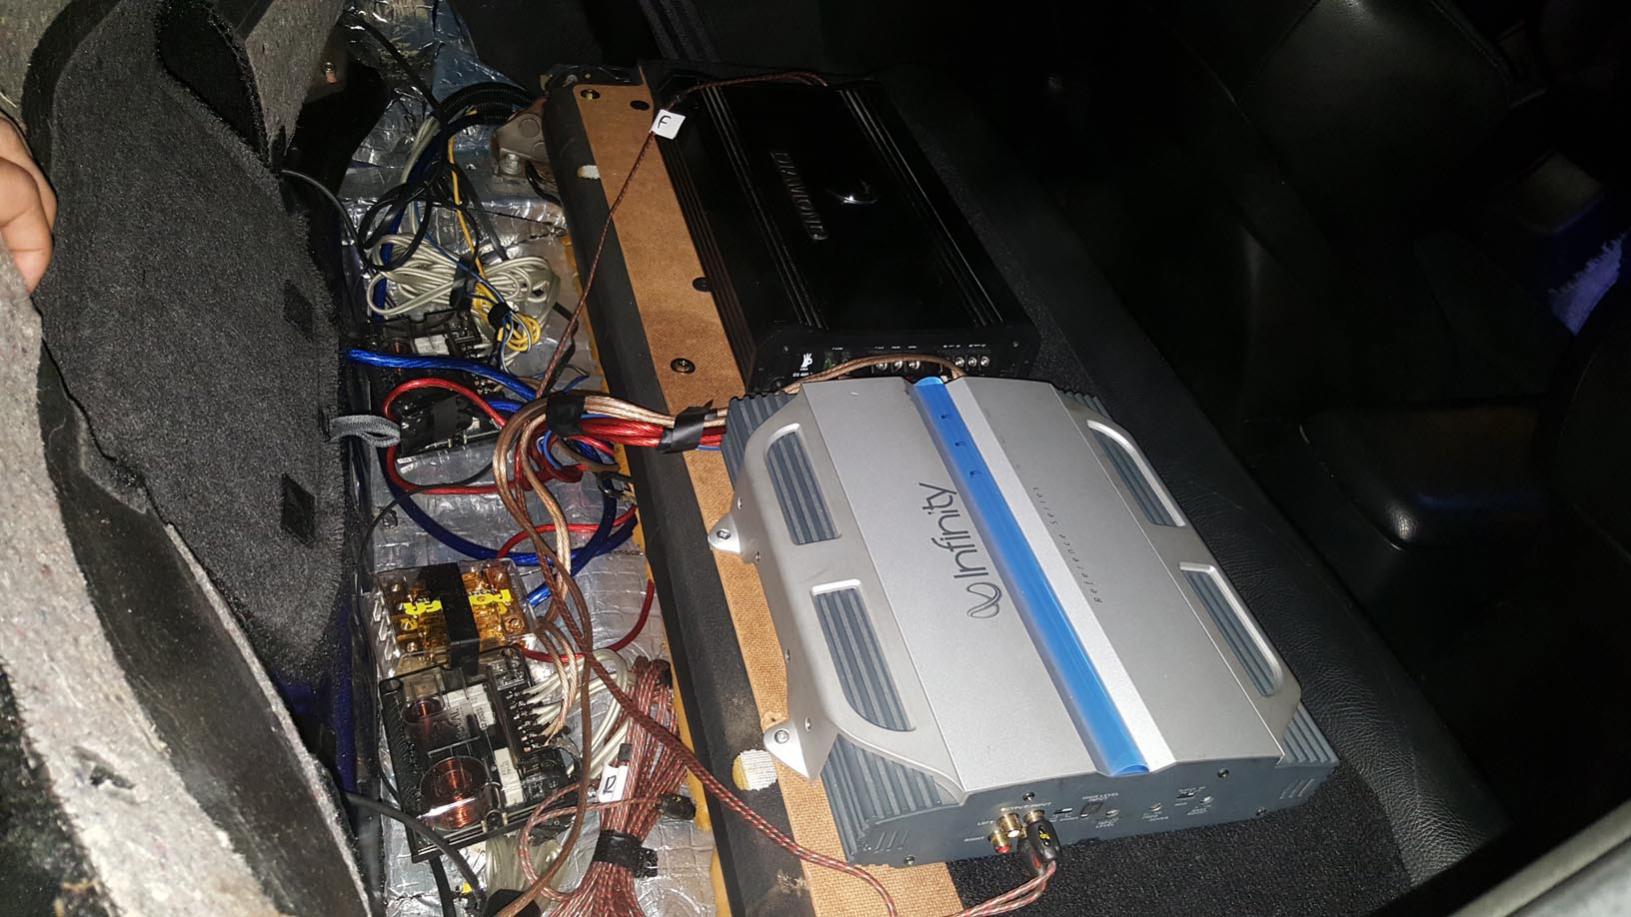
So my my first "proper" write up on what i've done with the car so go easy on me. Now that i've got it all down on paper i've realised that i've forgotten to take pics of lots of stages but as its my first time, i'm sure you'll let me off. The next piece of work i've focused on over the last two weeks was to bring the sound system up to spec. I've always been a bit of a audiophile and so the existing system simply had to go. To start with i got all the pieces together for the install, which was... - Pioneer AVH-X8700 7inch touchscreen headunit - Focal K2 Power 6.5inch components - Precision Power A10 10 inch subwoofer - Diamond 2 channel amp for the comps - Infinity 2 channel amp for the sub; i have a Pioneer monobloc amp currently in repair which I'll be swapping into the mix. - 10 Gauge audison speaker wire - 4 Gauge power cable - Live and Ground Distribution block - 3 packs of Silent Coat sound proofing (total of 12 meters squared) - Reversing camera with built in LEDS - cheap Amazon jobbie - Change footwell and door lights to an ice white (i'm not too keen on the neon blue that is there currently). I'm big on car audio so i wanted a system which would sound amazing but would also not add too much weight to the car so I've gone with quite a minimal equipment list. I wanted to reduce the road noise as well as making the system sound better so first on my list to do was to start stripping out the interior to start getting the sound proofing down onto all the metal panels. Had to get the carpet and all side panels out to get down to the body. As you can see, there was a mass of wires that needed to be stripped out from the old system to give us a good starting point to work with. Once done, i was ready to start cleaning the inside to get rid off the dust and wiped down all surfaces with white spirit to degrease Finally, i started on the sound proofing. Working on small sections at a time with a heat gun and a 1 inch wide roller to heat and then make sure each section adhere's to each panel completely. Can be very time consuming with the smaller bits; making sure you cut out small pieces and fit them together to completely cover. This bit took me about 3 days to do properly... Unfortunately, i got into a rhythm and managed to plough through it until... i ran out of Sound proofing, so i got as far back as the rear bench and both doors and ordered some more to finish off the boot and roof liner. Here's some pics of the inside practically complete with soundproofing done, and wiring laid with power and remote running down the outer passenger side, the RCA's through the middle with no other wires around them to ensure there was no interference, the speaker cables taken down each side with separate runs from to the mid and the tweeter to facilitate the move to an active front end system once all the bits i need arrive and finally the reversing camera down the drivers side to the headunit... I didnt want any of the wires to be showing so we went to the effort of running the speaker cable into the door for the mids through the rubber boot which was not easy but in the end some oil, a coat hanger and some hard work got the job done. The rubber boot... The wire going in one side... The wire coming out the other side... and the speaker cable sitting pretty after being pulled through into the door... A quick pic of the reversing camera... Unfortunately, i totally forgot to take pics of the sound proofing on the doors however, next i started working on the door cards. I had a think about how best to mount the speakers and while everyone has gone with the speaker ring adaptors, i wanted to ensure that the doors were rock solid so i decided to go with a fibreglass install to completely reinforce the door card and seat the speaker directly into it. First off, I got the door cards out and started to use fibreglass compound to fill all the little holes, tight corners and gaps to make the fibre glassing process much easier. At this point i also measured up the space i had to work with to make sure that the speakers would have enough clearance; they're 71mm deep and i had just over 90mm to work with... Step 1- figure out what goes where on the card Step 2- mix the fibre glass compound with enough activator to make sure you can get the mixture in. Best to work in small batches here... Step 3- Start filling in the small gaps and holes so that there's no trapped air, or empty sections so when we start applying the fibreglass mat we dont have to struggle to get it into every nook and cranny. Step 4- Start with the fibre glass mats to do the larger surfaces covering all sections of the door card completely, and using a brush to paint on the resit with the right mix of resin to hardner... With the tighter bits, we used smaller cut sections to get into the small area's. We carried on going until the whole of both door cards were totally covered. In the interest of ease, i used some MDF rings to mount into the fibre glass to give the speakers something solid to screw into. Step 5- ...and finally leave to dry. I left both with a heater on low to cure the fibreglass and left it overnight to harden. Here's the final fibre glasses set of door cards. The key with this was that i didn't want to add any extra weight over what i'd need to secure the speakers in solidly, and stop any flex - For that reason the bits closest to the speaker are thicker than the furthest extremities. Next was to mount the speakers onto the door cars themselves... Finally, i added some sheets of sound proofing to the back of the door card to help provide a little more stiffness and deaden any remaining vibrations. The final step was to start putting the car back together, carpet and centre console goes in... Rear and front seats go in along with the remaining trim... I got the door cards on which fitted back perfectly - the drivers side will need a bit of shaving of the fibre glass as I think the speaker magnet rubs slightly but only ever so slightly but im a bit banal about this so I'll need to get it back off to trim... I wanted to keep the look on the inside as stock as possible without the leary logo's so i decided to keep the original stock speaker grills but simply drilled some new holes into the plastic to makes sure as much of the sounds went through as possible and without impediment... Next i moved on to getting the stock tweeters out. Now i did some reading on this and everywhere i read it said that its a right PITA but i thought - it cant be that hard, right? WRONG. This took me th best part of two evenings. Eventually i had to take the whole dash out, squeeze my arm in and managed just about to get a screwdriver to the screw and get them off. The results were bleeding forearms, an almost threaded screw, a bad back from the awkward positions I had to take and a headache from the agro caused. Ultimately, i was so frustrated by this bit that i totally forgot to take any proper pictures but here's the stock tweeters, the cable being run, soldered to the tweeters and the new tweeter in its new home... Finally, got everything hooked up on the front end - connected the RCA's to the amps, the remote, reverse signal input for the reversing camera and got the head unit back in... Finally, did the same at the other end and mounted and connected up both amps to the back of the rear seat... Connected the subwoofer which for now is in a standard box - however, when i have more time ill be fibre-glassing a stealth box into the hole where the old subwoofer used to go to keep most of the space in the boot as there's obviously not a lot of it to begin... Finally, as i had most of the car open, i decided to swap out the old neon blue lights that came with the car for some new Ice white LEDS along with swapping the bulbs in the dome lights. I forgot to document this bit as it was an addon but the below is the pic above which best shows the end product... ...and finally, i got a carbon fibre gear shift knob to replace the worn out fake TRD gear knob...


-
for sale Pair of Seats - 1 x Blue Bucket Seat & 1 x Purple Bride Recliner
Loomie replied to Loomie's topic in Parts for Sale
Just stuck these on Fleabay - if anyone wants them the clock is ticking! -
I fitted one onto mine last weekend - if your headunit has an input its super easy. I got a cheap £14 one from amazon with leds built in, for a little extra brightness which turn on when the reverse light is on. I put mine directly in the middle facing the back of the bumper so i can judge distance effectively. I'll post some pics of it installed tonight when i get home. The camera i bought was http://www.amazon.co.uk/gp/product/B00VWMY6CI?psc=1&redirect=true&ref_=oh_aui_detailpage_o02_s00 which looks a bit funky on amazon but installed its not too bad - it could never claim to be OEM though.
-
While upgrading the speaker in the doors, I removed the door card and disconnected the windows switches and left them hanging off the wire. Quite stupidly, i ended up shutting the door and the switch got caught and smashed. Just to make it even i did the same on the passenger side about an hour later (what an absolute tw*t, right?). Long story short, i'm now in need of two new ones. If anyone has a pair of window switches, passenger and drivers side. I'm not sure if its available, but if there's an option of "auto up" (and down) on both sides that would be great; mine only had it on the drivers side. Thanks in advance, Looms.
-
If you're still looking, i've got one which i'm happy to let go for what i paid for it. £30!
-
What's the condition like buddy? Pics?
-
Could you take some better pics of the damage please mate? Sorry, just want to be sure it's something I can get sorted! If it is and I can sort transport, I'll take it!
-
Morning mate, did you manage to grab any pics?