
SimonB
-
Posts
3731 -
Joined
Content Type
Profiles
Forums
Store
Blogs
Events
Downloads
Supra Articles
Gallery
Everything posted by SimonB
-
If you give it a week or so I'll put up my list of stuff I bought recently. That'll include pretty much everything down to individual fittings...
-
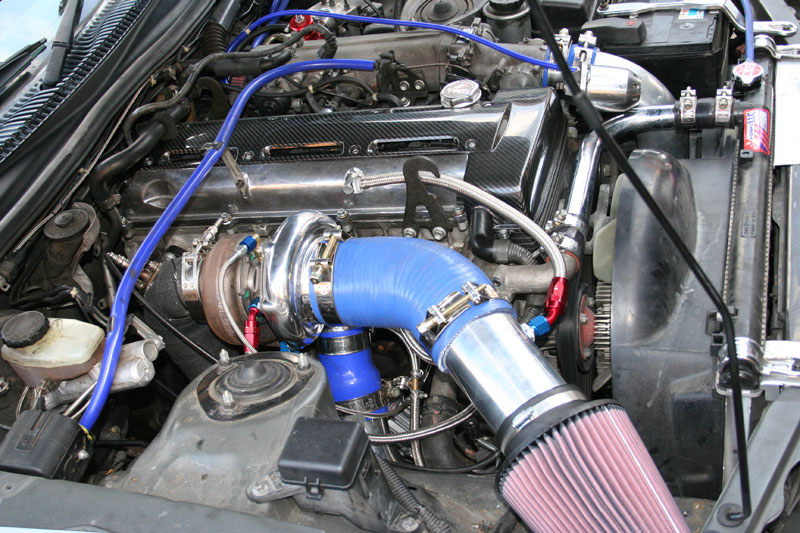
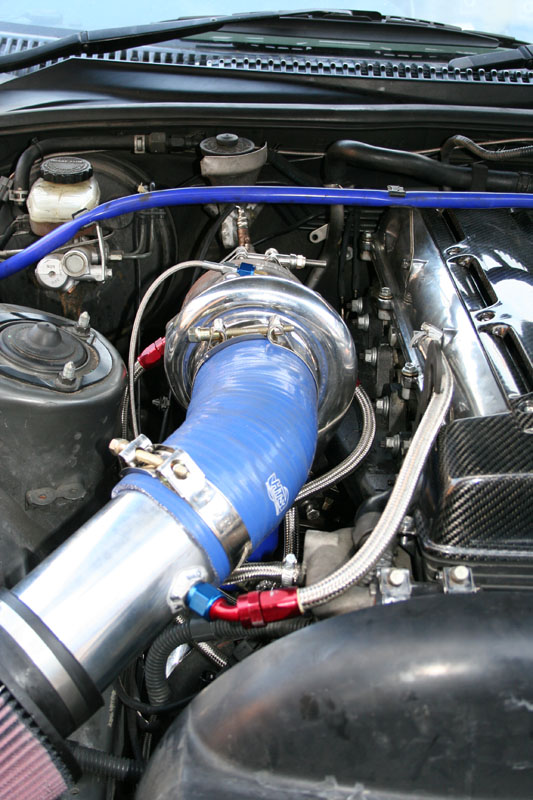
Yeah, can't wait to get it all back together and get mapping! Should all be sorted by the weekend. I need to rejig my intercooler piping yet again as the bumper fouls it slightly at the moment - hopefully sort that tomorrow and get it all back together and maybe fit my injectors. Then I've got to make an air box, I've got some ducting to go up where the standard intercooler piping goes to ensure a nice cold air supply.
-
If you email SPA, you can buy a new sensor from them. I had to do this when I accidently knackered mine. I won't say how, it was embarrassing! Anyway, they sent me a new one, I can't remember how much it was, but it wasn't a lot. The guy I dealt with was called Tony Taylor, his email is [email protected], his phone no. is +44 (0) 1827 300150.
-
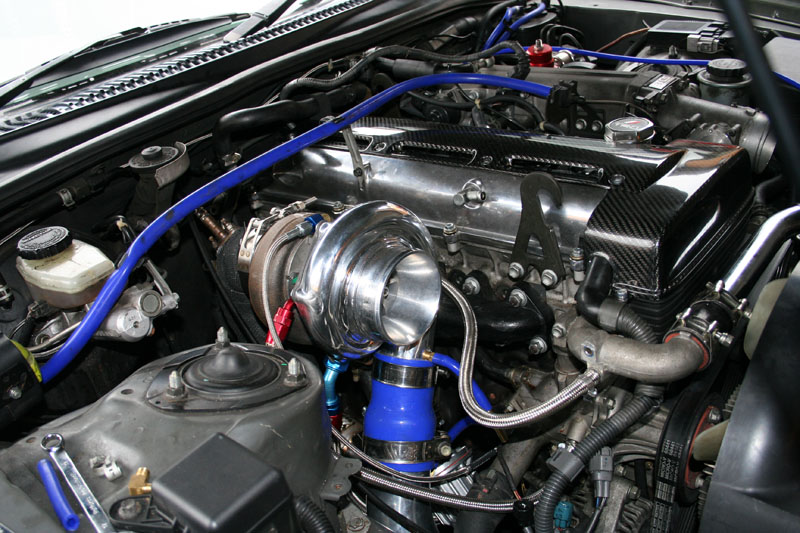
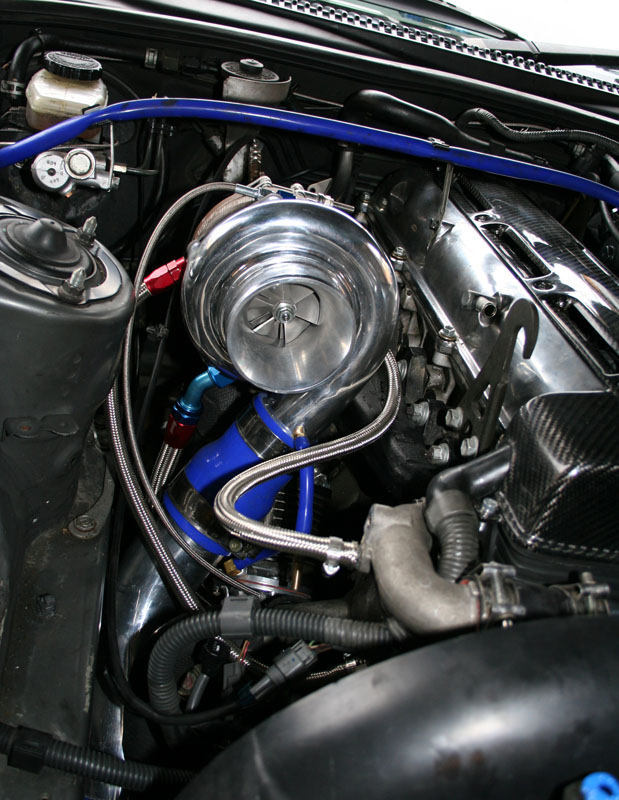
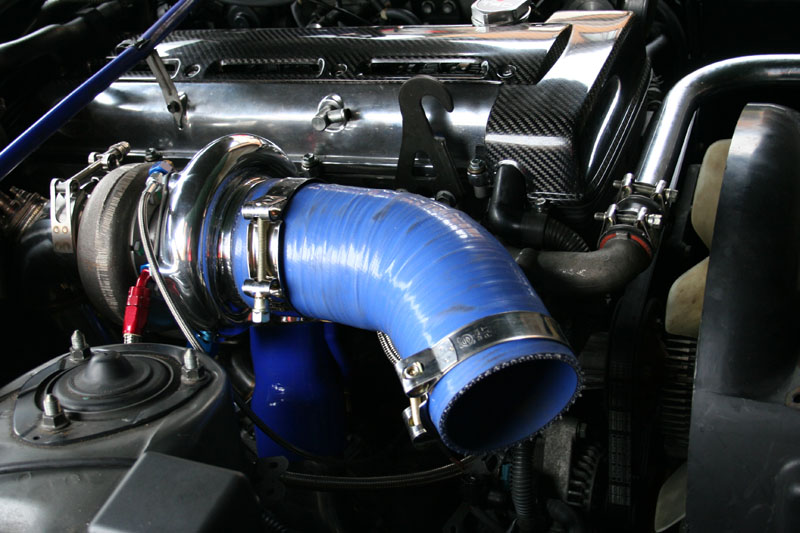
So then I fitted the intake side of the intercooler piping and my relocated HKS BOV. Then I cut the intake pipe and silicon connector down to size and fitted that and made the blow-by hose to go to the crankcase. Then it was time to check everything was torqued up tight and in place. I almost forgot to whip out my old restrictor ring, won't be needing that any more! Finally I was ready to start the car! So I filled it up with coolant again, unplugged the fuel pump and cranked it a few times to get oil pressure. It took quite a bit of cranking before I had oil pressure. That done, I plugged the pump back in and....it failed to start! Oh no! Then I spotted that I'd forgotten to plug in the water temp sensors on the rad elbow where I'd taken it off. Plugged 'em in and it fired up! Bit louder than I was expecting! But it lives!

-
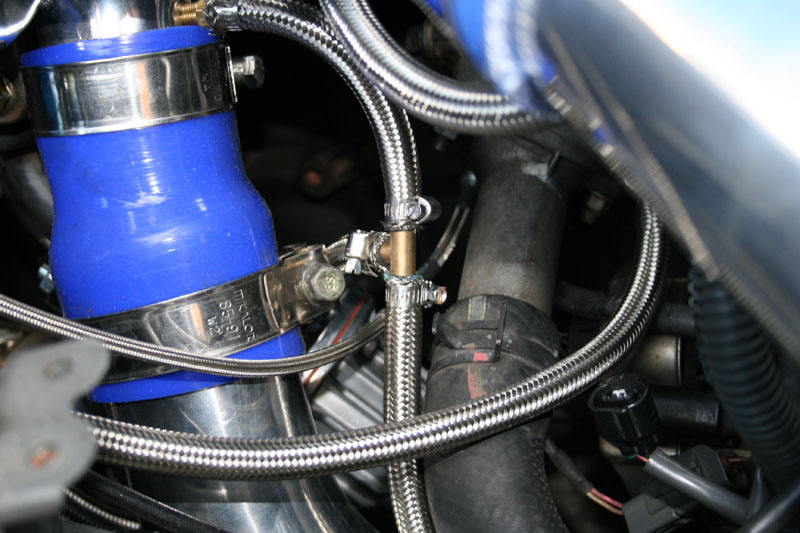
I took Charlie's advice and redid by boost control hoses with some spare braided hose.
-
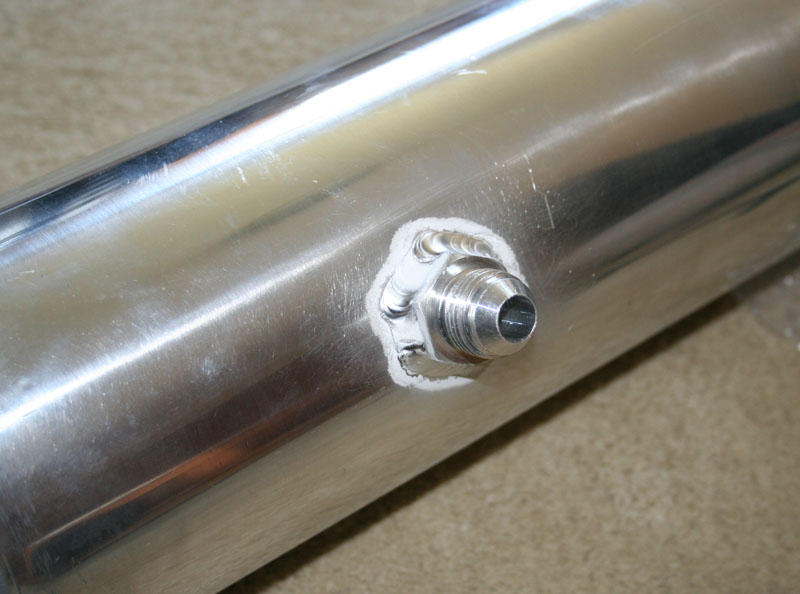
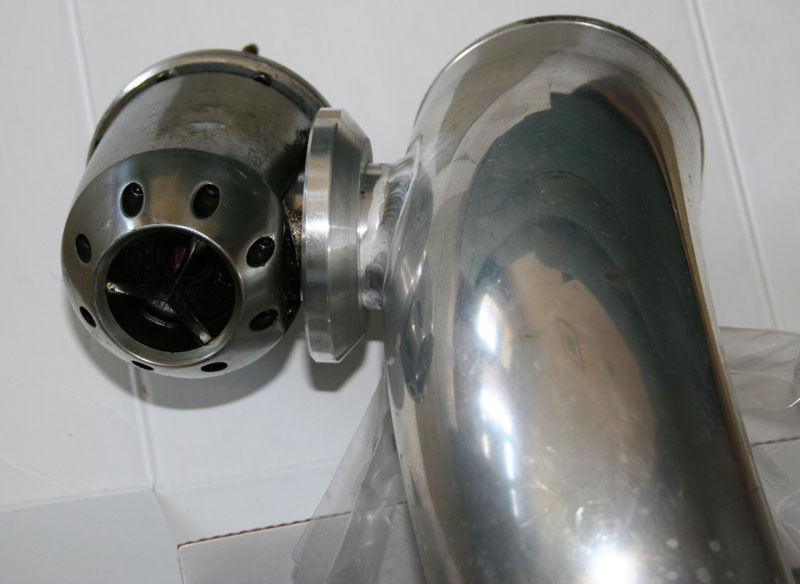
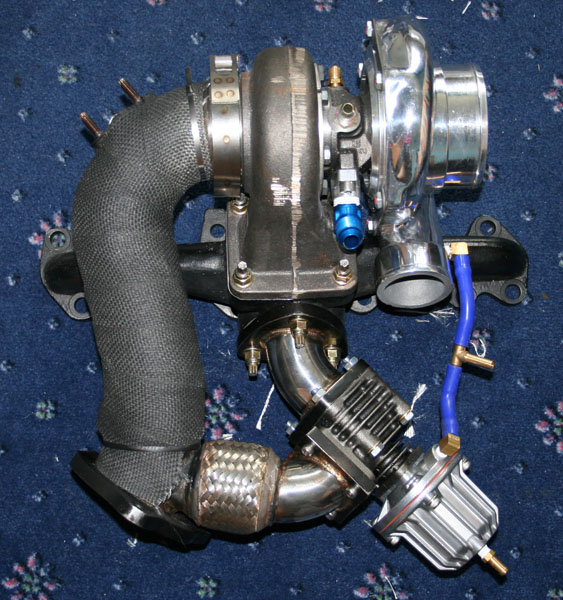
Got my pipes back from Turbo Dynamics today, have a look, quality welding job there.
-
I'm not a geek, cheeky git! No, hang on I've just taken two weeks off work to take my car apart and put it back together. It's a fair cop...
-
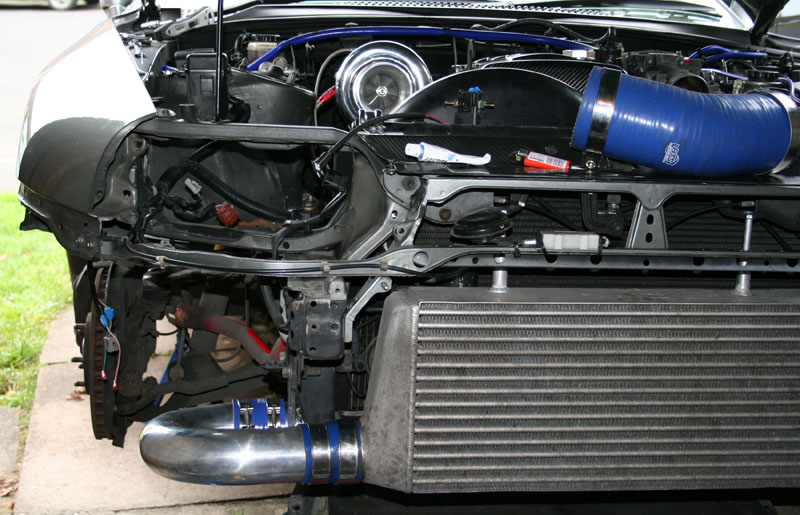
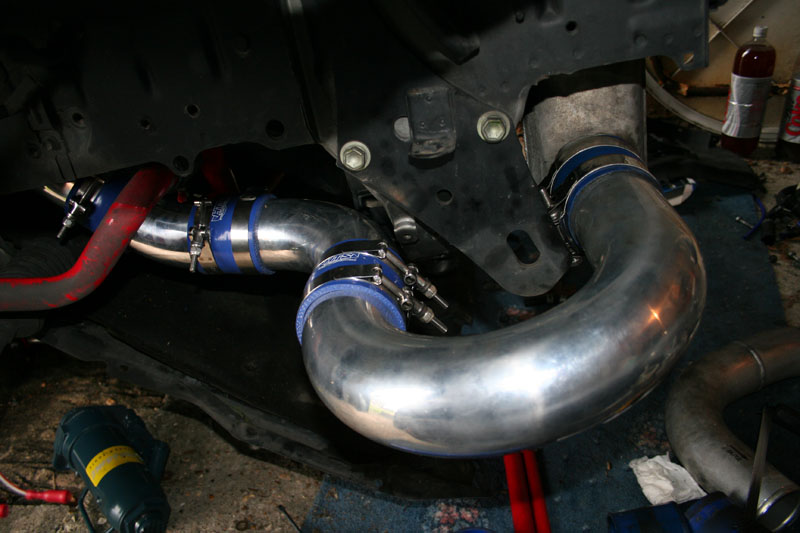
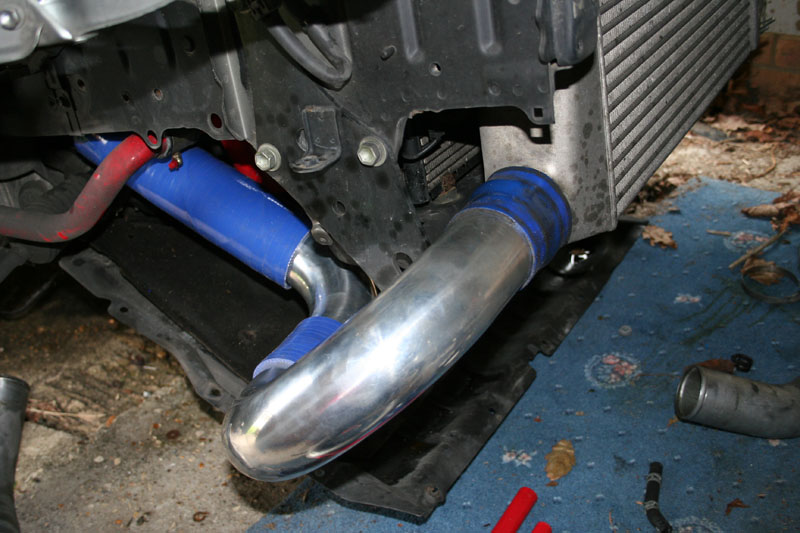
Next I set about fitting all the turbo side intercooler pipework. I encountered a snag here, because I realised that my lovely pipework routing stuck out the bottom of the car by miles, which would have left me with about 2 inches of ground clearance! Oops! Easy to overlook this sort of thing with the bumper and wheel off. Anyway, after a rethink I added another 45deg bend and cut off a bit of metal by the bottom rad mounting and managed to get it to fit much better. I'm really pleased with it now, it's a lot better than before. See pics. I also lowered the intercooler a bit by making some more spacers for the bolts out of aluminium pipe and drilling some more holes in the bottom bracket. Been meaning to do that for a while. There's a couple of general engine bay shots too. Tomorrow I'm picking up the intercooler and intake pipes with flanges welded on, so I'll stick those on and then fire it up!

-
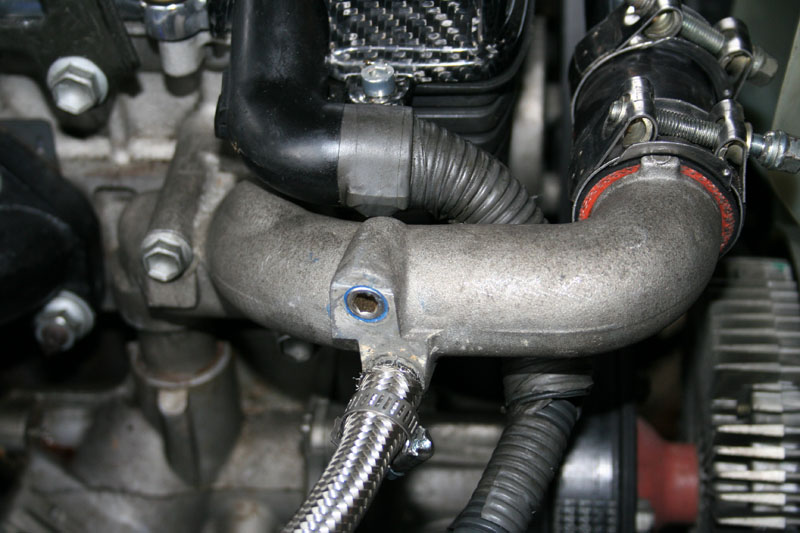
Cheers Gaz. Today I mainly corrected stuff I'd done before! First I soldered the connector back on my boost controller that I'd managed to pull off while dismantling everything. Then I took off the rad elbow to block up the spare return nipple that I don't need. First I cut the nipple off with a hacksaw, then drilled it out with a 10.2mm drill. Then I spent ages looking for my 12mm tap, rooting around on the floor before finding it where I'd left it in my tool bag! Doh! Tapped it 12mmx1.75 and screwed in a grub screw with a generous coating of sealant. Should do the trick.
-
You can get lift-off oversteer in any car, it happens because of weight transfer. When you lift, the car slows down, which transfers weight to the front. That gives the front more grip and the rear less. A more extreme version happens if you brake while cornering. You can use this to help the car turn into a corner, by coming off the brakes slightly after you turn in to give the front more grip as you turn into the corner. This is called trail braking (not a good idea to try it unless you know what youre doing though!).
-
Yep, you can get the oil feed/return kit from Boostlogic. I had to extend the return line as its not long enough. The oil drain blockoff you could just use a M12 blanking plug, but the oil feed and drain fittings are harder to find - I figured buying the BL kit was less hassle although more expensive. Pipe sections came from a brilliant place in the USA called Vertex aka Verocious motorsports. Verocious. They're on Ebay too, I ordered a load of stuff on a Friday night and it was here Monday morning, great service. Not really. You can get a kind of jacket thing but that looks worse. It's difficult to wrap when the pipe has bends in it. You could probably make it a bit neater than my attempt though!
-
Excellent, cheers Jake, much appreciated.
-
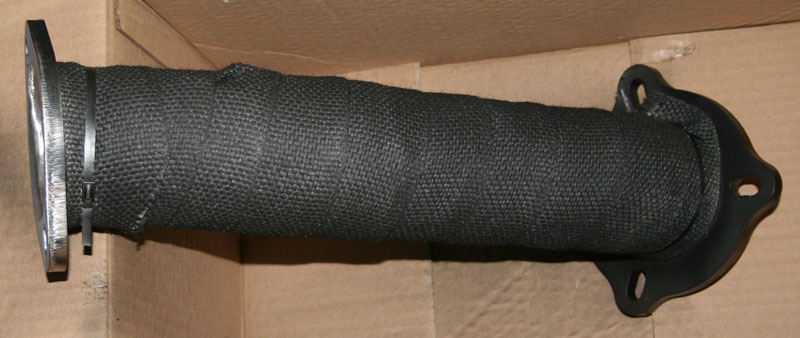
Not too much progress today, I wrapped the downpipe and 1st decat pipe with exhaust wrap and sprayed it with heat coating. Then I tightened up all the bolts etc on the turbo, manifold, downpipe, wastegate etc, fitted it with new manifold nuts and torqued them up to 39N-m as specified in the tech manual. That was much more of a pain than I was expecting, one nut in particular underneath is a right sod to get threaded on and tightened. Finally managed it and then attached the 1st and 2nd decats up and the exhaust. That all fit perfectly which was a relief! Then I put the bracket and support I took off when taking the turbos off back and attached all the oil and water lines and called it a day.
-
Cheers Jake, not in any great hurry. I've found a pic of a spec B on Ebay which shows the plug and I'm fairly sure white goes to black and green to red but it'd be better to know for sure!
-
In fact, I'm fairly sure all the Profec boost controllers use the same solenoid, so anyone with a spec B could probably help too...
-
I've managed to pull the wires out of the plug that goes to the boost control solenoid while extracting my turbos the other day! There's a plug on the solenoid with red and black wires going to it, and the plug that plugs into it (which is the one I've pulled off) has green and white wires going into it. Trouble is I don't know which wire connects up to which. So could somebody who has one just have a quick look at this plug and tell me if it goes greenred and white black or greenblack and whitered please? You should be able to tell just by looking at it. Cheers!
-
Looks a very neat job there. Thanks for the offer, I'm ok for now, I managed to squeeze the -6 hose on to the standard nipples which is fine for now. It just doesn't look quite as neat as it could. I might get round to doing something a bit better like you have later.
-
It would be a bit of a pain, there's loads of wires in the display cable. I was thinking of putting mine in the sunvisor but couldn't be bothered when I saw the cable wouldn't reach.
-
Yes, you're right the thread on the turbo itself is 14mmx1.5, but the unions I got from ATP are that thread to -6. I thought that was the correct size for the nipples, but I'd have been better off with probably -8. Never mind, they'll do the job. Also, because the turbo sits in a slightly different place with Arnout's manifold to the Boostlogic one and the wastegate gets slightly in the way the oil drain hose from the Boostlogic kit wasn't quite long enough by about an inch! So I had to take the fittings off and use some spare -10 hose I had to make a slightly longer one.
-
Yep. It's got to be finished by the end of the week, I drive it to work every day! Going to wrap the downpipe and 1st decat pipe with exhaust wrap now, then fit everything properly tomorrow. I'm waiting for Turbo Dynamics to finish welding the flange for the BOV onto the intercooler pipe and a fitting on to the intake pipe, hopefully that'll be done in the next couple of days. Then I just need to change the injectors, put everything back together and map it with the aid of my nice new det cans!
-
Since the GT35R is water cooled, I need a water feed and drain. I'm going to use the feed off the water pump body just above the alternator and one of the drains on the top rad elbow. I ran into a bit of a problem here as the hose I bought was a bit too small for the nipples (I couldn't be arsed removing the stock nipples and drilling and tapping for new fittings). The fittings on the turbo are -6, but -6 hose is a bit too small. I managed to squeeze it on though, although the nice hose finishers I bought are too small so plain old hose clamps will have to do! The pics show the hose squeezed on to the nipples.
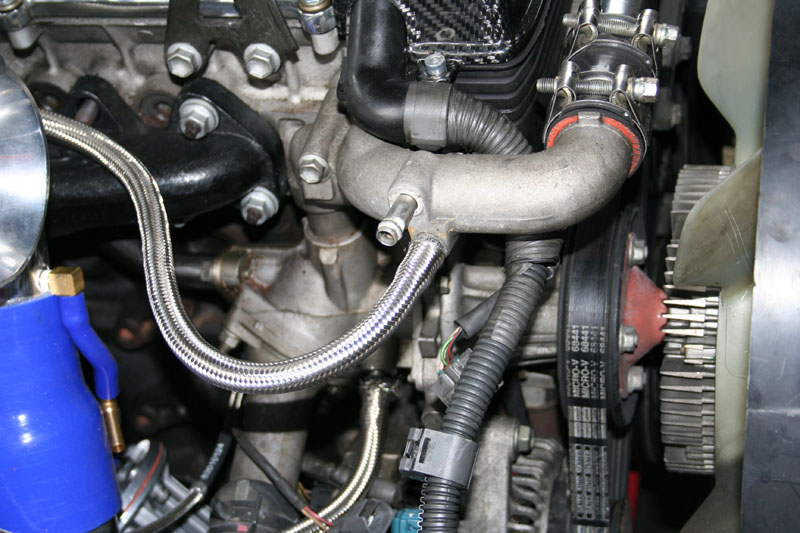
-
Then I set about trial fitting the manifold, turbo etc. The exhaust side all connects up with my 1st decat pipe perfectly. So I started figuring out where my intercooler pipework is going to go. It's going down from the turbo outlet rather than through the wing - I'm going to use the wing hole for a cold air feed for the intake. 1st pic shows the manifold etc in place. 2nd one shows the intercooler piping with the various bends cut down to fit. You can see the long blue silicon section - really I need to get a bit of straight pipe welded on to the 90 degree bend this connects to, but this will do for now.
-
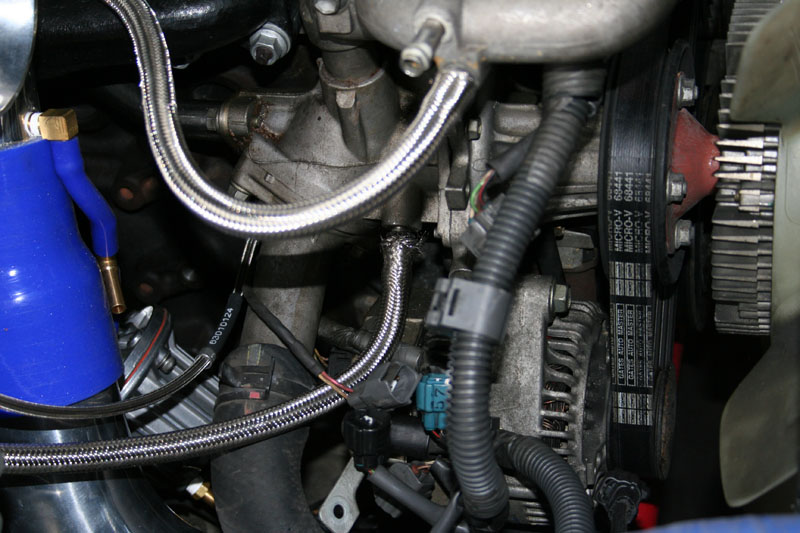
Rear water feed blocked off using a bit of hose with a bolt inserted in the end with some sealant and clamped down with a hose clamp.
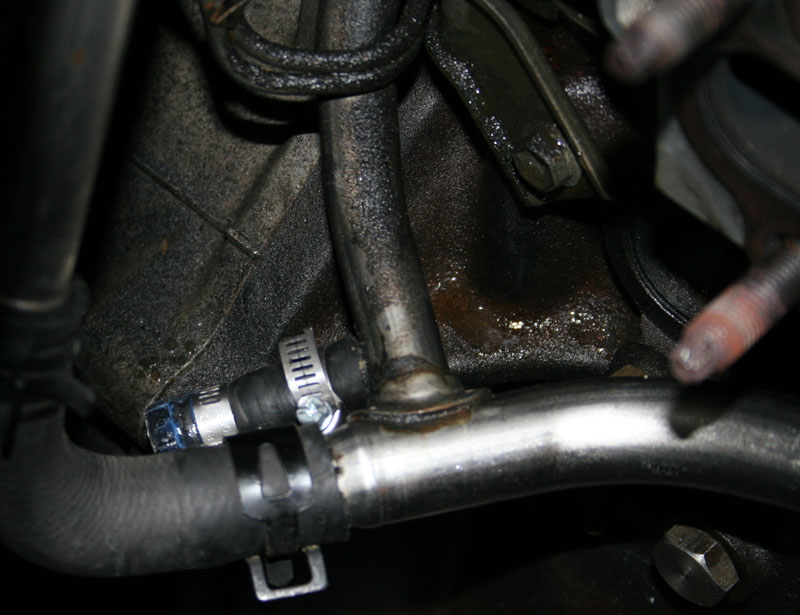
-
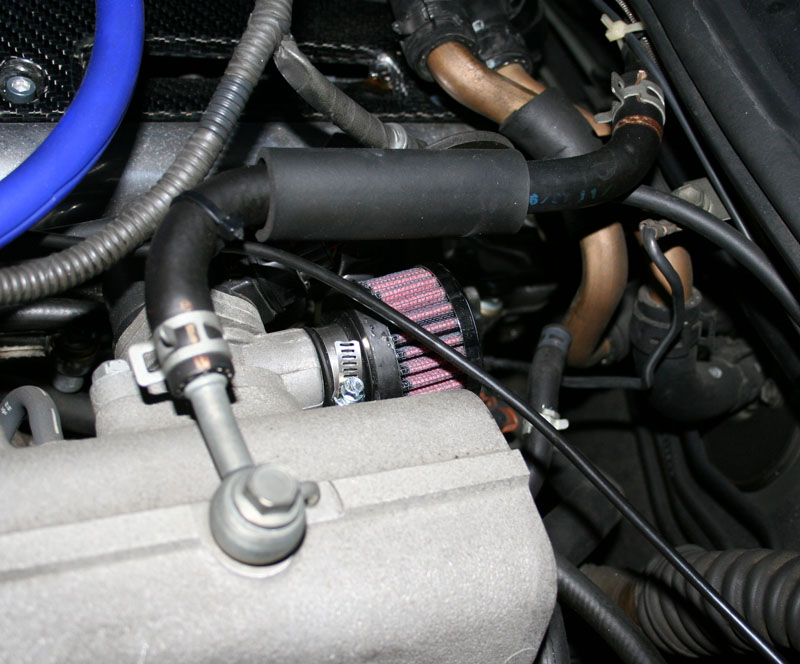
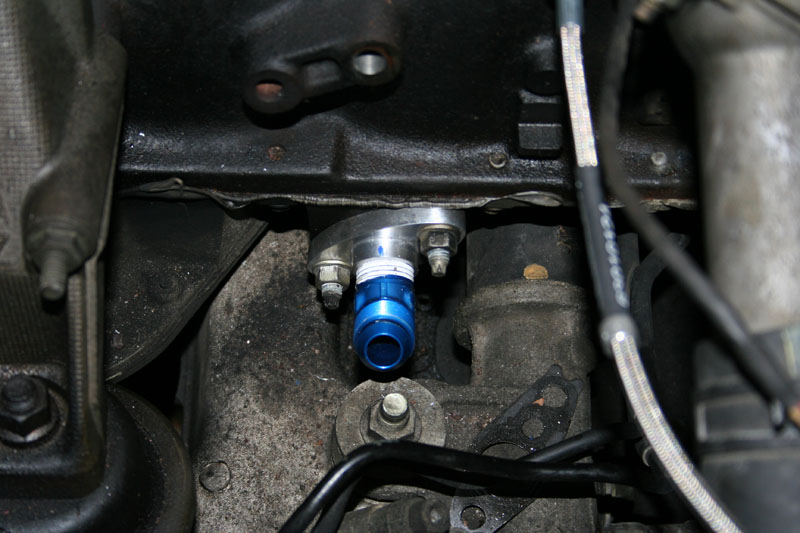
Didn't get too much done yesterday as a friend was visiting, but here's what I did manage. Pics are of: K&N filter on the idle control valve Oil drain fitting - make sure you use PTFE tape on the NPT fitting to avoid leaks. This fitting was from the Boostlogic oil feed/drain kit. Oil feed blockoff - fitting from the Boostlogic kit - use the stock crush washer to avoid leaks.

-
Does it have an EL (electroluminescent) backlight? The invertor for these can make a high pitched whine, my GReddy E01 does it, quite annoying actually.


